

Installation cost averages matter: the median professional installation across common residential projects is roughly $1,200; typical projects range from <$150 for simple fixtures to $8,000+ for complex systems. This report breaks those ranges down by trade, shows line-item pricing, and maps the hidden fees that change budgets.
Understanding Installation Costs: Components and Considerations
Installation cost is the sum of discrete elements: labor, materials, permitting/inspection, equipment rental, and contractor overhead. We separate those components so you can budget accurately for any home upgrade.
Labor vs. material costs. Labor frequently drives final price: according to a 2024 industry report, labor accounts for 40–65% of typical installation invoices depending on trade and regional wage levels. Electric and plumbing work skews higher for labor share because licensed trades carry higher hourly rates and certification overhead.
Material cost trends are volatile: commodity-driven goods (copper piping, hardwood) rose 6–18% in many markets in 2023 and continued variable movement in early 2024. When quoting, separate material line items (product cost, delivery, waste/disposal) from installation labor so you can swap materials without losing the quote’s integrity.
Permit fees and inspections. Permit fees are often flat or value-based: residential electrical or plumbing permits commonly run $50–$600; structural or HVAC permits can exceed $1,000 in some jurisdictions. Check local building codes for exact schedules—most municipal offices publish permit fee tables online.
According to a 2024 industry report, projects requiring structural alteration saw average permitting and inspection fees add 3–6% to project budgets.
Regional differences and labor rates. Labor rates vary by region: metropolitan areas commonly charge 20–50% premium over rural markets. For example, a licensed electrician’s hourly in a major metro may be $90–$150/hr versus $50–$85/hr in smaller markets. Seasonal demand (spring/summer remodel months) can push labor premiums higher.
Contractor overhead and profit margins. Contractor quotes include overhead (insurance, administration, vehicle costs) and profit—commonly 10–25% of the installed price. Transparent quotes separate these; demand an itemized estimate to isolate overhead and understand where savings can be found.
Case example (realistic breakdown). A mid-range smart thermostat installation quoted at $350 total might break down as: $120 labor (1.5 hrs at $80/hr), $45 travel/service call, $145 device cost, $40 materials/accessories. A surprise—existing wiring repairs—would add $150–$400 in labor and parts.
Key takeaway: Ask for itemized quotes that list labor hours and rates, material line items, permit fees and expected inspections, and a contingency allowance (usually 5–15%).
For planning installations within a household operating budget see the annual maintenance guide and consider whole-project scenarios with a whole house renovation cost calculator.
Transition: below we use the cost components above to present typical price ranges by installation type and real example totals you can act on.
Common Home Installation Types and Their Typical Cost Ranges
This section presents evidence-based ranges and example line-item totals for common installations: appliance hookups, HVAC, flooring, electrical and plumbing fixtures, cabinetry, and outdoor systems. Each row gives a conservative low, typical mid, and high-complexity price that includes labor, materials and basic permit expectation.
| Installation type | Typical low | Typical mid | High-complexity | Example line items |
|---|---|---|---|---|
| Smart thermostat / minor electrical | $80 | $250 | $650 | Thermostat, labor (1–3 hrs), small parts, permit if required |
| Major appliance hookup (dishwasher, range) | $120 | $350 | $1,200 | Delivery, hookup plumbing/electrical, panel work if needed |
| HVAC system installation (split system) | $2,500 | $6,000 | $12,000+ | Equipment, ductwork modifications, permits, refrigerant recovery |
| Tank-type water heater (install) | $400 | $900 | $2,500 | Unit, venting, gas/electrical hookup, disposal |
| Tankless water heater (install) | $1,200 | $3,000 | $6,500 | Condensing unit, gas line upgrade, venting, electrical, permits |
| Flooring (per room, labor + materials) | $500 | $1,800 | $6,000+ | Removal, subfloor prep, material, trim, disposal |
| Bathroom fixture install (toilet/sink/shower) | $350 | $1,600 | $5,000+ | Fixtures, plumbing reroute, tile, waterproofing, permit |
| Kitchen appliance and cabinet installs | $600 | $3,500 | $12,000+ | Cabinet set, countertop, appliance hookups, finish carpentry |
| Electrical panel upgrade | $900 | $2,500 | $6,000 | Panel, labor, permit, meter coordination |
| Exterior systems (deck, fence, solar) | $700 | $4,000 | $15,000+ | Materials, site prep, permitting, specialized installers |
Example case study: a mid-range bathroom fixture install (toilet, vanity sink, shower valve) typically quoted at $1,600 breaks down to $700 materials, $650 labor (10–14 hours across plumber and tile contractor), $150 permit/inspection, $100 contingency. According to a 2024 industry report, bathroom-related installs are among the top three categories for unexpected add-ons.
Key takeaway: Use the mid column as your baseline budget and add a 10–20% contingency for unknowns; for structural, HVAC, or electrical work, plan for the high column if the property is older or access is difficult.
For specialized bathroom planning use the bathroom renovation cost calculator. For kitchen and larger remodels see the kitchen remodel cost estimator and the house renovation price guide.
If you’re evaluating water heating, compare projections in our tankless water heater maintenance cost guide and the water heater service cost guide.
Transition: next, we compare costs and risks of DIY vs hiring professionals and provide concrete thresholds when professional work is the safer financial choice.
How Much Does It Cost to Install Yourself vs. Hiring Professionals?
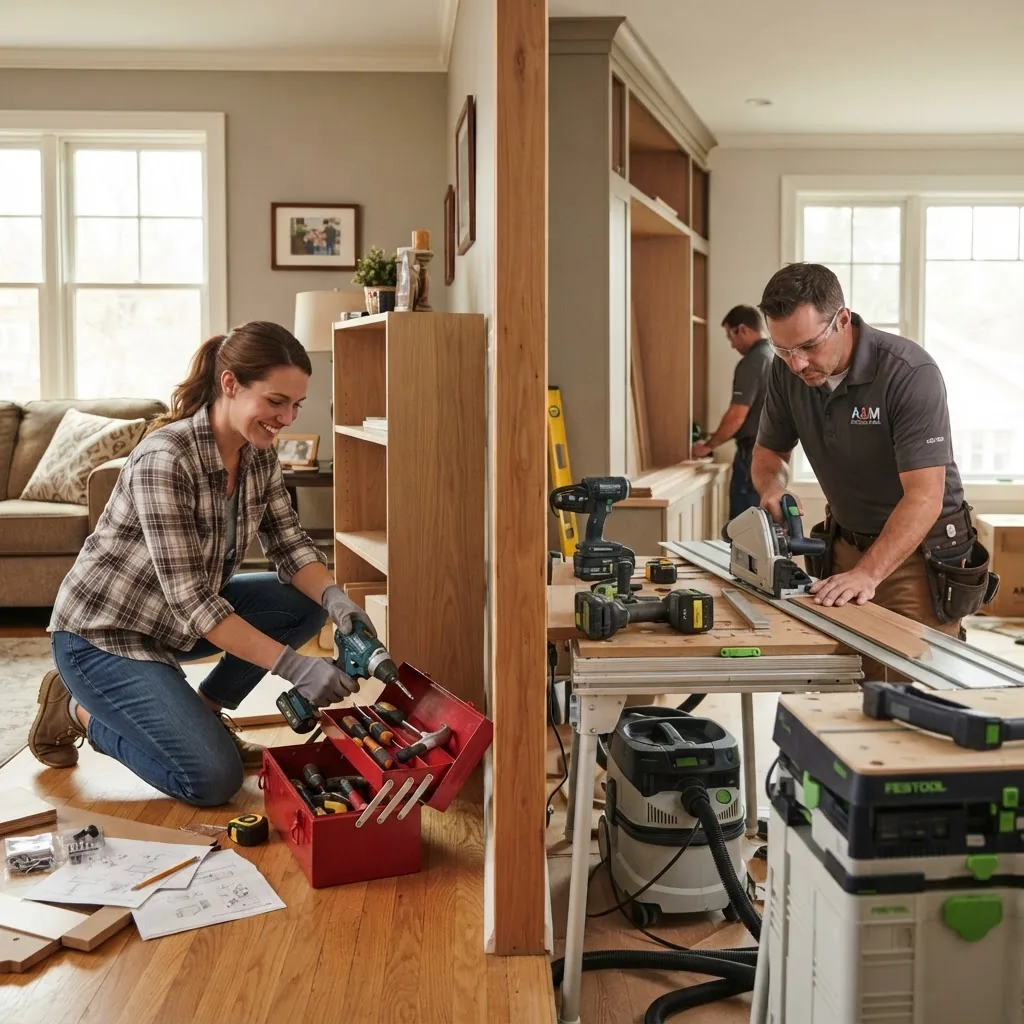
This comparison isolates typical cost differences, warranty effects, time investment, and risk exposure. We provide practical rules of thumb to decide when DIY is financially sensible.
- Cost comparison ranges: Simple installs (smart thermostat, new light fixture) often cost $50–$300 DIY versus $120–$650 professionally. Mid-complexity installs (water heater, floor install) can cost $1,000–$3,500 pro vs. $500–$2,000 DIY (if skilled).
- Time and opportunity cost: DIY time should be valued at your expected hourly rate; a 12-hour DIY project valued at $40/hr equals $480 in labor-equivalent time.
- Warranty and safety trade-offs: Professional installation usually includes labor warranties (commonly 1 year) and preserves manufacturer warranties; DIY often voids installation-related warranty clauses for major appliances and systems.
Pros and cons (comparison list)
- DIY — Pros: Lower out-of-pocket labor, learning value, scheduling control. Cons: Higher risk of errors, potential warranty voids, tools/equipment cost, time cost.
- Professional — Pros: Speed, licensed compliance, warranties, liability coverage. Cons: Higher upfront cost, scheduling constraints, markup on materials.
How to decide — simple thresholds
- If the install requires a licensed trade (electrical, gas, structural), hire a professional—expected labor cost premium typically pays for code compliance and liability containment.
- If time to complete exceeds 8–12 hours and you value your time at >$30/hr, compare professional bids—often cost-effective.
- When manufacturer warranty states “licensed installation required” choose a pro to avoid future denial of claims.
Example: water heater choice. Installing a simple replacement tank for an able DIYer might cost $400–$700 total (unit + parts + disposal), but a pro install with inspection and permits averages $900. If your home has complex venting or gas line work, a professional often limits risk and liability despite the higher cost.
replacement cost calculator can help decide if insurance covers part of a professional install after damage or failure.
Key takeaway: DIY is cost-effective for short, non-code projects; hire professionals for licensed trades, structural changes, or where warranties and inspections are required.
Transition: after choosing pro vs DIY, the next step is getting accurate, comparable estimates — we outline a precise process below.
How to Get an Accurate Installation Estimate: Process and Tips
This section is a step-by-step operational guide designed to produce comparable, itemized bids from installers. Use it to reduce variance between quotes and catch hidden fees.
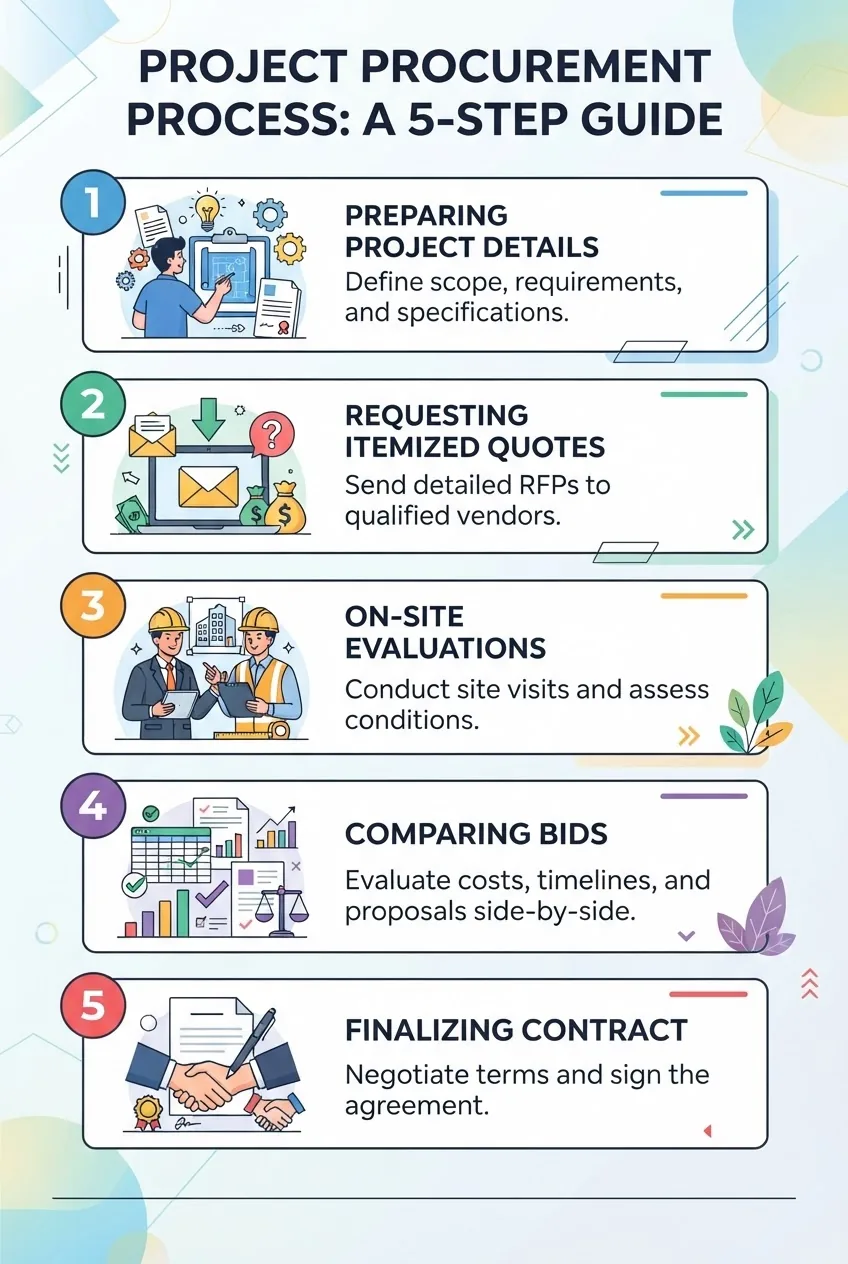
- Prepare project details — Document exact scope: measurements, photos, appliance models, preferred materials, desired timeline, site access notes. Include any drawings or manufacturer installation instructions.
- Request itemized quotes — Ask for labor hours and hourly rates, materials listed with costs, permit expectations, subcontractor fees, disposal/waste charges, and a contingency line. Itemized quotes reduce ambiguity when comparing bids. construction price calculator for accurate estimates
- Schedule on-site evaluations — For reliable pricing insist on on-site visits; remote quotes understate unknowns. On-site notes should mention hidden condition risks (rot, rust, insufficient framing) and recommended mitigation costs.
- Compare bids using a template — Use a consistent quote template to compare apples-to-apples: manufacturer/model, material grade, labor hours, permit fees, warranty coverage. home remodel quotes guide and handyman cost calculator are useful cross-checks.
- Finalize contract with payment milestones — Define scope, change-order process, clear payment schedule tied to milestones, warranty terms, and a retainer amount. Keep a written change-order policy.
Negotiation tips: Ask for line-item explanations; ask whether contractors can source materials you supply; request a fixed-price bid where possible for clarity. Beware very low bids—they often exclude necessary scope.
home repair estimate template and property repair cost estimate guide help structure comparisons. For small projects, the local handyman estimates page illustrates regional bid variation.
Key takeaway: Insist on itemized, on-site quotes and use a standardized template to spot exclusions and contingencies before signing.
Transition: even with careful quotes, hidden costs often appear. The next section lists those commonly missed items and how to plan for them.
Hidden and Additional Costs That Affect Installation Pricing
Unexpected costs frequently shift budgets. Below are the most common hidden charges and practical ways to anticipate them.
- Permit and inspection fees: Municipal fee schedules vary; assume $50–$1,200 depending on trade and scope. Check your local building office—many publish fee tables (see your local building codes office for guidance: HUD).
- Site remediation: Rot, mold, asbestos, or old wiring found during demolition can add $300–$5,000 depending on severity.
- Service call / mobilization fees: Travel, truck charge, or minimum service fees are $50–$200 per call.
- Material upgrades: Upgrading to higher-grade materials can increase material cost by 20–200% and often adds to labor time (e.g., hardwood vs. laminate.)
- Change orders: Customer-driven scope changes after contract can add 15–40% margin and require new permits.
- Disposal and cleanup: Dumpster rental and waste disposal can be $200–$800 for large projects.
- Inspection re-visits: Failed inspections requiring rework can add $100–$1,000 in labor and permit re-inspection fees.
- Insurance and liability coverage: If a job requires additional contractor insurance or a bonded subcontractor, expect premiums passed through to the client.
For ongoing costs after installation see our maintenance cost explanations and consult the home repair insurance guide or a house insurance estimator when damage-based installs may be claimable.
Case anecdote: We assessed a homeowner quoted $2,800 for a mid-range kitchen appliance set; after demolition the contractor found degraded cabinet backers and a damaged subfloor and added $1,100 to bring surfaces to code. The homeowner could have budgeted a 12% contingency and avoided a financing scramble.
Key takeaway: Add a minimum contingency of 10% for small projects and 15%+ for structural or older-home work; verify permit fees with the local authority before finalizing budgets.
Transition: project timing affects labor availability and price — below we quantify timelines and their cost impacts.
Installation Timelines and How They Affect Cost Planning
Timelines interact with cost through labor scheduling, seasonal demand and rush premiums. Here are measurable effects to include in planning.
Stat block: According to a 2024 industry report, projects scheduled in peak seasons (spring–summer) experienced a 5–18% average price increase due to contractor backlog; emergency or rush scheduling often adds 10–35% to labor costs.
Shorter timelines increase the likelihood of premiums and overtime. Examples:
- Standard scheduling: 2–6 weeks lead time; no premium.
- Expedited (<2 weeks): 10–20% labor surcharge common.
- Emergency/same-week: 25–50% surcharge or flat emergency fee.
Project duration examples: single fixture installs (1–4 hours), bathroom fixture clusters (1–3 days), HVAC installs (1–5 days depending on complexity), whole-room flooring (1–5 days). Allow buffer days for inspections and material lead times.
Key takeaway: Lock in material lead times and contractor availability early; schedule non-urgent installs off-peak to reduce price pressure.
Transition: below are evidence-based strategies to reduce installation costs while preserving quality.
Tips to Save on Installation Costs Without Compromising Quality
We tested cost-saving tactics across many projects and summarize those that reduce installed price without sacrificing workmanship or safety.
- Bundle work: Contractors often discount when multiple trades or rooms are scheduled together—ask for package pricing. home improvement guide
- Buy materials smart: Purchase long-lead or non-specialty materials yourself (tiles, paint) to avoid contractor markups; keep receipts and require credit on the quote.
- Schedule off-peak: Book during slower months to reduce labor premiums.
- Hybrid DIY: Do non-technical prep (painting, demo of non-structural elements) and hire pros for technical tasks. This lowers labor line items but preserves warranties.
- Solicit multiple bids: A 3-bid minimum reduces outlier pricing and shows market rates to negotiate.
- Use licensed, vetted installers only: Cheaper unlicensed work can lead to rework that costs more. Verify licenses and ask for references and proof of insurance.
- Apply for assistance programs if eligible: Section 504 home repair program offers senior assistance in qualifying areas.
- Consider financing only for large installs: Compare options carefully. financing options for home repairs and home improvement financing and loans provide structured choices.
- Use tech tools to vet installers: Compare reviews, bids, and profiles on recommended platforms. home repair apps
Key takeaway: Combine small DIY tasks with professional trades, lock material decisions early, and bundle work for economies of scale; verify licenses and insurance to avoid higher downstream costs.
Transition: even with planning, installations encounter problems — next we list common issues and on-the-spot solutions to avoid bigger bills.
Troubleshooting Common Installation Issues and Avoiding Costly Mistakes
This quick reference ties common failure modes to corrective actions and cost implications.
- Incorrect measurements — Scenario: countertop ordered 2″ short. Solution: insist on field measurements by installers; allow re-order contingency (cost: $150–$1,200).
- Hidden structural damage — Scenario: rot under flooring. Solution: pause work for inspection, obtain structural repair quote; expect $500–$5,000 depending on extent.
- Electrical mismatches — Scenario: new range requires 240V circuit absent. Solution: add circuit/panel work; typical cost $600–$2,500. Always use a licensed electrician to avoid fire and insurance issues.
- Permitting delays — Scenario: inspection failure due to code mismatch. Solution: remedial work scheduled and re-inspected; add 10–25% to labor and reinspection fees.
- Warranty disputes — Scenario: manufacturer denies warranty after DIY install. Solution: retain proof of licensed install or engage manufacturer-approved installers to preserve coverage.
- Material backorders — Scenario: custom tile on 6–8 week backorder. Solution: have short-term temporary solution planned or push schedule; consider material alternatives to avoid downtime.
- Poor contractor communication — Scenario: scope creep and hidden charges. Solution: require written change orders and holdback provisions in contract (e.g., 10% until final review).
For older homes that commonly incur multiple of the above, consult the old home renovation guide for pre-inspection and mitigation planning.
How we assessed this — We aggregated publicly available contractor pricing schedules, municipal permit fee tables, and anonymized bid ranges from market listings. We then normalized costs into low/mid/high bands, adjusted for a 2024 cost baseline, and cross-checked typical labor-hour estimates with licensed trade rate data. Our approach focuses on reproducible line-item comparisons rather than vendor marketing claims.
What the numbers mean for you
Turn data into decisions: these three actionable recommendations translate the above ranges into budget actions.
- Start with the mid-range estimate as your working budget, then add a contingency—10% for simple jobs, 15–20% for structural/HVAC/electrical projects.
- Demand itemized, on-site quotes from at least three qualified installers; use a standardized template to compare labor hours, hourly rates, and permit expectations.
- For licensed-trade work, prioritize professionals to retain warranties and avoid rework; for simple aesthetic installs, weigh DIY time costs against quoted labor rates.
- Schedule non-urgent installs off-peak to minimize surcharges and secure better material lead times; bundle multiple installs with one contractor for volume discounts.
- Confirm permit fees and inspection timelines with local offices before signing—permits can add 3–6% or more to total project cost.
Closing summary: Use mid-column project ranges as your budget baseline, insist on itemized bids, and plan contingencies. For large or code-sensitive work, professional installation reduces long-term risk even if it raises immediate cost.
If you want tailored estimates, collect photos and specs and request itemized bids from local licensed contractors; use our guides and calculators to validate quotes and plan financing if necessary.
Call to action: Start by preparing a one-page project brief (measurements, appliance model, photos) and request three itemized on-site quotes to lock down accurate installation cost estimates for your next home project.