

old home renovation — By the end of this hands-on guide you will have a prioritized, cost-managed renovation roadmap for an older house, a phased timeline, and concrete next steps for permits and trades. Expect to spend 1–6 weeks on inspection and planning and 3–24 months on phased execution depending on scope; this guide assumes a homeowner with intermediate DIY knowledge and project-managing capability.
Before you start, collect the right tools, paperwork and baseline skills so your time spent and money allocated produce predictable outcomes.
Before you start
- Paperwork: deed, existing home insurance policy, any prior renovation permits.
- Tools & supplies: digital camera, flashlight, moisture meter, screwdriver set, notepad, tape measure, labeled sample bags for material tests (lead/paint).
- Professional contacts: licensed home inspector, structural engineer contact, licensed electrician and plumber for quotes.
- Budgeting files: spreadsheets, contingency fund (see step on budgeting), and digital copies of contractor bids.
- Safety gear: N95 masks (for lead/old insulation), gloves, safety glasses.
Follow the numbered steps below to move from inspection to phased execution, with embedded guidance on cost management, permitting, material choices and contractor selection.
Understanding Old Home Renovation Challenges
Older houses carry character—and unique, often hidden liabilities. A successful project begins by recognizing the three dominant challenge groups: deferred maintenance, latent structural issues, and obsolete systems that no longer meet building codes. These are common renovation pitfalls that drive cost overruns if they aren’t uncovered early.
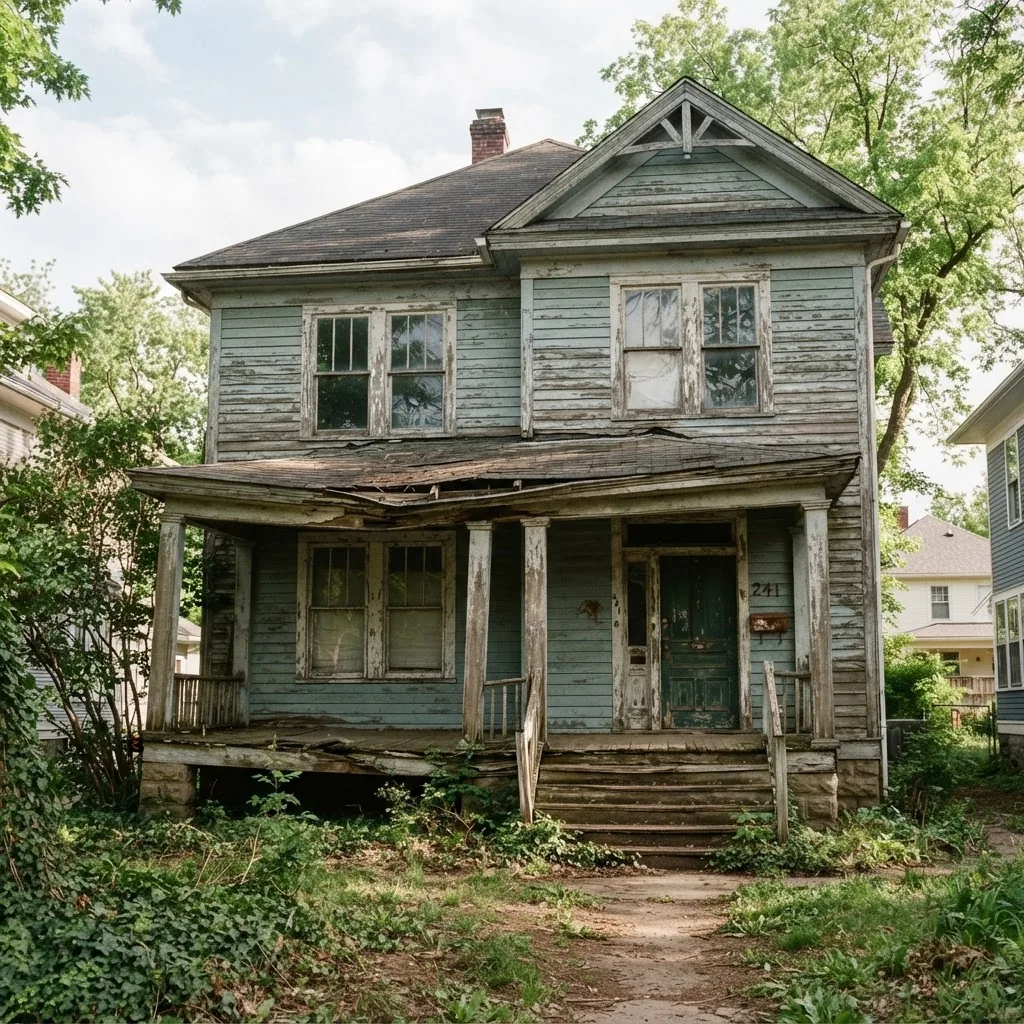
Deferred maintenance is the frequent root cause of escalating budgets: water stains ignored for years often mean hidden rot; paint failure often hides sash-rot and failing flashing. Addressing deferred maintenance first reduces cascading repairs later.
Structural integrity issues—settlement cracks, sagging beams and compromised foundations—change a project’s scope dramatically. A visible crack may be purely cosmetic or indicate a failing bearing wall; determining which is a technical decision requiring a structural inspection.
Building codes evolve. Electrical systems that function are not always code-compliant. Replacing a knob-and-tube system or renovating a kitchen that lacks GFCI protection can convert a simple remodel into a code-driven upgrade project.
Historical home challenges add another layer: original materials or construction methods (e.g., balloon framing, lime-based plasters) may require specialist trades and approvals if you want to preserve character while meeting contemporary safety and efficiency standards.
Common renovation pitfalls include:
- Skipping a phase-one inspection and proceeding directly to cosmetic work.
- Underestimating the cost of system upgrades (electrical, plumbing, HVAC) that must be brought to current code during other renovations.
- Mismatching finishes (using modern materials where reclaimed would preserve value and reduce long-term upkeep).
Transition: With a clear list of challenges, the next section shows how to assess an old house practically and then prioritize repairs vs. upgrades so your budget goes where it reduces risk and delivers value.
Assessing and Prioritizing Repairs in an Old House Remodel
Start with a methodical inspection and then use a prioritization matrix to allocate funds. Below is a step-by-step assessment and prioritization process you can follow on-site or with your hired inspector.
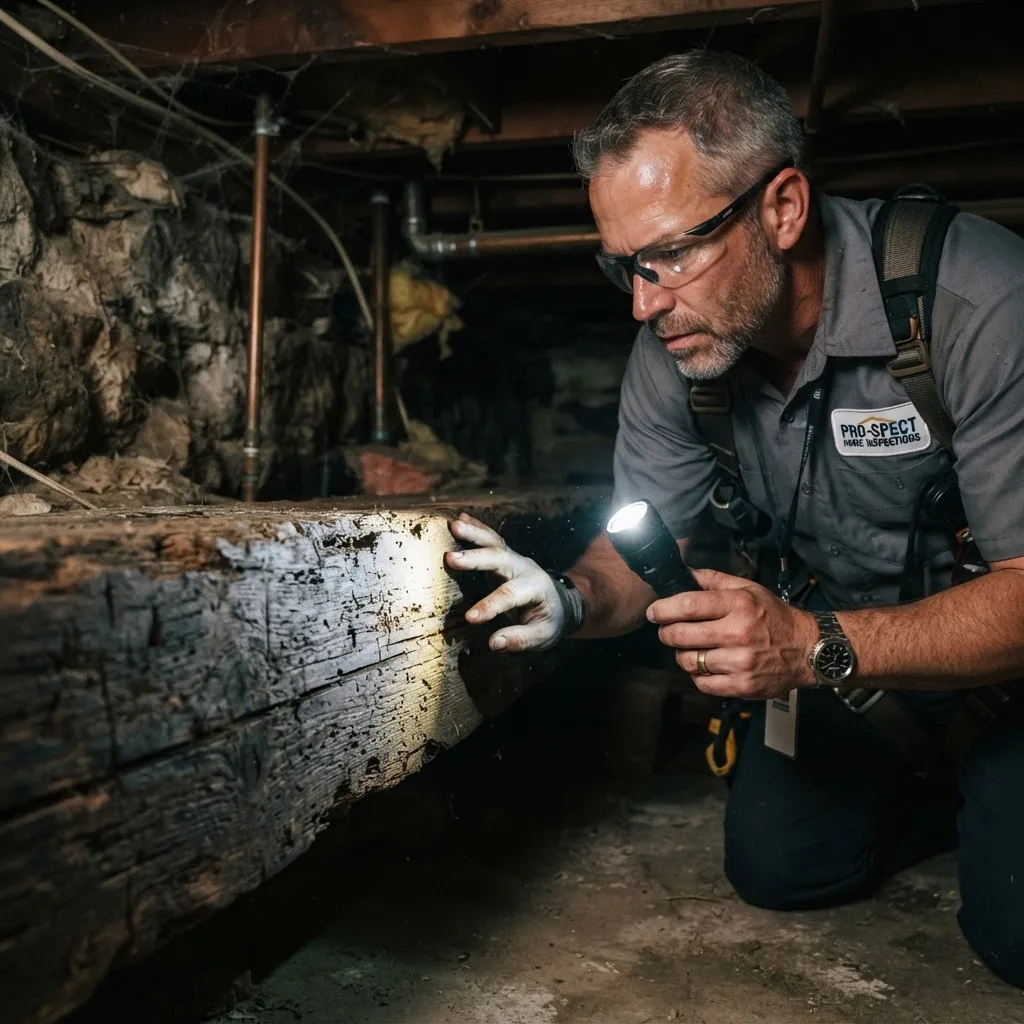
- Perform a full-scope inspection. Order a licensed home inspection and independent structural and pest inspections if the main inspection flags concerns. Document photos and locations. Expect inspection reports within 7–14 days of the visit.
- Create an itemized defects list. Break items into categories: safety, structural, system (electrical/plumbing/HVAC), weatherproofing, and cosmetic. Tag each item with risk level (High/Medium/Low).
- Assign urgency and cost bands. Mark urgent safety hazards (e.g., exposed live wiring, major roof leaks) as immediate. Use three cost bands: <$1,000, $1,000–$10,000, >$10,000 to plan funding and contingencies.
- Cross-reference with permits and code needs. If a repair triggers mandatory upgrades under local code (e.g., full electrical rewire when opening walls), escalate its priority and cost estimate.
- Estimate life-safety vs. aesthetic payback. Give life-safety items (structural shoring, gas leaks, asbestos remediation) absolute priority; then prioritize upgrades that stop further damage (roofing, gutters, deficient flashing).
- Map repairs to project phases. Place high-risk items into Phase 1 (critical repairs), system upgrades into Phase 2 (electrical/plumbing/HVAC), and finishes into Phase 3 (cosmetic and energy-efficiency improvements).
- Allocate contingency per phase. Use a minimum contingency of 15% for Phase 1 and 20–30% for older homes with unknowns. According to a 2024 industry report, older-home projects show a 25–30% higher likelihood of mid-project scope increases; plan contingency accordingly.
- Use benchmarks for likely costs. Compare inspection-identified issues to average home repair estimates to validate the realism of contractor bids.
- Decide on preservation vs. replacement. For historic elements, consult preservation guidelines—if you replace, document reasons and match materials where feasible to retain value.
- Prioritize energy-related fixes that lower ongoing costs. Insulate accessible cavities, seal air leaks and consider efficient heating upgrades as mid-priority because they reduce operating costs quickly.
Case study (realistic example, practitioner-level): A 1920s bungalow had a sagging front porch and intermittent brown water. The inspection revealed joist rot at the porch and failing galvanized water supply lines. We prioritized porch structural repair (Phase 1), then isolated and replaced the main water line (Phase 2), deferring full kitchen replacement to Phase 3. This saved the homeowner an estimated 18% by preventing repeated temporary repairs.
Tool walkthrough: how to interpret inspection results. For each listed defect, note three values: immediate action required? (yes/no), structural risk score 1–10, and probable cost band. Create a spreadsheet column for each and sort by “immediate action + risk score” to produce a priority queue.
Transition: With prioritized repairs in hand, the next section explains how to manage your budget across phases, control cost overruns and reconcile contractor bids with your prioritized list.
Managing Costs: Budgeting Strategies for Old Home Renovation
Budgeting for an old house remodel requires a blend of conservative cost estimation, contingency planning, and disciplined prioritization. Avoid the common trap of treating the project like a single lump-sum remodel—phase it, price each phase, and hold cash or credit for surprises.
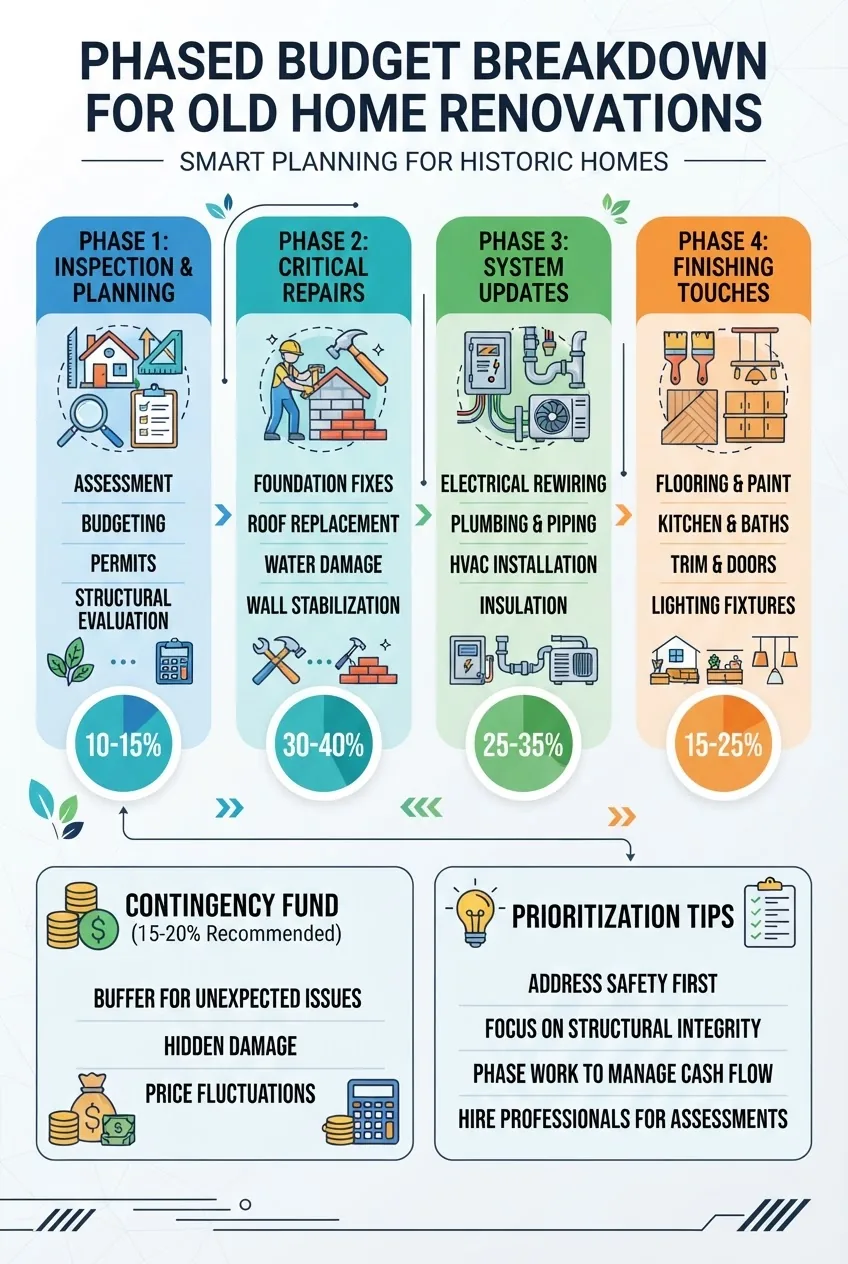
Core budgeting tactics:
- Phase budgets: Divide total available funds into explicit pots: Inspection & planning (3–5%), Critical repairs (25–40%), Systems & compliance (20–35%), Finishes (15–30%), Contingency (15–25%).
- Use tiered contingency: Keep a 15% “hard” contingency for known unknowns and a 10% “soft” contingency for desired upgrades you may postpone.
- Bid comparison: Always obtain at least three written bids for major trades and compare itemized line-by-line. Ask bidders to identify scope assumptions and exclusions.
- Trade-offs and cost-benefit analysis: Replace vs. repair decisions should reference life expectancy: if a system has less than five years left, replacement now often costs less long-term than repeated repairs.
Stat block (budgeting benchmarks):
| Phase | Typical Allocation | Primary Focus |
|---|---|---|
| Inspection & Planning | 3–5% | Full-scope inspections, permits, design |
| Critical Repairs | 25–40% | Structural, roof, major water intrusion |
| Systems & Compliance | 20–35% | Electrical, plumbing, HVAC—code upgrades |
| Finishes | 15–30% | Kitchens, bathrooms, trim, paint |
Internal budgeting resources and tools: use a structured estimator or consult guides that help refine per-trade costs.
For broader annual planning and ongoing maintenance budgeting, consult the pillar page to align renovation reserves with yearly upkeep expectations.
annual maintenance cost guide for home repair and budget
How to handle cost overruns practically:
- Freeze optional scope. Suspend non-essential finishes until critical repairs and systems are fully funded.
- Re-budget for uncovered work. Move 50% of the soft contingency into the current phase immediately; leave the rest as future-phase buffer.
- Negotiate scope adjustments with contractors. Convert open-price items to fixed-price addenda where possible.
Templates and estimating aids to use now:
home repair estimate template
home remodel quotes guide
house renovation price guide
how to pay for expensive home repairs
how to pay for home improvements
house renovation price guide
Note on regional variability: labor rates and permit costs vary by market. According to a 2024 industry report, labor cost fluctuations year-over-year ranged between 4–9% across U.S. regions, so validate local numbers with at least two local tradespeople.
Transition: After you set budgets and contingencies, you’ll need to choose the right systems and materials to balance cost, longevity and historical value.
Key Updates in Old Home Renovation: Systems and Materials
Older houses commonly need updates to electrical, plumbing and HVAC systems, plus decisions about retaining historic materials versus modern replacements. Below is a comparison to help decide when to restore and when to replace.
| System / Material | Restore (Pros) | Replace (Pros) | Typical Life Expectancy (post-update) |
|---|---|---|---|
| Electrical (knob-and-tube, old knob wiring) | Preserves original fabric; lower upfront cost if isolated | Safety, full code compliance, capacity for modern loads | 30–50 years (new wiring) |
| Plumbing (galvanized pipes, cast iron drains) | Maintain original fixtures; targeted repairs | Modern materials reduce leak risk and maintenance | 50+ years (PEX/CPVC/modern drains) |
| HVAC (boilers, furnaces) | Retain original radiators or boilers with selective updates | Improved efficiency, zoned controls, modern filtration | 15–25 years (modern HVAC) |
| Windows & doors | Restore sash; improves historic value, less waste | Better thermal performance, lower maintenance | 20–40 years (new windows) |
Material sourcing choices (reclaimed vs. modern): reclaimed materials often cost more upfront but preserve value and reduce waste; modern materials provide predictable warranties and lower maintenance. For historic homes, prefer restoration for street-facing elements and modern replacements where function is prioritized (e.g., behind-the-scenes plumbing).
Specific system notes and cost-awareness:
- Electrical system upgrades: Full rewire when knob-and-tube or aluminum is present—expect a full-home rewire to be a significant spend but mandatory for safety. Ask electricians for a circuit-by-circuit plan and phased rewire options.
- Plumbing repairs: Replace failing galvanized lines or heavily corroded cast-iron drains; running new PEX lines through cavities is faster and cheaper than trenching. Refer to the property repair cost estimate guide for comparing quotes.
- HVAC modernization: Consider mini-split heat pumps for zone control and minimal duct work in older houses.
- Energy efficiency: Insulate accessible walls and attics, air-seal openings and upgrade to efficient water heaters (tankless as an option). For tankless planning, see the tankless water heater maintenance cost guide.
Installation costs and component budgeting: use an installation cost guide to set realistic per-trade allowances and consult a local RSMeans dataset for current unit pricing.
Specific anchors for rooms often updated in older homes:
bathroom renovations calculator
kitchen remodel cost estimator
water heater service cost guide
When matching historic materials, document replacement pieces for future owners—this raises resale value and ensures preservation compliance where applicable.
Transition: After choosing systems and materials for each phase, you’ll need to ensure permits and code compliance—especially important in historic districts.
Navigating Permits, Codes, and Historic Preservation for Old House Renovation
Permits and code compliance are non-negotiable. Permit triggers include structural repairs, electrical, plumbing, mechanical work, and any changes to egress points or load-bearing walls. Failing to permit work can cause rework, fines, or trouble selling the property later.
Key permitting steps:
- Check with your local building department for required permits and inspection stages—local rules vary widely.
- For historic properties, consult the National Trust for Historic Preservation guidelines before altering character-defining elements. National Trust for Historic Preservation is a good starting resource.
- When a repair touches safety systems (electrical, plumbing, structural), assume the work will need permit submission and formal inspections.
- Document all work with photos and signed contractor invoices to support future sale disclosures and insurance claims.
Permit checklist:
- Scope description and drawings for structural changes
- Trade licenses and insurance from hired contractors
- Energy efficiency compliance forms (where applicable)
- Historic district approval (if property is within a regulated area)
Useful external government resource: consult your local building department website or federal housing resources for guidance on minimum standards or programs that assist with older-home rehab. U.S. Department of Housing and Urban Development provides broadly applicable rehab guidance.
Insurance and replacement valuation: before major work, check coverages and consider updating replacement valuations using a replacement cost calculator for home insurance to ensure your coverage aligns with renovation-driven value.
home repairs insurance guide
house insurance estimator
Transition: With permits in motion, you need to hire the right contractors and manage work efficiently—next section covers contractor selection and in-field management.
Tips for Hiring Contractors and Managing Work on Old Home Projects
Hiring trades for old-house work requires vetting specialists comfortable with older construction methods and possible unknowns. Follow this how-to process to select and manage contractors effectively.
- Define scope and deliverables in writing. Prepare a scope-of-work document with photos and reference specifications. Ask contractors to price against that scope to ensure apples-to-apples bids.
- Vet licenses and references. Verify trade licenses, insurance certificates, and at least three recent references with similar older-home projects.
- Request itemized bids and timelines. Get bids that break out material, labor, and allowances; ask for a start date, key milestones and completion date.
- Use an interview checklist. Ask contractors how they handle unknowns discovered after demo, their change-order process, warranty terms and cleanup responsibilities.
- Negotiate payment schedule tied to milestones. Limit deposits (typically 10–20%), tie payments to inspection sign-offs, and retain 5–10% until final punch list is complete.
- Require written change-order procedures. Never accept verbal changes; all scope changes must be documented with cost and schedule impacts.
Example contractor communication template (practical): “Begin work on June 1. Milestones: demo complete by June 8; structural repair complete by June 22; rough-mechanicals inspected June 25. Payments: 10% deposit, 35% at structural completion, 45% at mechanical completion, 10% retention at final.” Use this exact structure to avoid ambiguous expectations.
Handyman and small jobs: For minor repairs during phased work, a local handyman may be appropriate—compare costs with a professional tool such as the handyman estimate and cost calculator before deciding.
Tech tools for contractor discovery: use a vetted app to find licensed trades—see the home repair app guide.
Local examples: if you need local comparisons or market-specific references, consider localized guides such as the home repair Austin TX guide for an example of what to expect in a city market.
Managing the job site:
- Daily logs: require contractors to provide daily or weekly progress notes and photos.
- Weekly check-ins: short site meetings align trades and remove blockers quickly.
- Inspection coordination: schedule municipal inspections into the project calendar in advance; missing an inspection can freeze work.
Transition: With contractors hired and work scheduled, use phased planning to reduce disruption and keep occupant safety and budgets in check.
Phased Renovation Planning and Timeline Estimation for Old Home Projects
Phasing preserves cash flow and reduces risk. Below is a practical phased plan with timelines you can adapt to your project size.
- Phase 0 — Preconstruction & Permitting (2–6 weeks)
- Activities: inspections, design, permit submission, contractor selection.
- Deliverable: signed contracts, approved permits, project schedule.
- Phase 1 — Critical Repairs (2–12 weeks)
- Activities: structural shoring, roof repairs, major water-exclusion work, termite remediation.
- Timing: prioritize outside-weather protection first; plan for 2–8 weeks depending on complexity.
- Phase 2 — Systems & Compliance (3–16 weeks)
- Activities: full or partial electrical rewire, plumbing replacement, HVAC updates, insulation upgrades.
- Timing: system upgrades often require coordination across trades—expect 4–12 weeks for whole-house systems.
- Phase 3 — Interior Finishes (4–20 weeks)
- Activities: kitchen and bathroom remodels, painting, trim, flooring. Stagger room-by-room to remain habitable if needed.
- Timing: kitchens/bathrooms often take 4–12 weeks each.
- Phase 4 — Final Inspections & Punchlist (1–4 weeks)
- Activities: municipal final inspections, warranty documentation, final cleanup.
- Timing: allow two weeks minimum for back-and-forth on punchlist items.
Seasonal considerations: schedule exterior work in dry months; avoid major interior demolition in high-humidity seasons without climate control. For cold-climate HVAC or insulation work, plan during shoulder seasons (spring/fall) to reduce heating interruptions.
home improvement house guide for renovation and repair
whole house renovation cost calculator
Milestone tracking: create a Gantt-like schedule with visible milestones for the municipality inspections, trade start/finish dates and major material delivery dates (e.g., window lead times of 6–12 weeks if custom).
Transition: Knowing how to phase and schedule reduces surprises—next we cover common costly mistakes and how to avoid them.
Avoiding Common Costly Mistakes in Old House Renovations
Old house projects reveal unknowns; preparation and conservative planning are your best defenses. Below are common mistakes I’ve seen and explicit countermeasures.
Warning: Hidden damages such as rot, insect damage or outdated wiring are frequent and often triple initial repair estimates if not discovered early.
Common mistakes and mitigations:
- Underestimating hidden damage. I once accepted a quote to “repair a sagging porch” that became a full foundation-level rebuild when rot extended into the primary supports. Mitigation: always include a structural engineer in bids for load-bearing issues and budget 20–30% contingency for older structures.
- Skipping engineered plans for structural work. I’ve seen temporary fixes fail because no engineered solution was installed. Mitigation: require stamped drawings for structural repairs and coordinate inspections before covering work.
- Accepting the lowest bid without itemization. Low bids often exclude necessary work. Mitigation: compare line-by-line, ask for exclusions, and verify assumptions.
- Ignoring permit requirements. One homeowner started a bathroom gut and was forced to remove several elements because no permit had been pulled. Mitigation: pull permits before work starts; verify inspector sign-offs at each stage.
- Choosing incompatible modern materials. Modern paint/thinset choices can trap moisture in historic masonry. Mitigation: consult an expert on historic-material compatibility for exterior masonry and plaster systems.
Final warnings: always maintain an auditable trail of photos, invoices and permits. According to a 2023 industry report, projects with formal documentation and staged inspections reduced rework rates by 35%—a direct cost saver.
Transition: End the guide with practical closing tools: a compact checklist and guidance on when to bring in a professional.
Common mistakes and how to avoid them
I have often seen owners rush cosmetic finishes before addressing leaks; it only created waste. When I planned projects with a ‘stop leak first’ rule, the downstream cost of repeat repairs dropped substantially. Another frequent failure I observed was underfunding contingencies; setting aside 20% contingency saved homeowners from delaying critical system upgrades. Lastly, failing to require written change orders led to scope creep — I now insist on signed change orders before any additional work begins.
Project completion checklist
- All municipal permits closed and final inspections passed.
- Structural repairs verified by structural engineer sign-off.
- Electrical, plumbing, HVAC rough-ins inspected and approved.
- Materials delivered and matched to specification (document serials/warranties).
- Punch list completed and 5–10% retention released after 30 days.
- All warranties and operation manuals collected from contractors.
- Photos and documents archived for future owners and insurance.
When to call in a professional
Call a licensed professional immediately if you discover: active structural movement (new, widening cracks), suspected gas leaks, active mold over >10 sq ft, buried asbestos or suspected lead paint where disturbance is planned. For any full-house electrical or major plumbing replacement, hire licensed trades and require municipal inspections.
Final transition to closing summary: below is a condensed set of takeaways and a CTA to move from planning to action.
Conclusion: Old home renovation rewards careful inspection, phased budgeting, and disciplined contractor management. Prioritize safety and structural repairs, budget with conservative contingencies, and phase systems upgrades to reduce operating costs early. Use the linked tools and guides to sharpen estimates and manage trades professionally. Ready to refine your numbers? Start with the inspection phase, assemble your prioritized repairs list, and request three detailed bids. For broader planning, consult our pillar: annual maintenance cost guide for home repair and budget.
Call to action: Begin with a licensed home inspection and one-hour planning session with a contractor to lock Phase 1 deliverables—book those now and convert deferred maintenance into long-term value.