
Building application — by the end of this guide you will have a complete, actionable plan to obtain permits for a residential project: what to file, what fees to expect, typical timelines, and how to avoid delays. This hands-on walkthrough takes a practical reader about 3–6 hours of prep work plus waiting time for approvals; it assumes a homeowner or DIY project manager with basic digital literacy.
Before you start, gather the essentials and set expectations so the process is efficient and auditable.
Before you start
- Government-issued photo ID (driver’s license or passport).
- Property documents: deed or tax parcel number, recent property survey (if available).
- Scaled construction drawings: floor plans, elevations, and a site plan showing setbacks (minimum scale 1/8″=1′).
- Manufacturer specifications for structural elements (roof trusses, windows), energy compliance forms if required.
- Contractor information: license number, insurance certificates, contact details; if acting as homeowner-builder, notarized homeowner-builder declaration (where applicable).
- Payment method for permit fees (credit card for online portals or check/cash for office submissions).
- Tools: laptop with PDF reader, printer/scanner or mobile scanning app, measuring tape, tape measure for on-site dimensions.
Understanding Building Permits and Their Importance
What you will learn: why a permit matters, how permits enforce safety and code compliance, and the role of local authorities in approvals. A permit is an official approval from your local building department authorizing construction activity; it ties your project to local building codes and zoning rules so inspections can verify compliance.
Why permits exist: permits protect public safety by ensuring buildings meet structural, electrical, plumbing and energy codes. Think of a permit like a vehicle registration and inspection combined: it’s a license to proceed that documents compliance and creates a public record.
Permits reference three regulatory layers: municipal ordinances, county requirements, and state or nationally adopted codes such as the International Building Code (IBC) and International Residential Code (IRC) administered by the International Code Council. According to a 2024 industry report, municipalities that adopt up-to-date ICC codes typically report fewer rejections during plan review.
Types of permits commonly triggered in residential work include: new construction, major renovations, electrical, plumbing, mechanical, roofing, and deck permits. Zoning permits or certificates of occupancy may be separate and tied to land-use rules such as setbacks and lot coverage.
For homeowners focused on roofing work, see the roofing permit process and local building department requirements for detailed steps and local compliance nuances.
For a primer on when permits are legally required, consult the companion guide what is a building permit and when is one required guide for foundational rules and common triggers.
Transition: now that you understand why permits matter, the next section walks you through an operational, step-by-step application process that you can follow end to end.
Step-by-Step Guide to the Building Application Process

The following numbered steps assume a typical residential permit (e.g., addition, major remodel). Each step begins with an action-first bold phrase to keep you on task. Expect to spend 3–6 hours compiling documents and completing forms for a straightforward residential permit; complex structural plans or engineered drawings add days to weeks.
- Confirm permit type and jurisdiction. Identify whether the project is governed by city, county, or unincorporated-county rules. Locate your local building department portal or office and note submission hours, online application availability, and plan review cycles (e.g., weekly, biweekly).
- Obtain parcel and zoning details. Pull the property parcel number from your tax statement and request a zoning verification from the planning department (or check the online GIS). Record zoning designation, setback requirements, lot coverage limits, and any overlay requirements (historic districts, coastal zones).
- Determine required permit types. Make a checklist of all permits needed: building, electrical, plumbing, mechanical, grading, and trade permits. If your project affects energy efficiency, include any energy compliance forms (e.g., REScheck or local equivalent).
- Assemble construction drawings. Prepare scaled plans: floor plans, elevations, roof plan, and a site plan showing property lines, existing structures, and proposed work. For structural changes, include framing plans and, where required, an engineer’s stamped calculations. If submitting online, export to searchable PDF and ensure file size limits (commonly 10–50 MB) are respected.
- Gather supporting documentation. Include statements of work, manufacturer spec sheets for installed items (HVAC units, windows), soil reports if grading, and an erosion control plan if applicable. For homeowner-built projects, include signed homeowner declarations and proof of property ownership.
- Complete the application form. Fill the local building department application or the unified permit form: enter property address, parcel ID, valuation of work (use conservative market cost estimate — see cost section for valuation guidance), contractor information, and description of work. If filing online, create an account and prefill contact information to speed future submissions.
- Calculate permit valuation and fees. Determine the total valuation: materials + labor + contractor overhead. Many counties use valuation tables or percentage-of-cost formulas. Round to the nearest $100 and prepare payment. See the costs section below for typical fee structures and examples.
- Submit the application and plans. Choose online submission where available (faster review turnarounds) or deliver in-person. For in-person submissions, bring three printed plan sets plus one digital copy on USB if required. Record the application number, reviewer name, and expected review cycle length (e.g., “Plan review in 10 working days”).
- Track plan review and respond to corrections. After submission, monitor the portal for “corrections” or “plan check” comments. Prepare revised drawings addressing each comment with a numbered response letter. Re-submit corrected documents within specified time (commonly 30–90 days to avoid application expiration).
- Pay permit fees and obtain issued permit. Once reviews clear and fees are paid, the building department issues an approved permit packet. Keep a printed copy of the permit on-site; displays are often required at the job site during construction.
- Schedule and pass inspections. Book initial inspections (footings, slab, rough-in) in the sequence required by the jurisdiction. Provide 48–72 hours notice depending on local rules. Be present or ensure the contractor is on-site to address inspector questions.
- Complete final inspection and closeout. After final work, schedule the final inspection. When the inspector signs off, request a certificate of occupancy or final approval letter if applicable. Save all inspection records for resale disclosures and future permits.
Practical tips and links embedded in the process:
- Use the local portal for faster communication and digital plan stamping when available.
- For roofing-specific filings, reference the pillar resource: roofing permit process and local building department requirements.
- For deck additions, pair this guide with the deck building permit guide for application and requirements to cover ledger details and guardrail specifics.
Real-world example (case study)
A homeowner submitting a 200 ft² kitchen addition: collected parcel number, hired a drafting service to produce 4 plan sheets, obtained a structural engineer’s stamped beam calcs, estimated valuation at $45,000, submitted online, received plan check comments in 9 business days, resolved corrections in 4 days, paid $870 in combined permit fees, and received permit in 15 calendar days. Inspection cycle completed in 6 weeks with final approval.
Transition: with the process steps laid out, next learn the precise requirements reviewers look for so you can avoid common correction items and speed approval.
Key Requirements for Building Application Approval
Approval hinges on satisfying jurisdictional reviewers — usually plan examiners and zoning officials — who check both code compliance and accurate documentation. Below is a checklist and explanation of the most frequent approval conditions.
- Accurate site plan — show lot lines, north arrow, scales, dimensions to structures and property lines, easements, and proposed drainage.
- Complete construction drawings — floor plans, exterior elevations, roof framing, cross-sections, and foundation plans with dimensions and materials specified.
- Structural calculations — stamped by a licensed engineer if altering load-bearing components; include load paths, beam sizes, and connection details.
- Zoning compliance — setbacks, lot coverage, maximum height, and accessory structure rules. Confirm variances if existing nonconforming conditions exist.
- Energy and environmental forms — REScheck or local energy certificate, erosion and sediment control, and stormwater best management practices if triggers apply (grading >1,000 ft² in many counties).
- Trade permits and contractor credentials — valid contractor license numbers, worker’s compensation insurance certificates, and proof of license bonding if required.
- Public utility confirmations — sewer and water connection permits, septic permits where applicable, and electrical utility service upgrade confirmations when needed.
- Accessibility or specialized code compliance — ADA or other accessibility requirements for public-facing residential conversions; fire separation for attached units.
Quick approval checklist (printable):
- Completed application form with parcel ID and valuation.
- Three printed plan sets (or uploaded PDFs meeting portal requirements).
- Structural calculations and engineer stamps (if required).
- Contractor license and insurance evidence or homeowner-builder declaration.
- Payment ready for permit and plan check fees.
- Proof of compliance with zoning setbacks and lot coverage.
For more granular submission steps, consult the steps to getting a permit guide with application requirements which drills into form fields and common plan-check correction templates.
Transition: after confirming requirements, understanding typical fees and how counties vary helps budget realistically for your project.
Typical Costs Associated with Building Permits
Permit fees vary widely: many jurisdictions charge a combination of a plan review fee, a base permit fee, trade inspection fees, and valuation-based surcharges. Below is a comparison of common fee structures and example ranges to guide budgeting. Exact values differ by county and project type; consult your local building department for accurate figures.

| Fee Type | Typical Range (Residential) | Notes |
|---|---|---|
| Application/Plan Review | $50 – $1,200 | One-time fee based on plan complexity; higher for engineered plans. |
| Base Building Permit | $100 – $3,000 | Often scales with valuation; municipalities use tiers. |
| Trade Permits (electrical/plumbing/mech) | $50 – $800 per trade | Separate inspections and fees for each trade. |
| Inspection Fees | $35 – $150 per inspection | Some jurisdictions bundle first X inspections into permit fees. |
| Impact or Development Fees | $500 – $20,000+ | Applies to new dwellings or significant additions; varies by locality. |
| Total Typical Example (small addition) | $500 – $5,000 | Includes plan check and 4–6 inspections in many counties. |
How fees are calculated: counties often use valuation-based formulas where permit fee = base fee + (valuation × rate). For example, a $50,000 kitchen addition in many county systems could generate a building permit fee of $200–$900 plus trade permits.
Fee tips:
- Ask for a fee schedule and a valuation table from the building department before filing.
- Some jurisdictions offer fee waivers or reduced fees for small works under a defined threshold (e.g., < $5,000 valuation).
- Plan review is usually charged even if the permit is withdrawn; budget for it as sunk cost.
For a city-specific illustration of how city fees differ, see the Sacramento building permit guide for city requirements and cost.
According to a 2024 industry report, the median residential permit fee for minor remodels across a representative sample of U.S. counties is approximately $1,200 including plan review and three inspections; your mileage will vary depending on local impact fees and valuation methods.
Transition: with costs understood, you should know how residential permits differ from commercial filings and where the major trade-offs lie.
Navigating Residential Permits vs. Commercial Permits
Residential and commercial permits share process logic but differ in scope, scrutiny, and required documentation. Below is a comparative snapshot and practical pros/cons to help you decide if your project should be treated like a residential job or requires commercial-level review.
| Aspect | Residential | Commercial |
|---|---|---|
| Code Standards | IRC-based, local amendments | IBC and NFPA standards, often higher scrutiny |
| Plan Review | Typically faster (2–3 cycles) | Longer, may require multiple specialty reviews |
| Inspections | Standard sequencing; fewer specialized inspections | More trade and system inspections (eg. fire suppression) |
| Fees | Lower per-unit fees; valuation-based | Higher, may include additional impact and review fees |
Pros and cons
- Residential — Pros: typically faster reviews, simpler requirements, lower cost. Cons: homeowner-builder restrictions in some states, and limited allowance for commercial uses.
- Commercial — Pros: clear performance standards for public safety, predictable for larger contractors. Cons: longer review times, higher fees, additional specialized code compliance.
As an example of how locality changes inspection and permit expectations, compare rules in the Virginia Beach permits and inspections guide and requirements which illustrates different inspection triggers and trade-specific timelines.
Transition: now that you can decide the permit track, learn how to identify and prevent common challenges that create delays and denials.
Common Challenges and How to Avoid Permit Application Delays
Permit delays usually come from incomplete applications, unclear drawings, missing supporting documents, or incorrect valuations. Follow these practical steps to minimize delays or rejections.
- Double-check required fields and signatures. Before submission, verify every field on the application is complete, signatures are present, and contact numbers are current. Missing applicant signatures are a top cause of rejection.
- Provide clear, dimensioned plans. Reviewers reject plans lacking dimensions or ambiguous notes. I always include a dimension key and scale note (e.g., “Scale: 1/8\” = 1′-0\””) on the cover sheet to avoid back-and-forth.
- Label site plan features. Identify north arrow, property lines, existing structures, proposed work, and distances to property lines. Unmarked easements frequently prompt review holds.
- Respond to corrections comprehensively. When addressing plan-check comments, create a numbered response letter mapping each reviewer comment to the revision or explanation. Partial responses lengthen review cycles.
- Use checklists and pre-submittal meetings. Many counties offer pre-submittal reviews for complex projects—use them to reduce surprises. Bring your full plan set, a printed application, and a list of questions to the meeting.
- Schedule inspections promptly and be prepared. Book required inspections early in the project and leave a permit card on-site. If an inspector notes issues, correct them immediately and request a reinspection within the jurisdiction’s reinspection policy.
- Maintain a single point of contact. Assign one person (homeowner or project manager) to handle all communications; multiple contacts create confusion and lost messages during plan review.
Short case examples
Case A: A homeowner submitted a deck plan without ledger details. Review held for “incomplete structural connection details.” Resolution: added ledger attachment detail and fasteners; re-submitted and approved in 7 days.
Case B: Contractor undervalued project at $8,000 to reduce fees; plan checker flagged valuation mismatch. Outcome: corrected valuation to $12,400, paid supplemental fee, and approval proceeded. Lesson: declare realistic valuation to avoid holds.
Transition: having learned how to avoid delays, next you’ll get realistic timeline expectations and what to do after approval.
Timeline Expectations and Next Steps After Permit Approval
Expect timeline variability based on jurisdiction workload. Typical residential permit lifecycle:
- Application submission to initial plan check assignment: 1–7 days (online faster).
- Plan review cycle: 7–21 business days per cycle depending on complexity and jurisdiction.
- Correction response time by applicant: typically 3–14 days depending on revision scope.
- Permit issuance after final acceptance and fee payment: 1–3 business days.
- Inspection scheduling: usually 48–72 hours’ notice required; some counties offer same-day slots for urgent requests.
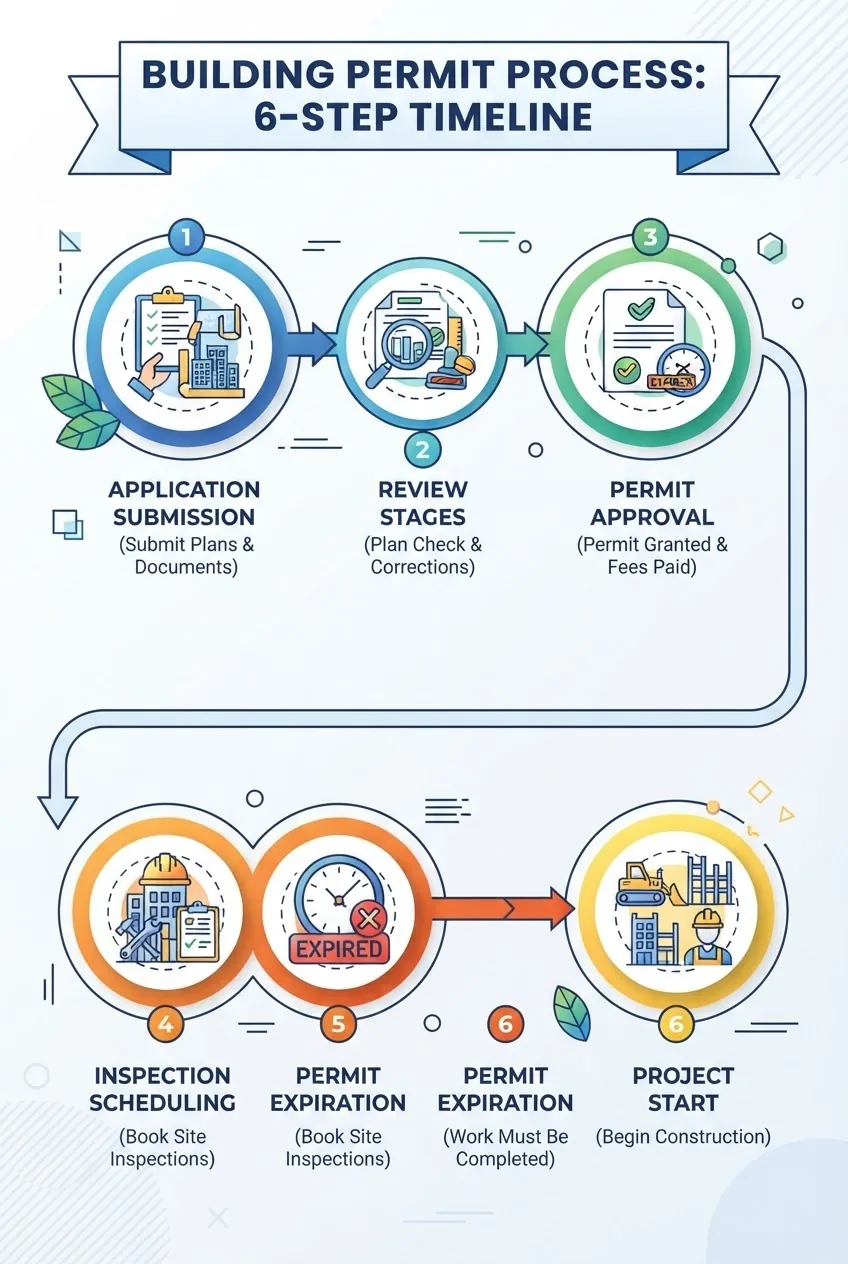
Permit expiration and renewal: many permits expire if no inspections are requested within 180 days or if the work is not completed within 12 months. Renewals typically require a written request and may include a penalty fee. According to a 2024 local government report, permit expiration notices increased in jurisdictions with higher staff turnover; maintain inspection activity every 60–90 days to avoid expiration risk.
Post-approval immediate next steps:
- Post the permit card on site and share permit number with contractors.
- Schedule initial inspections (e.g., footing, underground utilities) at least 5 business days ahead where possible.
- Confirm any required utility notifications (electrical meter upgrades, water taps).
- Keep revised plans and stamped approvals at the job site for inspectors.
Transition: if you need further help compiling documents, the next section lists resources and support contacts to help you finish the application confidently.
Resources and Support for Building Application Applicants
Use these resources to retrieve forms, code references, and contact information for your local building department. Start with your county or city building department’s website for official forms and application checklists, then reference national resources for code interpretation.
- Local building department portal or permitting office — search by county or city for the official application and fee schedule.
- International Code Council for code standards and interpretation: https://www.iccsafe.org.
- National Association of Home Builders for best-practice guidance and typical inspection checklists: https://www.nahb.org.
- USA.gov local government listings for links to county and municipal departments: https://www.usa.gov/local-governments.
Additional contacts and tools:
- Permit counter phone and email (listed on local portal).
- Pre-submittal meeting request forms (if offered).
- Permit fee estimator tools on county websites or via building department customer service.
Common mistakes and how to avoid them
From my experience managing dozens of residential permits, I see recurring errors. I describe failures in first person so you can avoid them.
- I once submitted plans without a north arrow; reviewers paused the file for clarification — always include orientation and scale on the cover sheet.
- I underestimated valuation on a remodel to reduce fees and was required to pay a supplemental fee later — use realistic, documented costs up front.
- I assumed the contractor’s license was valid without checking; when it had lapsed, the application was rejected — verify license and insurance immediately prior to submission.
- I failed to respond to all plan-check comments in one package; piecemeal corrections extended the review by several weeks — prepare a single, itemized response letter.
Final checklist
- Complete application with parcel ID and valuation entered.
- All plan sheets scaled, dimensioned, and stamped where required.
- Contractor license and insurance verified or homeowner-builder paperwork completed.
- Payment method ready for fee schedule and expected supplemental fees.
- Inspection schedule planned and permit card posted on-site.
When to call in a professional
Hire an architect or licensed engineer when structural changes, complex load paths, or code interpretation disputes arise; typical thresholds: changes affecting primary structure, additions over 500 ft² in many jurisdictions, or projects requiring variance applications. Engage a permit expediter when you need to accelerate reviews or manage multi-trade submissions across large projects.
Conclusion: follow the step-by-step process, use checklists, and lean on pre-submittal meetings and local resources to reduce risk. If you want tailored assistance, contact a local plan preparer or permit expediter to review your package before submission — it often saves money and time.
Next action: gather your parcel ID, draft a cover sheet with a north arrow and scale, and request the local fee schedule so you can compute the valuation and budget fees today.