

By the end of this hands-on guide you’ll be able to prepare and submit a complete deck building permit application, anticipate inspection milestones, and avoid the five most common compliance pitfalls. Expect to plan and gather documents in 1–3 days and to complete submissions and initial reviews in 2–8 weeks depending on local processing times; this guide assumes an intermediate DIY homeowner or small contractor skill level.
Before you start
- Basic site measurements (deck footprint, distance to property lines, elevation differences)
- Property deed or survey showing lot lines and setbacks
- Tools: tape measure, camera, laptop with internet access for portal submissions
- Materials list draft (decking type, joist sizes, post sizes, fasteners)
- Contacts: local building department phone/email, licensed structural engineer (if multilevel or attached)
What Is a Deck Building Permit and Why Do You Need One?
A deck building permit is an official authorization from your local building department that confirms your planned deck design meets legal requirements for structural safety, zoning, and property compliance. Think of permitting as getting the city’s green light before you start building: it ensures safety standards are enforced, neighbors’ rights are respected, and your property retains its insurability and resale value.
Permits cover three core areas: structural code compliance (loads, footings, connections), zoning rules (setbacks, lot coverage), and safety items (guardrails, stair risers). Failing to obtain a permit can lead to stop-work orders, required demolition, fines, or denial of future building insurance claims. According to a 2024 industry report by the International Code Council, jurisdictions that enforce deck permitting reduce structural failures and post-construction accidents by measurable margins.
Who reviews your application? The building department evaluates the application for: site suitability, structural adequacy, and code compliance. They may involve zoning officers, plan reviewers, and inspectors at different stages. The permit is typically tied to a permit number, a set of approved drawings, and a timeframe for inspections and final approval.
Before moving to the application process, connect your project to broader municipal practices so you understand how your deck permit fits into other home repairs and improvements. local building department requirements for permits
Transition: Now that you understand what a deck permit is and why it matters, let’s compare deck types and how each affects the permit requirements.
Types of Decks and How They Affect Permit Requirements
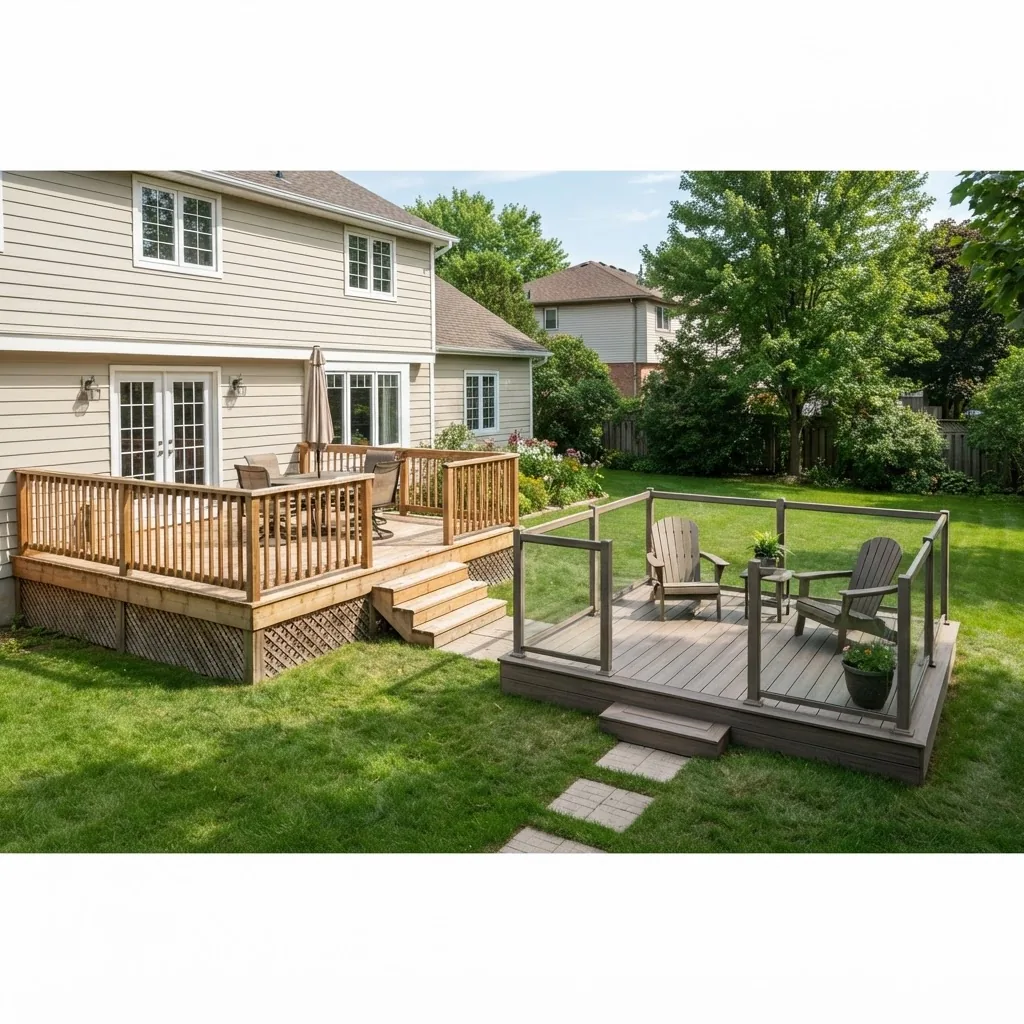
Deck type, size, and materials directly affect whether a permit is required and what documentation you’ll need. Below is a practical comparison to help you classify your project before you apply.
| Deck Type | Typical Permit Impact | Common Documentation Required |
|---|---|---|
| Attached deck (to house) | Higher scrutiny: ledger attachment details, flashing, potential foundation tie-ins. | Framing plan, ledger/connection details, footing plan, flashing detail. |
| Freestanding deck | Often simpler: may not require ledger flashing but still requires footings and guardrail info. | Site plan, footing sizes, post layout, guardrail details. |
| Multilevel deck | Significant structural review; engineered drawings commonly required. | Engineered structural drawings, stair and handrail details, load calculations. |
| Roofed or covered deck | May be treated as an addition — additional code and fireplace/heating considerations. | Roof framing plans, flashing and drainage details, possible electrical permits. |
| Material differences (wood vs composite vs metal) | Materials can change fastener schedules, span tables, and required connectors. | Manufacturer span tables, corrosion-resistance fastener specs, deck board details. |
Size thresholds: many jurisdictions exempt very small platforms (commonly under 200 sq ft or under a certain height, e.g., 30 inches above grade) — but these thresholds vary. Materials matter because treated lumber often requires specific fasteners and connectors; composite decking requires manufacturer warranty and span data to show compliance with code-prescribed live loads (commonly 40 psf residential loading per 2024 IRC guidance).
Transition: With the deck type and material impacts clear, follow the numbered permit application steps below to prepare and submit a compliant package.
Step-by-Step Deck Building Permit Application Process

This is the hands-on sequence to prepare, submit, and move your deck permit from application to approval. Each step starts with an action-first bold phrase and includes concrete details you can apply immediately.
- Confirm local code and zoning baseline: Call or check the building department website for your jurisdiction to determine setback, lot coverage, and height limits. Note the permit threshold (square footage and height). Log the contact and permit portal URL in a project folder. Average call duration: 10–20 minutes.
- Measure and create a site plan: Produce a simple site plan to scale (1″=10′ or similar) showing house footprint, proposed deck outline, property lines, setbacks, and existing trees. Use measurements to the nearest inch for distances under 10 ft and to the nearest foot beyond. Include finished grade and any retaining walls.
- Design the framing and footing plan: Prepare a framing plan showing joist spacing (commonly 16″ O.C. for 2×8 joists with standard spans), beam sizes, post locations, and footing diameters. For most single-level wood decks: typical footings are 12″ diameter x 12″ deep below frost line, or per local frost depth — confirm with the building department. If your deck is attached or exceeds single level, plan for engineered drawings.
- Decide if engineering is required: For multilevel decks, decks over 30 inches above grade, or spans beyond code tables, hire a licensed structural engineer. The engineer should provide a signed sealed drawing and load calculations. Typical lead time for an engineer: 3–10 business days.
- Assemble required documents: Common items: completed application form, site plan, framing plan, footing detail, guardrail/stair details, material specs, contractor license (if applicable), proof of ownership, and permit fees. Some jurisdictions require signed disclosure forms for lead-safe work or tree protection plans.
- Complete the application form accurately: Enter property parcel number, legal description, applicant (owner or contractor) contact info, estimated value, and project description (include square footage and maximum deck height). If applying online, save a PDF copy of your submission confirmation number.
- Submit through the proper channel: Many cities offer online portals. Upload all drawings as PDFs, label each file clearly (e.g., “SitePlan.pdf”, “FramingPlan.pdf”). If your building department accepts e-submissions, expect an automated intake within 24–48 hours; if in person, bring three sets of printed plans. Demonstrated practice: submit a single consolidated PDF under 25 MB unless the portal permits larger uploads.
- Pay permit fees and track the application: Fees often calculate on value and square footage. After payment, obtain a permit tracking number. Use the portal to review comments and correction notices; check daily for the first two weeks. Typical municipal review times: 5–30 business days depending on workload.
- Respond to reviewer comments promptly: If plan review generates corrections, update drawings with redline responses, include a revision cover letter listing changes, and re-upload within the portal. When reviewers require clarifications you can’t provide, request a plan review meeting or a permit intake appointment to clarify expectations and avoid repeat resubmissions.
- Schedule inspections as you build: Most decks require footing, framing, and final inspections. Schedule footing inspection after excavation and prior to pouring concrete; schedule framing inspection after joists and beams are installed but before decking. Final inspection occurs when all elements (guards, stair railings, flashing) are installed. Keep the permit card on-site during all inspections.
- Obtain final approval and retain records: After a passing final inspection, obtain the final sign-off and a copy of the approved permit set. Keep all documents for at least the life of the deck — this supports resale and insurance claims.
- Amendments and renewals if scope changes: If you change the deck size, materials, or structural system, submit an amendment form or apply for a revision through the portal. Permit validity varies; if construction stalls beyond the permit’s active period (commonly 6–12 months), you must request an extension or reapply.
Practical walkthrough example (sample checklist):
- Sample checklist for a 12′ x 16′ attached wood deck: Site plan with setback distances, ledger detail with 2½” stainless lag screws at 16″ O.C., 2×10 joists at 16″ O.C., 4×6 posts on 12″ diameter footings to frost depth, 1/2″ holdown connectors at beam-to-post, composite decking manufacturer span table, guardrail detail at 36″ height with 4″ maximum opening spacing.
- Submission packaging: Application form, two printed plan sets, one digital PDF, contractor license (if using), owner authorization if contractor submits.
- Portal tracking tip: Capture screenshot of submission receipt and set a calendar reminder to check for comments at day 7 and day 14.
Case study — common delay and resolution: A homeowner submitted plans with an attached ledger but omitted flashing detail. Reviewers issued a correction on day 9 requiring flashing and ledger attachment details. The homeowner resolved it by uploading a revised ledger detail from the manufacturer and received approval 6 days after re-submission. Lesson: include flashing and corrosion-resistance notes up front to avoid this delay.
Transition: With your application submitted and tracked, you should prepare for on-site inspections — read the next section for the inspection milestones and tips to pass each one.
Common mistakes and how to avoid them
- I once saw a contractor assume ledger connections could rely on old siding; that led to a denied inspection. Always show flashing and structural connection details.
- I’ve observed missing frost-depth footings causes failed footing inspections. Confirm local frost-depth and show it on the footing detail.
- A homeowner uploaded blurry site plans that reviewers rejected. Use clear, labeled PDFs with dimensions and a north arrow.
Compact verification checklist before submission
- Site plan with setbacks and north arrow
- Framing plan with joist spacing and beam sizes
- Footing plan showing depth and diameter tied to local frost line
- Ledger and flashing detail (for attached decks)
- Guardrail and stair details with dimensions
- Contractor license or owner-builder affidavit
- Permit fee payment receipt
When to call a professional
If your deck is multilevel, attached with complex ledger details, over habitable spaces, or triggers structural engineering (spans beyond prescriptive tables), call a licensed structural engineer and a contractor licensed in your jurisdiction. For complex permit negotiations or variance requests, an experienced permits consultant or land-use attorney can reduce time-to-approval.
Transition: Next, we’ll list the essential documents and specifics reviewers look for when deciding to issue a permit.
Essential Requirements and Documentation for Deck Permits
Below is a detailed checklist of documents and the exact information building departments commonly require. For many jurisdictions, omitting even one line item prompts correction notices.
- Completed permit application form: Include parcel ID, estimated value (use contract or cost estimate), contractor license number or owner-builder declaration, and contact information.
- Site plan: Dimensioned to scale showing existing structures, property lines, setbacks, easements, and distance to septic/drain fields when applicable.
- Framing and structural drawings: Plan view showing joist spans, beam sizes, post spacing, joist layout (e.g., 2×8 @ 16″ O.C.), stair layout with rise/run dimensions, and connection details.
- Footing detail: Diameter and depth tied to local frost-line or code requirement; show concrete strength (e.g., 3,000 psi) and rebar if required.
- Ledger and attachment details (attached decks): Flashing detail, ledger board size, fastener type and spacing (e.g., 1/2″ lag screws at 16″ O.C.), and holdown connections.
- Guardrail and stair details: Guard height (commonly 36″ for residential), baluster spacing (maximum 4″ sphere), stair tread dimensions (min 10″ tread, maximum 7.75″ rise typical under IRC).
- Material specifications: Lumber grading (pressure treated), fastener corrosion rating (stainless or hot-dipped galvanized), composite manufacturer’s span tables and installation guide.
- Engineered drawings (if required): Signed and stamped by a licensed engineer in that state for multilevel or non-prescriptive designs.
- Erosion and drainage plan (if site-disturbing): Temporary sediment controls, final grading plan to prevent runoff onto neighbors’ property.
- Proof of ownership or authorization: Deed, tax parcel, or owner authorization if a contractor submits.
- Contractor licensing and insurance: Valid licensing number, proof of general liability insurance and workers’ compensation as required by local rules.
- Payment/fee receipt: Electronic or paper proof of paid fees to complete intake.
Code excerpts and authority: many jurisdictions use the International Residential Code (IRC) for deck provisions. According to a 2024 International Code Council report, local amendments may modify prescriptive spans, frost depth requirements, or railing heights; always cite the code edition year used by your building department when you submit (e.g., “2021 IRC as adopted by City X”). Sacramento city permit requirements
Practical note on drawings: Drawings should be legible at 11″ x 17″ or standard A4; include a title block with project address, designer name, date, scale, and revision history. When online portals specify file size limits, split drawings into clearly named files (e.g., “01_SitePlan.pdf”, “02_Structural.pdf”).
Transition: With documentation ready, prepare for scheduled inspections during construction — the next section explains those milestones and what inspectors will check.
Common Inspection Milestones During Deck Construction
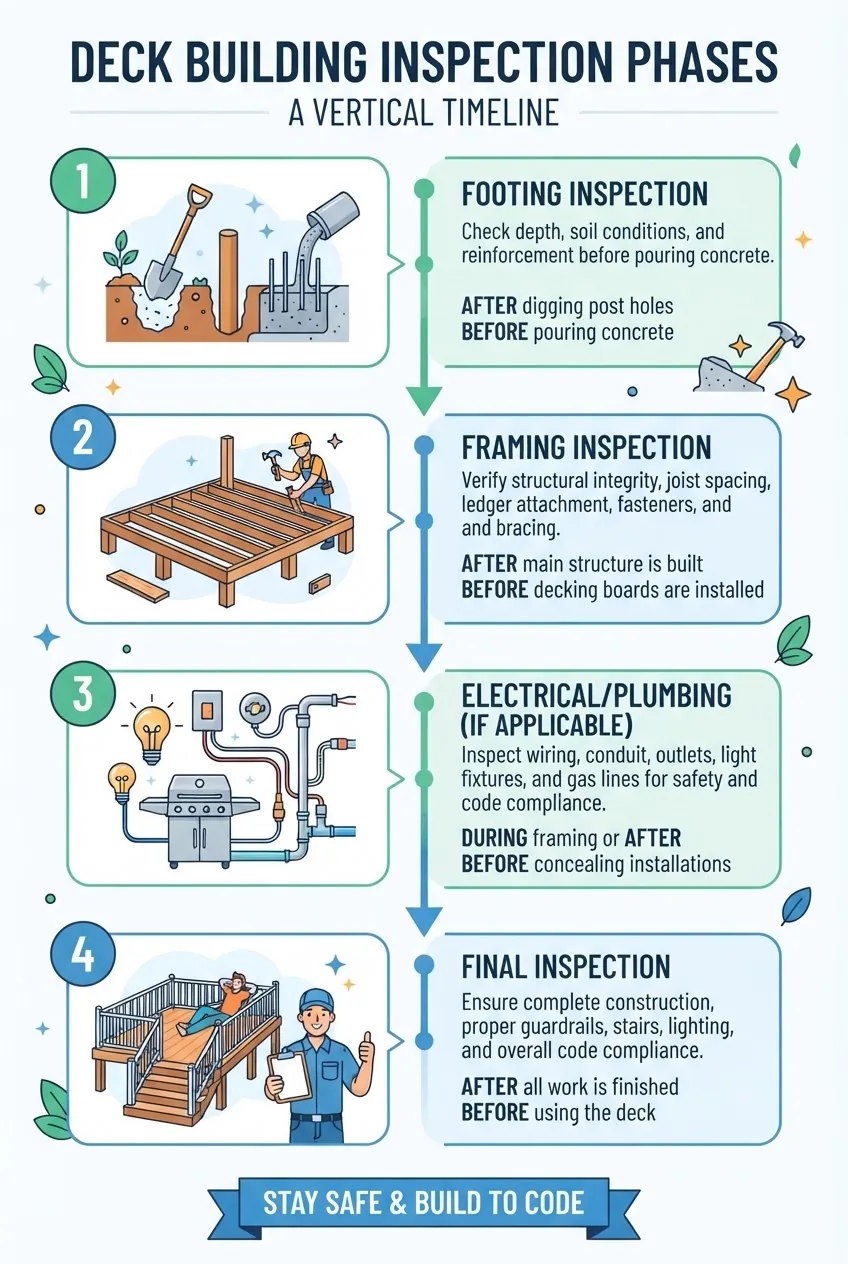
Inspectors verify that construction follows the approved plans and applicable safety standards. Below are the typical inspection stages and actionable tips to pass each one.
- Footing inspection (before concrete pour): Inspector checks excavation depth, footing location relative to the plan, and reinforcement if required. Tip: expose any holdown embedments and have the footing label tags ready. Bring the approved plan and the permit card to the site.
- Framing inspection (after framing and connections): Inspector checks ledger attachment, joist hangers, beam connections, post-to-footing connectors, and stair framing. Tip: install temporary guards if project is elevated and ensure joist hanger nails match hanger specifications exactly.
- Electrical/plumbing inspection (if applicable): For decks with outdoor lighting, outlets, or gas lines for grills, inspectors will check wiring per NEC or plumbing codes. Tip: have circuit labeling, GFCI protection, and conduit entries documented.
- Final inspection (after completion): Inspector verifies guardrail heights, baluster spacing, stair handrails, flashing integration, and that the site is cleared of construction debris. Tip: take photos of key details and present manufacturer installation guides for composite materials.
Inspector corrections: If the inspector issues a correction notice, it will list items to fix and whether a re-inspection fee applies. Respond quickly: many jurisdictions give 30 days to correct before additional actions. For similarities in inspection choreography, review comparative permit processes — roofing permit inspection requirements — roofing inspections often mirror footing and final checks around water-proofing and flashing.
Regional differences example: Inspections in coastal Virginia can emphasize corrosion resistance and wind-load connections. Virginia Beach permit inspections provide an example of local modifications including hurricane tie requirements.
Safety standards: Use OSHA guidance for on-site worker safety (fall protection for heights above 6 feet) and the National Safety Council for jobsite best practices. External resources: OSHA and International Code Council.
Transition: Inspections take time and may be delayed for many reasons. The next section explains fees, timelines, and how to reduce delays.
Understanding Permit Fees, Timelines, and Possible Delays
Permit fees are typically calculated using the estimated value of the project and may include plan review fees, inspection fees, and system development charges. Fee formulas vary; small decks may incur a flat fee while larger projects are charged per square foot or assessed by valuation tables.
Processing timelines depend on jurisdiction workload and whether your submission is complete. Typical stages and durations: initial intake (1–3 days), plan review (5–30 business days), corrections and resubmission (7–14 business days per round), and final issuance (1–3 days after acceptance). According to a 2024 industry report, average municipal plan review time for residential deck permits ranged from 7–21 business days depending on whether an online portal was used.
Common causes of delays:
- Incomplete applications or missing documents
- Non-compliant structural details (ledgers, spans)
- High review volumes and staffing shortages at the building department
- Required variances or neighbor objections to setbacks
How to avoid delays: submit complete plans, include stamped engineered drawings when required, and engage in pre-submittal meetings when offered. If a delay occurs, contact the reviewer directly, request a status update, and solicit a correction list that you can address in a single consolidated resubmission.
How long to get approved? Commonly 1–6 weeks for simple projects, 4–12+ weeks when engineering or variances are needed.
What if I need a change? Submit a permit amendment or revision; small scope changes often accept a supplemental drawing and fee.
Transition: Apply these timeline-management habits to increase your chance of first-pass approval — the next section lists additional practical tips.
Tips for Successful Deck Permit Approval and Avoiding Compliance Issues
- Document everything: upload clear, labeled PDFs and keep a submission log with dates and reviewer names.
- Communicate early: call the plan reviewer if you expect non-standard details to avoid surprises.
- Match materials to details: if using composite decking, include manufacturer span tables and fastening schedules.
- Hire licensed pros when required: if the jurisdiction requires a licensed contractor for permitting, use one to prevent rejection.
- Preempt inspections: install flashing and show it on drawings, and protect ledger areas from water intrusion during construction.
- Prepare for corrections: plan two weeks of buffer time for potential resubmissions.
A short final tip: always treat the permit as part of the project schedule — build inspection times into your timeline, not after the fact.
Transition: Finally, here’s when you might not need a deck permit and the caveats to that exception.
When You Might Not Need a Deck Permit
Some small or temporary decks may be exempt from permits depending on local variance rules. Typical exemptions include small platforms under a specified square footage (often under 200 sq ft), low platforms under a specified height (often 18–30 inches above grade), or temporary structures used for less than a defined time period.
Examples: a 4′ x 6′ ground-level composite platform under 18 inches above grade may be exempt in Municipality A; however, the same platform adjacent to a steep slope or within an easement may still require review. If unsure whether your specific scenario meets an exemption, consult guidance on when a building permit is required. when a building permit is required
Caveat: exemptions do not override HOA rules, utility easements, or local safety codes — always verify with the building department and your community covenants.
Conclusion: You now have a complete, practical roadmap to prepare, submit, and see a deck permit through to final approval: determine deck type, assemble precise documentation, follow the step-by-step application process, and prepare for inspections. For a smooth path, submit complete plans, use online portals when available, and engage licensed professionals for structural or complex items. Ready to start? Gather your site plan and measurements today and set a calendar reminder to begin the application process within the next 48 hours.