Roofing permit clarity: by the end you will know exactly how to research, apply for, pull, and manage a roofing permit from your local building department, how long each phase typically takes, and when to call in a pro. Expect to spend 1–3 business days gathering documents, 3–14 business days for plan review in many jurisdictions, and 1–4 weeks total for routine residential reroofs; this guide assumes a homeowner or small contractor with basic paperwork skills.
Before you start, gather these prerequisites and tools so you don’t stall the application.
Before you start
- Proof of property ownership or authorization (deed, lease, or owner authorization).
- Project scope summary: square footage, roof pitch, existing vs. new decking notes, roofing material type (e.g., architectural asphalt shingles, metal panels).
- Two copies of a site plan and roof plan (minimum 11×17 acceptable in many cities).
- Contractor license and insurance certificate (or homeowner affidavit if permitted).
- Digital photos of existing roof conditions and access points (mobile phone acceptable).
- Payment method for permit fees (credit card or check) and an email for status notifications.
- Access to the local building department’s online portal or the physical permit counter hours.
Introduction to Roofing Permits and Local Building Departments
Roofing permit — a formal authorization issued by a local building department or city permit office allowing roofing work that affects the structural, fire-resistive, or weatherproofing elements of a home. Think of a permit similar to a driver’s license for construction: official permission confirming you meet minimum safety and code requirements before and after work begins.
This section explains what typical home building permits cover and who enforces them. Local jurisdictions issue different classes of permits: a simple replacement of like-for-like roofing material may be a single trade permit, while structural modifications to roof framing can trigger a full building permit. The permit identifies the scope, required inspections, and any conditions the inspector will enforce.
Key roles you’ll interact with: permit technicians who intake applications, plan reviewers who check compliance with building codes, and field inspectors who perform site visits. Many cities and counties now publish requirements, forms, and application status online through a city permit office portal or a county permit office site that supports a building permit lookup tool.
For foundational background, see what is a building permit and when is one required for a quick primer on when a permit is mandatory versus optional.
Transition: with the basics set, next we’ll cover why roofing permits exist and the legal implications you must account for before submitting an application.
Why Roofing Permits Are Required: Importance and Legal Implications
Building permits exist to protect public safety, property values, and insurance integrity. A roofing permit demonstrates compliance with local codes and national standards—especially for fire resistance, wind uplift, and structural adequacy. When you submit for a roofing permit, the permit department verifies that your proposed work meets the local amendments to model codes such as the International Code Council (ICC) standards.
According to a 2024 local building department guidelines survey, common permit checks for residential roofing include deck soundness, underlayment type, flashing details, ventilation rates, and nailing patterns for shingles. Inspectors look for compliance with the local adoption of the ICC codes and any municipal amendments.
Legal implications of not obtaining a roofing permit can include:
- Stop-work orders that suspend the project until a permit is obtained.
- Fines or civil penalties calculated per day or per violation, variable by city building permits code.
- Insurance denial of claims for roof-related damage if work was unpermitted.
- Forced removal or retrofit if unpermitted work fails inspection later (sale-time disclosure requirements may trigger this).
Examples: If a contractor replaces sheathing and modifies roof framing without a building house permits entry, the local building department may require engineered drawings and a structural inspection. In coastal areas with strict wind load rules, missing a required uplift nailing schedule can fail inspection and require partial rework.
Permits also protect homeowners: they ensure licensed contractors meet insurance and bonding requirements, and they provide an inspection record that adds value and clarity when selling a home.
For permit requirements that involve other structures, consult our deck building permit guide to compare exterior structure rules and inspection touchpoints.
Transition: you now understand why permits are required—next is the hands-on, step-by-step process to obtain that roofing permit.
Step-by-Step Roofing Permit Application Process
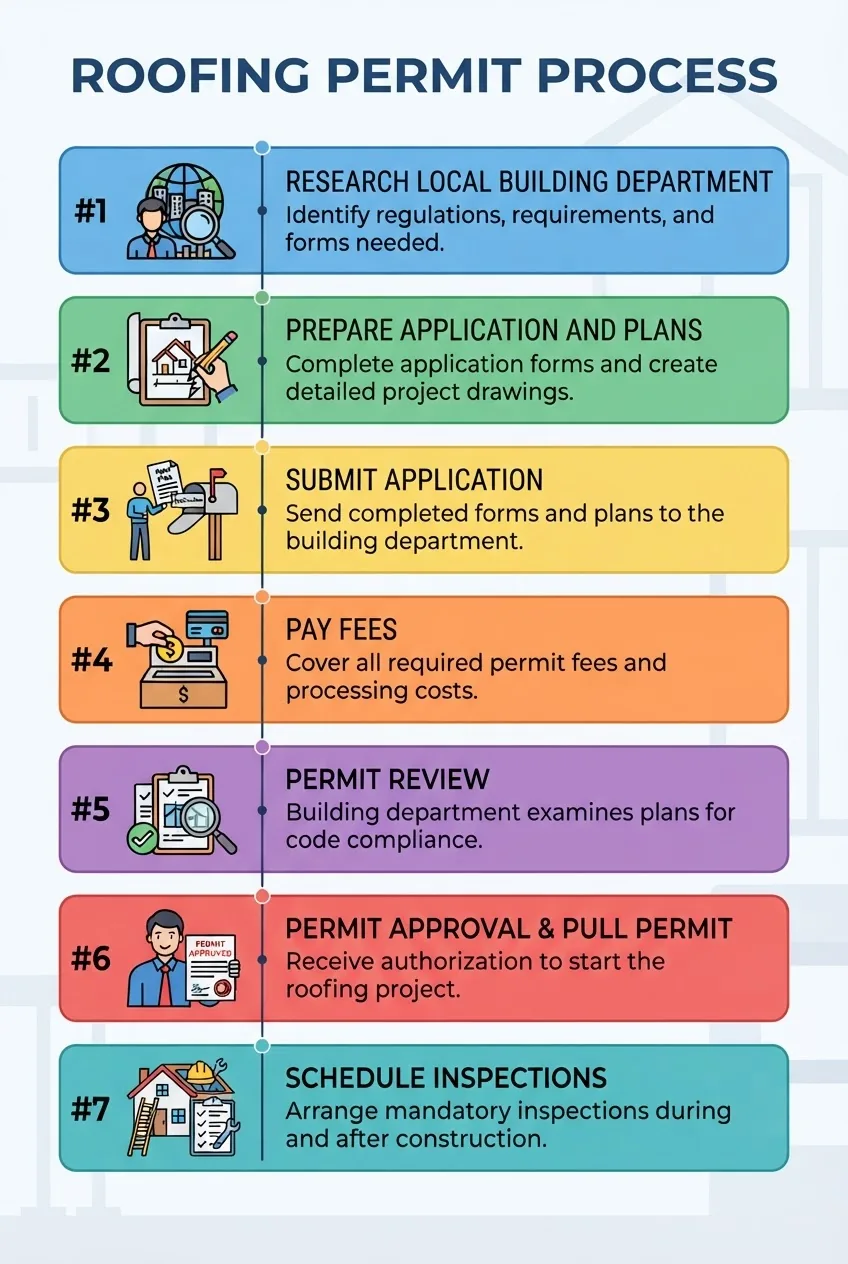
This section is the operational core. Follow each numbered step in order and use the checkboxes in the final checklist to verify readiness. Where a step has time expectations, I list typical durations and thresholds.
-
Confirm jurisdiction and permit type.
Determine whether your property falls under a city or county building department (often based on the municipal boundary lines). Call the central permit counter or use an online address lookup to confirm jurisdiction. Typical time: 15–30 minutes. Required outcome: jurisdiction name, permit counter hours, and portal URL if available.
Practical tip: major metropolitan areas have permit portals—search for your city name plus “building permits” or use the county website if outside city limits. If your property is in a homeowners association (HOA), verify HOA requirements in parallel.
-
Research code triggers and inspection requirements.
Read your local “roofing” section of the building code or the permit checklist on the city’s website; note required inspections (e.g., dry-in, final). Typical time: 30–90 minutes. Outcome: a list of required inspections and any code-specific requirements like shear nailing, ice-and-water shield zones, or roofing underlayment type.
External reference: check adopted model codes via the ICC for baseline standards referenced by many local departments.
-
Gather plans and documentation.
Prepare a concise set of plans and permits documents: site plan showing setbacks and property lines, roof plan with slopes and material notes, a scope-of-work narrative, contractor license and insurance, and photos of existing conditions. For simple reroofs, many jurisdictions accept a one-page site/roof sketch and material spec sheet. Typical time: 1–3 business days depending on printing/scanning.
If structural replacement is involved, include engineered drawings signed by a licensed engineer. File formats: check portal requirements—PDF is universally accepted; some portals require specific templates.
-
Complete the permit application form.
Use the online portal where available or bring a printed application to the city permit office. Provide owner/contractor contact info, valuation of work (use invoice or contractor estimate), and the description of work line should precisely state materials and scope (e.g., “Remove existing 3-tab shingles; install 25 sq architectural shingles, ice and water shield at eaves and valleys; replace up to 50% decking as needed.”)
Time: 30–60 minutes. Accuracy matters: inconsistent valuation or scope can delay review.
roofing permit process and local building department requirements
-
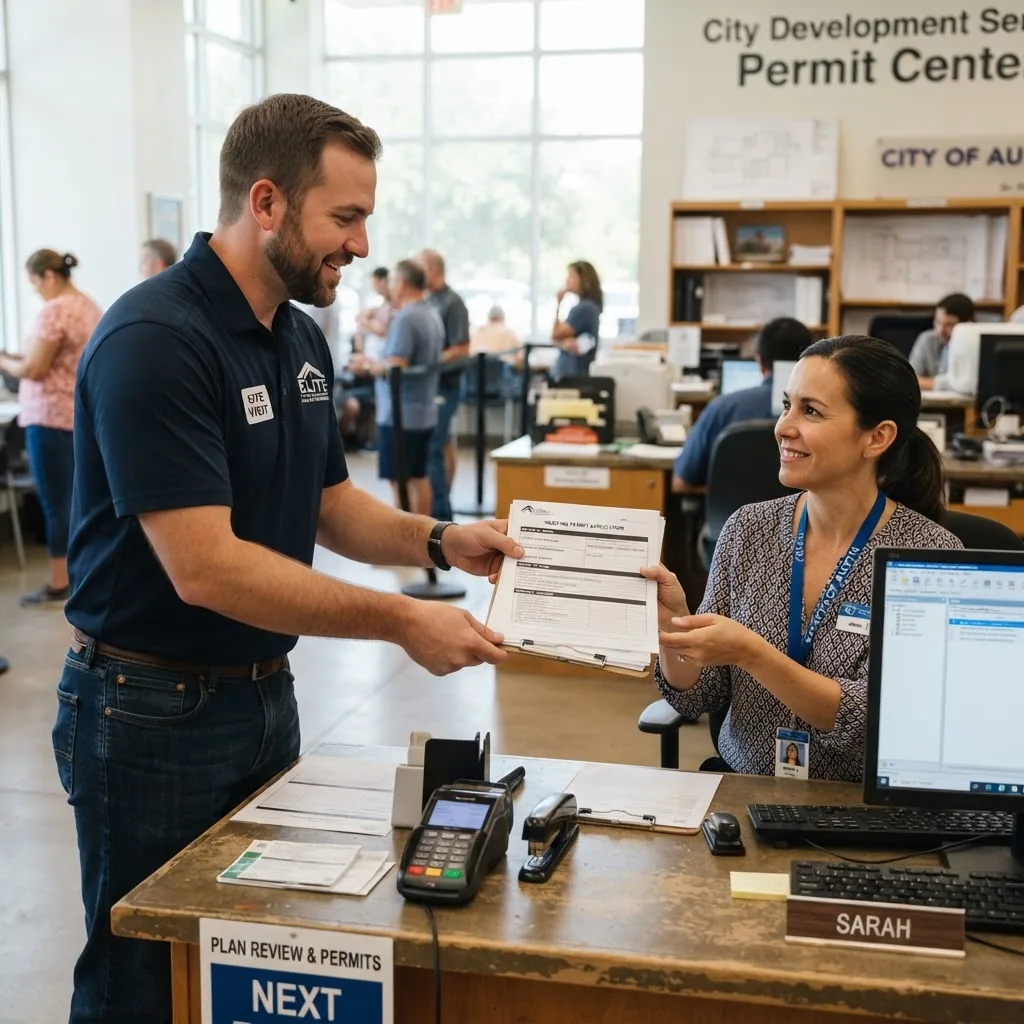
Submit application and pay fees.
Submission methods: online upload, email, or in-person counter drop-off. Pay the application/plan review fees (many cities accept credit card). Typical fees vary—according to a 2024 industry report, median residential reroof permit fees in mid-sized U.S. cities range $75–$350; confirm your local rate on the permit portal. Time: immediate for online submissions; 1–3 business days for in-person intake.
Keep receipts and note any transaction or application numbers for status checks.
-
Track application and respond to plan review comments.
Most jurisdictions issue “corrections” if additional information is needed. Use the assigned plan review number to check permit status via the portal. Typical plan review time: 3–14 business days for routine reroofs; structural changes can take longer.
When corrections arrive, respond by uploading revised documents and a point-by-point response. Time: 1–5 business days to prepare common revisions. Keep correspondence formal and dated.
-
Receive permit approval and pull the permit.
Once approved, download the permit and post it visibly at the work site as required. “Pull a permit” means the permit holder (contractor or owner) retrieves the official document. Some jurisdictions require printing and posting the approved permit on the property; others accept a digital copy displayed upon request. Time: immediate upon approval.
Verify the permit lists all required inspections and their sequence (e.g., nailing pattern inspection, dry-in, final). Order-of-operations matters: schedule inspections in the order the permit requires.
-
Schedule inspections and complete work compliant with codes.
Book inspections via the portal or phone; typical lead times vary from same-day to several business days. Conduct the work to the plan; for each inspection pass, the inspector will sign off electronically or with a card. Common inspections for roofing: deck/attachment, dry-in (underlayment & flashing), and final. Timeframe: inspections spread across project timeline—typically 1–3 inspections across 1–5 days of active work.
Virginia Beach permits and inspections guide for a localized example of inspection sequencing and expectations.
Case Study: Typical Single-Family Reroof (Start-to-Finish)
Scenario: A homeowner in a suburban jurisdiction replaces a 30-year asphalt shingle roof with architectural shingles, no framing work.
- Day 0–1: Homeowner confirms jurisdiction via city address lookup, collects contractor license and insurance, takes photos of current roof.
- Day 1–2: Contractor prepares a roof plan sketch, completes online application, uploads documents, and pays $150 fee.
- Day 3–7: City plan review returns with no corrections; permit issued online.
- Day 8: Contractor pulls the permit and posts on the jobsite. Contractor schedules a dry-in and final inspection (2-day lead time).
- Day 9: Roof is stripped and re-roofed; dry-in inspection occurs during day 1 and passes; final inspection occurs after cleanup and passes.
- Day 10: Permit is closed in the portal with inspection records attached.
Transition: after pulling the permit and scheduling inspections, you’ll need to know how to find and work with local permit offices—covered in the next section.
How to Locate and Use Your Local Building Department and Permit Offices

Finding the right office and using its resources shortens the time to approval. Typical contact points: a city permit counter, a county permit center, a centralized online portal, or a telephone intake line. Larger cities often separate plan review from field inspections; smaller counties may centralize all duties at one counter.
Step-by-step how-to use local permit resources:
- Lookup your jurisdiction by address. Use the city or county website “Permit Center” or “Building Department” page. If you’re unsure, use your county assessor’s site or the municipal GIS parcel lookup to confirm the governing body.
- Locate the permit portal link. On the department page, find links labeled “Online Permits,” “Permit Search,” or “ePermits.” These portals usually allow new application creation, plan uploads, payment, and inspection scheduling.
- Note contact points and hours. Save the permit counter phone number, email address for plan review, and inspection scheduling number. Record walk-in hours if you prefer in-person submission.
- Use FAQs and permit checklists. Many departments publish a “roofing permit checklist” that lists exactly what you must submit. Follow the checklist line-by-line to avoid review delays.
- Set up an account. Create a portal account and link your contractor license or business account if available. This reduces repeated data entry on resubmissions and provides email alerts for review comments and inspection results.
- When in doubt, call the intake technician. Permit technicians can often tell you whether your project is classificated as “repair” vs. “replacement” vs. “alteration,” which determines permit type and fees.
For a city-specific example of how local requirements and counters differ, consult the Sacramento building permit guide, which demonstrates a typical metropolitan permit portal layout and fee schedule.
Practical tips for in-person visits:
- Bring printed plans and 1–2 copies of your application; have a USB or emailed PDF ready for upload.
- Ask for the plan reviewer’s name and direct contact for follow-ups; polite persistence speeds clarifications.
- Confirm whether the city accepts scanned contractor insurance certificates or needs originals.
Transition: many departments provide online lookup and status tools—useful for real-time tracking of your building permit status. The next section walks through those tools.
Understanding Building Permit Records and Online Tools
Modern permit workflows include searchable permit logs, an online building permits search, and a building permit lookup that shows the building permit status. These tools let you verify approvals, view inspection history, and confirm permit closure.
How-to: using an online permit lookup
- Find the portal search page. Search the city/county website for “permit lookup” or “permit search.” If your jurisdiction uses a statewide or vendor portal (e.g., Accela, CitizenServe), the search will be consistent across municipalities that use the vendor.
- Search by address or permit number. Enter the property address exactly as the assessor lists it, or use the permit application number from your receipt. Use quotation marks around addresses in free-text searches if the portal supports it.
- Interpret results. A typical permit record shows permit type, application date, reviewer notes, fee paid, and inspection results. Look for items labeled “Corrections Required,” “Awaiting Payment,” or “Finaled.”
- Download records. Most portals allow you to download PDFs of approved plans and inspection cards; keep these in your project folder as proof of compliance.
- Sign up for alerts. Enable email or text notifications for status updates—this avoids repeated manual checks.
Walkthrough example (described steps for a typical Accela or CitizenServe portal):
- Go to the city permit portal and click “Search Records.”
- Choose “Address” search and enter the house number and street name; click Search.
- Select the active permit record and open the “Documents” tab to download approved plans or the “Inspections” tab to see scheduled/past inspections.
- Use the “Make Payment” or “Upload Documents” buttons to respond to plan reviewer requests.
According to a 2024 industry report, jurisdictions with mature online portals reduce average plan review times by 15–30% because applicants correct deficiencies more quickly when reviewer comments are clear and tied to specific plan pages.
Common data fields to note in the permit record:
| Field | What it tells you |
|---|---|
| Permit Type | Classifies the work (reroof, re-roof with sheathing, structural alteration) |
| Application Status | Shows progress (Applied, In Review, Corrections, Issued, Finaled) |
| Inspection Log | Lists scheduled and passed/failed inspections and notes |
Transition: now that you can find permit records and use online tools, make sure you prepare the correct documentation; the next section lists common requirements and documentation needed for roofing permits.
Common Requirements and Documentation Needed for Roofing Permits
Collecting the right paperwork at the outset prevents review delays. Below is a concise checklist followed by explanations for each item.
- Completed permit application form (signed by owner or contractor).
- Site plan and roof plan (minimum 11×17 or digital PDF).
- Scope of work narrative with material specifications and roofing square footage.
- Contractor license and current insurance certificate (workers’ comp and liability).
- Manufacturer’s product specifications and installation instructions for new roofing materials.
- Structural drawings or engineering reports if replacing sheathing or modifying framing.
- Proof of payment or fee waiver documentation (if applicable).
- Homeowner affidavit if the owner will do the work and the jurisdiction permits owner-builder permits.
Explanations and practical thresholds:
- Plans and permits documentation: For a like-for-like reroof under 25 squares (2,500 sq ft), most jurisdictions accept a simple roof plan and a materials spec sheet. For work that replaces more than 50% of the roof decking or modifies framing, submit structural plans sealed by a licensed engineer. Time to prepare: 1–3 days.
- Valuation and fees: Use contractor estimates to determine project valuation. Many fee schedules have thresholds (e.g., under $1,000 may be a flat fee). Check the fee calculator on the permit site to avoid underpayment that triggers a hold.
- Manufacturer approvals: If using a specialized system—like a mechanically attached metal panel—include manufacturer installation instructions and any special uplift testing reports.
- Insurance and licensing: Verify contractor license numbers and insurance policy effective dates; many permit counters will not accept expired coverage.
- Environmental or historic district reviews: In historic districts, add a preservation approval to the permit packet; allow an additional 2–6 weeks for review.
For a deeper dive into application paperwork and fee structures, consult our building application guide for permit requirements and cost.
Transition: after submitting and receiving a permit, inspections ensure compliance—next section explains inspection types, timing, and compliance strategy.
Inspections and Compliance After Obtaining Your Roofing Permit
Understanding inspections is crucial: each inspection confirms a stage of work meets the code before the project proceeds to the next step. Inspection on first use: a formal site visit where a certified inspector evaluates work against codes and approved plans.
Typical inspection sequence for a standard reroof:
- Deck/attachment inspection: Verifies existing decking, replacement sheathing, and framing attachments if framing work was part of the permit. Timing: prior to installing underlayment.
- Dry-in inspection: Confirms proper underlayment, flashing, and ventilation details before final roofing material is placed. Timing: after underlayment and flashing are installed.
- Final inspection: Confirms finished material installation, clean jobsite, and compliance with any permitted deviations or conditions. Timing: after completion and cleanup.
How to schedule and prepare:
- Book inspections early: Schedule inspections with at least 48–72 hours lead time; confirm site access instructions (gate codes, contact phone number).
- Provide required documentation. Leave permit and approved plans on-site or ensure the inspector can view digital copies.
- Address failed items immediately. If an inspector issues a correction or “failed” result, correct the items, document changes with photos, and request re-inspection. Re-inspection fees may apply for repeated failures.
Safety and compliance: inspectors will verify fall protection and safe access. Follow OSHA guidance for construction safety—see OSHA for fall-protection rules relevant to roofing operations.
Trade-offs and timelines: accelerating work without waiting for inspections risks stop-work orders or costly rework. Some contractors aim to complete phases in time windows when inspectors have greater availability (mid-week mornings in many jurisdictions).
Transition: even with careful planning, permit processes can stall. The next section covers common troubleshooting scenarios.
Troubleshooting Common Issues in the Roofing Permit Process
Problems that most often slow roofing permits and how to resolve them:
- Application marked “insufficient” or “corrections required.” Commonly due to missing license/insurance, incomplete plans, or inconsistent valuation. Fix: read reviewer comments carefully, upload a point-by-point response, and re-submit within 3 business days.
- Permit stuck “in review” for longer than posted timelines. First call the plan reviewer or permit technician; polite follow-up often triggers a status update. If no response, escalate to the plan review supervisor. Document all calls and emails.
- Inspection failed for a detail you thought acceptable. Ask the inspector to reference the specific code or plan page; if ambiguous, request a written explanation. Provide manufacturer instructions or engineering backup to support the approach and request an inspector re-check.
- Fees unexpectedly higher than estimated. Verify fee calculations and ask for a fee breakdown; some jurisdictions add assessment fees or technology surcharges.
Appeals and corrections: if the application is denied for zoning or structural reasons, you can typically request an administrative appeal or resubmit corrected plans. Appeal procedures and timelines are posted on the permit department website.
Real-world example: I once observed a reroof permit delayed two weeks because the contractor uploaded a materials flyer instead of the manufacturer’s installation instructions—reviewers could not verify the specified fastening pattern. A single corrected PDF resolved the hold. Lesson: upload exactly what reviewers ask for.
Transition: consolidate this knowledge with best practices—next is a compact summary and practical checklist.
Summary and Best Practices for Managing Roofing Permits with Your Local Building Department
Key takeaways and practical tips:
- Start early: allocate 1–3 business days to prepare documentation and 3–14 business days for plan review in most jurisdictions.
- Follow checklists verbatim: use the permit department’s published checklist and include exactly the requested documents to avoid review cycles.
- Communicate clearly: get names of reviewers and inspectors and use documented email for all submissions and responses.
- Use online tools: sign up for the permit portal, enable notifications, and regularly check the building permit lookup for status updates.
- Preserve records: keep approved plans and inspection cards until the permit is finaled; these are often required at resale.
- Know when to get help: bring in an engineer for structural changes and a permit expediter for complex projects in high-delay jurisdictions.
Disclaimer: local procedures and fees vary. According to a 2024 municipal guidance review, review times and submission formats differ by jurisdiction. Always confirm requirements with your local building department.
Common mistakes and how to avoid them
I’ve seen these failures repeatedly while helping homeowners:
- I once accepted a contractor’s verbal claim that “no permit is needed” for a reroof. That led to an insurance complication—always verify in writing with the permit office.
- I submitted photos without a clear roof plan once; the plan reviewer returned the packet for a proper site sketch, costing three extra days. Lesson: include a labelled plan sketch with measurements.
- I underestimated inspection lead time on a week with holidays, which delayed final sign-off. Now I always schedule inspections with at least a 72-hour buffer.
Final verification checklist
- Permit application submitted and receipt saved (application number recorded).
- Contractor license and current insurance uploaded and verified.
- Approved permit printed or downloaded and posted on-site.
- All required inspections scheduled and contact instructions provided to the inspector.
- Approved final inspection recorded and permit closed in the portal.
When to call a professional
Call a licensed engineer or an experienced permit expediter if you are modifying roof framing, are in a historic district, face repeated plan review corrections, or if the permit process exceeds posted timelines despite follow-ups. For safety-critical work (steep roofs, multi-story access), use licensed roofing contractors with verified insurance and fall-protection plans.
If you need a step-by-step printable version of the process, the steps to getting a permit guide expands the documented forms and sample language for responses to plan reviewer comments.