By the end of this hands-on guide you will have performed a complete heating tune up checklist for a typical residential furnace, known which items require professional tools, and produced a seasonal maintenance plan you can follow. Expect 90–180 minutes for a full homeowner tune up (more if heavy cleaning is required); skill level: basic mechanical familiarity plus comfort with simple electrical safety steps.
Before you start
Gather these tools, parts and safety items before you begin — they’ll save time and reduce risk.
- Basic toolset: screwdriver set (Phillips and flat), adjustable wrench, nut driver set.
- Protective gear: safety glasses, dust mask rated N95, work gloves.
- Replacement consumables: 1–2 furnace air filters (correct MERV and size), 9V battery for thermostat (if needed), rag and mild household cleaner.
- Diagnostic items: digital multimeter, flashlight or headlamp, small shop vacuum with brush nozzle.
- Reference materials: your furnace owner’s manual and the manufacturer model number noted on the access panel.
Why a Heating Tune Up is Essential for Your Home
Regular heating tune up keeps your furnace running safely, efficiently and reliably through peak cold months. A well-maintained furnace reduces energy waste, extends equipment life and lowers breakdown risk. According to a 2023 report from the U.S. Department of Energy, regular maintenance can improve system efficiency by up to 10% in older units; a 2024 industry report also found properly maintained furnaces last 3–5 years longer on average.
Beyond dollars, a tune up addresses safety: combustion checks can identify heat exchanger cracks and carbon monoxide risks before they become emergencies. Think of a furnace tune up like a car service — oil change, belt check and safety inspection rolled into one. It reduces surprise repair costs during peak heating demand and delivers measurable comfort improvements: more even room temperatures, quicker heat-up times, and fewer cold spots.
Regular maintenance also ties into year-round HVAC care — cross-training system service improves whole-home performance. For related cooling best practices see Air Conditioner Maintenance and Service Guide for Homeowners and the comprehensive air conditioner maintenance guide that explains balancing heating and cooling schedules for year-round comfort.
Transition: Now that you understand why maintenance matters, the next section lists everything inspected during a thorough furnace check up.
What a Comprehensive Furnace Check Up Includes
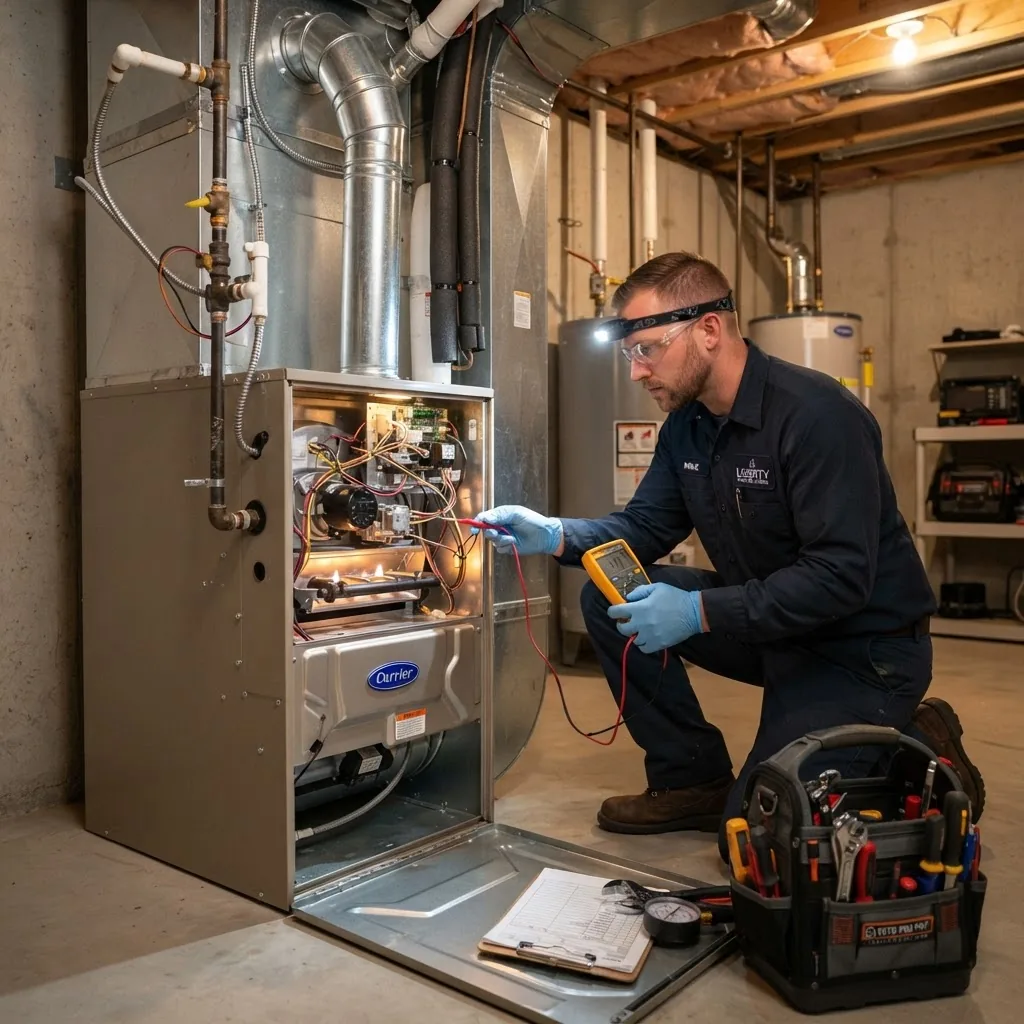
The following numbered checklist is what a technician does during a full residential furnace cleaning and inspection. Use this to compare a DIY session with a professional visit.
-
Visual and model verification — Confirm the furnace model and serial, inspect the cabinet for rust, corrosion or water damage, and verify clearances are met.
Why: documentation helps match service procedures and replacement parts.
-
Power and safety controls — Verify the furnace switch, circuit breakers, and safety interlocks operate. Test the limit switch and rollout switches for proper function.
Why: faulty safety controls can cause shutdowns or unsafe operation.
-
Air filter inspection and replacement — Remove and inspect filters; replace if >50% loaded or every 3 months for 1–3 family homes. Use the filter size stamped on the cabinet; prefer MERV 8–11 for residential systems unless the manufacturer recommends otherwise.
Why: clogged filters reduce airflow, lower efficiency and increase heat exchanger stress.
-
Blower assembly cleaning — Clean the blower wheel and motor area with a soft brush and vacuum. Check motor mounts, belts (if present) and shaft lubrication points.
Why: dust builds on blades and reduces airflow; a clean blower lowers energy use and noise.
-
Combustion system inspection — Examine burners, pilot light or electronic ignition, and perform a combustion safety inspection. Look for proper flame shape and colour (blue steady flame for gas burners).
Why: incomplete combustion raises CO risk. If you detect a yellow, wavering flame or soot, stop and call a pro.
-
Heat exchanger examination — Inspect for visible cracks, corrosion, or evidence of spalling. Use a flashlight, mirror or borescope when needed.
Why: hairline cracks can leak combustion gases into the home; this is a safety-critical item a certified technician should fully evaluate.
-
Ignition and pilot check — Test pilot light stability or electronic ignition cycles and measure time-to-ignite. Confirm proper operation of flame sensors and clean them with fine emery cloth if dirty.
Why: faulty ignition causes failed starts and short cycling.
-
Gas pressure and valves — For gas furnaces, inspect gas line fittings for leaks (soap bubble test) and verify the gas valve seating (visual and functional checks).
Why: leaks are dangerous; a licensed technician should handle gas-tightness and pressure adjustments.
-
Vent and flue assessment — Inspect flue passage and venting for blockages, corrosion and proper slope. Check for backdrafting signs.
Why: poor venting leads to carbon monoxide and dangerous combustion byproducts inside the home.
-
Controls and thermostat calibration — Check thermostat wiring, solder joints and battery; calibrate thermostat to actual room temperature and test setpoint response.
Why: an uncalibrated thermostat wastes energy and causes discomfort.
-
Airflow diagnostics — Measure airflow across the supply and return registers where possible, inspect duct boots for leaks and ensure returns are not blocked.
Why: restricted airflow causes high return temperatures and reduces efficiency; small adjustments like sealing duct joints can recover several percentage points in efficiency.
-
Electrical connections and capacitors — Tighten electrical connections, inspect contactors and test capacitors on motors and compressors (if hybrid systems are present).
Why: loose connections cause arcing and premature component failure.
-
System safety test and run cycle — Run the full heat cycle through several iterations, monitor startup times, observe burner operation, and check for unusual noises or excessive vibration.
Why: real-world cycling exposes intermittent issues not visible at rest.
-
Final report and recommendations — Technician or homeowner documents filter size replaced, belt tensions, observed issues, and suggested repairs or parts replacement with urgency levels.
Why: written records help track furnace health across seasons and support warranty compliance.
Transition: the checklist above is the basis for a step-by-step walkthrough you can follow at home; the next section takes you through a hands-on tune up with timings and troubleshooting tips.
Step-by-Step Heating System Tune Up Process
The following ordered steps are written for homeowners doing a routine heating system tune up. Steps that require specialized tools or gas handling are explicitly noted as technician-only.
-
Turn off power and gas (10 minutes) — Switch off the furnace power at the service switch and turn off the gas at the service valve. Verify power is off with a multimeter at the service panel.
Homeowner tip: always test the furnace switch and confirm the blower stops within 10 seconds. Technician recommendation: lockout/tagout when working on electrical or gas controls.
-
Remove the access panels and photograph wiring (5 minutes) — Remove the front panel(s). Take clear photos of the wiring and the control board before disconnecting anything.
Why: photos prevent reconnection errors. If you see missing wires or burn marks, stop and call a professional.
-
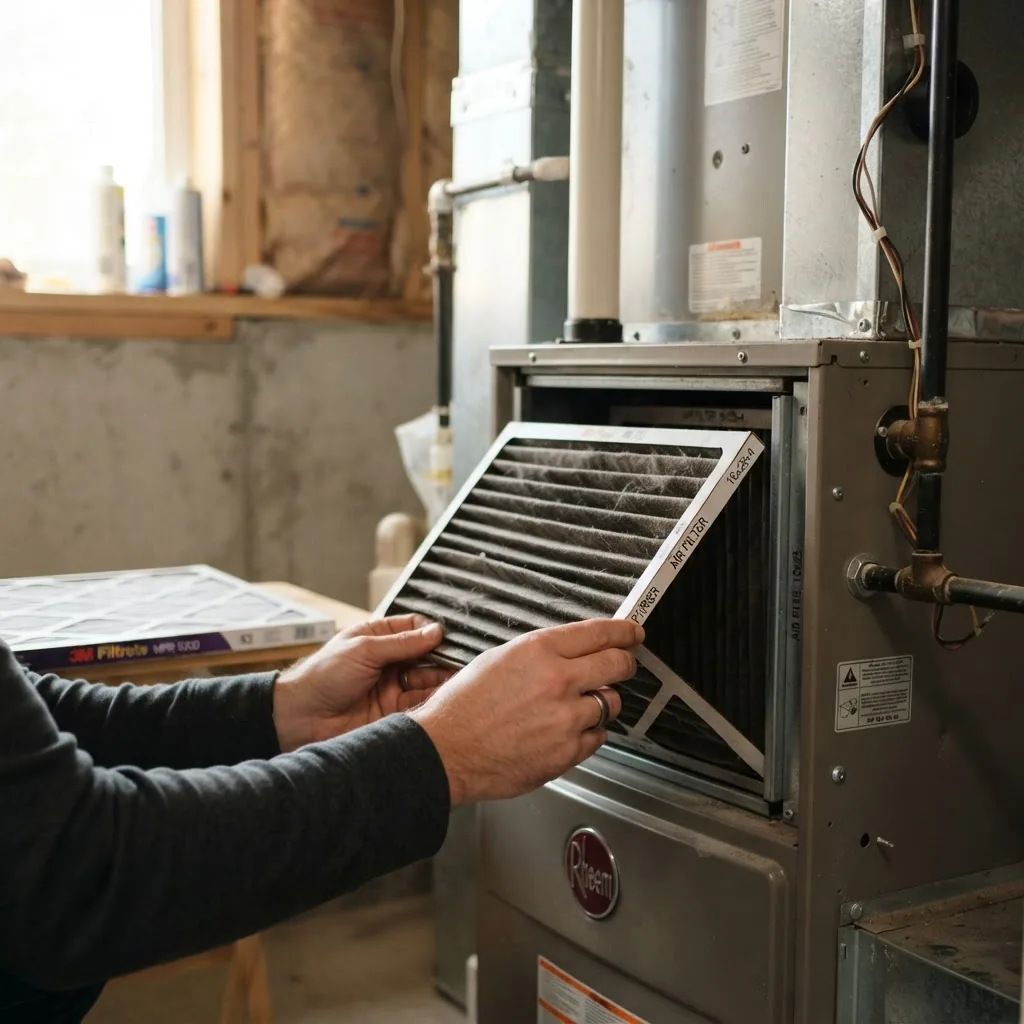
Inspect and replace the air filter (5–15 minutes) — Pull the filter, hold it up to a light; if you see less than 50% light transmission, replace. For typical residential use, replace every 90 days; high-use or pet homes: every 30–60 days.
Quantities/settings: use size stated on filter grill and a MERV 8–11 filter. Higher MERV may restrict some older furnaces — verify compatibility.
-
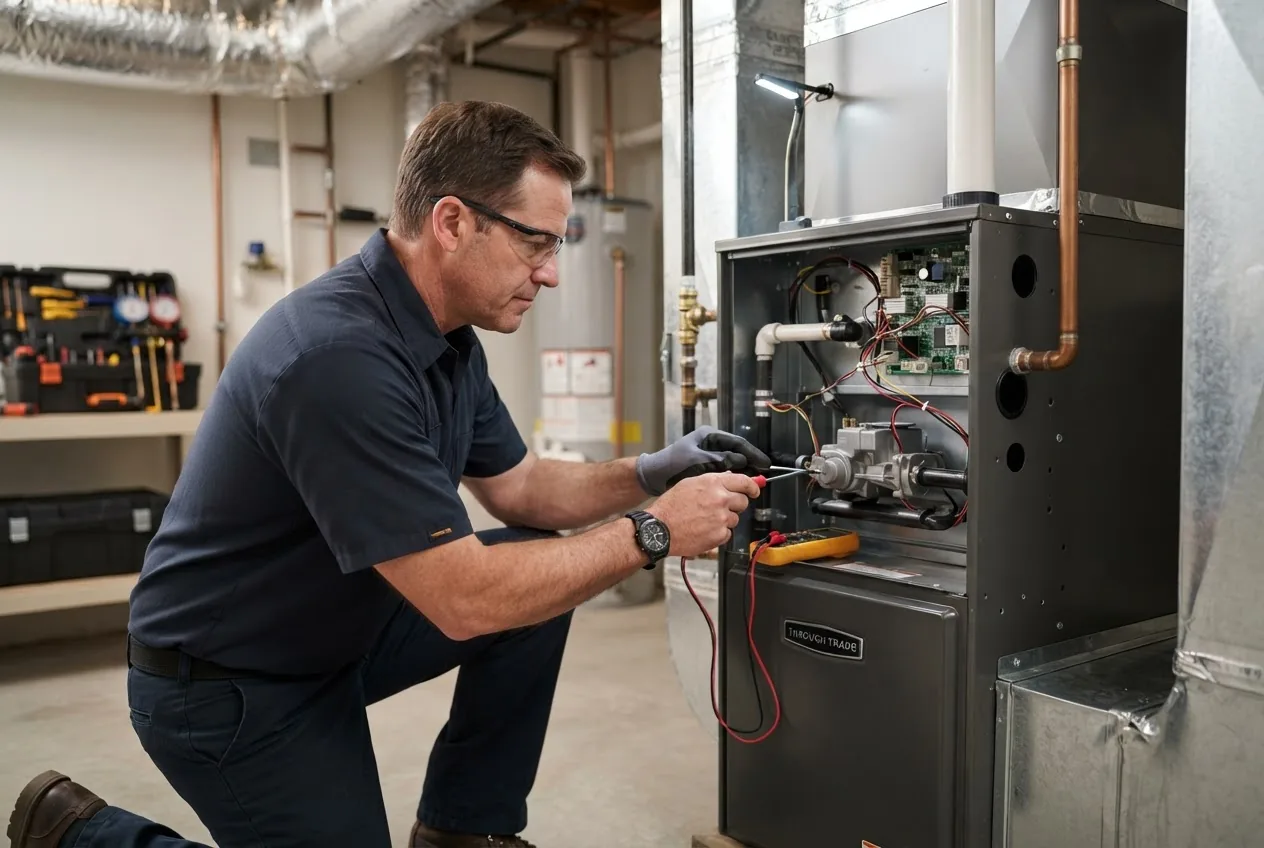
Clean the burner compartment and blower (20–30 minutes) — Vacuum loose dust with a soft brush attachment; gently brush the blower wheel and vacuum the chamber. Remove debris from the combustion air opening.
Homeowner tip: do not use a metal brush on the heat exchanger or burners. Technician recommendation: use a borescope for deep burner inspection when soot or deposits are suspected.
-
Check ignition and flame pattern (10 minutes) — For gas furnaces observe flame: it should be firm and blue with minimal yellow tips. For electronic ignition, test several on/off cycles.
Safety threshold: any persistent yellow flame or soot requires immediate professional service and a combustion analysis.
-
Clean flame sensor and pilot (5–10 minutes) — For flame sensors, gently wipe with a fine abrasive pad until metal is bright. For pilot assemblies (older units) clear debris and ensure stable pilot.
Homeowner caution: for sealed combustion and power-vented units do not attempt pilot adjustments; stop and call a certified technician.
-
Inspect venting and flue (10 minutes) — Look for rust, holes, or loose joints. Ensure vertical draft and that the flue is free from nests or blockages.
Why: small obstructions reduce draft and can cause CO backdrafting. If you smell gas or notice unusual odors, evacuate and call emergency services.
-
Check blower motor operation and electrical tightness (10–20 minutes) — Spin the blower by hand (power off) to feel for rough bearings; test motor run amperage if you have a clamp meter. Tighten loose electrical connections to 8–12 in-lb on control terminals, per manufacturer specs.
Technician note: motors with bearings that drag should be replaced; lubricate only if manufacturer allows.
-
Verify thermostat calibration and controls (10 minutes) — Set thermostat 2–3°F higher than room temp and confirm furnace responds within 60 seconds. Replace thermostat battery if voltage low.
Homeowner tip: if your thermostat has advanced features, test both heat anticipator and programmable schedules for correct operation.
-
Inspect ductwork accessible areas and seal visible leaks (15 minutes) — Check boot connections, visible joints and seams; apply foil HVAC tape or mastic for small accessible gaps. Do not attempt major duct repairs from within an attic without assistance.
Why: sealing can improve delivered airflow by 5–20% and reduce energy loss.
-
Run a full heat cycle and log observations (15–30 minutes) — With panels reinstalled, restore power and gas. Run the furnace through at least two full cycles, timing ignition, warm-up and cool-down. Note any unusual noises, smoke, or smell.
Record: ignition time (seconds), flame appearance, blower start time, and thermostat response.
-
Perform basic carbon monoxide check (5 minutes) — Use a certified CO detector placed in the mechanical room and living area; monitor during startup and 10 minutes after cycle completes.
Safety note: a small audible CO detector is advised; if readings exceed 9 ppm over an 8-hour average or sudden spikes above 35 ppm occur, evacuate and call a professional.
-
Document service and schedule next check (5 minutes) — Write down filter changes, repairs, and recommend next inspection date. If under warranty, keep a dated service record to maintain coverage.
Why: maintenance records preserve warranty benefits and help technicians diagnose future issues faster.
Transition: after a homeowner tune up you’ll notice immediate airflow and comfort improvements; however, some tasks and risks still favour professional service — next we compare both approaches.
Benefits of Professional HVAC Furnace Maintenance vs. DIY
This table contrasts professional HVAC furnace maintenance with a homeowner DIY tune up across critical criteria. Use it to decide what to delegate and what to handle yourself.
| Criteria | Professional Service | DIY Homeowner |
|---|---|---|
| Scope of inspection | Full diagnostics including combustion analysis and heat exchanger borescope | Filter, visible blower and basic vent checks |
| Safety checks | Gas pressure, CO testing, heat exchanger crack detection | CO detector monitoring and visual inspections only |
| Tools required | Specialized meters, combustion analyzers, borescopes | Basic hand tools, vacuum, multimeter |
| Warranty and compliance | Often required for warranty and service records | May void some warranties if not documented |
| Cost | Higher upfront; includes labor and diagnostics | Lower immediate cost; risk of missed issues |
Analysis: hiring a pro provides a deeper safety and performance net. For example, technicians use a combustion analyzer to measure CO, O2 and combustion efficiency — data a homeowner can’t obtain with a single CO detector. According to a 2024 industry report, coordinated professional maintenance reduces emergency repair calls by about 40% in high-use regions.
Benefits summarized:
- Professional inspection ensures safety-critical items (heat exchanger, gas pressure) are evaluated with calibrated equipment.
- Warranty compliance and documented service history protect future claims.
- DIY is cost-effective for frequent filter changes and basic cleaning but risks missing hidden failures.
For a deeper look at professional service best practices and cross-system advantages see professional HVAC service advantages.
Transition: next, plan how often to schedule maintenance so you keep the benefits above without unnecessary expense.
How Often Should You Schedule Residential Furnace Maintenance?
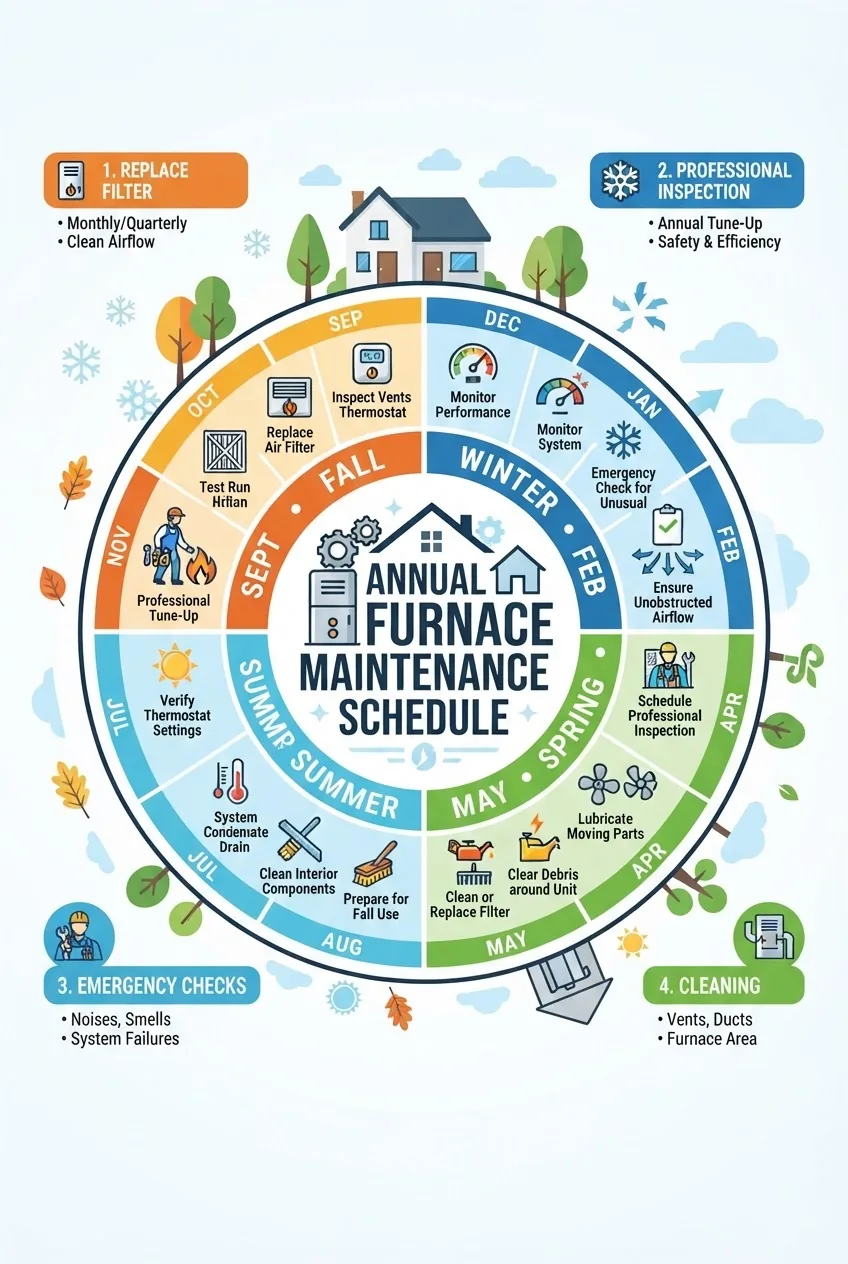
Recommended maintenance frequency varies by system age, fuel type and usage. Below is a conservative, homeowner-friendly timeline; adjust for heavy-use homes, pets, or dust-prone areas.
| Interval | Tasks |
|---|---|
| Monthly | Check filter; replace if clogged (every 30–90 days depending on usage). |
| Early Fall (before heating season) | Full tune up including combustion check (recommended professional inspection annually). |
| Mid-season | Visual check, listen for unusual noises, replace filters as needed. |
| Spring (post-season) | Clean and store, inspect for corrosion, schedule any off-season repairs. |
| Every 1–2 years | Duct inspection and cleaning if >20% leakage or excessive dust; professional combustion analysis annually for gas units. |
Bundled maintenance options provide convenience: if you want combined heating and cooling coverage, consider maintenance plan options for HVAC systems — these often include two annual visits and priority emergency response.
Transition: scheduling is useful only when inspections reveal issues — the next section explains the common problems that routine maintenance catches and how to address them.
Common Furnace Problems Detected During Maintenance and How to Address Them
During checkups technicians and homeowners commonly find the following issues. Each entry includes DIY troubleshooting steps and when to call a pro.
-
Pilot light or ignition issues — Symptoms: furnace won’t light or has intermittent starts.
Troubleshoot: ensure gas is on, check pilot assembly for debris, clean flame sensor. If the ignition control module or thermocouple is failing, replace the component or call a technician. Do not attempt gas valve repairs yourself.
Call a professional if: ignition fails after cleaning or gas smell present.
-
Clogged or incorrect air filters — Symptoms: reduced airflow, higher bills, heat cycling.
Troubleshoot: replace with proper-size MERV-recommended filter; track replacements every 30–90 days. If circulation doesn’t improve, inspect ducts for blockages.
Call a professional if: filter replacement doesn’t restore airflow or blower noise persists.
-
Airflow and duct problems — Symptoms: cold rooms, high return temperatures, uneven heating.
Troubleshoot: seal visible duct joints with mastic or foil tape, ensure vents are open and registers unobstructed.
Call a professional if: major ductwork access, attic/ crawlspace sealing or insulation upgrade is required.
-
Ignition control or flame sensor failure — Symptoms: frequent short cycling or shutdown.
Troubleshoot: clean flame sensor; if error continues, test sensor voltage and continuity with a multimeter (requires some electrical skill).
Call a professional if: sensor replacement or control board diagnosis is needed.
-
Strange noises (pinging, rattling, banging) — Symptoms: mechanical or combustion-related sounds during operation.
Troubleshoot: tighten loose panels and duct connections; check heat exchanger and burners for deposits. Pinging is often thermal expansion; loud bangs can indicate delayed ignition in gas burners.
Call a professional if: noises persist after tightening or are accompanied by poor combustion signs.
-
Heat exchanger cracks — Symptoms: rust, soot accumulation, inconsistent combustion or CO concerns.
Troubleshoot: visually inspect for discoloration or cracks, but do not probe or repair yourself.
Call a professional immediately if suspected — this is a safety-critical repair requiring certified inspection and likely replacement.
-
Electrical component failure — Symptoms: blower won’t start, capacitors fail, or wiring shows overheating.
Troubleshoot: check breakers and fuses, replace simple capacitors if you’re comfortable and component specs match. Use proper PPE.
Call a professional if: breakers trip repeatedly, wiring shows burn marks, or components require soldering/replacement on circuit boards.
-
Gas leaks or odor — Symptoms: rotten egg smell, hissing near line.
Troubleshoot: evacuate immediately and call emergency services; do not operate electrical switches.
Call a professional: this is an immediate emergency; only licensed gas technicians should handle leaks.
Transition: many issues above carry safety implications — here are explicit safety best practices to follow during furnace cleaning and inspection.
Safety Tips and Best Practices During Furnace Cleaning and Inspection
Safety is the primary reason many homeowners opt for professional maintenance. Still, certain homeowner tasks are safe when done with care. Follow these best practices, and never attempt tasks listed as professional-only.
Safety first: If you detect a gas smell, carbon monoxide alarm activation, or severe rust/heat exchanger damage, evacuate and call emergency services and a licensed HVAC specialist.
- Always turn off power and gas before accessing internal components. Verify power is off with a meter.
- Use a certified carbon monoxide detector and place it near the furnace during testing. According to a 2023 safety bulletin from the U.S. Department of Energy, CO detectors should be replaced every 5–7 years and installed within 10 feet of sleeping areas. U.S. Department of Energy
- Avoid obstruction of combustion air openings; sealed-combustion furnaces have special air intake requirements — refer to manufacturer guidelines.
- Do not attempt to adjust gas pressure or valve seating without a licensed technician. Gas line work requires local licensing and leak testing per code; for standards see ACCA.
- Maintain clean surroundings: less dust and clutter around your furnace reduces particulate loads. For home-cleaning best practices that reduce dust, see effective home cleaning tips and guidelines for maintaining clean indoor air.
- Follow electrical safety: if you must test components under power, use insulated tools and keep one hand in your pocket to reduce shock risk.
- Keep combustible materials at least three feet from the furnace access and service area.
- For gas furnace specifics and safety protocols consult licensed professionals and resources such as gas heater safety and maintenance.
Transition: choosing the right service provider matters when you need professional help; the next section lists selection criteria.
How to Choose a Reliable HVAC Furnace Tune Up Service Provider
When hiring a technician for hvac furnace maintenance, vet candidates using these key criteria. A good contractor balances clear pricing with certified workmanship.
- Licensing and insurance: verify local HVAC licensing and liability insurance.
- Certifications: look for NATE, ACCA membership or manufacturer certifications for your furnace brand.
- Transparent pricing and written service agreements: avoid vague “diagnostic” fees that balloon without written consent.
- Service guarantees: look for 30–90 day workmanship guarantees and parts warranties.
- Local references and reviews: request recent customer references; check independent review sites.
- Emergency response and priority scheduling for plan holders.
Practical selection steps:
- Request a written estimate itemizing inspection, parts and labor.
- Confirm whether the service will include combustion analysis and a documented safety checklist.
- Ask how technicians document work for warranty validation.
For detailed contractor vetting and hiring guidance see selecting qualified HVAC contractors.
Transition: budget expectations help decide between DIY and professional service — the final sections cover costs and give you a ready checklist.
Cost Expectations and Budgeting for Heating Tune Up and Furnace Maintenance
Typical costs vary by region, system complexity and whether combustion analysis is included. Below is a common price range for the United States market as a homeowner guideline.
| Service | Typical Range (USD) |
|---|---|
| Basic tune up (filter, visual, blower clean) | $79–$150 |
| Full tune up with combustion analysis | $150–$350 |
| Major repairs (heat exchanger, control board) | $600–$2,500+ |
Budget tips:
- Shop for bundled annual plans to lower per-visit cost and get priority service.
- Ask if the provider shows labor and parts line items to avoid hidden fees.
- Confirm whether maintenance visits maintain your equipment warranty — many manufacturers require documented professional service for major claims.
- For comparative consumer pricing research see Consumer Reports and local trade association guidance.
Transition: to end this hands-on guide, I’ll share common mistakes I see and provide a verification checklist plus guidance on when to call in a professional.
Common mistakes and how to avoid them
From years of service work I’ve seen recurring homeowner mistakes. Below I describe them in first person with corrective actions.
- I once tightened electrical terminals without turning the power off — that near-miss taught me to always verify power with a meter. Action: always de-energize and test before working on electrical parts.
- I replaced a filter with the wrong thickness and it rubbed against the blower, causing noise. Action: confirm filter depth and frame dimensions stamped on the grill; use the correct 1″, 2″ or 4″ replacement.
- I assumed a yellow flame was harmless and later found a blocked vent. Action: any yellow flame or soot must be professionally inspected for combustion problems.
- I sealed ducts from inside the attic without enough access and caused pressure issues. Action: small accessible sealing is fine; major duct repair or rebalancing needs professional ductwork access.
Post-service checklist
Use this compact list to verify your work or the technician’s service before they leave.
- Filters replaced and sizes recorded.
- Blower and burner areas cleaned; no loose debris inside cabinet.
- Thermostat calibrated and 9V battery replaced if needed.
- Combustion flame is steady and blue; no unusual odors during startup.
- CO monitor reading normal during and after a cycle.
- Written service report with recommended next service date provided.
When to call a professional
Call a licensed HVAC technician immediately for any of the following:
- Suspected heat exchanger cracks or visible corrosion.
- Persistent yellow flames, soot, or signs of incomplete combustion.
- Gas odor, hissing near gas lines, or confirmed leak.
- Electrical burning smell, repeated breaker trips, or visible wiring damage.
- Major airflow problems after filter and register checks.
For professional furnace cleaning and specialist services see professional furnace cleaning services.
Final note on expectations: maintenance improves performance and safety, but it does not eliminate the need for replacement in old or badly corroded equipment. According to a 2024 industry report, the largest efficiency gains are seen within the first two years after a professional tune up, then taper; keep realistic expectations and plan capital replacement for equipment older than 15–20 years.
Conclusion: Regular residential furnace maintenance and an annual professional inspection are your best investments to preserve safety, comfort and value. Schedule a pre-winter tune up, keep a simple maintenance log, and act quickly on any safety-related symptoms. If you’re ready for a professional assessment, start with the checklist above and choose a certified contractor who provides documented combustion analysis and written guarantees.
Call to action: Schedule your next furnace tune up this fall to ensure season-long comfort and safety — keep your maintenance record handy and ask for combustion analysis to validate safe operation.