Heat pump repair hands-on guide: by the end you will be able to perform routine inspections, diagnose common faults, complete safe DIY maintenance tasks, and prepare accurate information to share with a contractor. Estimated time: 2–6 hours for a full homeowner tune-up; skill level: basic mechanical aptitude and comfort with simple electrical safety procedures.
Before you start
- Prerequisites: basic home hand tools, ability to turn power off at the breaker, and access to your unit’s model/serial number.
- Personal protective equipment: eye protection, work gloves, dust mask, and insulated gloves for electrical checks.
- Materials & tools: screwdriver set, coil brush, soft-bristled brush, shop vacuum with brush attachment, fin comb, multimeter, bubble-level, household refrigerant leak detector (sniffer) or UV dye kit, replacement filters, spray water-only coil cleaner, spray bottle, flashlight.
- Documentation: owner’s manual, last service record, warranty paperwork, and a notepad for recording readings.
Follow the numbered steps below. Each step begins with a bold, action-first phrase and contains concrete settings, timings, and thresholds. Where a task can be unsafe, I state when to stop and call a pro.
Understanding Heat Pump Systems and Their Repair Needs
Transition: Before troubleshooting, you need to understand what each component does and why faults create symptoms you can observe.
At its core a heat pump moves heat instead of generating it. The two main parts are an indoor unit (air handler or ducted coil, blower, filter, and expansion device) and an outdoor unit (compressor, condenser coil, reversing valve, fan). Refrigerant circulates in a closed loop between them. In heating mode the outdoor coil absorbs heat and the indoor coil releases it; in cooling mode the cycle reverses.
Key components and repair-relevant behaviors:
- Compressor: the “engine” of the system — signs of failure include frequent short cycling, loud mechanical noises, or a unit that won’t start. Compressor faults often require professional replacement.
- Refrigerant circuit: includes lines, valves, and the expansion device — low refrigerant pressure causes poor heating/cooling and ice on coils; leaks must be located and repaired by licensed technicians.
- Reversing valve: controls heating vs cooling; failure causes wrong-mode operation or noisy switching.
- Thermostat and controls: incorrect thermostat configuration or wiring faults are common and inexpensive to fix but can mimic serious system issues.
- Filters and airflow: clogged filters, blocked returns, or obstructed outdoor units cause heat-exchange inefficiency and compressor strain.
Typical repair needs derive from wear (compressor bearings, fan motors), contamination (dirty coils reducing heat transfer), mechanical damage (bent fins, debris), and refrigerant loss. Hybrid heating systems pair a heat pump with a gas furnace — the heat pump handles moderate temperatures while the gas furnace provides backup at very low temperatures. Understanding this relationship helps decide if the heat pump or furnace needs service.
Inspection is a recurring theme: a short monthly visual check plus quarterly advanced inspection catches issues early, reduces repair complexity, and preserves energy efficiency.
Common Heat Pump Problems and When to Call for Heat Pump Repair
Transition: Start with observable symptoms, then map them to likely causes and decide DIY vs professional.
-
Unit not heating or cooling properly
Symptoms: reduced output, long run times, uneven temperature. Common causes: dirty coils, clogged filters, low refrigerant, compressor inefficiency, incorrect thermostat mode. DIY checks: replace/clean filter, clear airflow obstructions, verify thermostat settings. Call a pro when refrigerant is low or compressor current draw is high.
-
Short cycling (unit turns on and off rapidly)
Symptoms: multiple on/off cycles within 10 minutes, higher energy bills. Causes: oversized thermostat sensitivity, failed run capacitor, low refrigerant, or overheating due to airflow restriction. DIY: check filter and outdoor fan clearance; measure capacitor voltage only if you have a multimeter and electrical safety skills. Otherwise call for heat pump repair.
-
Outdoor unit noisy or vibrating
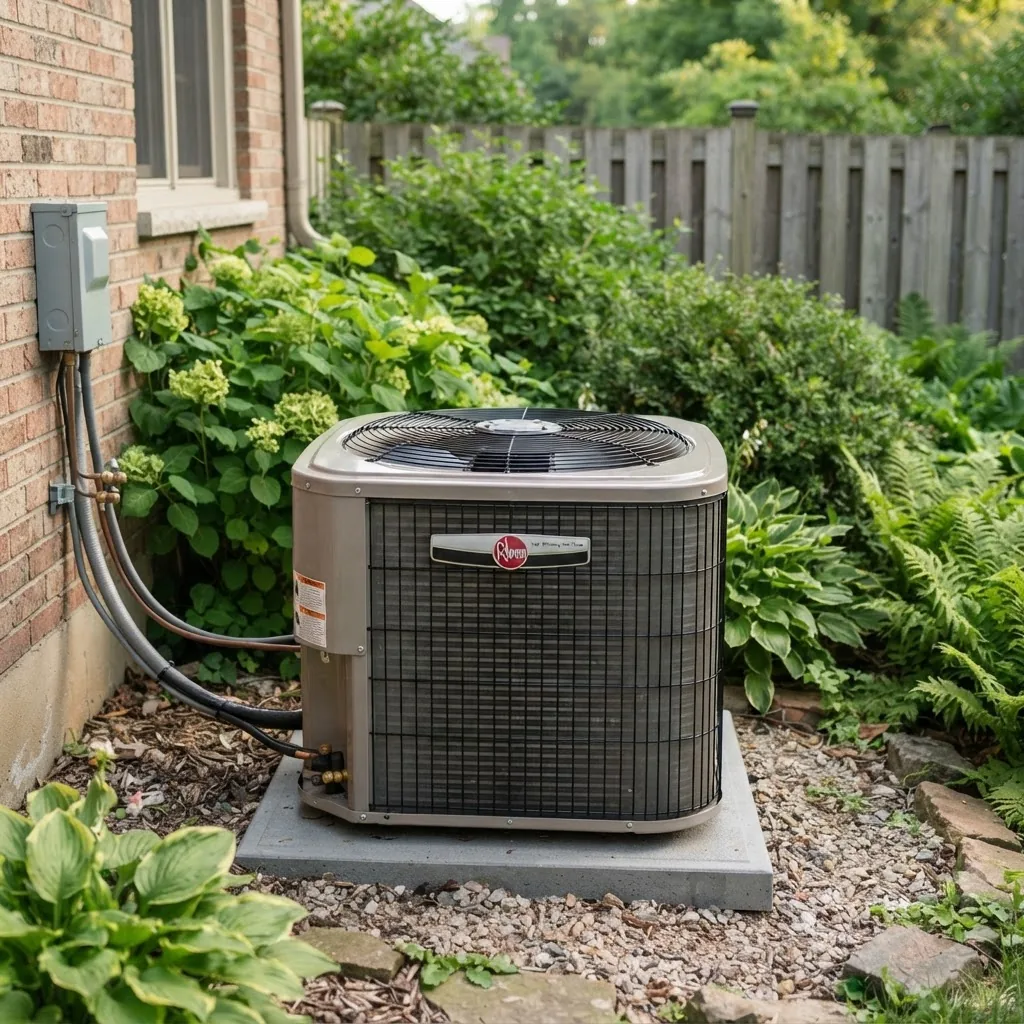
Symptoms: rattling, grinding, hums. Causes: loose panels, failed fan motor bearings, compressor mount failures, debris hitting the fan. DIY: turn off power, remove debris, tighten accessible fasteners. If noise is mechanical inside the compressor or the motor hums but won’t start, call a technician.
-
Ice buildup on coils
Symptoms: frost or thick ice on outdoor coil in heating mode. Causes: low refrigerant, faulty defrost control, restricted airflow, or tainted outdoor temperature sensor. DIY: gently remove light frost after switching unit to off and using warm water (do not chip ice). For repeated icing, schedule a professional heat pump inspection and refrigerant leak test.
-
Refrigerant leaks
Symptoms: rapid decline in performance, oil traces or staining near fittings, audible hissing. Legal/regulatory note: refrigerant handling requires certified technicians in most jurisdictions. According to a 2024 industry report, licensed recovery and leak repair reduce long-term operating costs by 12% on average. Do not attempt refrigerant recharge yourself — contact a licensed contractor.
-
Thermostat faults or incorrect wiring
Symptoms: unit won’t respond to calls for heat/cool, incorrect mode, or temperature setpoint mismatch. DIY: verify thermostat is on correct mode, replace batteries, and check wiring for loose connections at the thermostat and the air handler control board. Call a contractor if control board replacement is required.
-
Compressor failure
Symptoms: unit won’t start, loud mechanical clunk, burnt electrical smell, tripped breakers. Causes: motor burnout, electrical surge, internal mechanical failure. This usually requires professional replacement; prepare by recording model/serial numbers and obtaining 2–3 quotes.
-
Electrical problems and tripped breakers
Symptoms: breakers trip when unit engages, fuses blow, or contactor burned. Causes: short circuits, failed capacitors, or motor inrush. DIY: check breaker and exterior disconnect box for corrosion; tighten visible terminals only with power off. For wiring faults or repeated trips, schedule heat pump repair by a licensed electrician/HVAC technician.
-
Poor airflow or cold/hot spots
Symptoms: weak vents, rooms that don’t reach temperature. Causes: blocked returns, dirty evaporator coil, duct leaks, or incorrect fan speed. DIY: clean filters, confirm supply vents open, and check blower speeds per owner manual. If ductwork requires sealing or blower motor replacement, call a professional.
-
Unusual smells
Symptoms: mildew, burnt plastic, or chemical odors. Causes: moisture in ducts, electrical arcing, refrigerant leak. Safety action: if you smell burning, shut off the system and call emergency service. For moldy smells, perform filter changes and professional duct/hvac cleaning if odors persist.
DIY Heat Pump Maintenance Service Tips for Homeowners
Transition: Many preventive tasks are safe and effective for homeowners; they reduce the chance of needing full repairs.
-
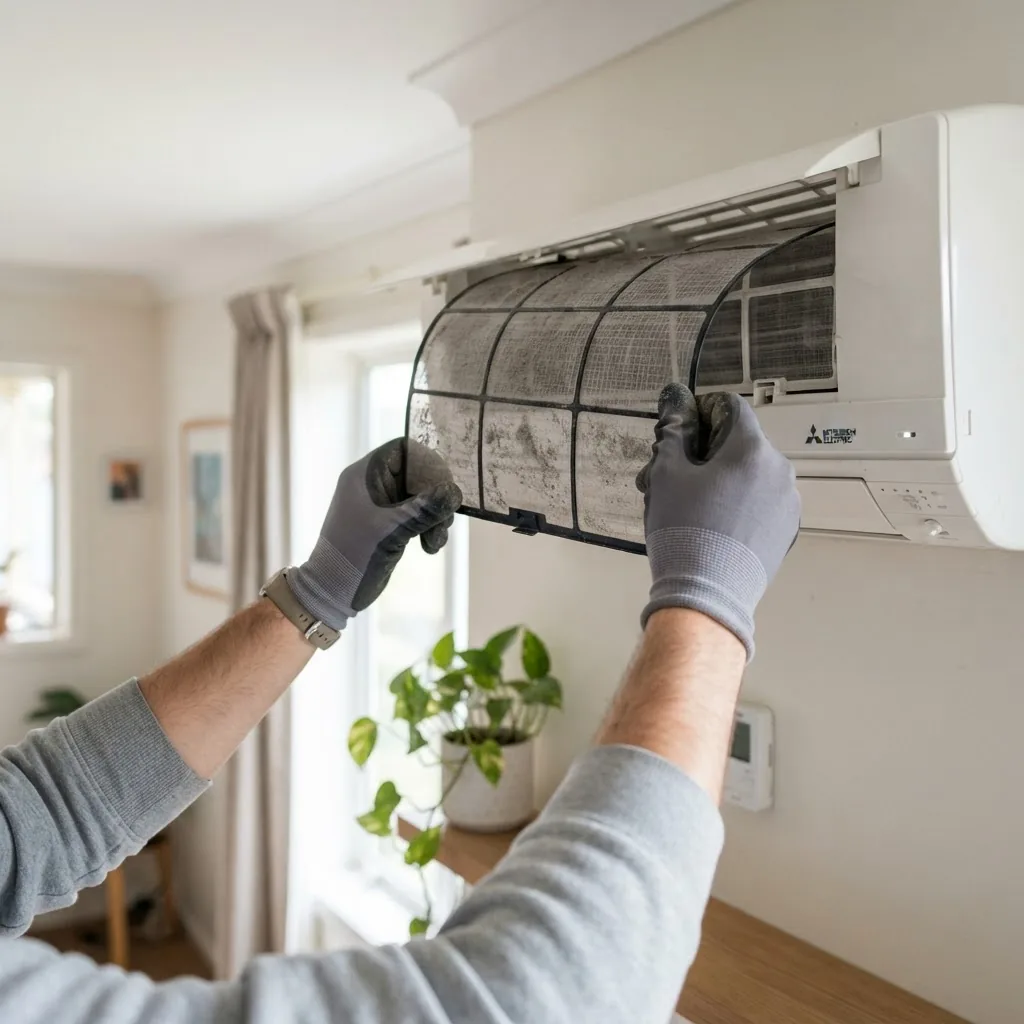
Monthly: Inspect and replace or clean filters
Procedure: turn thermostat to OFF and switch power at the service disconnect. Remove the filter; for disposable pleated filters replace with the same MERV rating (recommended MERV 8–11 for most homes). For reusable filters, vacuum and wash with lukewarm water, dry fully (24 hours) and reinstall. Goal: airflow pressure drop <0.3 inches water column compared to a clean baseline; replace sooner if household pets or smokers are present.
Tip: mark the filter change date on the filter frame and set a calendar reminder for 30–90 days depending on use. See how air conditioner maintenance routines for overlap with common filter schedules.
-
Quarterly: Clear outdoor unit and remove debris
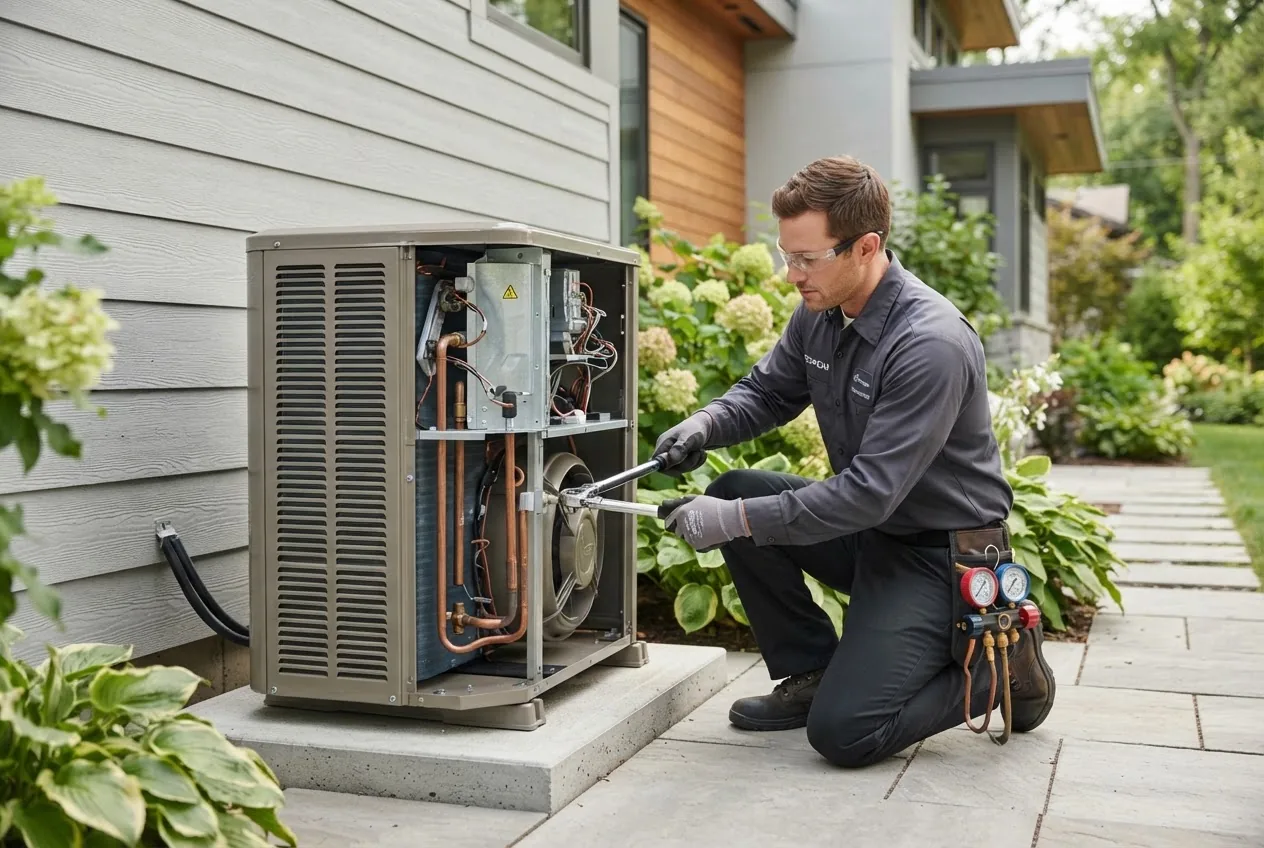
Procedure: switch power off. Remove leaves, grass, and 2 feet of clearance around the unit. Use a soft brush to sweep fins from top-down; avoid bending fins. If fins are slightly bent, use a fin comb to realign them. Allow 10–20 minutes for visual cleaning; don’t spray high-pressure water directly at the motor or electrical compartment.
-
Biannual: Clean coils and check condensate drainage
Procedure: indoor coil — remove access panel, inspect for dust and debris. Use a no-rinse, water-based coil cleaner and a soft brush. Outdoor coil — after clearing debris, spray with water-only cleaner and let dry. Check condensate line: pour 1 quart of white vinegar through the drain pan; if water backs up or drains slowly, call for service to avoid mold growth.
-
Annual: Test electrical components and motor capacitors (safety first)
Procedure: with power off, inspect contactor points for pitting and clean lightly. Measure capacitor microfarads with a multimeter capable of capacitance; compare to printed rating: tolerance ±6%–10% typical. If capacitor is >10% off the rating or shows bulging, replace. If uncomfortable with high-voltage parts, schedule a professional technician.
-
Seasonal: Verify thermostat calibration and settings
Procedure: set thermostat to a target temp and verify temperature at a central room with a calibrated thermometer after 15 minutes of running. Check programmable schedules and heat pump differential settings (often called balance point on hybrid systems). Replace thermostat batteries yearly.
For additional context on broader tune-up items, consult heating system tune-up essentials.
-
Safety checks: verify outdoor fan and blower operation
Procedure: restore power, put system in fan-only mode, and confirm indoor blower runs smoothly; in cooling or heating mode, confirm outdoor fan rotates freely without rubbing sounds. If fan blade contact, motor hum, or strange vibration occur, power off immediately and call for repair.
-
Airflow & duct quick-check
Procedure: close all supply registers except one, measure airflow with a simple handheld anemometer at 3–5 vents — target average 350–500 CFM per main supply in typical homes (varies by system). If any vent reads <80 CFM, inspect ducts for obstructions and consider professional duct sealing.
-
Document readings and photograph panels
Procedure: record static pressure, filter date, measured capacitor values, and any audible symptoms. Take clear photos of service panels, wiring labels, and the unit nameplate; this speeds diagnostics when you call a contractor.
Practical example: a homeowner I worked with documented a gradually increasing run-time and a 15% drop in measured capacitor microfarads; this allowed the technician to replace the capacitor on first visit and prevented a compressor burn-out.
Common mistakes and how to avoid them
I once tightened an electrical terminal without turning off the exterior disconnect — that shorted the system and tripped the main breaker. Now I always confirm power at the breaker and use a voltage tester. Also, I have removed fins with a wire brush, which bent them; use a fin comb instead.
Professional Heat Pump Inspection and Repair: What to Expect
Transition: When DIY checks show signs beyond simple maintenance, a professional inspection and repair deliver diagnostics you can rely on.
Licensed technicians use diagnostic procedures and tools: digital refrigerant gauges, leak detectors, clamp ammeters, temperature probes, and microfarad meters. A typical professional inspection includes:
- Visual inspection of indoor and outdoor units, electrical panels, and condensate systems.
- Electrical testing: voltage, current draw, and continuity checks for motors, compressors, and contactors.
- Refrigerant pressure and superheat/subcooling measurements to validate charge and detect leaks.
- Operational test cycles in both heating and cooling modes to observe reversing valve, defrost cycles, and control logic.
- Safety checks including verifying proper grounding, disconnect function, and combustion safety on hybrid systems.
Service checklist (what to expect on a contractor visit):
| Inspection Item | What the Technician Does |
|---|---|
| System startup & operational test | Runs both modes, times cycles, records temps and pressures |
| Electrical inspection | Measures voltage/current; checks capacitors and contactors |
| Refrigerant system check | Checks pressures, superheat/subcooling; locates leaks |
| Mechanical inspection | Examines fan, motor mounts, bearings, and compressor |
| Airflow & duct check | Measures static pressure and recommends duct sealing or balancing |
Cost factors: labor rates, travel, parts, refrigerant type (R-410A vs legacy R-22), warranty status, and diagnostic complexity. According to a 2023 DOE report, regular professional tune-ups can improve heat pump seasonal performance by 6–12% over untreated systems. Expect an inspection fee of $80–$200 and repairs ranging from $150 (capacitor) to $3,500+ (compressor replacement), depending on model and warranty.
How to choose a contractor: check certification, insurance, and reviews. Industry associations like the Air Conditioning Contractors of America provide contractor directories and standards. For professional service standards applicable to heat pumps and AC units see professional HVAC maintenance services.
External resources for standards and safety:
- U.S. Department of Energy — efficiency and maintenance guidance.
- Air Conditioning Contractors of America — contractor certification and best practices.
- Occupational Safety and Health Administration (OSHA) — electrical safety and safe work practices for technicians.
Role of Gas Furnace Installers in Heat Pump Systems
Transition: Hybrid systems require coordination between HVAC trades; know where a gas furnace installer fits into heat pump service.
In hybrid heating systems the heat pump provides efficient heat until temperatures fall below a defined balance point, at which the gas furnace or auxiliary heat takes over. Gas furnace installers and service contractors have skills that overlap with heat pump technicians — gas line work, combustion analysis, and furnace controls — but certified heat pump repair technicians are necessary for refrigerant and compressor service.
When selecting a contractor for a hybrid system, consider responsibilities:
- Gas furnace installers ensure safe combustion, correct flue connections, and proper sequencing controls between the furnace and heat pump.
- Heat pump maintenance contractors handle refrigerant, reversing valve, and compressor diagnostics.
- Integration work requires verifying control logic and thermostat compatibility so the system switches seamlessly between heat pump and furnace operation.
For guidance on selecting qualified installers and contractors refer to the contractor service guide.
Also see how furnace and heat pump repair integration works in practice when both systems are present.
Scheduling Routine Heat Pump Maintenance and Preventive Repairs
Transition: Create a predictable schedule to reduce emergency repairs and maintain energy efficiency.
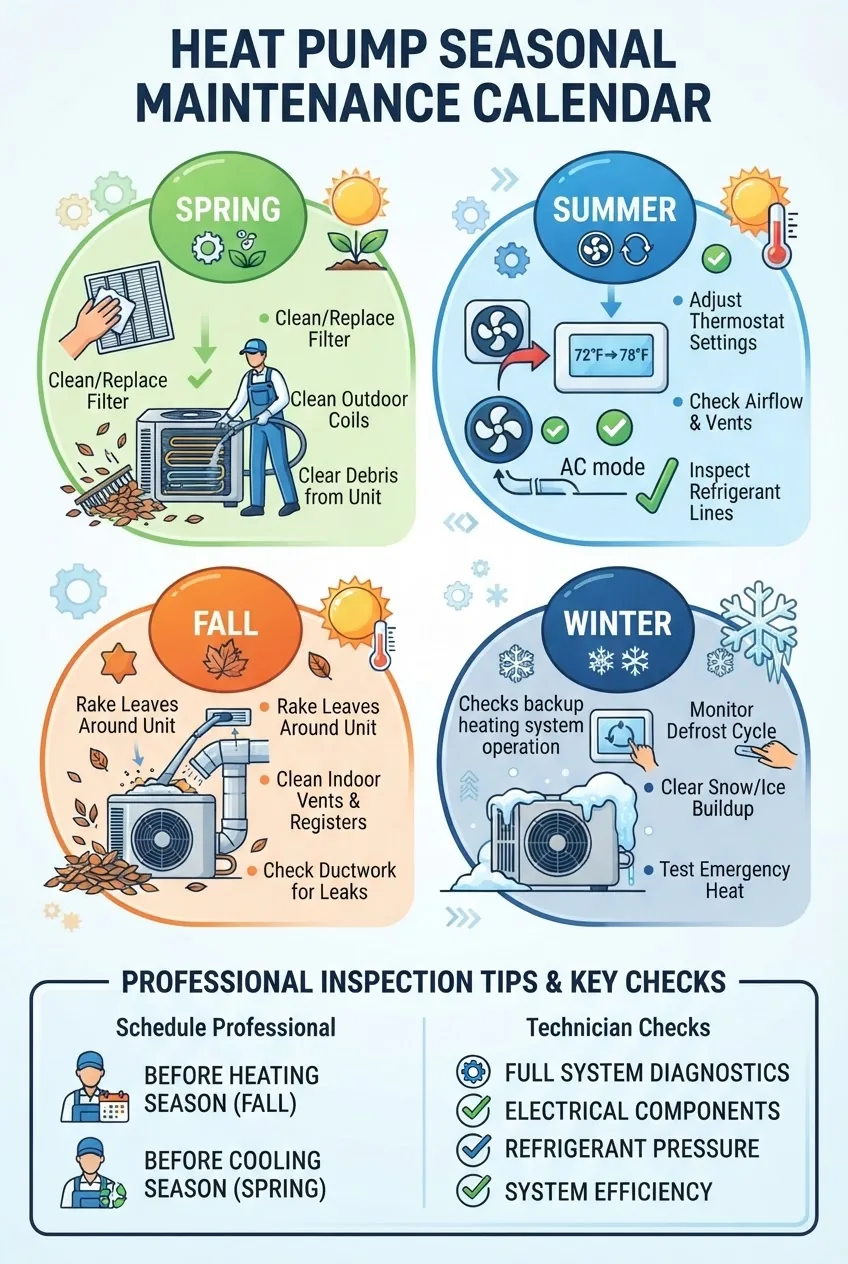
-
Spring (March–May): Pre-cooling prep
Tasks: clean or replace filters, clear outdoor debris, inspect outdoor coil fins, check refrigerant lines for insulation damage, schedule professional inspection if the unit showed problems the previous winter. Recommended action: book a technician by late April to avoid summer backlogs.
-
Summer (June–Aug): Peak-season monitoring
Tasks: monthly filter checks, check condensate drain bi-monthly, verify thermostat setback schedules, monitor run-time — if runtime exceeds normal by 20% call for diagnostic inspection. Energy note: According to a 2024 industry report, well-maintained heat pumps deliver up to 15% lower seasonal energy use than neglected units.
-
Fall (Sept–Nov): Pre-heating tune-up
Tasks: clean indoor coil, test defrost cycle, check reversing valve operation, inspect backup electric strip heaters or furnace interlock, and schedule a professional pre-winter inspection. Replace filters before first sustained heating period.
-
Winter (Dec–Feb): Winter-readiness checks
Tasks: ensure 2 feet of clearance around outdoor unit, monitor for icing, check auxiliary heat operation, and confirm thermostat balance-point switching. If you notice repeated icing or poor low-temperature performance, contact a technician promptly.
Consider signing up for maintenance plans and service options to schedule regular inspections and receive discounts on repairs.
Practical scheduling tips:
- Set calendar reminders for monthly filter checks and quarterly coil checks.
- Keep a simple maintenance log with dates, measurements, and photos of panels and nameplates.
- Book professional tune-ups before seasonal demand spikes — spring for cooling, fall for heating.
Evaluating Repair Costs and When to Consider Heat Pump Replacement
Transition: Weigh repair costs against expected remaining life and efficiency loss to make an informed replacement decision.
Heat pump lifespan typically ranges 12–18 years depending on maintenance and usage patterns. According to a 2023 industry report, systems older than 12 years often show 20–30% efficiency decline compared with new, high-efficiency models.
Use the comparison table below to evaluate typical costs and decision thresholds:
| Repair | Typical cost (USD) | When replacement is preferable |
|---|---|---|
| Filter / minor parts | $20–$150 | Always repair |
| Capacitor / contactor | $120–$350 | Repair unless multiple major components failing |
| Compressor replacement | $1,500–$4,000+ | Consider replacement if unit >10–12 years or other major components aging |
| Refrigerant leak repair & recharge | $200–$1,200+ | Replace if repeated leaks or obsolete refrigerant system (e.g., R-22) |
| Full system replacement | $4,000–$12,000+ | When efficiency gains, warranty coverage, or age justify capital expense |
Key decision factors:
- Age: if the system is over 12 years and repair exceeds 50% of replacement cost, replacement is usually justified.
- Efficiency decline: if measured seasonal performance has dropped >20%, replacement with a modern, higher-SEER/SCOP system can pay back over time.
- Warranty coverage: verify manufacturer warranty on compressor and parts before deciding.
- Compatibility with modern refrigerants: older units using phased-out refrigerants (e.g., R-22) are costly to service and often better to replace.
Case study: A homeowner with a 14-year-old unit faced a $2,800 compressor repair. Given the unit’s age and a quoted 25% improvement in seasonal efficiency with a new unit, they chose replacement. The new system reduced their annual heating bill by an estimated $320, per the contractor’s calculation and manufacturer efficiency data.
Hands-On Steps: Complete Homeowner Heat Pump Tune-up
Transition: Apply the following step-by-step tune-up that combines DIY safety with professional handoff preparation.
-
Turn off power and confirm shutdown (10 minutes)
Action: Switch the thermostat to OFF, then open the outdoor disconnect or trip the breaker for the heat pump circuit. Use a non-contact voltage tester at the unit control panel to confirm zero volts at exposed terminals before touching. If voltage is present after breaker off, stop and call an electrician.
-
Replace or clean the air filter (20–30 minutes)
Action: Remove filter and inspect. Replace disposable filters with same size and MERV rating; if using a reusable filter, vacuum and wash then dry 24 hours. Record the date. Acceptable filter pressure drop: <0.3 in. w.c.; if your system’s fan struggles, change earlier.
-
Clear 2 feet of clearance and clean outdoor coil (30–45 minutes)
Action: Remove leaves, trim vegetation, and gently brush fins top-down. Use fin comb for bent fins (count fins per inch to match comb). Do not use high-pressure washers. If coil fins are oily or heavily soiled, schedule a professional coil cleaning.
-
Inspect indoor coil and condensate drain (30 minutes)
Action: Open the air handler access, visually inspect coil. If dust is present, use a no-rinse coil cleaner and a soft brush. Pour 1 cup white vinegar into the condensate drain; if backup occurs or slow drainage persists, call a service contractor to clean trap and lines.
-
Check fan blades and motor operation (15 minutes)
Action: With power restored and system running, observe fan and listen. Fan blade tip speed should be smooth; if wobble or rubbing occurs, turn power off and tighten mounting screws or replace the fan.
If motor hums but doesn’t start, check capacitor value; if capacitor microfarads are >10% off rating, replace it.
-
Measure supply and return temperatures (15 minutes)
Action: Use probes to measure return and supply air temperatures while running for 10 minutes. In cooling mode, a typical delta T (return minus supply) is 15–20°F; in heating mode expect 10–20°F depending on outside temps. If outside these ranges by >5°F, investigate airflow or refrigerant charge issues.
-
Verify thermostat programming and sensors (10–20 minutes)
Action: Confirm thermostat wiring terminals match manufacturer diagram. Use a calibrated thermometer to check room temperature calibration; adjust thermostat offset if needed. Replace thermostat batteries annually and update schedules for energy savings.
-
Document all findings and photograph nameplates (15–20 minutes)
Action: Record model numbers, serials, capacitor readings, filter dates, and any odd noises. Photograph the outdoor unit nameplate, electrical panel, and any damaged areas. This information saves technician diagnosis time and cost on a service call.
Common mistakes and how to avoid them (practitioner notes)
I have seen homeowners try to “boost” airflow by forcing higher blower speeds without checking static pressure — that led to noisy ducts and reduced comfort. Now I measure static pressure before changing blower speeds. I’ve also seen people add refrigerant without leak testing; refrigerant is regulated and adding it is a temporary fix that masks leaks.
Final checklist (verify your work)
- Power confirmed off before internal work and restored after checks.
- Filter replaced/cleaned and date recorded.
- Outdoor unit cleared with 2 ft. minimum clearance and coil fins straightened as needed.
- Condensate line tested with vinegar and draining properly.
- Fan and blower operate smoothly with no unusual vibration.
- Supply/return delta T within expected range (cooling 15–20°F, heating 10–20°F).
- Photos and measurements saved for contractor handoff.
When to call in a professional
Call a licensed heat pump maintenance contractor immediately if you observe refrigerant leaks, compressor failure, electrical arcing, tripped breakers tied to the HVAC circuit, burnt smells, repeated icing despite defrost cycles, or if diagnostic readings (pressures, microfarads, amps) are outside manufacturer tolerances. Also call when work crosses into gas line or combustion inspection territory — that requires a certified gas furnace installer.
If you want a deeper step-by-step inspection or are considering service contracts, consider the pillar resource Air Conditioner Maintenance and Service Guide for Homeowners for overlapping AC and heat pump maintenance strategies.
If your records show >12 years of service, multiple major repairs, or declining efficiency above 20%, prepare for replacement quotes and consider energy-efficiency rebates your contractor may help you claim.
Conclusion: A disciplined routine of inspections, monthly filter care, seasonal coil and condensate checks, plus an annual professional inspection minimizes unexpected heat pump repair costs and preserves system lifespan. When in doubt, document thoroughly and hand off precise data to your chosen technician for efficient, lower-cost repairs. Ready to schedule service or learn more about long-term care? Use your maintenance log and technician photos to get accurate quotes.