Gas heater maintenance made practical: by the end of this guide you will understand how to inspect, maintain and safely clean your home’s gas heater and furnace, complete key DIY tasks, and know when to call a pro. Expect 90–240 minutes for a basic tune-up and cleaning; skill level: homeowner with basic hand tools.
Before you start, gather the right tools and understand safety limits so you don’t void warranties or risk exposure to gas or carbon monoxide.
Introduction to Gas Heater Maintenance and Furnace Cleaning
This hands-on overview combines practical routines for both gas heaters and furnaces so homeowners can improve safety, efficiency and lifespan without diving into advanced repairs. You’ll learn visual inspection processes, simple maintenance tasks, a seasonal schedule and how to balance DIY do’s and don’ts with professional service insights. For broader HVAC care and cooling responsibilities see routine home maintenance tasks and the related Air Conditioner Maintenance and Service Guide for Homeowners.
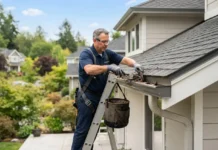
Complementary household upkeep—like regular roof and gutter work—also protects furnace access points and vents; see professional maintenance tips for related tasks that prevent water and debris entering furnace areas.
Real-life example: a homeowner in a three-bedroom house reduced monthly heating bills by 12% and eliminated intermittent pilot failures after replacing a clogged filter and clearing the blower housing during a 2-hour DIY session (detailed steps below). That outcome mirrors common results when routine upkeep is followed.
Transition: first, understand why regular maintenance matters and the measurable benefits before you touch any panel or burner.
Why Regular Gas Heater Maintenance is Essential
Routine care protects household safety, improves heating performance and lowers running costs. Unmaintained units develop clogged burners, restricted airflow and worn components that increase fuel use and create safety hazards like incomplete combustion (carbon monoxide production).
Stat block:
- According to a 2024 industry report, regular annual servicing can improve fuel efficiency by 8–15% on average.
- According to a 2023 HVAC industry report, routine filter changes and blower cleaning reduce emergency service calls by up to 40%.
- According to a 2022 energy study, homes that follow scheduled maintenance replace heaters 25% less often, extending service life by several years.
Safety risks: a cracked heat exchanger, dirty burners or blocked flues increase carbon monoxide (CO) risk and can cause flame instability. Energy savings: improved combustion and airflow reduce gas consumption. Emission reduction: well-maintained burners emit fewer unburned hydrocarbons and pollutants.
Transition: with the benefits clear, next we’ll identify the components that need routine attention and what each check achieves.
Key Components of Gas Heater Maintenance
- Thermostat calibration — Verify setpoint accuracy. Use an independent thermometer: set thermostat to 68°F (20°C) and confirm actual room temperature within ±1.5°F (±0.8°C). If outside range, recalibrate per manufacturer instructions or replace the thermostat.
- Burner inspection — Check flame characteristics. A healthy burner produces a steady blue flame 1–2 inches long. Yellow tipping indicates soot or incomplete combustion. Clean burner ports with a soft brush and compressed air at low pressure.
- Pilot light and ignition assembly — Inspect pilot flame (if present) or electronic igniter. Pilot flame should be a strong blue cone; if weak or erratic, clear debris and confirm gas valve pressure. For electronic ignition, observe cycle behaviour during start-up to detect misfires.
- Heat exchanger — Visually inspect for rust, cracks or soot using a flashlight. A compromised heat exchanger risks CO leakage; any visible cracking requires immediate professional service and likely replacement.
- Ventilation and flue system — Inspect for obstructions, nests, corrosion and secure joints. Ensure the exhaust path is clear and terminates correctly outdoors. Measure draft if you have a draft gauge; weak or reversed draft suggests a blockage.
- Gas connections and valves — Check for hand-tight fittings and obvious corrosion. Smell for gas and perform a soap-solution leak test on accessible joints (bubbles indicate leak). Never use a flame to test for leaks.
- Air intake and filters — Replace or clean filters. Fiberglass or pleated filters are crucial: replace standard pleated filters every 90 days or sooner; washable filters cleaned monthly during active season.
- Blower motor and fan assembly — Inspect for dust, oil bearings (if serviceable), and noisy bearings. Clean blades with a vacuum brush and check belt tension on belt-driven fans: typical deflection is about 1/2 inch with moderate thumb pressure.
- Combustion chamber — Remove loose deposits and soot; heavy build-up requires professional cleaning. Soot is a sign of inefficient combustion and must be corrected.
- Controls and safety switches — Test limit switches, pressure switches and the flame rollout sensor per manufacturer procedures. Replace any failing safety switches and keep records of test outcomes.
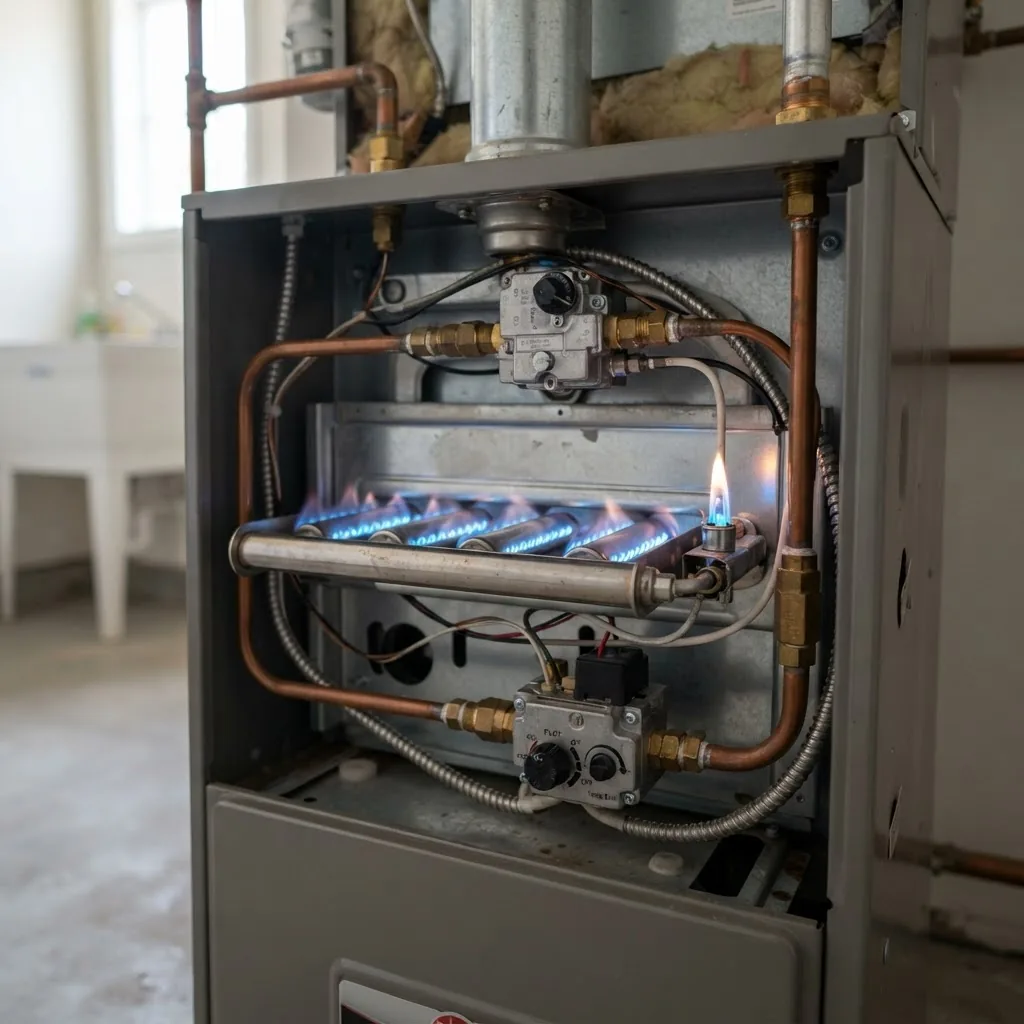
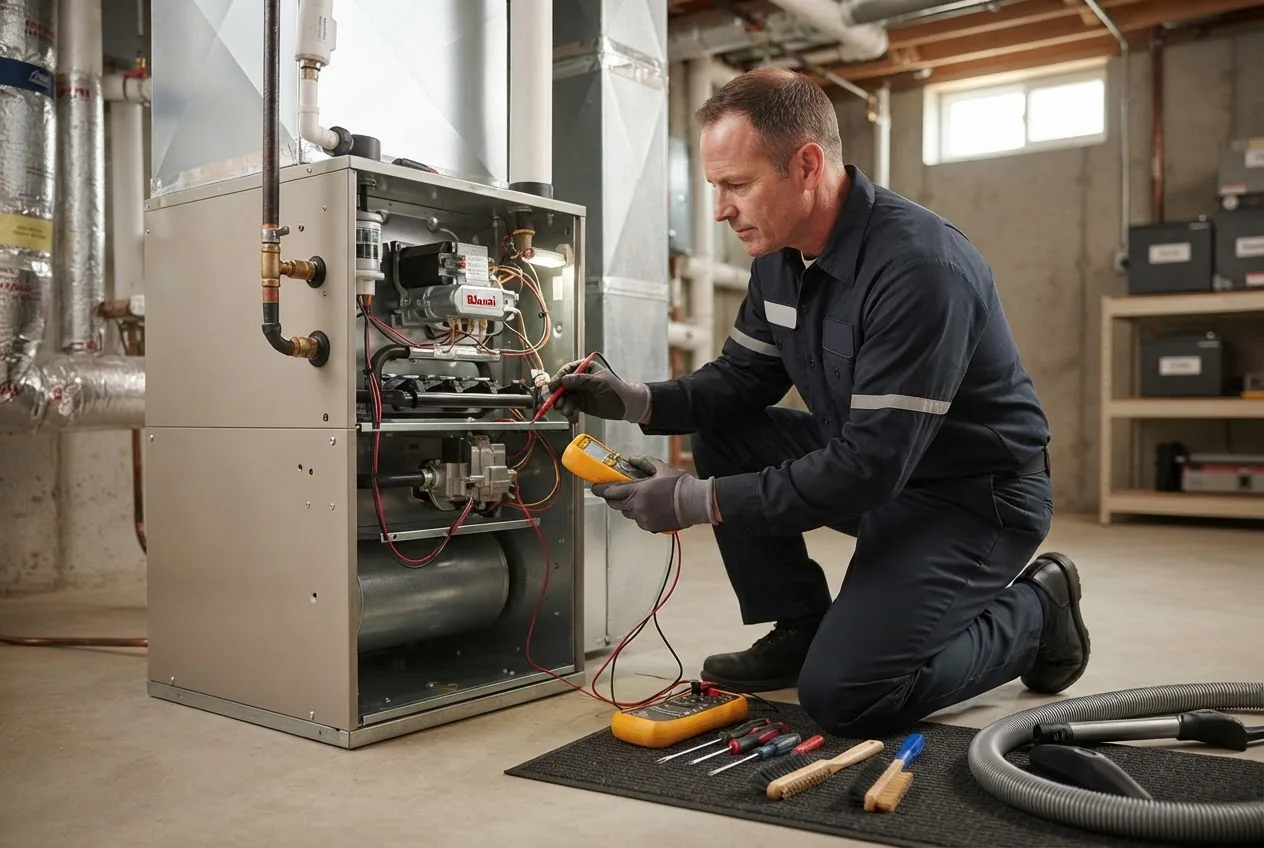
Tools and equipment needed for these checks include a screwdriver set, adjustable wrench, flashlight, replacement filters, soft brush, shop vacuum with brush attachment, multimeter for electrical checks, and a manometer or draft gauge for professionals. Use NIOSH-approved respirators when disturbing dusty components.
Transition: once you know the components, the next section explains full furnace cleaning procedures and how DIY compares with professional service.
Furnace Cleaning and Maintenance Overview
Furnace cleaning focuses on airflow, combustion cleanliness and removing dust and residues that degrade performance. Core tasks include replacing filters, cleaning the blower, clearing the condensate (if present), and inspecting coils and combustion chambers.
How-to steps for a basic furnace cleaning
- Shut off power and gas: Turn off electrical power at the furnace switch and shut the gas valve to the appliance.
- Replace the filter: Remove the old filter and install the correct size and MERV rating—MERV 8–11 is a common balance for homes; replace pleated filters every 60–90 days during heating season.
- Clean the blower assembly: Remove the blower access panel, vacuum dust from the blower wheel with a brush attachment, and wipe accessible areas with a damp cloth. Do not spray cleaning liquids near electricals.
- Inspect and clean the heat exchanger and combustion chamber: Use a flashlight; remove loose soot with a small brush and vacuum. Do not attempt to repair cracks—tag for professional attention.
- Check condensate drain (if present): Clear blockages in PVC or copper drains and clean with a 1:1 vinegar/water solution to prevent slime.
- Reassemble and test: Restore gas and power, run the furnace through a full cycle and observe flame, airflow and thermostat response.
DIY vs. Professional cleaning — quick comparison:
| Task | DIY | Professional |
|---|---|---|
| Filter replacement | Easy, 5–10 minutes | Included in tune-up |
| Blower cleaning | Moderate; 30–60 minutes | Thorough, includes lubrication |
| Combustion chamber/heat exchanger inspection | Visual only; no repairs | Detailed inspection, testing for cracks |
| Combustion analysis | Not available | Included with professional service |
For general household cleaning habits that reduce dust and lint buildup around furnaces, consult effective home cleaning tips and the cleaning home guide. If you’d rather hire specialists for a full deep clean, see furnace cleaning service.
Transition: now that you know what’s involved, we cover safety considerations and what warning signs to watch for during maintenance.
Safety Precautions and Warning Signs during Maintenance
Working with gas and combustion equipment carries real hazards. Follow safety checks and never ignore warning signs. Always prioritize safety over cost savings.
- Install and test a carbon monoxide detector near sleeping areas and furnace rooms; replace batteries annually and detectors every 5–7 years.
- Check for the smell of rotten eggs—if present, evacuate, shut off the gas at the meter (if trained), and call the gas provider immediately.
- Observe flame color: a steady blue flame indicates good combustion; yellow or flickering flames suggest soot or blocked burners.
- Watch for unusual noises (clanking, persistent rattles) that indicate loose parts or failing blower bearings.
- If the system repeatedly shuts down on safety limits, stop DIY work and seek professional diagnostics.
Authoritative safety standards and guidance: consult the U.S. Consumer Product Safety Commission for gas appliance safety and recall information U.S. Consumer Product Safety Commission, industry best practices from the Air Conditioning Contractors of America Air Conditioning Contractors of America, and energy-efficiency guidance from ENERGY STAR.
Transition: with safety covered, the next section walks through a practical DIY gas heater maintenance workflow you can follow step-by-step.
DIY Gas Heater Maintenance: Step-by-Step Guide
Before you start, ensure you have these prerequisites and tools:
- Prerequisites: access to furnace/utility room, working flashlight, power and gas shut-off knowledge, manufacturer manuals.
- Tools and materials:
- Screwdriver set (flat + Phillips)
- Adjustable wrench and pliers
- Shop vacuum with brush nozzle
- Replacement filters (correct size; MERV 8–11 recommended)
- Soft-bristle brush, lint-free cloths
- Digital thermometer, multimeter
- Soap solution (dish soap + water) for leak testing
- Safety gear: gloves, eye protection, N95 respirator
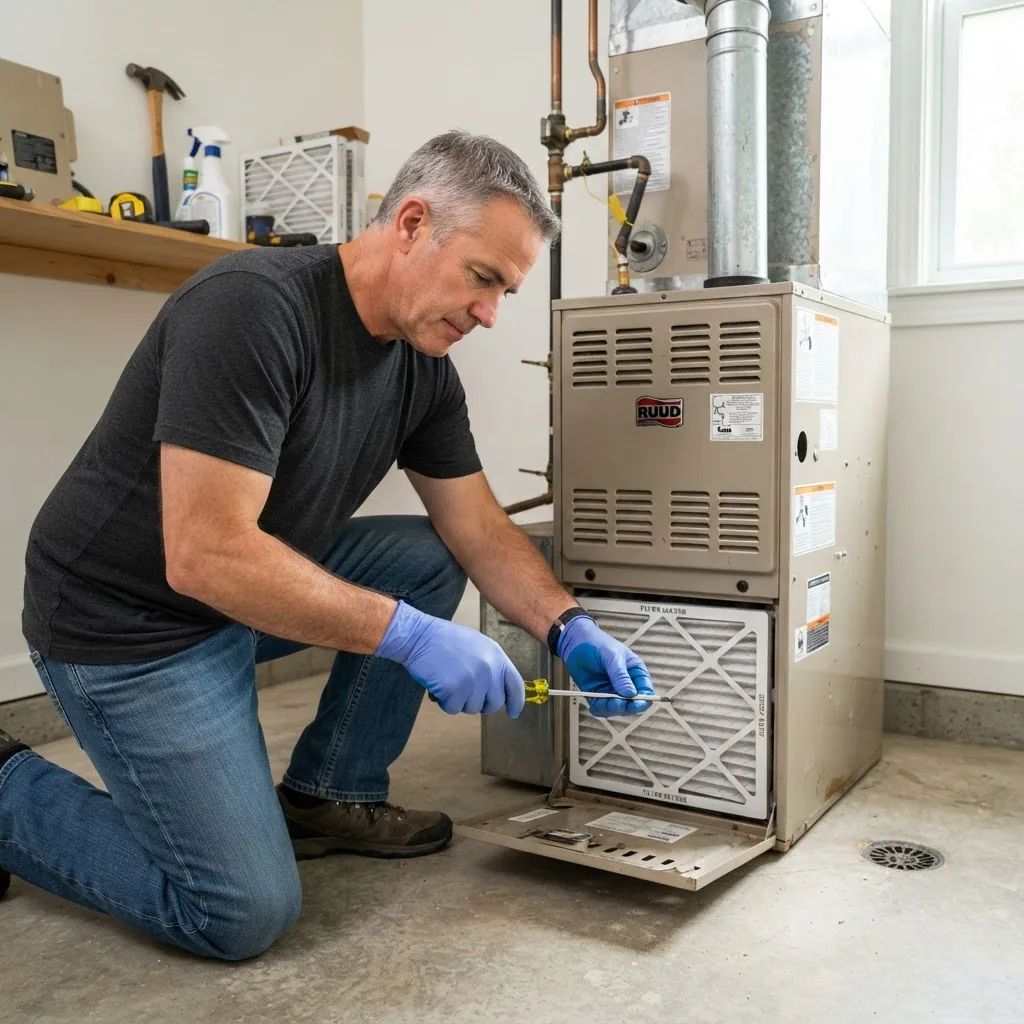
Proceed through these numbered steps. Each step begins with an action-first bold phrase and gives exact quantities, settings and timings where applicable.
- Turn off power and close the gas valve. Flip the furnace power switch and switch off the circuit breaker. Close the gas cock on the appliance (quarter-turn perpendicular to flow). Wait 5 minutes to ensure residual gas clears before opening panels.
- Replace the air filter. Remove the filter frame and insert the correct size pleated filter with airflow arrow pointing toward the furnace. For typical households: MERV 8 filters replaced every 90 days, MERV 11 every 60 days. Time: 5–10 minutes.
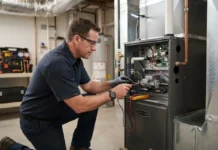
- Open and visually inspect the combustion chamber and heat exchanger. Remove the access panel; use a flashlight to inspect for soot accumulation, rust or visible cracks. Time: 10 minutes. Thresholds: any hairline crack or heavy soot requires immediate professional evaluation; stop DIY and tag the unit.
- Clean the burner and ignition area. Use a soft brush and low-pressure compressed air (no more than 20 psi) to clear dust from burner ports and pilot assembly. Avoid bending electrode tips; keep cleaning under 10 minutes. If burner flames remain yellow after cleaning, record observations and schedule a professional tune-up.
- Vacuum the blower compartment and clean the blower wheel. Remove the blower housing panel, secure the blower wheel with your hand, and vacuum the wheel and motor area with brush attachment for 10–20 minutes. DO NOT spray solvents on the motor. Lubricate bearings only if labelled serviceable—use 1–2 drops of 20-weight oil per port.
- Inspect and test controls and safety switches. Reconnect power temporarily and cycle the thermostat through heating mode to observe ignition sequence. Use a multimeter to check thermocouple or flame sensor continuity (typical flame sensor resistance < 50 ohms when warm); if readings are out of expected range, replace the sensor.
- Test for gas leaks at accessible joints. Close gas valve briefly, apply a 50/50 soap solution to fittings and open gas slowly: bubbles indicate leak—shut valve and call a professional. NEVER use an open flame for leak checks. Time: 5 minutes.
- Clear intake and flue vents outdoors. Visually inspect exterior vents and flues; remove debris, leaves or nests. Use a garden hose only if manufacturer permits; otherwise use a soft brush. Ensure vent caps are secure and unobstructed.
- Measure draft and observe combustion. If you have a draft gauge, measure draft (typical positive draft ~0.02–0.05 inches w.c.). Perform a visual check: steady blue flame, no excessive soot, uninterrupted run for 5 minutes. Any reverse draft or lingering odors: stop and call a technician.
- Record findings and reset maintenance reminders. Log filter size, last replacement date, observations of flame color, and any parts replaced. Set calendar reminders at 60–90 day intervals for filter checks and one annual slot for professional servicing.
Common mistakes and how to avoid them
I once saw a homeowner vacuum a burner assembly with the gas on; that created soot and a delayed ignition. I now always power and isolate gas before any work. Another frequent error: using a higher-MERV filter than the blower can handle, reducing airflow—check blower capacity before upgrading filters.
Checklist to verify your DIY work
- Power and gas were shut off before opening panels.
- New filter installed with correct orientation and MERV rating.
- Blower wheel cleaned and bearings inspected.
- Burner ports cleared; flame is steady blue after restart.
- No soap-bubble leaks on accessible gas fittings.
- Vent terminations clear and draft direction correct.
- Maintenance log updated and next checks scheduled.
When to call a professional after DIY steps
Call a licensed technician if you detect a cracked heat exchanger, persistent yellow flames after cleaning, unexplained carbon monoxide detector activations, gas leaks, failed control switches, or if the unit is under warranty that forbids homeowner servicing.
Transition: the next section explains specific scenarios that require professional help and gives a checklist for hiring qualified service providers.
When to Call a Professional for Furnace Cleaning and Gas Heater Service
DIY maintenance covers cleaning, filter replacement and basic inspections. Complex tasks require licensed technicians: combustion analysis, heat exchanger repair, gas valve replacement and any work tied to warranty conditions.
Checklist of scenarios that should trigger a call to a professional:
- Repeated pilot light failures or electronic ignition misfires.
- Evidence of a cracked or corroded heat exchanger.
- Persistent carbon monoxide detector triggers or unexplained odors.
- Gas leaks confirmed by testing or strong gas smell.
- Electrical issues like blown fuses at the furnace control board.
- Warranty terms requiring certified technician service.
For professional options and diagnostic-level services, consult professional HVAC service options. When selecting help, prefer licensed HVAC contractors and ask for references, proof of insurance, and certification. If the issue appears to be repair-level rather than maintenance, see furnace repair services.
Transition: estimate costs and schedule options to plan maintenance for the year ahead.
Maintenance Schedule and Cost Considerations
Plan your maintenance around seasonal needs: pre-season checks in autumn for heating, mid-winter filter inspections and a full annual service. Balanced scheduling reduces emergency calls and spreads cost.
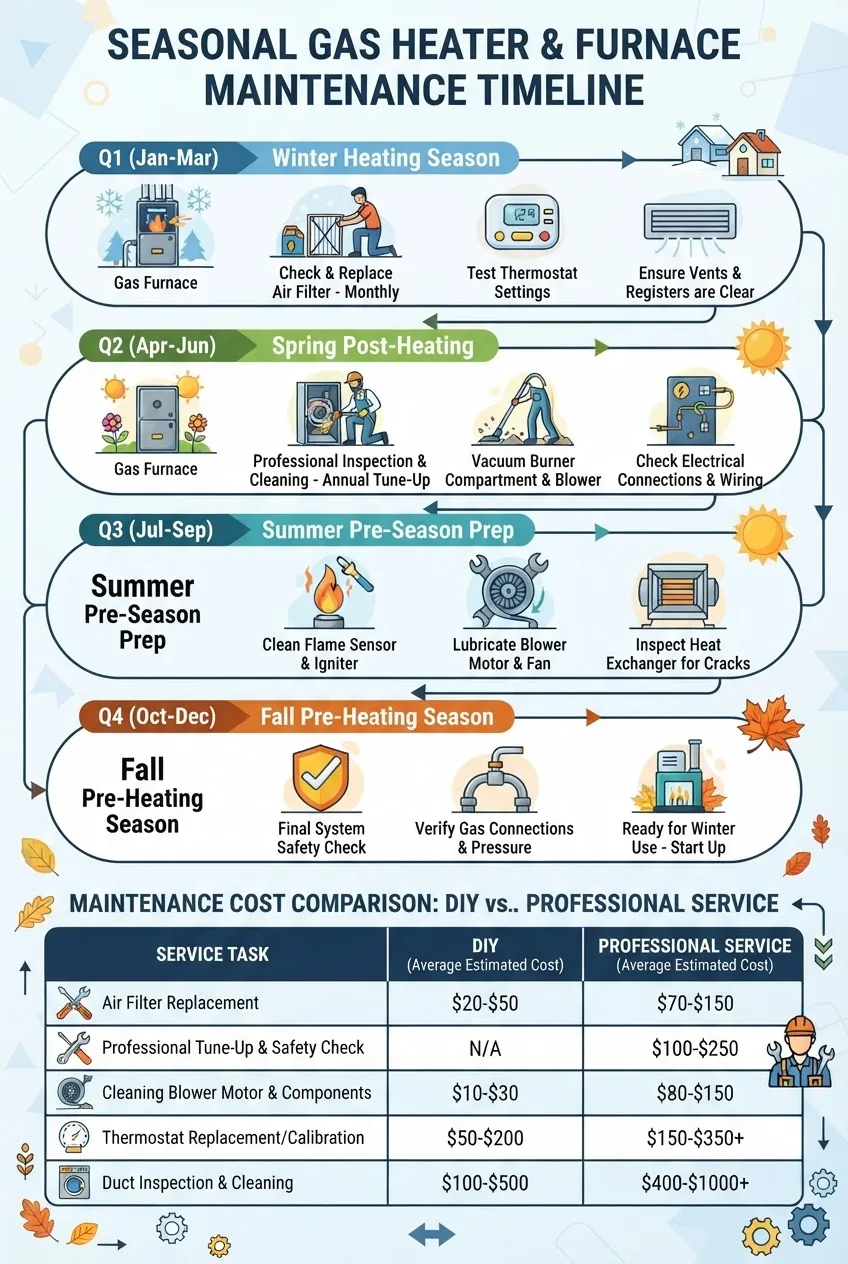
Typical schedule and cost ranges (national averages):
| Task | Frequency | Typical DIY Cost | Typical Pro Cost |
|---|---|---|---|
| Filter replacement | Every 60–90 days | $10–$40 per filter | Often included in service |
| Basic cleaning & inspection | Annually | $0–$100 (parts only) | $80–$200 |
| Comprehensive tune-up (combustion test) | Annually | N/A | $150–$350 |
| Major repairs (heat exchanger, valves) | As needed | N/A | $500–$3,000+ |
Service plans and budgets: a basic annual service plan often costs $80–$200 and can include priority scheduling and discounted repairs. For cross-system plans that include cooling, consider the benefits of an air conditioner maintenance plan benefits to spread costs and ensure year-round coverage.
Transition: with scheduling and costs understood, review the concrete benefits of routine maintenance next.
Benefits of Routine Gas Heater and Furnace Maintenance
Regular maintenance yields measurable advantages: lower energy bills, improved reliability, fewer emergency repairs, and longer equipment life. A well-tuned system operates more quietly and safely.
- Energy efficiency: cleaner burners and unrestricted airflow reduce fuel consumption (see earlier stat block).
- Cost savings: fewer emergency repairs and delayed replacement lead to lifecycle savings.
- Reliability: scheduled upkeep reduces breakdowns—fewer cold nights waiting for service.
- Safety assurance: routine checks lower the risk of CO incidents and gas leaks.
For more on the core service items included in professional heating upkeep, see heating tune up essentials.
Transition: final recommendations and a succinct homeowner checklist wrap up this hands-on guide.
Conclusion and Best Practices for Homeowners
By following this hands-on guide you can confidently perform routine gas heater maintenance and basic furnace cleaning tasks, recognize warning signs and choose appropriate professional help when needed. Keep a maintenance log, replace filters every 60–90 days, schedule an annual professional tune-up, and never ignore carbon monoxide alerts.
Final best practices: treat furnace cleaning like an oil change for your car—regular, low-cost care that prevents large bills later. Use the checklist below to verify your work and set reminders on a calendar or home-maintenance app.
Homeowner maintenance checklist (compact)
- Replace filter: every 60–90 days.
- Vacuum blower and remove dust: annually.
- Visual heat exchanger check: annually; professional inspection if suspect.
- Test CO detector: monthly; replace batteries yearly.
- Schedule professional tune-up: annually before heating season.
When to call in a professional (short)
Call a licensed pro for heat exchanger concerns, gas leaks, repeated ignition failures, CO alarms, electrical faults, or if your warranty requires certified service. For reputable options and certifications, consult professional HVAC service options and consider licensed HVAC contractors when hiring.
Call to action: schedule your next filter replacement and add an annual professional inspection to your calendar—small steps that protect your home, wallet and family.