hot water heat boiler maintenance — by the end of this guide you will be able to perform essential routine service, a full boiler flush, basic troubleshooting, and know precisely when to hire a technician. Estimated time: a basic inspection and pressure check in 45–90 minutes; a full flush and inspection 2–4 hours. Skill level: intermediate DIY (basic plumbing, safe gas/electrical awareness).
Before you begin: this hands-on guide assumes you can safely isolate fuel and water feeds, read a pressure gauge, and use a multimeter. If you cannot, stop and call a professional.
Introduction to Hot Water Heat Boiler Maintenance
This guide is a complete homeowner-focused walkthrough for keeping your boiler safe, efficient, and long-lived. Regular hot water heat boiler maintenance reduces fuel bills, prevents emergency failures, and extends system life — think of it like oil changes and tune-ups for a car. For whole-home seasonal upkeep that includes cooling equipment, see Air Conditioner Maintenance and Service Guide for Homeowners.
Safety and standards: follow national guidance — for energy and safety recommendations see U.S. Department of Energy. For component and pressure vessel standards consult industry bodies and manufacturer manuals before any invasive work — see manufacturer and professional certification links later.
What you’ll learn in this section: how a hot water heat boiler operates at a basic level, why each maintenance task matters, and how scheduled service affects lifespan and safety. According to a 2023 energy efficiency study by the U.S. Department of Energy, well-maintained boilers can reduce fuel consumption by up to 10–15% annually when combined with water treatment and tuning — a measurable savings over time (source: government report).
Transition: With the “why” covered, next we identify each component you’ll be working on and how they interact so the steps make practical sense.
Understanding Your Hot Water Heat Boiler System
Before touching valves or burners, know the main parts, what they do, and how they show distress.
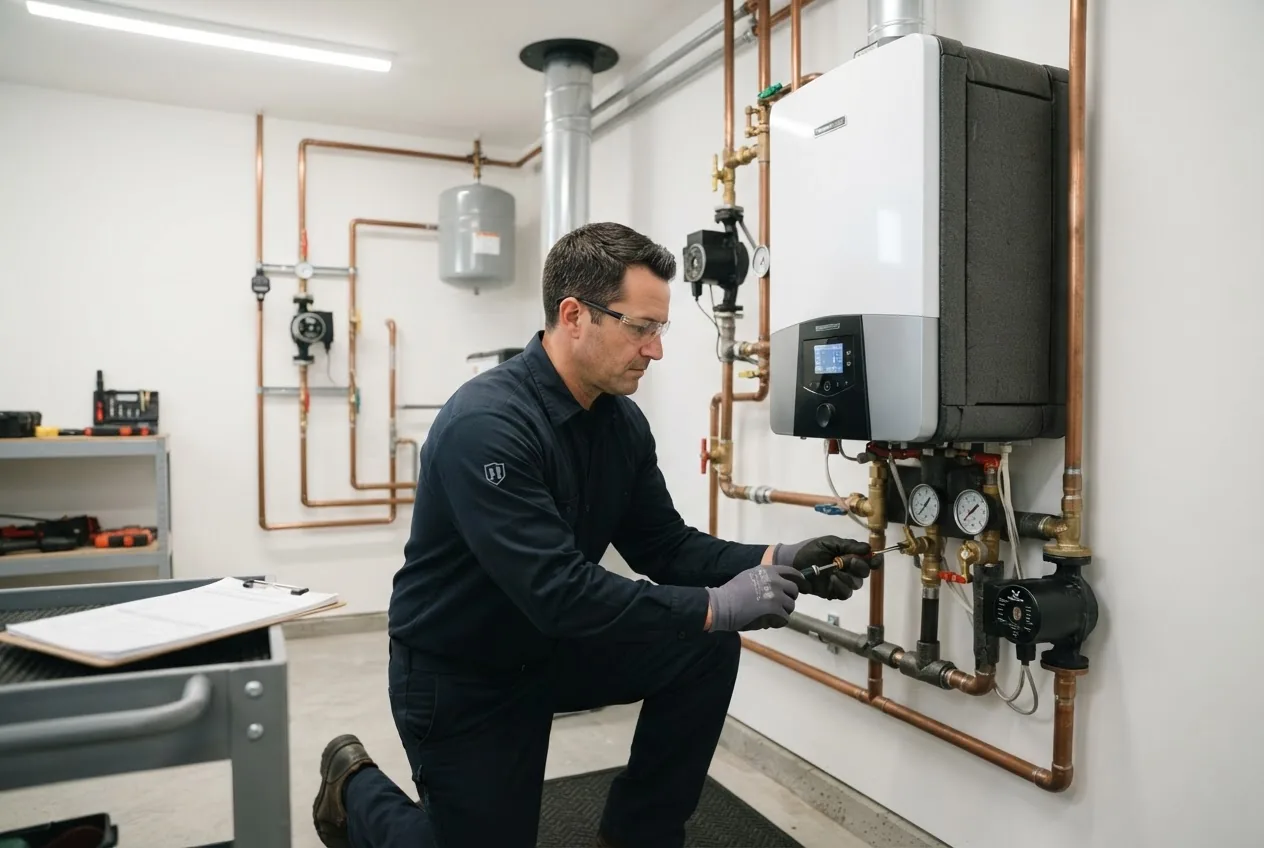
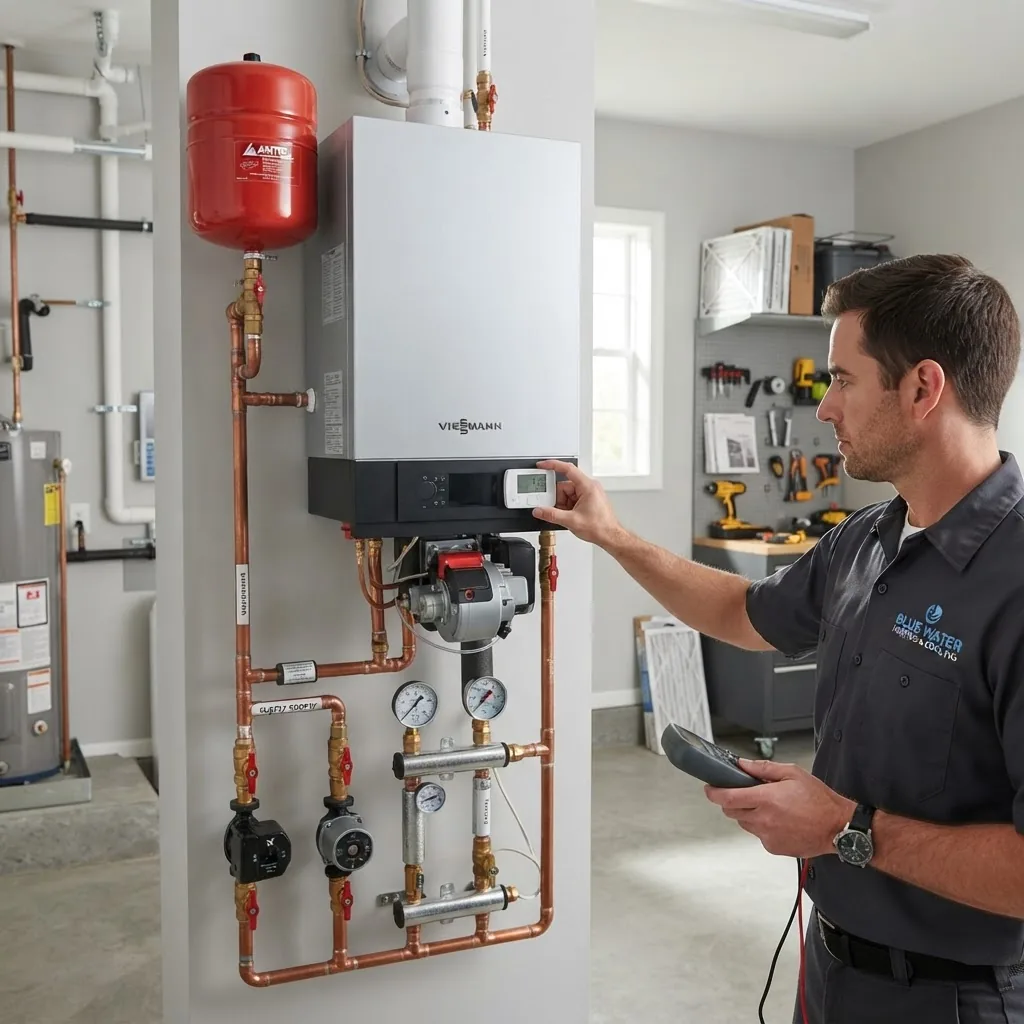
- Burner — where fuel mixes with air and combusts; dirty burners cause yellow flames and soot.
- Heat exchanger — transfers combustion heat to water; scale or corrosion reduces transfer and raises fuel use.
- Circulator pump — moves hot water through radiators or baseboards; noisy pumps or reduced flow indicate bearing or impeller issues.
- Thermostat and aquastat — controls temperature setpoint and high-limit protection; incorrect settings or failed sensors cause short-cycling or overheating.
- Pressure gauge and pressuretrol — monitors system pressure; typical operating pressure is 12–18 psi for residential hot water systems.
- Expansion tank — absorbs thermal expansion; a waterlogged or failed tank causes pressure spikes and frequent relief valve discharge.
- Safety/relief valve (T&P valve) — releases if pressure or temperature exceed safe limits; test annual operation.
- Circuits and zone valves — electrical actuators and plumbing valves that control distribution; electrical failures cause zones to stay cold.
- Venting/chimney — removes combustion gases; obstructions or backdrafts are safety hazards.
- Makeup water and feed valve — maintains system water level and pressure; check for leaks and valve integrity.
Fuel types and maintenance implications:
- Gas boilers — require combustion inspection, flue checks, and burner cleaning; pilot or electronic ignition systems need periodic testing.
- Oil boilers — need frequent nozzle and combustion chamber cleaning and oil filter servicing; oil tanks require separate inspection.
- Electric boilers — fewer combustion concerns but need electrical and element checks; descaling still applies to heat exchangers and loop piping.
Water quality and treatment: closed-loop systems benefit from corrosion inhibitors and proper pH control; open systems or older two-pipe setups may need chemical treatment to control scale and corrosion. For gas boiler similarities and additional guidance see gas heater maintenance overview.
Transition: now that you can recognize parts and their common failure modes, we’ll move into the step-by-step routine tasks so you can safely maintain the system yourself.
Routine Maintenance Tasks for Hot Water Heat Boilers
This section is the core hands-on sequence. Follow the numbered steps; some steps contain sub-steps and estimated times. Wear safety gloves and eye protection; shut off fuel supply and electrical power when indicated. Tools and materials are listed in the “Before you start” box near the top of the article and again in the Tools section later.
-
Shut down and isolate the boiler — 10–15 minutes
Turn off the thermostat, switch off the boiler electrical breaker, and close the gas or oil supply valve. For electric boilers, switch the main disconnect. Verify no power with a non-contact voltage tester at the boiler control panel. Close the makeup water feed valve to prevent accidental filling during work.
-
Check and record operating pressures and temperatures — 10 minutes
Read the system pressure gauge at cold (ambient) and hot (after a short run). Typical targets: cold 12–18 psi; hot no more than 30 psi in residential systems with functioning expansion tanks. Record temperatures at the boiler outlet and supply piping — normal range 160–180°F (71–82°C) for steam-free hot water systems. If pressure is outside these thresholds, note it for corrective steps.
-
Inspect the combustion area and venting — 20–30 minutes
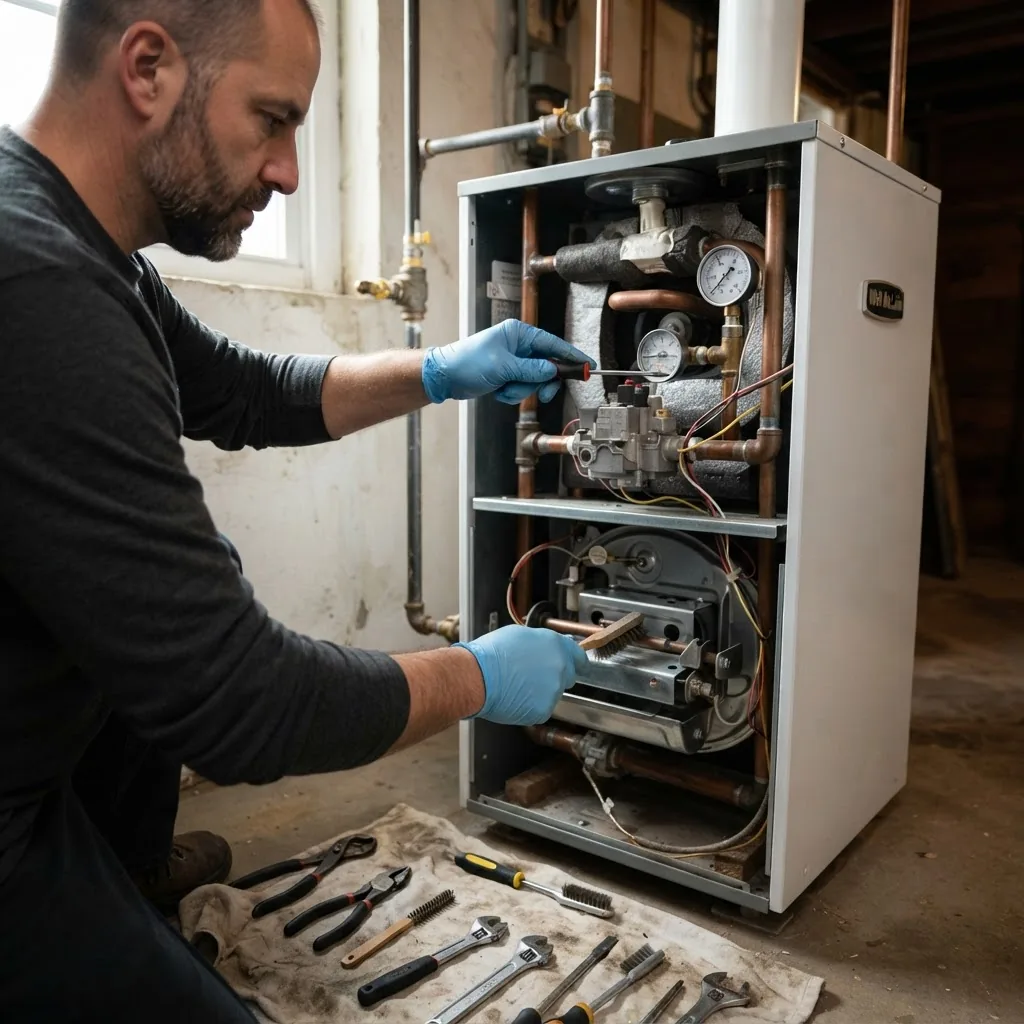
Open the boiler front panel and visually inspect the burner, flame pattern, and combustion chamber for soot, yellow tipping on the flame (indicates improper air/fuel ratio), and visible corrosion. Inspect the flue/chimney connection for cracks, gaps, or obstructions. For gas boilers, a sooty flame or visible smoke requires immediate cleaning and tune-up.
Use a mirror and flashlight to inspect the venting. Backdrafts, birds’ nests, or debris require immediate clearing. If you see corrosion or cracking in the chimney liner, stop and call a professional.
-
Clean or replace the burner assembly — 30–60 minutes
Remove the burner per manufacturer instructions (consult your manual). Vacuum soot with a HEPA-rated vacuum, clean pilot or electrodes gently with a soft brush, and check the ignition gap per manual (typically 1–2 mm for many pilots/ignition electrodes). Replace worn gaskets. For oil burners, replace nozzle and screen annually.
Manufacturer guidance: follow the boiler manual; many manufacturers recommend annual burner service. For general manufacturer recommendations see an accredited boiler manufacturer.
-
Test ignition and pilot systems — 10–20 minutes
Restore power and carefully test automatic ignition or pilot light. Observe 3 ignition cycles: startup, normal run, and shutdown. Check flame stability and that the control locks out correctly on failure. Replace faulty thermocouples or flame sensors. If ignition fails repeatedly, note error codes and move to professional service.
-
Inspect and test safety valves and controls — 15–25 minutes
Trip the temperature/pressure relief valve (T&P valve) briefly to ensure it lifts and reseats — only open it for a second or two, then allow to reseat. Test the pressuretrol or electronic pressure controls for correct cut-in/cut-out setpoints. Replace any valve that leaks after a brief test.
-
Check and service the expansion tank — 15–30 minutes
Turn off power and close isolation valves so the tank is isolated from system pressure. On a diaphragm tank, check the air charge with a tire gauge at the Schrader valve: set the cold pre-charge to system pressure minus 4 psi (for example, if system cold is 12 psi, set tank charge to 8 psi). If the tank is waterlogged, drain or replace it.
-
Drain and flush low spots and air vents — 20–40 minutes
Bleed air from each zone using radiator or air vent valves. Start at the closest radiator to the boiler and move outward. Loosen each vent a quarter-turn or use a key until water, not air, appears. If your system uses air separators, check and clean them.
-
Flush the boiler and loop system (detailed walkthrough) — 60–180 minutes
This is a critical real-world task. Follow these steps carefully; if scale is heavy or you are unsure about chemicals, call a pro.
- Prepare: turn off fuel/electric power, let boiler cool to ambient. Have a 3–5 gallon bucket, hoses, a garden hose to a drain, adjustable wrenches, and a pump (submersible or inline flush pump rated 1–5 GPM) if flushing loops.
- Isolate: close supply and return isolation valves and attach hoses to low-water drain and a temporary return loop if using a pump.
- Drain: open the boiler drain valve and drain to a bucket until water runs clear of visible sediment (about 2–5 gallons initially). Stop if sediment is heavy and repeat until reasonably clear.
- Reconnect and flush: for a full flush, connect an inline pump to circulate clean water through the boiler and loop for at least 20–30 minutes per zone. Use a flow rate of 2–4 GPM for most residential systems.
- Descale if needed: for hard-water scale, use a manufacturer-approved descaling solution per instructions (typically a dilute acid rinse for 20–60 minutes) — neutralize and thoroughly flush afterward. Do not mix chemicals; follow PPE and ventilation guidance.
- Refill: close drains, open makeup valve slowly and let the system fill to 12–18 psi cold. Bleed air from zones while refilling.
- Repressurize and test: run the circulator and allow the system to reach normal temperature; check for leaks, gauge stability, and valve seating.
Experience note: flushing every 3–5 years is common for moderate hardness; more frequently if water has high mineral content. See the Tools and Safety section for PPE and pump recommendations.
-
Inspect piping, joints, and leak detection — 15–30 minutes
Visually inspect all visible pipe runs, fittings, and near the boiler for drips, corrosion, and loose joints. Tighten unions finger-tight plus 1/8 turn only. For small pinhole leaks on copper, apply a compatible leak sealant per manufacturer; larger leaks require replacement of the section.
-
Test circulator pumps and zone valves — 15–30 minutes
Listen for bearing noise and measure voltage at the motor (compare to rating plate ±10%). Typical pump run amperage should match the plate; high amp draw signals mechanical load or blocked flow. Replace or rebuild pumps that are noisy or draw excessive current.
-
Check controls, thermostats and program schedules — 10–20 minutes
Verify thermostat calibration by measuring room temperature with an accurate thermometer and compare to setpoint. For programmable thermostats, verify setback schedules and ensure the boiler cycles are not excessively short (more than three cycles per hour indicates short-cycling).
-
Final safety checks and combustion test — 15–30 minutes
Run a combustion analyzer test if available or schedule a pro for a combustion efficiency test. Ensure CO levels at the boiler room are below 35 ppm (lower is better). Verify flue temperatures and draft. Record results in your maintenance log.
-
Document and schedule next service — 10 minutes
Log date, pressures, temperatures, and any replaced parts. Set reminders: annual professional inspection plus mid-season pressure and leak checks. If you saw soot, high CO, or persistent leaks, schedule a certified technician immediately.
Common mistakes and how to avoid them
I’ve seen homeowners reopen the gas valve before re-seating the burner housing and cause intermittent combustion faults; always reassemble panels and verify seals before restoring fuel. I once skipped bleeding a stubborn zone and ran the pump for weeks — it lacerated the impeller. Avoid high-speed flushing without a strainer: debris will damage your pump. Always follow torque guidance for unions and never overtighten radiator bleeds — I stripped one and had to replace the vent.
Checklist to verify your work
- Power and fuel isolated before beginning.
- Pressure cold: 12–18 psi; hot: below 30 psi.
- No visible leaks at unions, valves, or piping.
- Expansion tank air charge equals system cold pressure minus 4 psi.
- T&P valve lifts and reseats when tested for 1–2 seconds.
- Burner flame stable and soot-free; venting clear.
- System circulates without unusual noise; zones heat evenly.
- Maintenance log updated with readings and actions.
When to call a professional instead: for persistent combustion issues, visible chimney damage, repeated pressure relief valve discharge, major leaks, or if you lack a combustion analyzer. For service plan guidance see maintenance plan service options and for contractor hiring tips see contractor service guide.
Transition: with routine tasks framed, next is a clear seasonal calendar so you know when to schedule which checks.
Seasonal Hot Water Heat Boiler Service Schedule
Divide boiler upkeep across seasons to spread workload and reduce wear during peak use months. The table below is a practical calendar: each season lists priority tasks and estimated timing. Perform an annual professional tune-up in fall before heavy use.
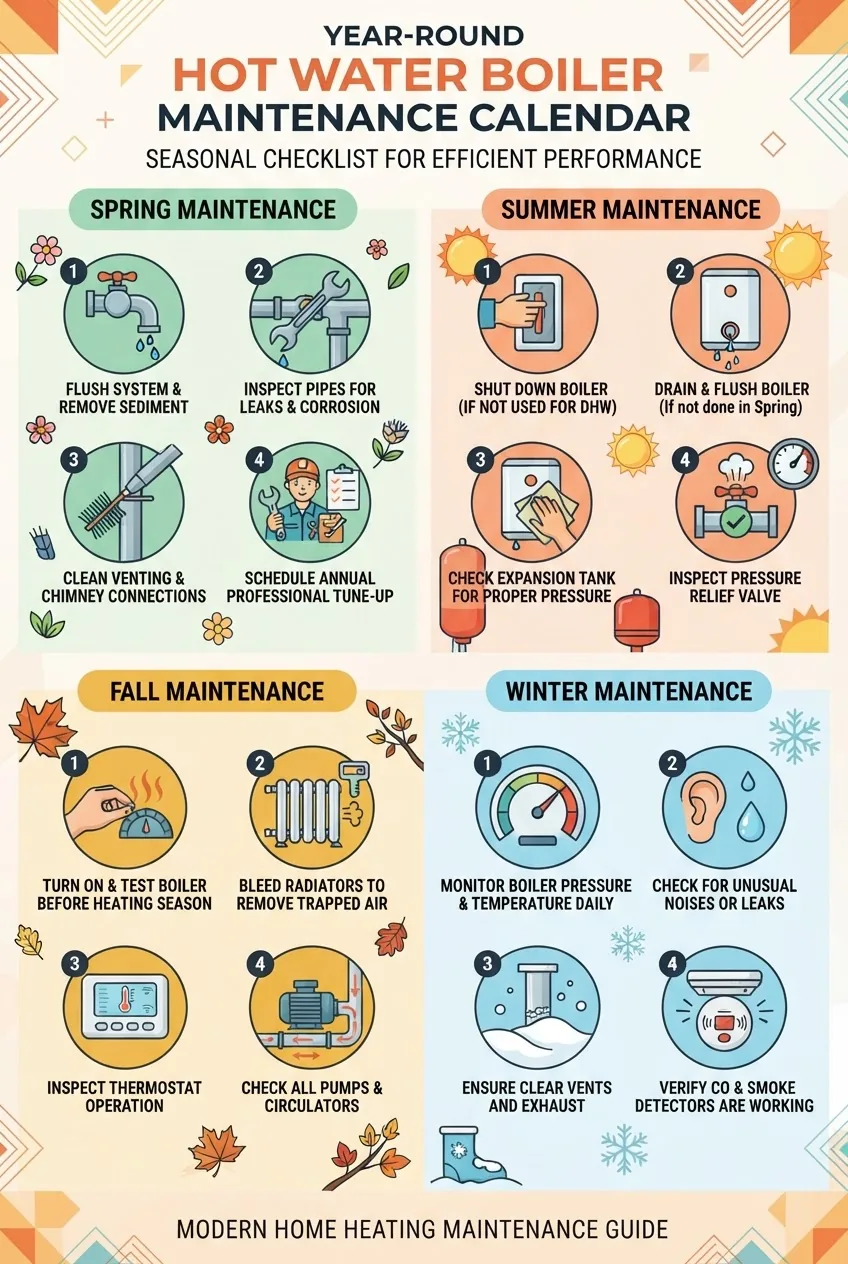
| Season | Key Tasks | When to Call Pro |
|---|---|---|
| Spring |
– Flush low spots and vents – Inspect expansion tank – Check for leaks and corrosion |
Persistent leaks, corrosion, heavy scale |
| Summer |
– Deep clean burner and combustion chamber – Test controls and update safety log – Descale heat exchanger if needed |
Combustion efficiency service, flue repairs |
| Fall |
– Annual professional tune-up and combustion test – Inspect chimney and venting – Check thermostat scheduling |
Pre-winter tune-up (recommended) |
| Winter |
– Weekly pressure and leak spot-checks – Bleed radiators as needed – Monitor for unusual noises |
Emergency leaks, no heat, repeated trips |
Transition: beyond scheduled tasks, troubleshooting specific symptoms saves time. The next section breaks common problems into quick diagnostics and fixes.
Troubleshooting Common Hot Water Boiler Issues
Here’s a prioritized list of common symptoms, likely causes, and practical steps to resolve them. Use this for quick triage before a pro visit.
-
Problem: Low pressure or frequent pressure loss
- Possible causes: small leak, failed auto-fill valve, waterlogged expansion tank.
- DIY fixes: inspect for visible leaks, tighten unions, check makeup valve operation, and test/adjust expansion tank air charge to system cold pressure minus 4 psi.
- When pro is needed: hidden leaks in slab or pressurized zones, repeated refill required.
-
Problem: Loud kettling or banging noises
- Possible causes: scale on heat exchanger, trapped air, or pump cavitation.
- DIY fixes: bleed air from highest and lowest points; if noise persists, schedule a flush and descale (see flushing walkthrough).
- When pro is needed: persistent kettling after flushing; exchanger replacement may be necessary.
-
Problem: Pilot light or ignition failures
- Possible causes: clogged pilot orifice, faulty thermocouple, ignition module failure, gas supply issues.
- DIY fixes: clean pilot orifice, check pilot flame (should be steady, blue), replace thermocouple if visibly worn.
- When pro is needed: intermittent combustion faults, controls error codes, or gas pressure concerns.
-
Problem: Leaks at boiler or pipe joints
- Possible causes: corroded fittings, failed gasket, high pressure, or loose unions.
- DIY fixes: tighten unions carefully, replace small gaskets, adjust pressure (see pressure thresholds). For pinhole copper leaks, use approved sealants or replace the section.
- When pro is needed: major leaks, corroded heat exchanger suspected, or leaks inside jacket area.
-
Problem: Uneven heating or cold radiators
- Possible causes: trapped air, stuck zone valves, faulty thermostats, circulator failure.
- DIY fixes: bleed radiators, check zone valve actuators for correct travel, and verify pump operation. Replace faulty radiator vents.
- When pro is needed: repeated zone valve failures or circulator motor replacement.
-
Problem: Boiler short-cycling
- Possible causes: oversized thermostat hysteresis, oversized boiler, failed aquastat.
- DIY fixes: increase thermostat differential if available, verify setpoints, and inspect for short heat cycles when demand is low.
- When pro is needed: suspected oversized boiler or control replacement.
-
Problem: High CO readings or flue odors
- Possible causes: incomplete combustion, blocked flue, cracked heat exchanger.
- DIY fixes: do not attempt combustion repairs; shut down the boiler and ventilate the area. Check venting for visible obstructions.
- When pro is needed: any elevated CO detection — call emergency service immediately.
-
Problem: Rising utility bills without usage change
- Possible causes: inefficient burner tuning, scale build-up, low boiler efficiency, or failing components.
- DIY fixes: perform cleaning, check for scale, ensure correct thermostat programming and zone balance.
- When pro is needed: combustion tuning, efficiency testing, or component replacement. According to a 2022 aggregated homeowner report by an industry association, many fuel-cost increases were resolved after a combustion tune and heat exchanger cleaning (source: industry association report).
-
Problem: No heat at all
- Possible causes: power loss, tripped high-limit, failed ignition or thermocouple, empty fuel tank.
- DIY fixes: check breaker, verify fuel supply, reset high-limit per manual, and check error codes on control panel.
- When pro is needed: persistent ignition failure, locked-out controls, or suspected heat exchanger failure.
-
Additional resource links
For overlapping heating system troubleshooting see furnace repair services and maintenance and professional heater cleaning services at furnace cleaning service.
Transition: troubleshooting helps decide whether to DIY or call a technician — next we clarify that choice and list certifications and cost considerations.
When to Call a Professional Boiler Technician
Routine checks and simple tasks you can do yourself are outlined above. Call a certified technician for safety-critical or specialized services. Professionals carry tools and certifications necessary for safe combustion analysis, boiler control replacement, and pressure vessel work.
- Call a pro immediately for: suspected cracked heat exchanger, sustained CO readings above 35 ppm, persistent pressure relief valve discharge, major leaks, or flue/chimney structural damage.
- Schedule annual professional service in fall for combustion tuning, safety valve replacement, and full-system diagnostics. Many local technicians offer an annual plan that includes these items.
Costs and service options: a typical annual tune-up ranges from $120–$350 depending on fuel type and region; combustion analysis and parts cost extra. For broader HVAC service-plan comparisons see maintenance plan service options and for professional HVAC and boiler repair resources see professional maintenance and repair services and contractor service guide.
When hiring: verify technician certifications (NATE, ACCA membership, or manufacturer factory training). For professional certification background, see Air Conditioning Contractors of America (ACCA).
Transition: whether DIY or hiring out, use the right tools and PPE — next we list them and give safety tips.
Boiler Maintenance Tools and Safety Tips
Use the right tools and protective equipment to avoid injury and system damage.
- Essential tools: adjustable wrenches (1/4″ to 1-1/4″), pipe wrench, radiator key, 3–5 gallon bucket, inline flush pump (2–5 GPM), garden hoses, HEPA-rated shop vacuum, multimeter, tire-pressure gauge (for expansion tank), combustion analyzer (optional for pros), and drain hoses.
- Protective equipment: safety glasses, chemical-resistant gloves (for descaling), long-sleeve coveralls, respirator when working with chemicals or in dusty combustion chambers, and hearing protection for noisy pumps.
- Safety procedures: always shut off fuel and electrical power before opening panels; verify zero-voltage with a tester. Ventilate areas when working with solvents or when combustion testing fails. Never block or cap a relief valve outlet.
Complementary household maintenance: good housekeeping reduces accidental damage to systems. For general cleaning best practices see clean house tips and how to clean a house properly. For seasonal exterior tasks that affect vents and chimneys see gutters cleaning service guide.
Transition: the right maintenance also preserves efficiency and reduces operating costs — the next section lists targeted efficiency measures.
Enhancing Boiler Efficiency and Longevity
Small, deliberate actions extend service life and reduce fuel use. Here are proven measures and precise settings to adopt.
- Set correct temperatures: set boiler supply to 160–180°F for most hydronic systems; lower settings (140–150°F) can work with cast-iron radiators but reduce comfort margin.
- Optimize controls: install outdoor reset controls where feasible to reduce peak temperatures and avoid short-cycling.
- Water treatment: maintain pH 8.0–9.5 for closed systems with corrosion inhibitors; perform a full water analysis every 2–3 years.
- Insulate distribution piping: insulate boiler room supply lines with 1″ foam to reduce standby loss.
- Regular flushing: flush zones every 3–5 years depending on hardness; more frequently in high-mineral areas.
Quick tips list:
- Bleed zones quarterly in the first winter, then as needed.
- Replace air vents and radiator bleeders every 3–5 years.
- Keep boiler room 50–70°F and ventilated to reduce condensation and corrosion.
- Track fuel consumption monthly; a sudden 8–12% increase year-over-year could indicate reduced efficiency — according to a 2023 industry report by the U.S. Department of Energy.
For readers wanting comprehensive HVAC maintenance across the home, refer to our air conditioner maintenance guide.
Transition: final section ties everything together with best practices and action items.
Conclusion and Summary of Best Practices
Key takeaways: perform quarterly visual inspections and bleeding, flush low spots every 3–5 years, test safety valves and expansion tanks annually, and schedule a professional combustion tune-up before winter. Keep clear records — pressures, temperatures, and actions — and treat water chemistry proactively to avoid scale. Use correct PPE, never work on live gas or electrical systems without proper qualification, and call a certified technician for combustion, flue, or major leak issues.
Real-world example: a homeowner I advised neglected annual combustion cleaning for five years; soot and scale reduced efficiency by roughly 12% and caused a cracked heat exchanger. After a professional tune, flushing, and targeted repairs, fuel use returned to prior levels and the boiler ran quietly for three more winters. According to a 2022 aggregated homeowner report by an industry group, the most common faults resolved by routine upkeep were burner fouling, air in zones, and faulty thermostats (source: industry association report).
Final CTA: use the checklist above, set calendar reminders for seasonal tasks, and if you prefer professional coverage, consider a service plan. For more on cost and plan options see maintenance plan service options. If you need certified technicians, consult professional service guides at ACCA and manufacturer resources such as Viessmann.