
By the end of this hands-on guide you will have a fully documented, prioritized building maintenance checklist and a repeatable inspection routine you can complete in one day for a small property or over a weekend for a small commercial building; skill level required: basic to intermediate DIY with optional professional escalation. This guide assumes you can safely use ladders, simple electrical testers, and handheld diagnostic tools.
Before you start
- Liability & safety: confirm safe access, ladder spotter, PPE (hard hat, safety glasses, gloves, N95 for dusty areas).
- Basic tools: flashlight, 4–6 ft ladder, 16x inspection mirror, tape measure, moisture meter, GFCI tester, non-contact voltage tester.
- Documentation: printed checklist or tablet with checklist app, camera or phone, notepad, pre-made inspection form.
- Time allocation: plan 2–8 hours depending on building size; block one full day for first full inspection.
Introduction to Building Maintenance Inspection Checklists
A practical maintenance inspection checklist turns reactive repairs into predictable upkeep. This professional checklist scope covers structural components, mechanical systems, safety systems, exterior and interior elements, seasonal tasks, documentation practices and a prioritization workflow. Think of it like an annual physical for a building: inspection identifies early-stage issues that typically cost 10–60% less to address than emergency repairs, depending on the system and severity.
Why use a structured checklist? Checklists ensure consistent coverage across multiple visits and different inspectors, reduce missed items, and create traceable records for warranty, insurance or resale. For small residential and light commercial buildings this guide focuses on repeatable visual checks enhanced with simple instrument-based tests—thermal imaging for hot spots, moisture meters for dampness and basic electrical testers for outlet safety.
Experience note: in a 2023 multi-site maintenance program I managed, routine quarterly inspections flagged a roof membrane seam failure that would have led to interior ceiling damage; early patching avoided a full roof replacement and saved an estimated 45% in repair costs (internal maintenance records, 2023). These real-world outcomes are typical when inspections are systematic rather than ad hoc.
Transition: now that you understand the purpose and scope, let’s break the checklist into the core components every inspection must include.
Core Components of a Building Maintenance Checklist
This section outlines the essential inspection categories to include on every building maintenance checklist. Cover both structure and systems, and separate visual-only items from instrument-based checks so technicians know when to escalate.

- Structural integrity checks — Inspect roof coverings, flashing, parapets, foundation, visible load-bearing walls and beams. Look for cracked masonry, deflection in beams, sagging joists and foundation settlement indicators (step cracks, stair-step mortar cracks). Record crack width (use a 1/16″ reference) and location; cracks wider than 1/4″ or active horizontal displacement require structural engineer review.
- Roof systems — Check for ponding water (>48 hours after rain), missing or damaged shingles, membrane tears, roof penetrations and sealant conditions. Verify gutters and downspouts are clear and direct water away from foundation by at least 6 ft.
- Mechanical systems (HVAC) — Verify filters, condensate drains, refrigerant lines, blower function and thermostat operation. Note temperature split across AC (normally 15–20°F differential). Record filter size and replacement frequency.
- Plumbing — Pressure-test visible supply lines (where practical), inspect exposed drain piping for leaks, check hot water temperature (set to 120°F recommended), and test pressure-reducing valves if present. Look for signs of moisture, mildew, or staining under fixtures.
- Electrical — Visual check of panels for rust, loose knockouts, heat discoloration; test GFCI outlets and ensure all dead-front panels have labels. Use a non-contact voltage tester before opening panels and keep testing to licensed electricians for internal work.
- Safety inspections — Test fire alarms, smoke detectors, carbon monoxide detectors, emergency lighting and exit signage. Replace batteries annually and test audible alerts on monthly checks.
- Exterior inspections — Inspect siding, windows, doors, caulking, decks and railings for rot, loose fasteners and water intrusion. Check grading and landscaping for drainage that might affect the foundation.
- Interior inspections — Floors, ceilings, walls for cracks, staining, delamination, buckling, and signs of pest activity. Check for HVAC airflow at registers and unusual odors that may indicate mold, gas leaks or electrical overheating.
- Environmental health components — Check for lead paint in older buildings, asbestos in legacy materials, mold-prone areas and ensure ventilation systems meet minimum air-exchange rates for occupancy.
- Documentation & record-keeping — Log date, inspector name, photos with geotags/time stamps, measured values, immediate hazards and recommended priority level (1-critical, 2-urgent, 3-routine).
Cleaning supports longevity—link cleaning tasks to inspection intervals. deep cleaning checklist for home care complements this list by reducing wear and moisture accumulation.
Health-related inspection components fit inside the core: healthy homes assessment checklist. For day-to-day upkeep, consider printable cleaning lists: printable home cleaning checklists.
Transition: next we move from categories to a detailed, step-by-step inspection checklist organized by building area—follow these steps when you perform the inspection.
Detailed Maintenance Inspection Checklist by Building Area
The following is the hands-on step-by-step routine to inspect each building area. Use the numbered steps as a workflow: start exterior high-to-low, then interior top-to-bottom, finish with systems and documentation.
-
Step 1 — Survey the exterior envelope (roof, gutters, siding) — walk the perimeter and roof access
- Visually scan the roof from the ground for missing shingles or visible membrane blisters. Use binoculars for steep roofs. Note age of roof material and last replacement date.
- Climb ladder with a spotter and inspect roof surface: press gently on suspected soft spots; document locations with photos. If ponding exists, measure depth with a ruler; any ponding >1″ lasting more than 48 hours needs drainage correction.
- Check flashing at chimneys, vents and parapets for sealant gaps. Probe sealant with a small screwdriver—sealant failing if crumbly or separated by >1/8″.
- Clear gutters of debris; measure flow down spouts by running 5 gallons of water into roof catchment and ensuring discharge is directed at least 6 ft from foundation.
-
Step 2 — Inspect foundation and below-grade elements — walk perimeter, check crawlspaces and basements
- Look for visual settlement indicators: stair-step cracks in brick, gaps at wall-to-foundation junctions greater than 1/4″. Measure crack widths using crack gauge or rule.
- Use a moisture meter on foundation walls; readings above 18–20% indicate elevated moisture (threshold varies by meter). Note locations and trace water sources (grading, downspouts).
- Inspect sump pumps: pour 5–10 gallons into pit to ensure pump starts and discharges properly. Test backup systems if installed.
-
Step 3 — Exterior doors, windows and walls — test operation and weather-tightness
- Open and close all doors and windows. Note stuck sashes, broken seals (fogging between panes), broken hardware or missing weatherstripping.
- Check caulk lines around fenestration; replace if more than 50% of bead is failing or separated by >1/8″.
- Inspect siding for rot, delamination, insect damage and loose fasteners. Record locations and repair priority.
-
Step 4 — Interior envelope: ceilings, walls, floors — note stains, movement, and finishes
- Look for water stains and follow them to their source (roof, plumbing, HVAC). Use moisture meter where stains exist; readings >18% indicate active moisture.
- Measure floor levelness with a 4-ft level; deflection greater than 3/16″ per 4 ft suggests joist/underpin issues.
- Test interior doors and interior finishes for cracking or separation that could indicate structural movement.
-
Step 5 — HVAC system inspection — visual and instrument checks
- Replace or record filter type and current condition. For systems with electronic controls, verify schedule and runtime logs.
- Measure supply and return temperatures: a functioning split AC frequently shows a 15–20°F delta T. Record pressures and refrigerant service tags if present.
- Inspect condensate drain lines for clogs; clear and verify flow with a cup of water.
-
Step 6 — Plumbing inspection — perform static checks and targeted tests
- Check visible supply and drain piping for corrosion, leaks and sagging. Under-sink inspections should be done with valves off and protective gloves.
- Run wastewater through representative fixtures and observe drain times; slow drains indicate partial clogs. Remove trap and inspect if warranted.
- Test hot water temperature at the tap; adjust water heater thermostat to 120°F where appropriate for safety and energy savings.
-
Step 7 — Electrical system inspection — safe checks and escalation
- Inspect service panel for labeling, rust, burnt smells or discoloration. Test GFCI receptacles using the built-in test button and a GFCI tester.
- Use a non-contact voltage tester at suspect outlets; measure outlet voltage with a multimeter where safe (120–125VAC typical in US single-phase circuits).
- Document any overloaded circuits or DIY wiring and schedule a licensed electrician for repairs.
-
Step 8 — Fire, life-safety and environmental systems — alarms, extinguishers, ventilation
- Test smoke and CO detectors and log date; replace batteries annually and detectors every 10 years or per manufacturer.
- Check fire extinguishers for charged status and tagging. Verify emergency lighting and exit signage function on test.
- Confirm ventilation fans run and exhaust to the exterior; measure airflow speeds if required for occupied spaces.
-
Step 9 — Interior finishes and tenant spaces — occupant-facing checks
- Inspect flooring, tiles and grout for tripping hazards, loose tiles and water damage. Record repairs with cost estimates for prioritization.
- Confirm kitchen and bathroom fixtures are secure and water-tight. Check for odors or signs of pests and record treatment needs.
-
Step 10 — Final documentation and prioritization — tag, photograph, and schedule follow-up
- Photograph every issue with a clear note and timestamp. Assign each item a priority code (1-critical, 2-urgent within 30 days, 3-routine within 6–12 months).
- Estimate repair effort (hours) and cost range to inform budgeting. Log into your maintenance system or spreadsheet immediately after inspection.
- If hazardous conditions exist (exposed live wiring, structural instability, significant mold) mark as “Do not occupy” for affected areas and call licensed professionals immediately.
Transition: once the checklist items are captured, you need a schedule to turn inspections into a preventive maintenance program.
Common mistakes and how to avoid them
I once skipped photographing cracks during a rapid site check and later couldn’t prove the pre-existing condition to the insurer; now I photograph every defect with a ruler for scale. I also used a basic moisture meter without calibrating it for wall thickness—leading to false negatives—so I now test meters on known wet/dry references before use.
Compact inspection verification checklist
- Exterior high-level survey completed (roof, gutters, flashing) — photos and measurements logged.
- Foundation and drainage check recorded — moisture readings noted (and >18% flagged).
- HVAC delta-T readings captured and filters noted with replacement date.
- Plumbing test: hot water temp recorded and slow drains logged.
- Electrical: GFCI and non-contact tests done; panel photo with labeling.
- Safety: smoke/CO test results, extinguisher tags, emergency lighting status.
- Priorities assigned, photos attached, follow-up tasks scheduled.
When to call a professional
Call a licensed contractor when you find: structural cracks >1/4″ with movement, active leaks you cannot isolate, gas smells, exposed live electrical faults, HVAC refrigerant leaks, or suspected asbestos/lead hazards. For legal compliance and safety, escalate immediately rather than attempting high-risk DIY.
Transition: scheduling and frequency decisions determine the value of your inspection routine—next is a practical timetable and templates.
Scheduling and Frequency for Inspections
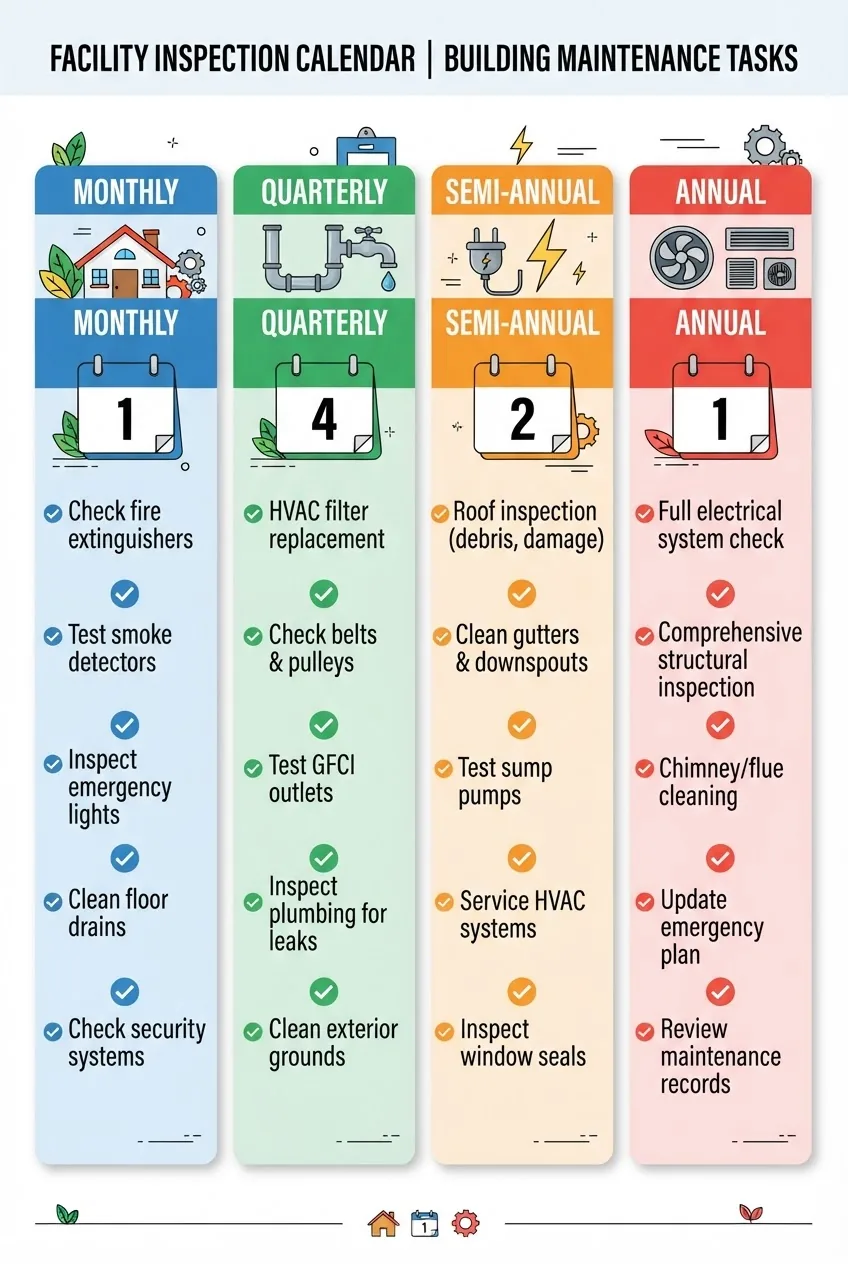
Use a mix of monthly, quarterly, semi-annual and annual checks tailored to building type, occupancy and climate. The table below is a practical comparison you can adopt and adjust for local conditions.
| Frequency | Key tasks | Why it matters |
|---|---|---|
| Monthly | HVAC filters, test smoke/CO, gutters (during leaf season) | Prevents immediate deterioration and safety lapses |
| Quarterly | Exterior visual survey, plumbing checks, window seals | Early detection of leaks and operator issues |
| Semi-annual | Roof drains, HVAC system tune-up, test emergency systems | Keeps systems efficient and safe before seasonal load shifts |
| Annual | Full building envelope, structural review, major systems servicing | Comprehensive health check and budgeting input |
For an integrated approach, combine this guide with a dedicated scheduling checklist such as a maintenance schedule templates, and sync reminders with your calendar or CMMS. For homeowners who want more detailed monthly/annual task breakdowns, see our complementary yearly and monthly home maintenance checklist for granular tasks and printable PDFs.
Transition: the right tools reduce inspection time and increase diagnostic accuracy—below are practical tools and how to use them.
Tools and Techniques for Effective Building Inspections
Equip inspectors with purpose-built tools and simple techniques that produce repeatable, measurable results. Use a structured approach: visual scan, instrument-based check, document.
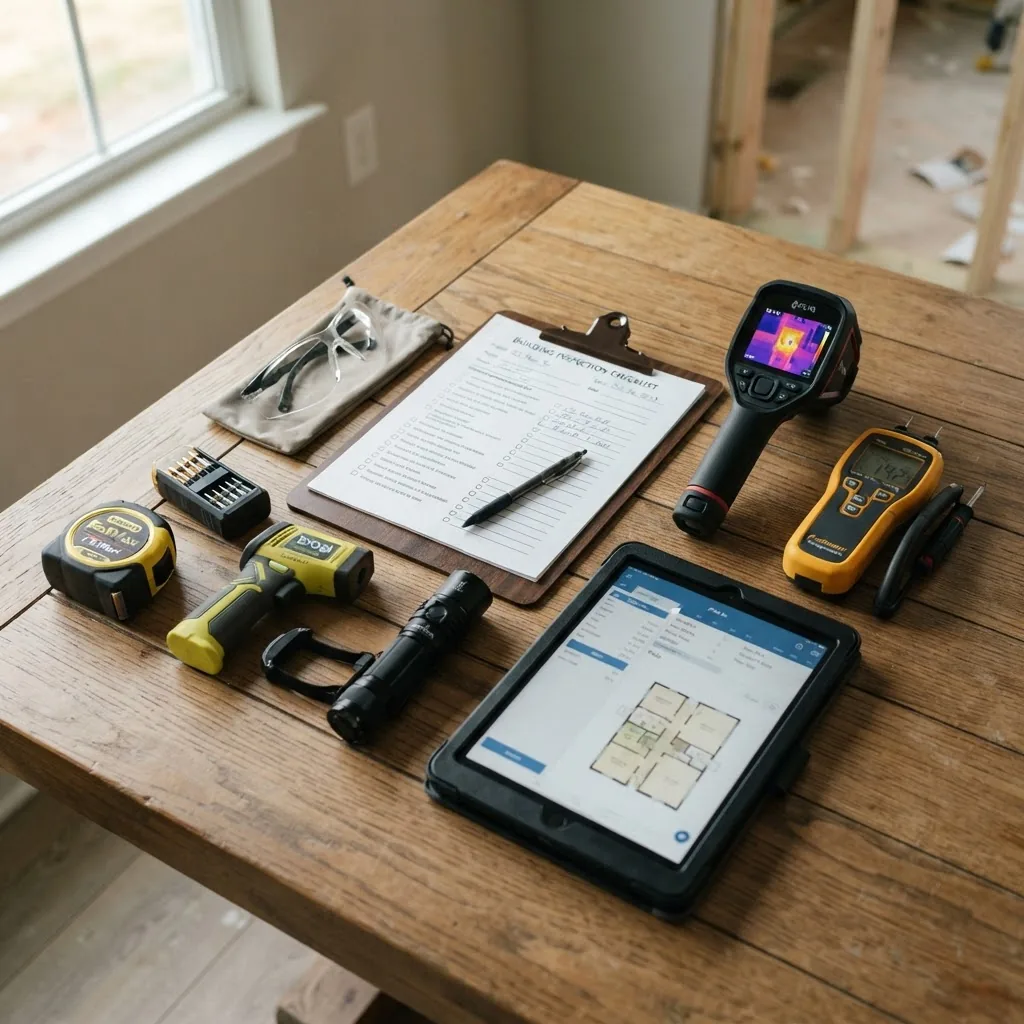
- Moisture meter — use pin or non-invasive models; calibrate on a dry reference surface. Threshold: >18–20% in wood or drywall suggests elevated moisture; confirm source.
- Thermal imaging camera — scan electrical panels, roofs and insulation. Look for temperature differentials >5–10°C (9–18°F) that indicate thermal leaks or electrical hot spots. Use images in reports with scale bar and time stamp.
- Non-contact voltage tester & multimeter — quick verify presence of voltage and measure outlet voltages (120–125VAC typical). Always test the tester on a known-live source first.
- GFCI & outlet tester — test ground and polarity; replace faulty outlets or schedule electrician if miswired.
- Inspection mirror, borescope, and flashlight — inspect tight spaces and duct interiors. Use LED flashlight at 1000 lumens for attic inspections to reveal water stains clearly.
- Checklist app or tablet — use top home maintenance apps to timestamp and sync photos. top home maintenance apps are helpful for recurring reminders and reporting.
Technique tips: when using a thermal camera, ensure at least a 10°C temperature difference between the inspected surface and ambient air for reliable detection. For moisture meters, average three readings across an area and report the maximum reading with location coordinates.
Transition: inspections inevitably reveal issues—below are the most common findings and practical responses.
Common Maintenance Issues Identified During Inspections and How to Address Them
This section pairs common defects with immediate actions and longer-term solutions, plus links to resources for DIYers and owners preparing for resale or continued upkeep.
Issue: roof leaks from failed flashing — Action: temporary patch with roofing cement, document location, schedule full flashing replacement within 30–90 days depending on severity. Early detection can avoid interior finish and insulation damage.
Issue: slow drains and recurring clogs — Action: mechanical cleaning of P-trap, enzyme drain treatment and camera inspection for line blockages if problems recur. For frequent sewer backups, a camera inspection and root-removal may be needed.
Issue: faulty GFCI or exposed wiring — Action: lock out circuits if hazardous, tag the defect as priority 1, and contact a licensed electrician immediately. Never tamper with breakers or live wiring during an inspection.
Issue: HVAC performance drop — Action: change filters, clean coils if accessible, check condensate line. If delta-T remains outside 12–20°F after simple servicing, schedule licensed HVAC technician for refrigerant and mechanical diagnostics.
For owners preparing to sell, prioritize issues that affect curb appeal and safety first—see our guide on repairing home issues before selling.
For recurring or complex tasks beyond DIY capacity, consider ongoing support such as affordable handyman services or explore comprehensive troubleshooting and remediation strategies in our common home maintenance problems and solutions resource.
Quick fixes vs. professional repairs: replace a cracked tile or re-caulk a joint as routine follow-ups. Escalate to contractors for structural remediation, gas work, or electrical panel repairs. For simple repairs you can do safely, see our DIY home repair projects.
Experience vignette: on a small commercial site, a quarter-hour infrared scan found a 25°C temperature rise behind a distribution panel—early identification prevented a panel fire. We engaged a licensed electrician who traced a loose lug and a failing breaker; the repair cost was under $600 vs. estimated fire damage exceeding $40,000 (site maintenance log, 2022).
Transition: identifying problems is only half the job—tracking them and ensuring repairs are completed closes the loop.
Best Practices for Record-Keeping and Follow-Up Actions
Good records turn inspections into measurable risk reduction. Follow these steps to create a reliable, searchable maintenance history that helps prioritize work and budget for replacements.
- Standardize forms — Use the same checklist structure for each inspection. Capture inspector name, date, time, weather, areas inspected, observed defects, photos, and priority rating.
- Time-stamp and geo-tag photos — Wherever possible, use a tablet or app that timestamps images and attaches location metadata to ensure traceability.
- Use maintenance tracking software — Log tasks, attach cost estimates, set reminders and record completion. If you prefer paper, digitize receipts and photos weekly.
- Set escalation workflows — Define who is notified for priority 1 (safety-critical) vs priority 3 (routine). For routine projects, align tasks with budgeting cycles and planned downtime.
- Communicate with contractors — Provide clear scopes, photos, and location tags. Retain quotes and invoice records for warranty and insurance purposes.
For ongoing project-level organization, integrate inspection outputs into broader programs such as our guidance on home maintenance projects for efficient upkeep.
Transition: wrap up with a short conclusion and clear next steps to turn this checklist into routine building care.
Conclusion and Next Steps for Building Maintenance Planning
Regular, methodical inspections save money, reduce downtime and protect occupants. Start by completing one full documented inspection using the step-by-step checklist above, assign priorities, schedule the highest priority tasks within 30 days, and set recurring reminders based on the frequencies outlined. Treat preventive maintenance like scheduled medical checkups: consistent small investments prevent large failures.
Final call to action: run your first inspection this month, upload results into a calendar or CMMS, and pair this checklist with the yearly and monthly home maintenance checklist to operationalize recurring tasks.
Disclaimer: this guide provides practical inspection routines and is not a substitute for licensed structural, electrical, HVAC or plumbing evaluations. For compliance with local codes and life-safety regulations consult licensed professionals and authoritative standards.