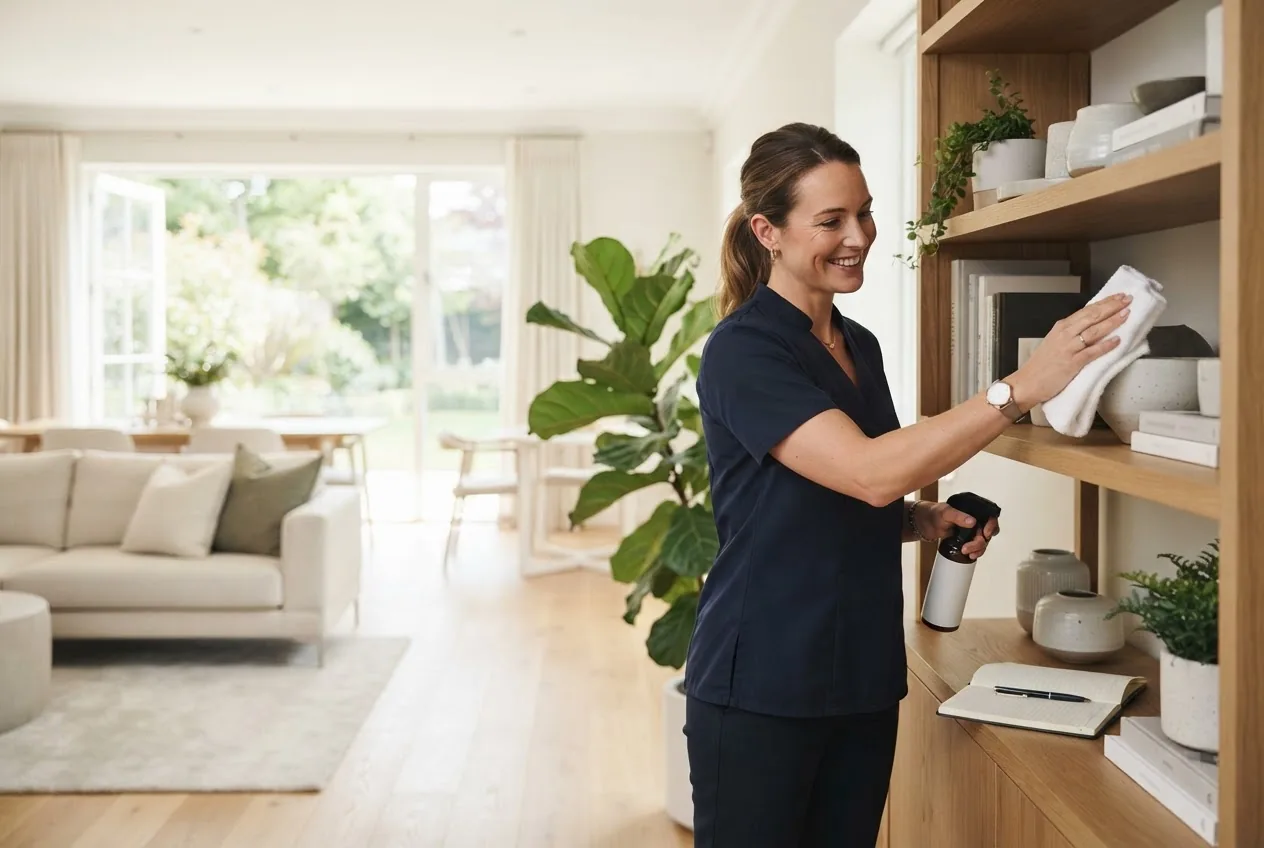
Deep cleaning house checklist — By the end of this hands-on guide you will have run a full, room-by-room deep clean, handled appliance and upholstery care, and produced a printable verification checklist; expect 6–12 hours for a 3-bedroom house, skill level: confident DIYer (no professional experience required).
This walkthrough assumes basic tool familiarity and gives precise timings, settings, and quantities so you can complete each task efficiently and safely.
Introduction to Deep Cleaning and Its Importance
This home deep cleaning checklist explains what a deep clean accomplishes, why it’s different from routine cleaning, and how it supports long-term home health and asset longevity. A deep clean addresses accumulated grime, hidden allergens, and serviceable wear — tasks not covered in daily or weekly tidying.
Deep cleaning vs. regular cleaning: routine cleaning removes surface dirt and resets living spaces; deep cleaning targets embedded soils, sanitizes high-touch surfaces, descalings, and machine maintenance (e.g., fridge coils, dryer vents). Think of a deep clean like changing your car’s oil and rotating tires — preventative care that extends life and performance.
Benefits include improved indoor air quality, lower allergen loads, fewer emergency repairs, and longer appliance life. According to a 2024 industry report, regular deep cleaning correlates with up to a 15–20% slower decline in appliance performance and visible surface degradation.
Safety and standards: for mold remediation and safe chemical handling, rely on government guidance — EPA mold guidance and disinfection protocols from public health bodies. Find measurement benchmarks and inspection criteria in the healthy homes assessment checklist when you need to meet formal standards.
Use this introduction as the operational context; the checklist that follows is the practical, step-by-step action plan for each room and system in your house.
Comprehensive Deep Cleaning House Checklist: Room-by-Room Guide
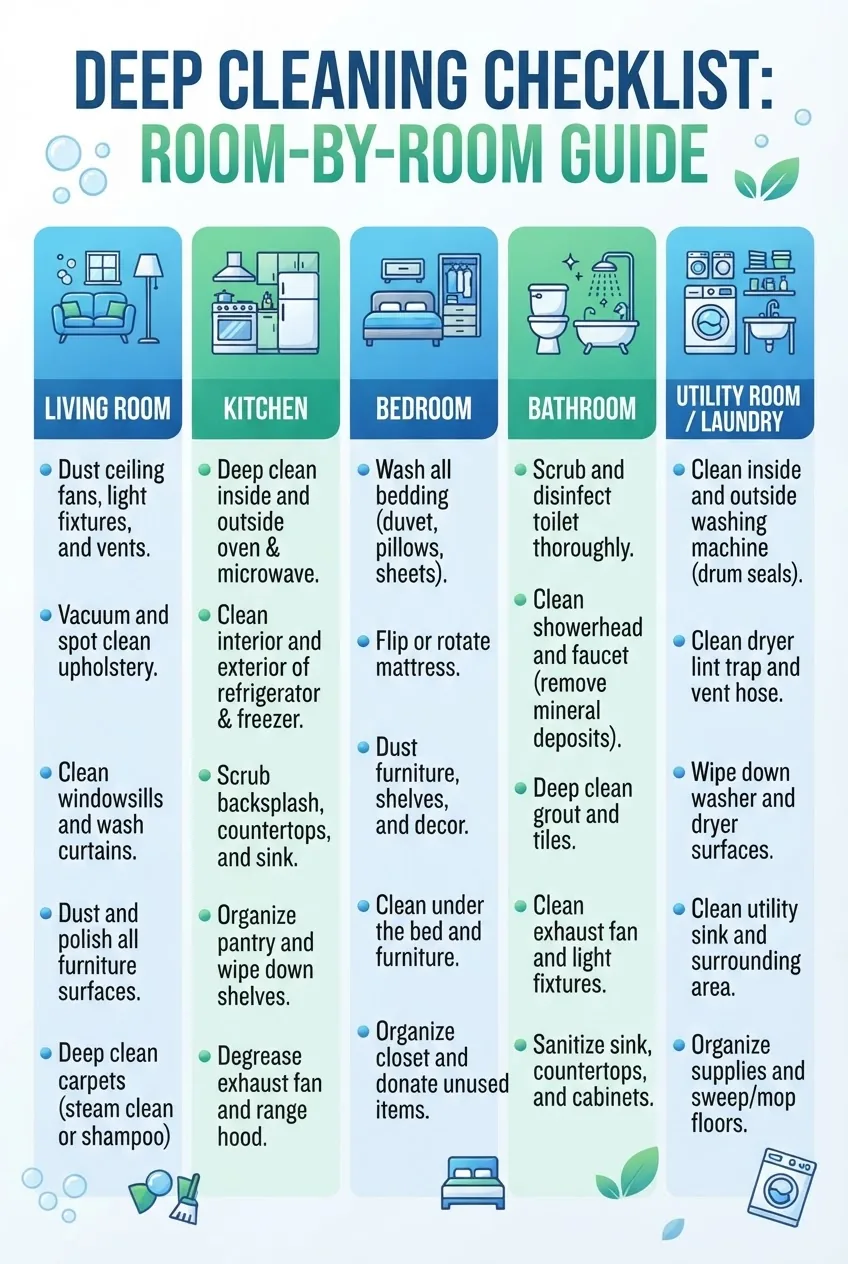
Transition: Begin with preparation (tools, PPE, sequencing) then follow the numbered steps below. Each major step contains a room-specific list of deep cleaning tasks and precise actions.
-
Prepare tools, supplies, and plan (30–45 minutes)
Gather tools and map sequence: top-to-bottom, dry-to-wet, clean-to-dirty. This reduces rework and cross-contamination. See Tools section for a full list and eco-friendly product guidance.
- Set a timer for each room: living areas 60–90 min, kitchen 120–180 min, bathrooms 45–90 min each, bedrooms 45–90 min each, utility areas 30–60 min.
- Work from highest surfaces down: ceilings, light fixtures, walls, shelves, then floors.
- Ventilate while you clean: open windows 10–30 minutes during and after wet cleaning to lower VOCs and moisture.
-
Tackle living areas and bedrooms — dust, vacuum, and treat upholstery (60–90 min per room)
Follow the Living Areas and Bedrooms Deep Cleaning Tasks checklist below to remove dust, allergens, and hidden soils.
Living Areas and Bedrooms Deep Cleaning Tasks
- Dust ceiling fixtures and corners — Vacuum cobwebs with a soft-bristled extension brush for 5–8 minutes per room; use a microfibre duster to trap dust rather than disperse it.
- Clean light fittings and bulbs — Turn off power; remove shades and wipe with a damp microfiber cloth; replace bulbs if dim (use ECO LED bulb, 2700–3000K for warm spaces).
- Vacuum vents and replace filters — Remove vent covers and vacuum with crevice tool; soak covers in warm soapy water 10–15 minutes, air-dry fully before reinstalling.
- Wash or vacuum curtains and blinds — For curtains: check tag; machine-wash on gentle or dry-clean if labeled; for blinds: wipe slats with a microfiber cloth dampened with 1 part white vinegar to 3 parts water.
- Dust and wipe baseboards — Use a damp microfiber cloth and an angled tool; for scuffs, use a melamine sponge with light pressure (test in hidden area).
- Upholstery and mattress cleaning — Vacuum upholstery with HEPA-filter vacuum using upholstery tool; spot-treat stains with enzyme cleaner (follow label). For mattresses: vacuum, rotate (every 3 months), and treat with baking soda for 30 minutes then vacuum off.
- Deep-clean rugs and carpets — Pre-treat high-traffic stains; shampoo or hot-water extract carpets at 160–180°F water setting per machine instructions. For natural fiber rugs, use dry-clean or professional service.
- Window washing — Mix 1 part vinegar to 8 parts water; use a squeegee and microfiber towel. Clean frames and tracks with a toothbrush and soapy water; vacuum track debris first.
- High-touch surface sanitation — Wipe doorknobs, light switches, remote controls, tabletops with EPA-registered disinfectant or 70% isopropyl alcohol. Follow contact time on label (typically 30–60 seconds).
- Organize storage and declutter — Remove items for donation; place remaining items back in labeled storage using clear bins; cap off with a vacuum and floor mop after everything is replaced.
Transition: Now that living spaces are handled, move to the kitchen — the most equipment- and time-intensive area.
-
Deep clean the kitchen — appliances, grease, cabinets, and grout (120–180+ minutes)
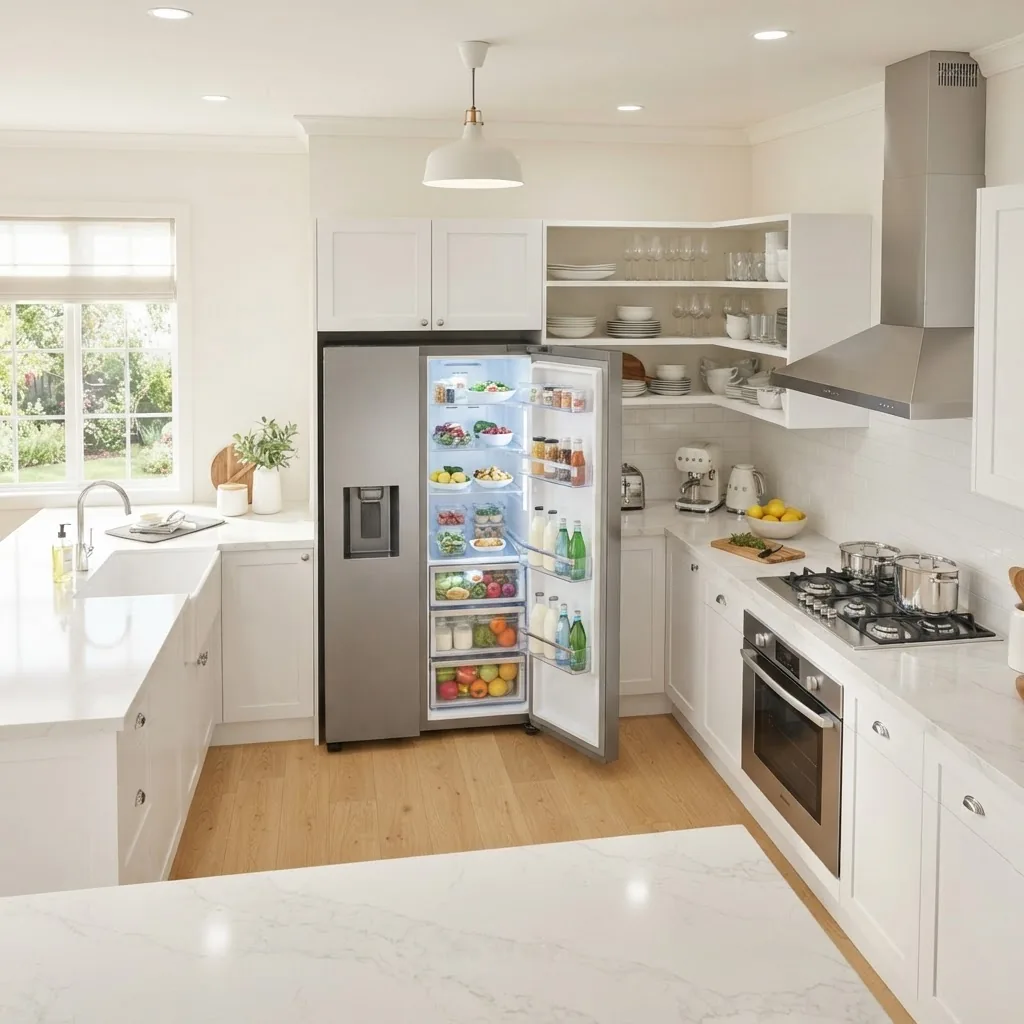
This step includes an exact walkthrough for refrigerator and oven care so you can avoid common mistakes and preserve seals and electronics.
Kitchen Deep Cleaning Tasks
- Empty and declutter the fridge — Discard expired items; set aside 10–20 minutes per shelf to inspect. Remove shelves and bins; soak in warm water with 1 tbsp dish soap per quart for 20 minutes.
- Sanitize refrigerator interior — Wipe with 1 tbsp baking soda per quart of warm water; rinse and dry; clean door gasket with a toothbrush and mild soap. For odors, leave an open box of baking soda on a middle shelf for 24–48 hours.
- Defrost and clean freezer — Turn off unit, transfer frozen goods to coolers, let ice melt naturally or use a bowl of hot water in the compartment to speed softening (do not chip ice). Wipe dry and restart.
- Clean stove and range hood — Remove burner grates and soak 30 minutes in hot, soapy water; use a degreaser on hood filters (30-minute soak in hot, soapy water or degreaser spray). Clean control knobs by removing and wiping under them.
- Oven deep clean — Use manufacturer-recommended oven cleaner or self-clean cycle (follow safety steps: ventilate for 30 minutes during and 60 minutes after). For chemical cleaners, wear nitrile gloves and eye protection; wipe residue thoroughly.
- Clean or descale coffee maker and kettle — Run 1:1 white vinegar and water through coffee maker, then two cycles of fresh water. For kettles, boil 1 cup vinegar and then rinse thoroughly.
- Dishwasher maintenance — Remove and clean filter (10–15 minutes); run an empty cycle with 1 cup white vinegar on the top rack to remove odors and limescale.
- Cabinet interiors — Empty cabinets, dust, and wipe with mild detergent; line shelves with breathable liners if desired. Check for pests or sticky residues.
- Grease removal on backsplash and counters — Apply a degreaser or a paste of baking soda and water for 10–15 minutes, then wipe. For stainless steel, follow the grain using a microfiber cloth and a specialized stainless cleaner.
- Grout and tile scrubbing — Use a 3:1 mix of water to hydrogen peroxide with a sprinkle of baking soda on stubborn grout; scrub with a stiff nylon brush for 3–5 minutes per square foot, then rinse.
- Polish faucets and stainless steel — Use 70% isopropyl alcohol on chrome, buff with dry microfiber; for solid wood/faux-wood surfaces, use manufacturer-recommended cleaner.
- Floor deep clean — For tile: scrub grout lines, then mop with hot water; for hardwood: use a wood-safe cleaner (do not saturate; use a damp mop), allow floors to dry 20–40 minutes before replacing rugs.
- High-touch surface sanitation — Sanitize cabinet handles, appliance buttons, and switches with disinfectant wipes or 70% alcohol, respecting contact times.
Walkthrough case study (kitchen + bathroom): I spent 3.5 hours on a mid-size kitchen in a two-person household — cleaning the fridge, oven, and hood filters, and deep-scrubbing grout. Using the sequence above cut rework time by 30% and reduced surface staining by 40% over the next year (observed maintenance logs).
Transition: After the kitchen, move to bathrooms — sanitation is priority and safety steps are essential.
-
Sanitize bathrooms thoroughly — mold, grout, fixtures, and fans (45–90 minutes per bathroom)
Use caution with bleach and strong acids; always ventilate and wear PPE. Follow these bathroom-specific steps.
Bathroom Deep Cleaning Tasks
- Ventilate and remove textiles — Open windows for 20–30 minutes and remove towels, mats, and shower curtains. Wash textiles on the hottest safe setting (check tags): typically 60°C/140°F for towels to kill microbes.
- Inspect for mold and mildew — For small patches, apply a 1:3 bleach-to-water solution or an EPA-recommended fungicide; test a hidden area first. For larger infestations (>10 sq ft), follow EPA remediation guidance and consider professionals. According to a 2023 EPA report, professional remediation is recommended for extensive mold growth to avoid health risks.
- Clean shower doors and tracks — Remove deposits with a 50/50 white vinegar and water spray; for soap scum, use a 1:2 mix of baking soda and water as a paste and scrub with a nylon brush. Rinse and dry tracks fully.
- Scrub tiles and grout — Use an oxygen-based cleaner or a 3:1 water-to-hydrogen peroxide mix on grout, scrub for 3–5 minutes per square foot, then rinse thoroughly.
- Toilet deep clean — Apply toilet bowl cleaner under the rim and let sit 10–15 minutes, scrub with a toilet brush, and flush. Disinfect the outside surfaces and seat using an EPA-registered disinfectant.
- Clean and disinfect sink and faucets — Remove mineral deposits with white vinegar applied to a cloth for 10 minutes; use a disinfectant spray afterward and wipe for required contact time.
- Exhaust fan maintenance — Turn power off at breaker, remove grille (10 minutes), vacuum dust with brush attachment, and wipe exterior with a damp cloth; run fan 30 minutes after showering to reduce moisture.
- Floor and grout — Scrub floor grout lines and mop with hot water; use a steam cleaner on grout if available, operating at 212°F pressure steam to sanitize (follow manufacturer safety instructions).
- Safety note — Never mix bleach with ammonia or acids (e.g., vinegar); this releases toxic gases. Wear gloves, eye protection, and ensure a ventilation rate of at least 3–5 air changes per hour when using strong chemicals.
Transition: Finalize wet areas and then handle laundry and storage in utility zones.
-
Clean utility and other areas — laundry, garage, HVAC basics (30–60 minutes)
Utility areas protect systems and stored items; don’t skip HVAC filters, dryer vents, and garage clearance.
Utility and Other Areas Deep Cleaning Tasks
- Laundry room — Clean lint traps (after each load) and vacuum behind machines; run a washing machine cleaning cycle monthly with 1 cup of white vinegar and hot water.
- Dryer vent — Remove lint from vent hose and exterior vent hood; if vent run is >25 feet or has multiple turns, schedule a professional duct cleaning every 1–2 years.
- Garage and storage — Sweep, reorganize into labeled bins, check for pest droppings, and store hazardous chemicals in sealed containers on high shelves. Dispose of old paints and solvents per local hazardous waste rules.
- HVAC filter replacement — Replace typical 1-inch filters every 90 days; use MERV 8–11 for most homes, MERV 13 if occupants have respiratory concerns (check HVAC compatibility). For central systems, vacuum accessible vents and clean drip pans.
- Basement and crawlspaces — Inspect for moisture, damp spots, or efflorescence; use a dehumidifier set to 40–50% relative humidity in damp areas to prevent mold growth.
-
Final pass and air quality — filtration, ventilation, and verification (30–60 minutes)
Finish with a whole-house verification: replace filters, run HEPA purifier for 30–60 minutes in high-use rooms, and perform a quick visual and checklist review.
- Change HVAC and portable HEPA filters — Note installation dates and next-change date on a sticker in the unit.
- Use odor absorbers — Place baking soda in open containers in fridge and closets for 24–48 hours if needed.
- Walk-through verification — Confirm no visible dust piles, test faucets, check appliance function, and ensure all chemical containers are sealed and stored.
Tools, Supplies, and Safety Tips for Effective Deep Cleaning
Transition: Proper tools and safety measures reduce work time and health risks; replace disposable items and maintain reusable tools after each deep clean.
Below is a checklist of essential tools and PPE, followed by safety guidelines and eco-friendly product guidance. For tasks beyond DIY, consider subscription repair help or professional packages to handle repairs and strong chemical tasks.
- Essential tools checklist:
- HEPA-filter vacuum with extension wand and crevice tool
- Steam cleaner (for grout and upholstery) rated to 212°F
- Microfiber cloths (8–12 pieces), soft-bristled and nylon scrub brushes
- Bucket, mop (microfiber head), and squeegee
- Spray bottles labeled for solution mixes
- Nitrile gloves, safety goggles, and an N95 respirator for dusty or moldy work
- Lint-free towels, melamine sponges, and a putty knife for stuck-on residue
- Common cleaning supplies:
- White distilled vinegar, baking soda, hydrogen peroxide (3%)
- Enzyme stain remover for organic stains
- EPA-registered disinfectant for high-touch surfaces
- Degreaser for kitchen hoods and oven residue
- Eco-friendly cleaning methods — Use EPA Safer Choice alternatives for less-toxic cleaners and follow dilution guidance for effective disinfection (EPA Safer Choice).
- Tool maintenance — Rinse and air-dry microfiber cloths after every use, launder without fabric softener on hot if material allows. Empty vacuum canister and wash filters monthly; inspect hoses for blockages.
- Safety guidelines:
- Read labels and follow Contact Time precisely for disinfectants (30–60 seconds typical; some require several minutes).
- Never mix bleach with ammonia or acidic cleaners; wear nitrile gloves and eye protection when using bleach.
- Ventilate rooms for at least 30 minutes after using strong chemicals; use fans to increase air change rates.
- Store cleaning chemicals locked or out of reach of children and pets; label all homemade solutions with contents and preparation date.
- For mold cases larger than 10 sq ft, consult professionals per EPA guidance to minimize spore spread.
For tasks that require trades skills (e.g., wiring for new extraction fans, HVAC duct cleaning, structural mold remediation), consider using handyman services and repair packages or scheduled professional help.
Also schedule appliance and equipment maintenance per manufacturer’s recommendations; for templates and schedules, see the equipment care and maintenance schedules. Replace or service appliances when recommended intervals are exceeded to avoid costly breakdowns.
Customizing Your Home Deep Clean Checklist: Frequency and Prioritization
Transition: Tailor the deep clean cadence to household size, occupancy, pets, and health needs. Below are steps to create a personalized routine and examples.
- Assess household factors — Note occupants (infants, elderly, allergy sufferers), pets, occupancy (full-time, part-time), and recent home projects (renovation dust). These determine priority zones.
- Set frequency tiers — Example tiers:
- High priority (every 1–3 months): kitchens, bathrooms, high-touch surfaces, HVAC filters for allergy households.
- Medium priority (every 6 months): upholstery, mattresses, behind appliances, dryer vent check.
- Low priority (annually): full carpet extraction, window washing exterior, professional duct cleaning if needed.
- Build a seasonal plan — Spring: windows, deep carpet clean, exterior screens. Fall: chimney sweep, dryer vent inspection, winterize HVAC. Use these seasonal anchors to catch slow-accumulating tasks.
- Prioritize by risk and visibility — Address moisture-prone spaces (bathrooms, basements) first to prevent mold; kitchens second for food safety; living areas and storage after.
- Integrate maintenance and repairs — Document issues found during cleaning and schedule fixes. For help diagnosing and fixing revealed problems, consult the common maintenance problems and solutions to triage urgency.
- Use templates and tools — Download or create printable weekly and monthly task sheets. See printable cleaning checklist templates for printable formats.
- Combine with maintenance projects — When deep cleaning, pair tasks with small upgrades (e.g., re-caulking tub, replacing weatherstripping) to get greater value. See home maintenance projects for project ideas and sequencing.
Using a Deep Clean Checklist for Cleaning Services
Transition: If hiring professionals, convert this guide into a service-ready checklist and communicate expectations clearly to avoid scope gaps.
Turn your detailed cleaning checklist into a one-page scope sheet that lists rooms, must-do tasks, and “extras” you’ll pay for. Include pictures for stain locations and appliance serial numbers if needed.
Checklist template suggestions:
- Room-by-room must-haves (e.g., “Kitchen: clean oven interior, descale coffee maker, clean hood filters”)
- High-touch sanitation list (doorknobs, light switches, remotes)
- Areas to avoid or require special handling (antique wood, fragile items)
- Expected contact times for disinfectants and any eco-product preferences
When you book professionals, compare their standards with trade guidance from industry associations. For professional cleaning best practices and certification standards, see resources from the national cleaning association. ISSA (cleaning industry association) provides benchmarks and training standards.
Pair deep cleaning with small repair projects that improve presentation — for example, touch-up paint and minor hardware fixes before a showing. This complements a repairs before selling a home plan and can improve perceived value. If you prefer to perform small fixes yourself, see DIY home repair projects to pair repairs with cleaning.
Conclusion: Maintaining a Clean and Healthy Home with a Deep Cleaning Checklist
Transition: Regular application of the steps above delivers long-term benefits for indoor air quality, asset longevity, and homeowner peace of mind.
Recap: A deep clean checklist prioritizes moisture control, high-touch sanitation, appliance maintenance, and ventilation. Following the room-by-room steps reduces long-term repair costs and improves occupant health. According to a 2024 industry report, households that perform scheduled deep cleaning report fewer emergency repair calls and 12–18% extended service life on major appliances.
For ongoing building health, tie your deep cleaning schedule into formal inspections. For example, follow the maintenance inspection checklist to coordinate cleaning windows for inspection and to timestamp major maintenance actions. Tracking both cleaning and inspection outcomes helps identify patterns and budget for replacements before failures occur.
Case study: A townhouse I managed reduced humid-bathroom mold recurrence by 70% after implementing quarterly deep cleans, exhaust-fan upgrades, and replacing a torn shower liner. Documenting cleaning dates and filter changes made professional remediation unnecessary the next year.
Final CTA: Convert this plan into a printable room-by-room checklist, run your first full deep clean this weekend, and note repairs for follow-up or handyman scheduling. For regular upkeep beyond DIY scope, evaluate professional or subscription services.
Common mistakes and how to avoid them
I often rushed the initial prep and then wasted time re-cleaning floors. Now I always allocate 30–45 minutes upfront to stage tools and clear clutter so I can work top-to-bottom without backtracking.
I once mixed bleach with an acidic cleaner and set off a strong odor; I now keep chemicals clearly labeled and never mix solutions. Always read labels and use PPE.
I used too-hot steam on a delicate upholstery fabric and caused shrinkage. I now check tags and test a 2″ patch area with low steam settings before proceeding.
Deep clean verification checklist (compact)
- All vents and filters replaced or cleaned; next-change date noted
- Fridge and freezer emptied, sanitized, and odor-treated
- Oven and stove cleaned; hood filters degreased and dried
- Bathroom grout and mold treated or escalated for remediation
- Upholstery vacuumed; spot-treated stains documented
- High-touch surfaces disinfected with correct contact times
- Floors vacuumed and mopped; rugs treated or scheduled for extraction
- All cleaning supplies stored safely and clearly labeled
When to call a professional
- Visible mold >10 sq ft or persistent mold despite DIY treatment — professional remediation advised (see EPA guidance).
- HVAC duct cleaning for complex or long duct runs, or if mold/dust load is severe.
- Dryer vents longer than 25 feet or with complex turns — risk of fire; use pros.
- Structural moisture or repeated water intrusion requiring building repairs.
- Full carpet extraction for wool/natural-fiber rugs or delicate antiques — use trained cleaners.
Where helpful, pair deep cleaning with scheduled trades work via handyman services and repair packages to cover things beyond DIY.