New house cleaning checklist: by the end of this guide you will have a complete, room-by-room deep clean and move-in preparation plan you can execute in 1–3 days (single-person effort: 18–30 hours; two-person team: 8–14 hours). Skill level: basic DIY cleaning knowledge — this guide clarifies every tool, setting and timing.
Why a New House Cleaning Checklist is Essential Before Moving In
Think of a new-home deep clean as resetting the space to a fresh baseline before you unpack. A purposeful, systematic clean removes left-behind dust, allergens, chemical residues and unseen grime that surface cleaning misses. That fresh baseline reduces immediate cleaning needs, helps protect fabrics and HVAC systems, and improves indoor air quality for people with sensitivities.
Key benefits:
- Allergen removal and reduced dust load for a healthier start
- Sanitation of contact points (switches, handles) to reduce germ transfer
- Early detection of issues (mold, leaks, pest signs) while contractor access is easier
- Better efficiency: deep-cleaned surfaces mean fewer repeat scrubs after moving boxes in
Start by prioritizing high-contact zones (kitchen, bathrooms, HVAC) and open with tasks that improve air quality: replace HVAC filters, vacuum with HEPA where needed, and ventilate while cleaning.
Before you continue, gather essentials listed below so you can work room-to-room without interruption.
- Clear access to water and power (test faucets, outlets)
- Personal protective equipment: nitrile gloves, safety glasses, N95 mask for dusty work
- Designate a staging area for trash and donated items
- Plan a 1–3 day timeline and reserve professional services if the home shows major mold, pests or structural issues
Preparing Your New Home: Tools and Supplies Needed for Deep Cleaning
Below is a numbered supplies list with brief, practical descriptions so you can stock precisely what you need for a successful new house deep clean.
- HEPA vacuum cleaner — Use a vacuum with a HEPA-rated filter for carpets, upholstery and ducts where accessible; set to manufacturer-recommended floor modes (carpet = high suction; hard floors = lower suction with brush off).
- Microfiber cloths (assorted) — 12–20 cloths: 10 for general dusting, 4 for wet/dry kitchen and bathrooms; microfiber traps particles better than cotton.
- Scrub brushes and sponges — stiff-bristle grout brush, medium kitchen scrubs, non-scratch sponge pads; keep separate for bathrooms and food-prep areas.
- Neutral pH all-purpose cleaner — for painted surfaces, trim and appliances; avoids finish damage. Use a concentrated formulation and dilute as directed.
- Disinfectant with kill-time instructions — for switches, handles and high-touch points; check label for surface compatibility and dwell time (usually 1–10 minutes).
- Glass cleaner or vinegar solution — for windows, mirrors and glass doors; use lint-free microfiber to avoid streaks.
- Floor tools — flat mop with washable pads, mop bucket, and a steam mop if floors permit (avoid on unsealed hardwood).
- Bucket and wringer — for mop use and rinse cycles; two-bucket method (wash/rinse) reduces cross-contamination.
- Carpet cleaner or extraction machine — rent or buy a machine for used-home carpets; pre-treat stains and use manufacturer stain removers.
- HVAC filters (correct sizes) — replace existing filters immediately; keep at least two spares for the first 3 months of occupancy.
- Safety supplies — N95 respirators (2–4), chemical-resistant gloves, eye protection, knee pads for floor work.
- Specialty products — grout cleaner with neutralizer, oven cleaner (self-cleaning ovens may need only a wipe), stainless-steel polish if appliances need it.
- Trash and recycling bags — heavy-duty contractor bags for bulky waste and a box for hazardous items (old paint, batteries).
- Tool kit basics — screwdriver, wrench set, flashlight, small step ladder for high cleaning and inspection.
- Labeling supplies — masking tape and marker to mark cleaned areas, or to note items needing repairs.
Stock quantities: for a 3-bed/2-bath home expect to use 2–3 mops pads, 2 HEPA vacuum bags (or empty filters between uses), 2–4 liters total of concentrated all-purpose cleaner, and one carpet-cleaning treatment per major carpeted room.
For supply quick-checks use our house cleaning supplies checklist.
Step-by-Step New House Cleaning Checklist: Room-by-Room Guide
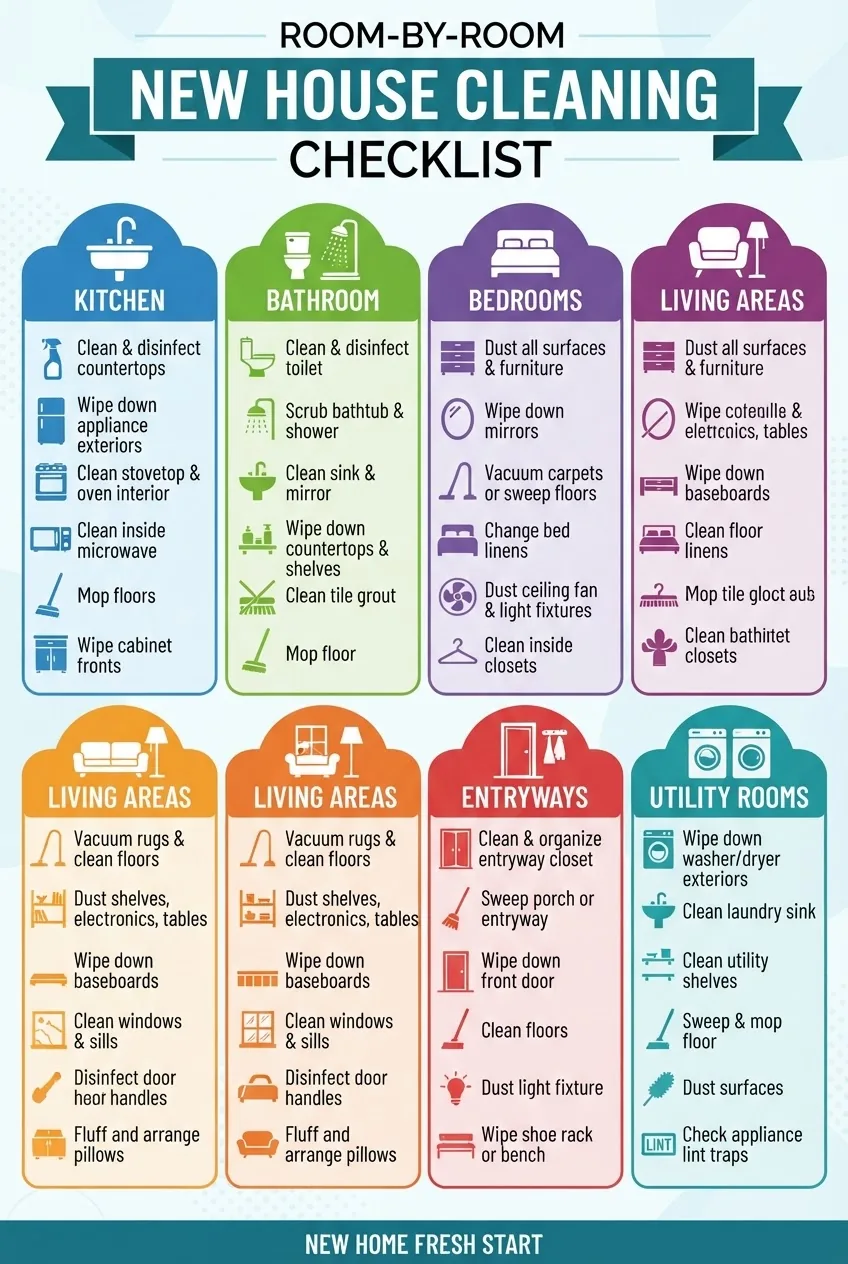
Follow the numbered steps below room by room. Each item lists action, tools, timing and specific settings when relevant. Tackle rooms in this order for best efficiency: entryway → kitchen → bathrooms → bedrooms → living areas → utility spaces. Between rooms, change microfiber cloths and empty dirty water to avoid cross-contamination.
-
Kitchen: deep-clean and sanitize food-prep zones
Estimated time: 3–5 hours for a standard kitchen. Tools: degreaser, microfiber cloths, oven cleaner, stainless-steel cleaner, HEPA vacuum, mop.
- Empty and inspect cabinets: Remove all shelf liners, vacuum cabinet interiors with HEPA attachment (setting: low suction for delicate shelving), wipe with neutral pH cleaner and replace liners or allow to air dry for 1–2 hours.
- Degrease range hood and filters: Soak metal filters in hot water with 1 cup baking soda for 20–30 minutes, scrub with a stiff brush, rinse and dry. Wipe exterior with degreaser and a microfiber cloth.
- Deep clean the oven: For self-cleaning ovens run the manufacturer-recommended cycle; for chemical clean, follow label dwell times and ventilate for 2–4 hours. Remove racks and soak in a degreaser solution for 2 hours, then scrub.
- Sanitize sinks and faucets: Scrub with an antimicrobial cleaner, run hot water for 2 minutes and flush aerators (unscrew and soak in vinegar for 20 minutes to remove scale), reattach.
- Appliance exteriors and interiors: Pull fridge away from wall and vacuum coils with brush attachment (turn power off at plug), discard any old food left behind, clean gaskets with mild detergent and inspect for mold. For washers/dryers in kitchen-adjacent utility areas, run a clean cycle with manufacturer cleaner.
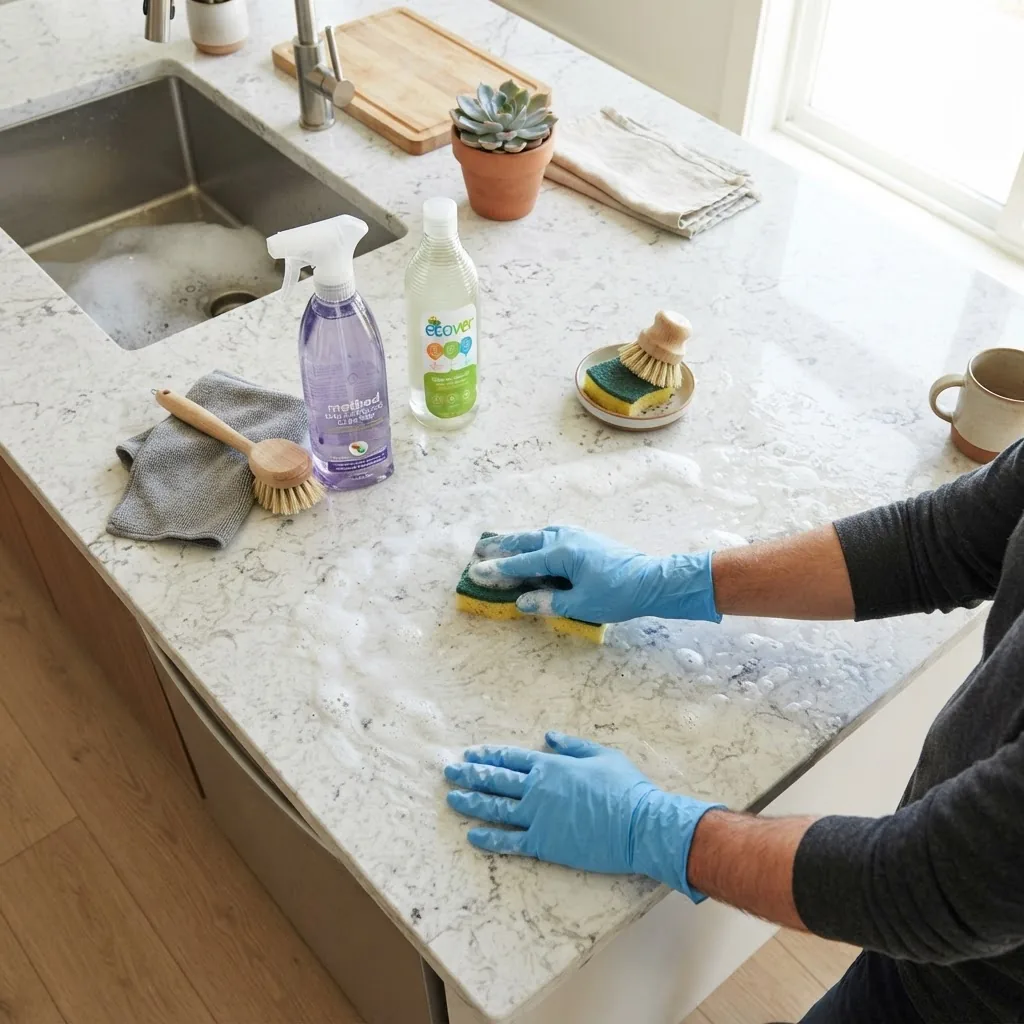
- Countertops and backsplash: Use surface-appropriate cleaners (stone: pH-neutral, laminate: mild soapy water). Disinfect high-touch areas using label dwell time; do not use bleach on stone surfaces.
- Floor cleaning: Vacuum corners with HEPA; mop using the two-bucket method. If tile grout is dirty, scrub grout lines with a grout brush and neutralizer, then rinse thoroughly. For sealed hardwood, use a barely-wet microfiber mop and avoid steam.
- Final checklist: Check under appliances (fridge, stove) for debris, replace HVAC filter if return is in kitchen, and set a note if any appliance requires repair or servicing.
Tip: Use color-coded cloths for food-prep surfaces (e.g., green) and non-food areas (e.g., blue) to avoid cross-contamination.
-
Bathrooms: sanitize, descale and ventilate
Estimated time: 1–2 hours per full bathroom. Tools: descaler, bleach alternative for grout, glass cleaner, toilet bowl disinfectant, grout brush, microfiber cloths.
- Ventilate and assess: Open windows and run exhaust fan for at least 30 minutes before and after chemical use; test fan operation and note any weak airflow (builds case for further inspection).
- Shower/tub deep clean: Pre-soak tiles and grout with a descaling solution for 10–15 minutes, scrub grout lines with a stiff brush, and rinse. If mold is visible beyond surface staining, document and consider remediation — severe mold requires professionals.
- Shower doors and curtains: Remove doors and tracks where possible; clean tracks with a brush and disinfectant. Launder or replace curtains; soft curtains: wash on warm with 1 cup vinegar.
- Toilets: Apply bowl disinfectant with 10-minute dwell time, scrub under rim, and disinfect outside surfaces focusing on handles and seat hinges.
- Sinks, counters and cabinets: Wipe with neutral cleaner, disinfect handles, and vacuum cabinet interiors. Replace drawer liners or clean them separately.
- Mirrors and fixtures: Clean mirrors with glass cleaner; polish chrome fixtures with microfiber to restore finish. Flush fixtures by running hot water for 2 minutes to clear stagnant water.
- Floors: Vacuum then mop; grout floors: scrub grout joints paying attention to thresholds. Seal grout if older and porous (apply sealant per product instructions).
Note the difference between cleaning and remediation: if mold covers >10 sq ft or you smell musty odors after cleaning, contact a certified remediator.
-
Bedrooms: dust, air and prepare sleeping spaces
Estimated time: 30–90 minutes per bedroom. Tools: HEPA vacuum, microfiber cloths, mattress cleaner or steam cleaner (if suitable), ladder for ceiling fan/fixtures.
- Ceilings, fixtures and fans: Dust ceiling corners and fan blades using an extension duster; set fan to low and check for wobble. Remove and clean light fixtures where possible and replace bulbs as needed (note bulb type).
- Closets and shelving: Empty, vacuum interiors, wipe shelving, and check for pest signs or water stains. Document and photograph any staining for future repair.
- Mattress and bedding: Vacuum mattress on both sides with HEPA attachment for 5–8 minutes per side; spot-treat stains and allow mattress to air in sunlight if possible for 2–4 hours before moving bedding in.
- Windows and blinds: Wipe frames, wash blinds or vacuum with brush attachment, and clean window tracks of debris. For high pollen seasons, consider a 24–48 hour indoor airing before placing linens.
- Floors: For carpets: perform a hot water extraction with appropriate cleaner or hire a pro; for hard floors: sweep and mop per surface instructions.
Privacy tip: If moving into a previously occupied home consider replacing bedroom door hardware and key cylinders as part of move-in security.
-
Living Areas: remove dust reservoirs and condition soft surfaces
Estimated time: 1–3 hours depending on square footage. Tools: HEPA vacuum with upholstery tools, microfiber dusting system, steam cleaner for upholstery if fabric permits.
- High dusting first: Dust crown moldings, vents and top-of-cabinet areas using microfiber dusters; allow dust to fall and finish with a HEPA vacuum at floor level.
- Upholstery and curtains: Vacuum upholstery with brush tool, pre-test fabric for water/steam cleaning on a hidden area (15-minute dry test). For velvet or delicate fabrics, use dry cleaning only or professional services.
- Electronics and media components: Power down and dust vents, backs and remote controls; disinfect high-touch items with a 70% isopropyl wipe (avoid screen damage — consult manufacturer guidance).
- Carpets and rugs: Vacuum thoroughly, then test a small area and run a carpet extractor across major traffic paths. Let carpets dry 6–12 hours with fans and dehumidifier if needed.
- Floors and baseboards: Wipe baseboards with mild cleaner and damp microfiber; mop floors last to remove settled dust from dusting.
-
Entryways and mudrooms: control dirt and assess seals
Estimated time: 30–60 minutes. Tools: broom, HEPA vacuum, doormat, door sweep kit, silicone lubricant.
- Door frames and thresholds: Vacuum debris from weatherstrip channels and apply silicone lubricant to hinges and locks.
- Floor runner prep: Deep clean tile or vinyl and install a durable doormat; for rugs, shampoo or steam-clean high-traffic runners.
- Seal checks: Inspect weatherstrips and door sweeps; note gaps larger than 1/4″ for later sealing or DIY repairs.
-
Utility spaces: laundry, mechanical rooms and garage
Estimated time: 1–2 hours. Tools: broom, HEPA vacuum, degreaser, flashlight, ladder.
- Washer and dryer: Run washer on a clean cycle with 1 cup white vinegar or a manufacturer cleaner; vacuum behind appliances and clean dryer lint traps and exhaust ducts (inspect ducts visually for obstructions).
- HVAC intake and returns: Vacuum returns, replace or install new HVAC filters — MERV 8–13 recommended for typical homes, higher (MERV 13) for allergy concerns; note exact filter sizes.
- Garage and mechanical areas: Sweep concrete, check for oil stains, and inspect water heater and sump pump for visible leaks.
- Tool and supply organization: Keep cleaning supplies in labeled bins; store hazardous chemicals locked away and log their locations.
Walk-through tip: After utility cleaning run all major mechanical equipment (furnace, water heater, HVAC) for 15 minutes to listen for abnormal noises and to confirm operation.
Common mistakes and how to avoid them
I once tried to speed through a rental home’s oven without ventilating; the chemical fumes set off the smoke alarms and left a residue smell for 48 hours. Now I always open windows and schedule heavy-chemical tasks for the first morning, and I keep a box fan running out a window for two hours after use.
- I used a steam cleaner on unsealed hardwood and caused cupping — always check surface finish and manufacturer guidance before steam cleaning.
- I mixed bleach with ammonia-based cleaners once; never mix chemicals. Always use one product per surface and rinse between different product types.
- I vacuumed before high-dusting; I now dust from top-to-bottom so settled dust gets cleaned after upper surfaces are addressed.
- I skipped HEPA filtration and reintroduced allergens—use HEPA vacuums and replace HVAC filters immediately.
Verification checklist (quick pass)
| Area | What to verify |
|---|---|
| Kitchen | No grease in hood filters, fridge coils vacuumed, sink fixtures rinsed and aerators cleaned |
| Bathrooms | Grout clean, exhaust fan running, no visible mold stains |
| HVAC/Utility | Filter replaced (note size), mechanical equipment runs |
| Floors | Carpets extracted or sanitized, hardwood mopped and dry |
When to call a professional
Call a licensed professional if you encounter: suspected structural leaks, mold covering more than 10 sq ft, termite/pest infestations, visible black mold in HVAC ducts, electrical hazards, or unusual gas smells. For deep carpet extraction in large homes, consider a certified cleaner with truck-mounted equipment to ensure rapid drying.
Special Considerations for New House Deep Clean and Home Preparation
Some move-in concerns overlap with repairs and inspections. Address these early to avoid repeating cleaning work or compromising safety.
- HVAC filter replacement and air quality: Replace filters on move-in (sizes documented) and run the system on continuous fan for 24 hours with windows open when weather allows. According to a 2023 CDC guideline on allergen control, improved filtration and ventilation reduce indoor particulate exposure; consult CDC indoor air guidance.
- Pest control measures: If you find droppings or live pests, take photos and schedule an inspection. For ongoing management consider integrated pest management rather than broad-spectrum sprays.
- Mold inspection and remediation: Surface mold can often be cleaned; widespread or hidden mold needs remediation. If remediation is required hire specialists and do not attempt large-area removal yourself.
- Plumbing flushing and fixture checks: Run all cold and hot taps for 5 minutes, flush toilets repeatedly, and check under sinks for leaks; consider replacing supply hoses older than 5 years.
- Safety inspection: Test smoke and CO alarms (replace batteries and test alarms for 10 seconds), check GFCI outlets, and create a simple evacuation plan.
For planning repairs that overlap with cleaning, reference our what to repair before selling a home guidance — early small repairs reduce recurring cleaning effort.
If you prefer scheduled help for minor fixes, consider affordable handyman subscription services to handle recurring small tasks noted during your deep clean.
Bring a formal inspection into your routine by incorporating a comprehensive maintenance inspection checklist and review the common home maintenance problems list to prioritize fixes.
For basic DIY repairs that often arise during move-ins, consult our DIY home repair projects guide.
To verify overall health of the home, follow a healthy homes assessment checklist and explore home improvement online resources for contractor contacts. For large clean-and-fix projects, check local professional house cleaning services list.
For safety and product guidelines see the EPA safer product guidance at EPA Safer Choice, and for home inspector recommendations consult InterNACHI.
Printable and Digital Checklist Templates for New Home Cleaning
After you complete the deep clean, a printable or digital checklist helps keep tasks manageable. Choose a template based on whether you want daily micro-tasks, weekly routines, or a printable sign-off list for each room.
Options and where to use them:
- Printable PDF room checklists: Use a full house PDF checklist to mark off completed items by room; ideal for tracking pre-move contractors and cleaners. Download our printable home cleaning checklist templates.
- Mobile checklist apps: Use apps that support recurring tasks and photo attachments for proof of work. Try options listed in our top home maintenance apps for scheduling and management.
- Customizable spreadsheets: Build a 30/60/90-day plan with columns for task, assigned person, status and notes (include photos of problem areas).
- Printable formats: Provide a one-page “move-in sign-off” sheet for contractors to confirm completed cleaning items and repairs.
For digital-first households, sync checklists to calendar reminders and maintenance apps to convert one-time deep clean tasks into recurring upkeep items.
After Cleaning: Tips to Maintain Your New Home’s Cleanliness
Transitioning from deep clean to sustainable upkeep requires a realistic routine and small daily habits that prevent the need for repeated large cleans.
For ongoing care beyond your initial deep clean, refer to our Complete Home Maintenance Checklist for Yearly and Monthly Care to keep your new home in top shape.
- Quick daily upkeep (10–20 minutes): wipe high-touch surfaces, do a 10-minute kitchen tidy, and sweep entryways to reduce tracked-in dirt.
- Weekly tasks: vacuum all carpets, mop high-traffic hard floors, clean bathroom surfaces and spot-clean kitchen appliances (schedule 60–90 minutes).
- Monthly tasks: check HVAC filters and replace if dusty (every 1–3 months based on occupancy), clean range hood filter if cooking heavily, and inspect under sinks for slow leaks.
- Seasonal deep cleans: deep-extract carpets, clean behind major appliances, wash windows and rotate mattresses every 6 months.
Useful resources to build an ongoing program include our home maintenance projects for easier upkeep, printable maintenance schedule template and program guide, and the home maintenance tips for new homeowners.
Make routines stick by assigning tasks to specific days (e.g., dust Saturdays, vacuum Wednesdays) or delegating chores from our household chores list and checklist.
For more day-to-day mastery, see our household keeping guide for daily cleaning and the house cleaning schedule guide. To stock supplies efficiently use the complete house needs checklist.
Practical habits make the deep clean last; follow simple rules like “clean-as-you-go” in the kitchen and a 10-minute nightly tidy to keep surfaces ready for guests or sudden inspections (e.g., pre-listing).
Conclusion: Your Path to a Fresh, Healthy New Home
By following this new house cleaning checklist you’ll create a clean, safe baseline that reduces allergens, prevents early wear and helps you spot issues before they grow. Start with the supplies list, follow the room-by-room steps, and adopt a small maintenance rhythm to keep the home in top shape. Ready to get started? Print your room checklist, schedule 1–3 days, and move in with confidence.