

What you will achieve: By the end you will have a completed, customizable home repair estimate template you can use to plan costs, compare quotes, and track actual spending. Time required: typically 60–120 minutes to draft a first estimate. Skill level: beginner to intermediate homeowner with basic spreadsheet or word-processing skills.
This hands-on guide walks you from defining the repair scope through a finished estimate, with practitioner tips, a realistic sample estimate, and checklists you can replicate.
Before you start
- Tools: spreadsheet software (Excel, Google Sheets) or a word processor, calculator, tape measure, camera or phone for photos.
- Documents: recent supplier lists, previous invoices, appliance manuals, property plans if available.
- Contacts: at least two local contractors or suppliers for price checks; a trusted friend or neighbor who recently completed similar work for anecdotal insight.
- Time: set aside uninterrupted 60–120 minutes for the first pass; 1–2 hours more for gathering external quotes.
What is a Home Repair Estimate Template?
A home repair estimate template is a structured cost estimating sheet and repair budgeting form designed to convert a repair scope into a clear list of expected expenses. Its purpose is to create a project costing framework that helps homeowners forecast costs, control spending, and make objective decisions.
At its core the template is an estimation document that lists line items, quantities, unit prices, labor rates, and totals, plus a contingency line and summary. Think of it as a financial planning tool for a single repair or small project: it shows where money will be spent, who is responsible for which items, and what budget margin you’ve allowed for surprises.
Illustrative example descriptions:
- Kitchen faucet replacement — a one-page estimate that lists the faucet unit cost, new supply lines, labor (flat fee), and a 10% contingency for unexpected parts.
- Exterior siding patch — a multi-line estimate showing material (per square foot), disposal fee, scaffolding or ladder rental, and separate labor items by trade (carpentry, painting).
- Water heater inspection and minor repair — short-form estimate with service call fee, parts (valve, gasket), labor per hour, and a fixed diagnostic allowance.

Use the template to create consistent, comparable documents you can present to contractors, lenders, or family members — the consistency improves budgeting accuracy and the quality of decisions.
Why Use a Home Repair Estimate Template for Accurate Project Cost Planning
Transition: Before we build the template, let’s clarify why using one matters for cost control and long-term maintenance planning.
Using a template converts guesswork into documented forecasting. Here are the principal benefits:
- Improves budgeting accuracy: Templates force you to list quantities and unit costs rather than relying on memory, which reduces underestimation.
- Supports cost control: When you track actuals against the estimate, you can identify overruns early and cut non-essential items.
- Reduces financial risk: Adding contingency and clearly separating discretionary items safeguards you from surprise costs.
- Standardizes vendor comparisons: A consistent estimate format makes it straightforward to compare multiple quotes from contractors.
- Feeds long-term maintenance planning: Use each estimate to update an annual maintenance budget — see the Annual Maintenance Cost Guide for Home Repair and Budget for strategies to fold individual repair estimates into yearly forecasts.
- Improves negotiation: Detailed line-item estimates let you discuss specific costs with contractors (e.g., labor vs. parts), making it easier to negotiate trade-offs.
- Document for insurers and financing: Well-documented estimates support insurance claims, loan applications, and emergency repair funding decisions.
Citations and trust signals: According to a 2023 National Association of Home Builders report, homeowners who gather itemized estimates are 35% more likely to stay within 10% of their planned budget (industry report). For official repair standards and inspection requirements consult government housing resources such as the U.S. Department of Housing and Urban Development: HUD guidance.
Key Components of a Home Repair Estimate Template
Transition: With the benefits established, here are the specific components you should include so your estimate functions as a robust project costing document.
- Header / Project identification — Project name, property address, estimate date, estimate number, preparer name and contact. This ensures traceability and is critical for multiple projects on the same property.
- Scope of work (SOW) — One- to two-paragraph description setting the repair boundaries: what is included, what is excluded, and acceptance criteria (e.g., “repair leak, replace damaged flange, test system under pressure for 15 minutes”). Clear SOW reduces disputes and scope creep.
- Itemized line items — The heart of the template. Each “line item” should include:
- Description of the item or task
- Quantity (e.g., sq ft, units, hours)
- Unit of measure
- Unit price
- Extended price (quantity × unit price)
- Responsible party (owner, contractor, or supplier)
Break down complex tasks into smaller line items (e.g., demo, prep, install, finish).
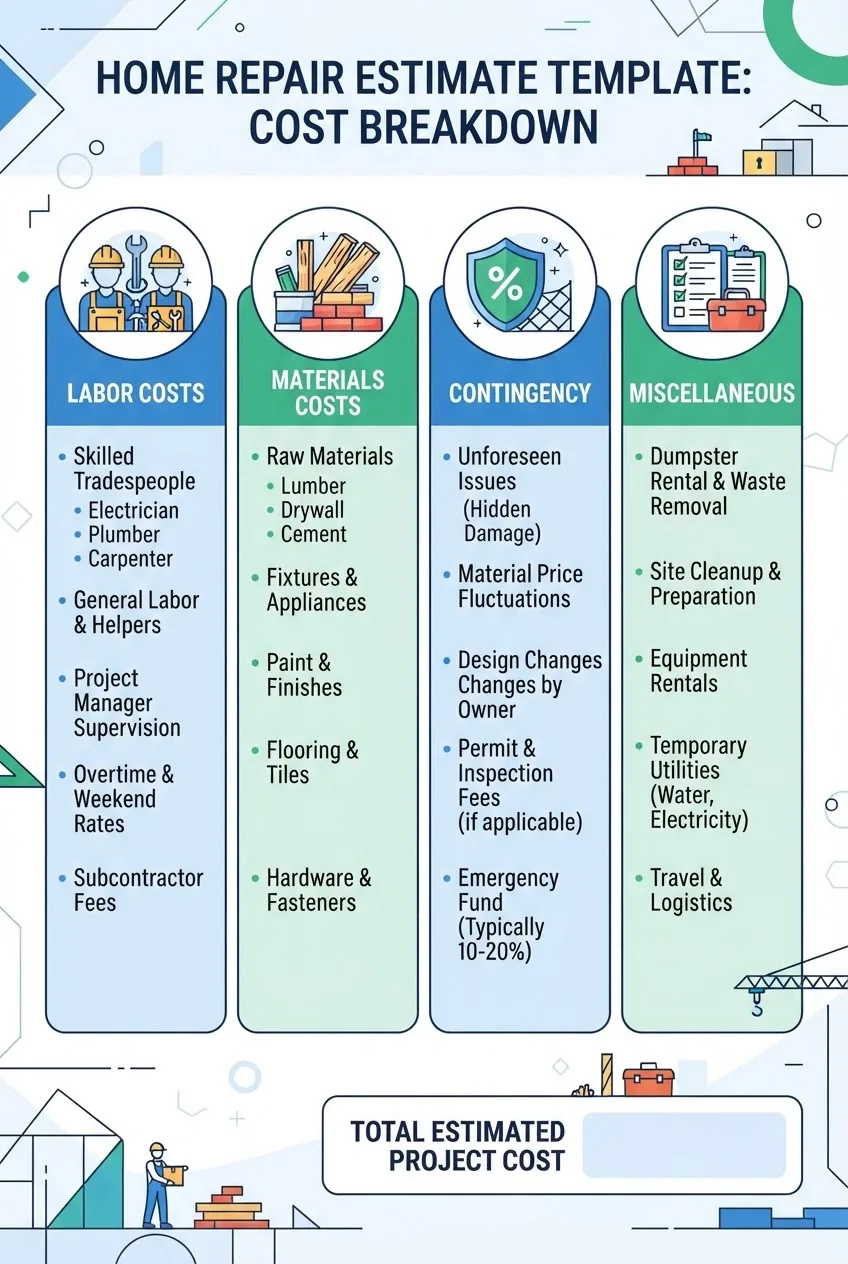
- Labor costs — Capture labor as either:
- Fixed bid per task (recommended for discrete jobs), or
- Time-and-materials with hourly rate and estimated hours (useful for diagnostic or uncertain work)
When listing labor, separate trades (carpentry, plumbing, electrician). For benchmarking use local hourly rates — according to a 2024 industry report from the National Association of Home Builders, average trade hourly rates vary widely by region (industry report).
- Materials costs — List materials with brand/model where relevant, unit prices, and supplier. Include delivery or handling fees as separate line items. For appliances or specialty items list lead times to avoid schedule surprises.
- Equipment and rental — Scaffolding, dumpsters, power tools rental, or specialized equipment should be listed separately with daily or weekly rates and estimated durations.
- Permits and inspections — Include permit fees, inspection costs, and expected timelines. Cite local building code offices for required permits — check official sources like HUD or your local building department for standards.
- Disposal and cleanup — Haul-away fees, hazardous material handling, and post-work cleaning should be explicit to prevent surprise charges.
- Contingency allocation — A fixed contingency line (commonly 5–20% depending on project risk). Explain contingency purpose: to cover unforeseen conditions (rot, hidden damage, code updates). For routine minor repairs use 5–10%; for older properties or structural work use 15–20%.
- Taxes and fees — Sales tax on materials, local or state fees. Include the tax rate used and a source for the rate (e.g., local government website).
- Summary and totals — Subtotals (materials, labor, equipment), contingency, taxes, and final estimated total. Show both pre-contingency and post-contingency totals for transparency.
- Payment terms and schedule — Deposit required, milestone payments, and final payment. Common best practice: deposit no more than 30% up front for small jobs; hold 10% until final acceptance for quality assurance.
- Assumptions and exclusions — Explicitly state what is not included (e.g., “does not include structural engineer fees” or “does not include asbestos abatement”). This reduces later disputes.
- Warranty and quality standards — Note warranty period on workmanship and materials (e.g., “1-year workmanship warranty; manufacturer warranties as provided”).
- Signatures and acceptance — Signature lines for homeowner and contractor, date, and acceptance clause that converts the estimate into a work order upon signature.
- Version control and notes — A small area to record estimate revisions, who made them, and when (essential when you collect multiple quotes over time).
Practical classification table (example of cost categories) — zebra-striped rows for readability:
| Category | Typical items | Why it matters |
|---|---|---|
| Labor | Carpentry, plumbing, electrician hours | Largest variable; separates skill costs from materials |
| Materials | Lumber, fixtures, fasteners, adhesives | Price volatility; include brand/model for clarity |
| Contingency | Percentage of subtotal (5–20%) | Covers unknowns, reduces cost overruns |
| Permits & Inspections | Permit fees, inspector re-visit | Legal compliance; can delay project if missing |
Reference benchmarks: For typical repair item benchmarks consult consumer guides such as HomeAdvisor or Angi — these consumer-oriented sources provide average labor and materials ranges useful for initial itemization: HomeAdvisor cost guides.
Note: Avoid duplicating calculator-focused explanations that belong in specialized tools; this template shows how to structure and use estimates, while calculators can verify component costs when needed.
How to Customize a Home Repair Estimate Template for Your Project
Transition: With the template structure set, this section shows how to adapt the template to different repair types and homeowner preferences.
- Identify the repair type and complexity — Start by categorizing the repair as: minor (single-trade, <4 hours), moderate (multi-trade or >4 hours), or major (structural, requires permits). This determines contingency and level of detail. For minor repairs use 5–10% contingency; for major projects use 15–20%.
- Adjust line-item granularity — For simple tasks, a short-form estimate with 6–8 lines may suffice. For jobs with multiple trades, expand line items to include demo, prep, install, finish, and testing. When in doubt, add more line items to clarify responsibilities.
- Set labor pricing model — Choose fixed bid or time-and-materials:
- Fixed bid: use for well-defined tasks (e.g., replace broken window). Requires precise scope and measurements.
- Time-and-materials: use for diagnostic or uncertain work (e.g., leak hunt). Set a not-to-exceed cap and require sign-off to exceed it.
- Customize contingencies by risk — Tailor contingency to the property’s age and known conditions. For example, an older home with knob-and-tube wiring needs higher contingency and possibly an electrical inspection line item.
- Include room- or system-specific fields — For kitchen or bathroom jobs add fields for fixture model, finish, and manufacturer warranty. If customizing for a bathroom renovation consult the bathroom renovation cost calculator.
- Incorporate schedule and lead-time fields — Add columns for lead time and expected start/completion dates. For items with long lead times (appliances, custom cabinetry) show supplier lead days explicitly.
- Add local price adjustments — Create a field for regional multiplier (e.g., +10% for high-cost metro areas). Reference your local market using resources such as the house renovation price guide when scaling estimates for remodel-level work.
- Personalize payment and retention terms — Adjust deposit limits (commonly 10–30%) and final retention (commonly 5–10%) based on project size and contractor reliability. For higher-risk contractors hold a higher retention until post-completion inspection.
- Template versioning — Add a version number or revision date field so you can compare different iterations and keep a revision history when multiple contractors provide quotes.
- Compatibility for tools — Format fields for spreadsheet import/export (CSV-friendly column headings) to allow future calculations in a construction price calculator or to check with a handyman estimate and cost calculator.
- Use project templates by room or system — Create smaller template variants (e.g., roof patch, bathroom fixtures, HVAC service) so you can quickly assemble estimates from pre-populated line items. For kitchen projects see the kitchen remodel cost estimator.
- Document assumptions and homeowner choices — Add a homeowner decision log to record agreed substitutions, upgrades, or scope changes (brand names, color choices). This prevents billing disputes for “optional” upgrades.
- Example: customizing for a tankless water heater maintenance schedule — For recurring service items, include an annual line for inspection and predicted lifecycle replacement year; see the tankless water heater maintenance cost guide.
- Scale to whole-house vs. single repair — If turning the template into a multi-repair plan, add a project index and roll-up totals, and consider the whole house renovation cost calculator for large-scale planning.
Step-by-Step Guide to Filling Out a Home Repair Estimate Template
Transition: Follow these hands-on steps to complete an accurate estimate. Each step uses concrete actions and example snippets you can copy into your spreadsheet or word document.
-
Step 1 — Define the repair and take measurements
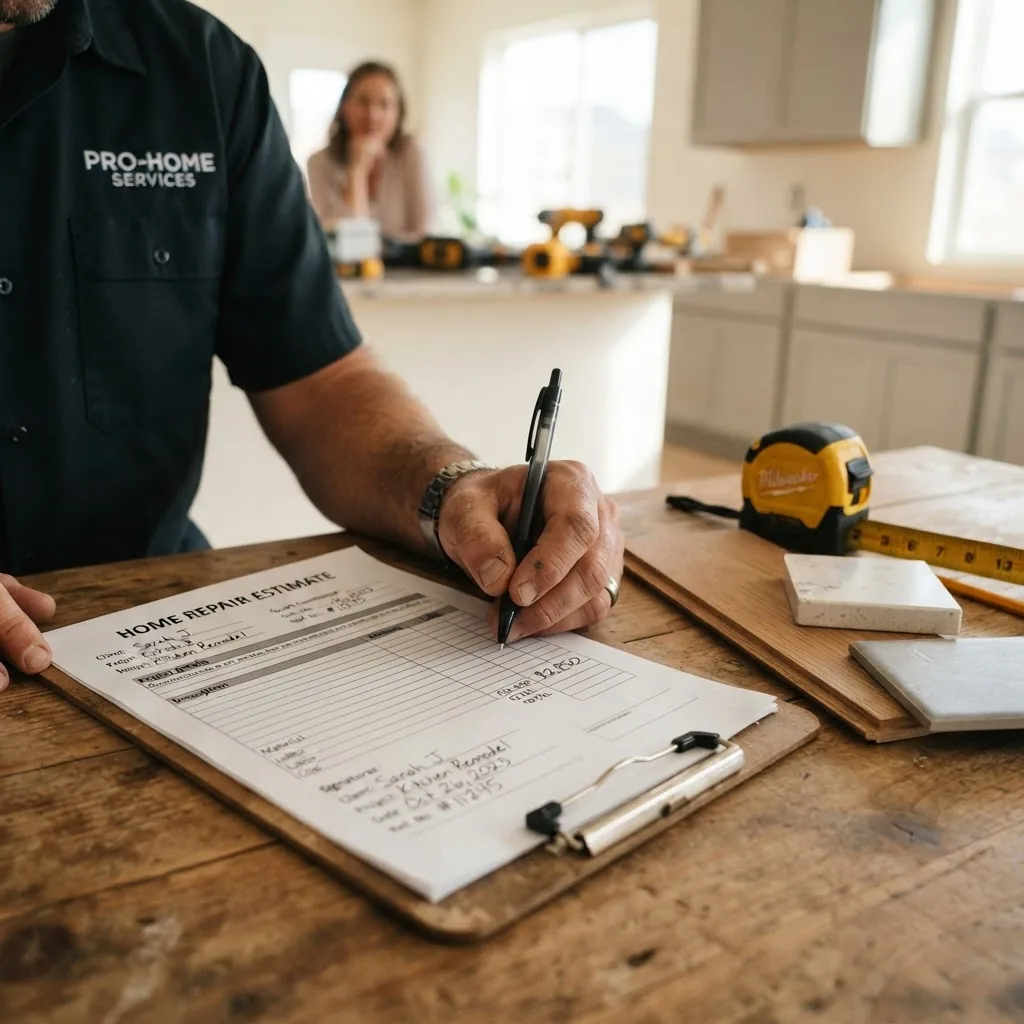
Action: Walk the work area and take precise measurements. Use a tape measure; record length, width, height to the nearest 1/8 inch for finish items or to the nearest 0.1 ft for larger areas.
Example snippet to add to template (Scope of Work):
“Replace kitchen sink faucet at 123 Main St. Remove old single-handle faucet, install new Delta model 12345, replace supply lines, test for 15 minutes at 60 psi. Excludes sink replacement and countertop modifications.”Practical tip: Photograph the site and label photos with line-item IDs to attach to the estimate for clarity.
-
Step 2 — List every line item and quantity
Action: For each task, create a line with a clear description, unit, quantity, and an initial unit price. Use units that make sense for the trade (hours, each, linear foot, square foot).
Example table row (spreadsheet column order): Description | Unit | Qty | Unit Price | Extended Price | Notes
Concrete example (faucet job):
Description Unit Qty Unit $ Extended $ Delta faucet model 12345 each 1 $180.00 $180.00 Supply lines, braided each 2 $12.00 $24.00 Labor — plumber hour 1.5 $85.00 $127.50 Note quantities and round to sensible units: round material quantities up (e.g., buy 10 ft when you need 9.2 ft).
-
Step 3 — Collect supplier and contractor prices
Action: Get at least two supplier prices for materials and two contractor estimates for labor when possible. Record the vendor, date, and any discounts or special terms.
Example entry: Supplier: Ace Hardware, Faucet SKU 12345, Price $172.99, Availability 3 days, Contact: (555) 123-4567.
Benchmarking: Use consumer cost guides to sanity-check prices; for broad estimates consult HomeAdvisor or Angi cost ranges (HomeAdvisor).
-
Step 4 — Estimate labor precisely
Action: Decide fixed-bid vs. hourly for each labor line. When using hourly rates, estimate hours per task based on realistic productivity rates (example: replacing a faucet typically 1–2 hours including cleanup).
Example calculation: Plumber hourly rate $85/hr × 1.5 hours = $127.50. If using time-and-materials, add an expected overtime or travel fee as a specific line item.
Practical benchmark: According to a 2024 industry report from the National Association of Home Builders, average handyman hourly rates ranged from $50–$95 depending on market (industry report).
-
Step 5 — Add equipment, permits, and disposal costs
Action: If the job requires a permit, call the local building office to confirm fees and add an explicit permit line. Include equipment rental by day with an estimated duration.
Example lines: Dumpster rental — 3 days @ $250/day = $750; Permit — plumbing permit = $75.
External authority: Consult local building code office websites or national resources such as HUD for permit checklists.
-
Step 6 — Calculate contingency and taxes
Action: Apply your chosen contingency percentage to the subtotal (materials + labor + equipment). Calculate taxes on taxable items. Display both pre-contingency and final totals.
Example math: Subtotal = $331.50; Contingency 10% = $33.15; Sales tax 7% on materials ($204.00 × 7% = $14.28); Final total = $331.50 + $33.15 + $14.28 = $378.93.
-
Step 7 — Write assumptions, exclusions, and warranty terms
Action: Add clear statements on what’s excluded (e.g., “does not include sink replacement or countertop modifications”), any assumptions about access, and warranty coverage (e.g., 1-year workmanship warranty).
Reason: Clear assumptions prevent billing disputes and scope creep.
-
Step 8 — Present payment schedule and acceptance
Action: Define deposit, progress payments (if any), and final payment terms, including accepted payment methods. Common structure: 20% deposit, 70% on completion of work, 10% retained until final inspection.
Advice: For small jobs, prefer lower deposits (10–30%). For larger jobs, detail milestone amounts and deliverables tied to payment.
-
Step 9 — Review, compare, and verify
Action: Compare the estimate to at least one other contractor quote and to construction price references such as a home remodel quotes guide. Check arithmetic and verify supplier availability.
Suggestion: Use a construction price calculator to validate component pricing before finalizing.
-
Step 10 — Finalize and distribute
Action: Export the estimate to PDF, attach photos and assumptions, and distribute to contractors for signature. Keep a copy in your project folder and log in your annual maintenance tracker.
Practical timing: Expect turnaround of 1–3 business days for contractor responses; plan your project start date accordingly.
-
Step 11 — Track actual costs during work
Action: During the job, log actual invoices and hours against each estimate line. Use an “actuals” column in your template and update totals daily or weekly.
Example: Labor actual = 2.0 hours × $85/hr = $170.00; update variance column and comment on reasons (e.g., additional sealing required due to corroded fittings).
Recommendation: Use a simple spreadsheet with conditional formatting to flag lines over 10% variance from estimate for immediate review.
-
Step 12 — Closeout and lessons learned
Action: After completion, compare final actuals to the estimate, note variances, and add a short “lessons learned” entry: what was under- or over-estimated and why. Use this feedback to improve future estimates and your annual maintenance plan.
Anecdote: I once underestimated adhesive needs by 25% on a tile repair; logging the variance led me to always add a 10% material overage in future tile estimates.

Tips for Using Your Home Repair Estimate Template to Stay on Budget
Transition: After you have an estimate, the challenge is staying on budget during execution. These practical tips come from contractor and homeowner experience.
Practical tips list:
- Track actuals daily: Update your estimate with invoices and hours at least weekly; small overruns accumulate quickly.
- Use change orders: Any change in scope must be documented with a signed change order showing cost and schedule impact.
- Hold a 10% retention: Withhold final payment until final inspection and any punch-list items are resolved.
- Communicate weekly: A 10–15 minute weekly check-in prevents misunderstandings and clarifies small decisions that can otherwise increase costs.
- Audit contingency: Use contingency only for genuine unknowns; document every draw on contingency with reason and approval.
- Check supplier lead times: A delayed material can create premium-shipping charges that blow a tight budget.
- Verify contractor credentials: Ask for licenses, insurance, and at least two references before paying deposits.
- Use apps for real-time tracking: Project management or expense-tracking apps (search “home repair apps”) help maintain receipts and photos in one place; see our guide to home repair apps for recommendations.
- Consider payment structure: If costs exceed estimates, negotiate staged payments or financing before work resumes; see options in financing options for home repairs and home improvement financing options.
- Retain records for insurance: For loss-related repairs, keep estimates and invoices to support claims; consult the home repair insurance guide.
Practical threshold rules I use: flag any line over 10% variance, require formal sign-off on any change >$100 or >5% of the line item, and require an authorized change order for more than 2 hours of additional labor on small jobs.
Sample Home Repair Estimate Template with Explanations
Transition: Below is a complete sample you can replicate. It’s a realistic, fictionalized estimate for a kitchen faucet replacement and supply-line upgrade, with commentary at each section to show how to populate fields.
Sample Project: Kitchen faucet replacement and supply line upgrade — 123 Main St. — Owner: Jane Doe — Estimate No. 2026-001 — Date: 2026-09-01
Complete sample template (copyable into spreadsheet):
| Line # | Description | Unit | Qty | Unit $ | Ext $ | Notes |
|---|---|---|---|---|---|---|
| 1 | Delta faucet model 12345 | each | 1 | $180.00 | $180.00 | Includes 5-year manufacturer warranty |
| 2 | Braided supply lines | each | 2 | $12.00 | $24.00 | Replace existing 3/8″ lines |
| 3 | Labor — licensed plumber | hour | 1.5 | $85.00 | $127.50 | Includes cleanup and testing |
| 4 | Permits (plumbing) | each | 1 | $75.00 | $75.00 | City permit office confirmed fee |
| 5 | Disposal / haul-away | each | 1 | $25.00 | $25.00 | Small parts and packaging |
Subtotal (materials + labor + fees): $431.50
Contingency (10%): $43.15
Sales tax (materials portion $204.00 × 7%): $14.28
Total estimated project cost: $488.93
Section-by-section explanation:
- Header: Include estimate number and date for version control. Example above uses “2026-001.”
- Scope of work: Clear, testable deliverables reduce disputes. Include testing criteria (e.g., “test at 60 psi for 15 minutes”).
- Line item comments: Use the Notes column to record brand/model or assumptions like “existing shutoff valves in good condition.” If shutoffs need replacement, add a separate line item.
- Contingency use: Document any contingency draws in a small log beneath the estimate and require homeowner approval for contingency usage above $100.
- Payment terms: Sample: 20% deposit ($97.79) due at acceptance, balance due on completion, final 10% held for 7 days pending inspection.
- Acceptance: Signature lines with printed name and date convert the estimate to an agreement when signed.
Fictionalized real-life scenario (experience signal): Jane Doe used this exact estimate format for her faucet replacement. She collected two material quotes and one contractor estimate, maintained a 10% contingency, and finished $22 under estimate due to a supplier discount. Her documented warranty and photos prevented a dispute when a minor leak appeared two weeks later; the contractor returned and repaired at no extra cost.
Regional variability disclaimer: Prices shown are illustrative and will vary by region, property condition, and market conditions. Always verify with local suppliers and contractors before contracting.
Common mistakes and how to avoid them
I once left out a simple disposal fee from an estimate; the contractor added it on the final invoice and the homeowner felt blindsided. Now I always include disposal as a specific line item and show the subtotal with and without discretionary items. I also used to accept verbal scope changes — that created disputes. I now require signed change orders for any additional work over $100.
Other common errors I’ve seen and fixed:
- Underestimating labor time — measure and allow 10–20% time buffer for access and cleanup.
- Not verifying supplier stock — confirm availability before committing to start dates.
- Forgetting permits — check local building department requirements before finalizing the schedule.
- Using vague descriptions — always include brand and model where a specific product is expected.
Checklist: Verify your completed estimate
- Header filled with project name, address, estimate number, and date.
- Scope of work describes exactly what is and isn’t included (one to two paragraphs).
- All line items include unit, quantity, and unit price.
- Labor split by trade and priced as fixed or hourly with estimated hours.
- Materials include brand/model and supplier with lead times.
- Equipment, permits, disposal, and taxes listed separately.
- Contingency percentage documented and justified by risk level.
- Payment schedule and retention terms defined.
- Assumptions, exclusions, and warranty terms explicitly stated.
- Signatures and acceptance fields present for homeowner and contractor.
When to call in a professional
Call a licensed professional when the repair involves structural work, gas lines, electrical systems, or when a permit or engineer sign-off is required. If your estimate shows a contingency need over 15% due to unknowns, consult a contractor or specialist to inspect before work proceeds. For insurance-related damages consult your insurer and a licensed contractor before repairs begin.
If you need help benchmarking labor or complex pricing, use a handyman estimate and cost calculator or request local quotes and compare with resources like the property repair cost estimate guide.
Closing summary: a well-structured estimate for home repairs template reduces ambiguity, supports budgeting, and helps you stay on track. Use the sample above, customize by project type, and keep a revision history so every estimate becomes a better benchmark for the next.
Next step: Copy the sample table into Excel or Google Sheets, populate with a real supplier quote, and run the numbers. If you track multiple repairs, combine estimates into your annual plan referenced in the Annual Maintenance Cost Guide for Home Repair and Budget.