

Home maintenance tips for new homeowners: by the end of this hands-on guide you’ll have a one-page, repeatable plan, a prioritized list of DIY repairs, and a tool kit setup you can complete in 6–10 hours total over a weekend; skill level: beginner (basic hand skills, able to follow step-by-step instructions).
Before you start
- Prerequisites: basic safety awareness, access to main water shutoff and electrical panel, smartphone for photos and notes.
- Materials: flashlight, fresh replacement HVAC filters (sizes noted on furnace), plumber’s tape, silicone caulk, drop cloths.
- Documentation: home warranty papers, recent inspection reports, appliance manuals (scan or photograph them).
- Time: block two 3–4 hour sessions (indoor checks + tool setup; seasonal tasks separate).
Understanding Home Maintenance Basics for New Homeowners
Preventive maintenance is the mindset that turns unexpected breakdowns into scheduled tasks — like changing an HVAC filter instead of calling for a full system repair. Think of home upkeep like vehicle maintenance: regular oil changes and tire checks prevent roadside breakdowns; routine home checks reduce emergency repairs and costs.
What you’ll cover in this section:
how to prioritize tasks, what to inspect monthly vs. seasonally, and simple ways to track repeat tasks.
- Identify high-impact systems. Walk the home and list HVAC, plumbing, electrical, roof/gutters, and major appliances. Note last service dates and warranty windows in your smartphone notes.
- Adopt a preventive schedule. Mark monthly, quarterly and annual tasks. Monthly: test smoke detectors, inspect HVAC filters, look for leaks. Quarterly: test GFCI outlets, check water heater relief valve. Annual: roof/gutter inspection, HVAC professional tune-up.
- Create inspection checkpoints. For each system, write 3–6 quick checks (e.g., for plumbing: check under sinks for dampness, watch water meter for phantom use, inspect visible pipes for corrosion).
- Prioritize safety items first. Ensure functioning smoke and CO detectors, accessible fire extinguisher, and clear egress paths. These reduce risk immediately.
Real-life note: I once inherited a house where the previous owner skipped quarterly checks; a small, ignored mold patch behind a washer led to a $1,200 remediation. Regular spot checks caught the next issue before it grew.
For a more exhaustive inspection beyond these basics, see comprehensive maintenance inspection checklist.
Transition: with a clear understanding of the systems and priorities, the next step is assembling the right tools and supplies so you can act when inspections reveal small issues.
Essential Tools and Supplies Every New Homeowner Should Have
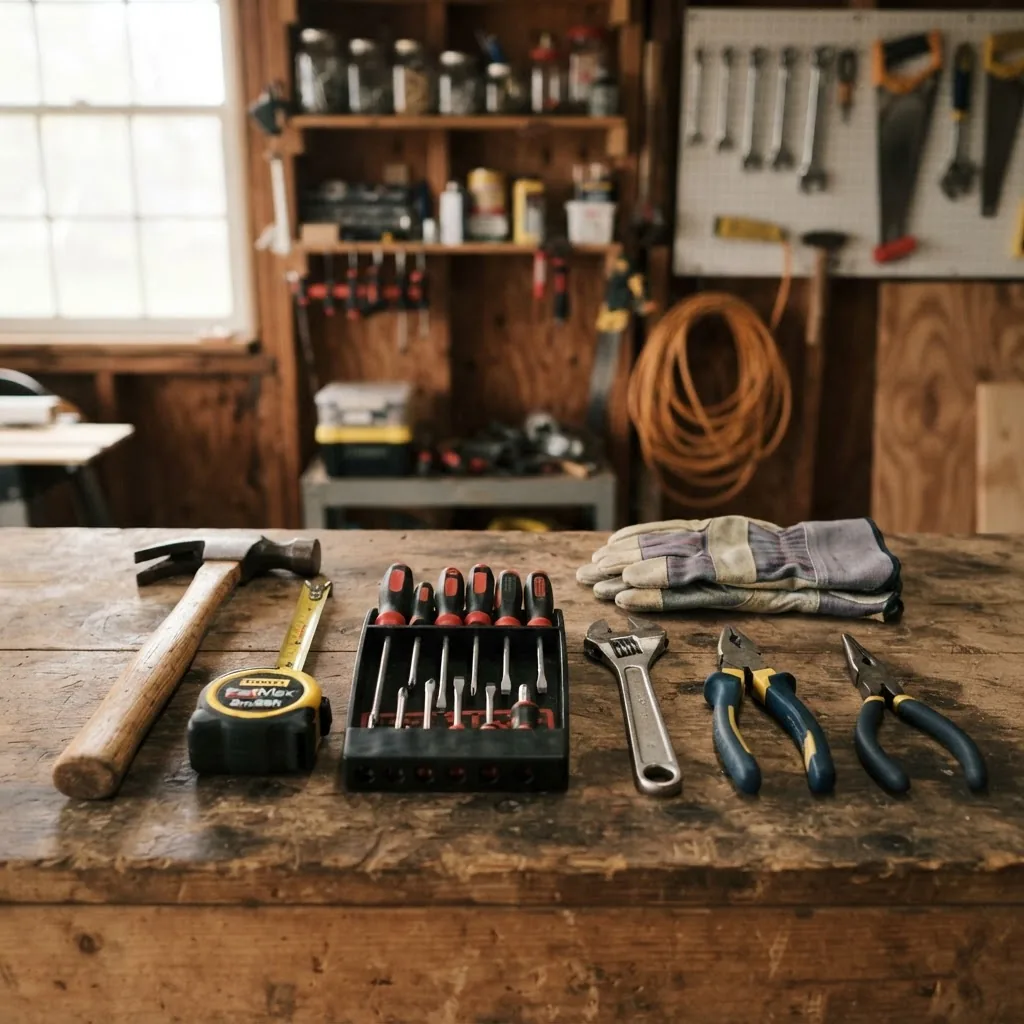
Build a compact home maintenance kit that fits a 12″ toolbox and a small shelf. Buy quality over bargain-basement where tools are safety-critical (e.g., insulated screwdrivers).
- Basic hand tools (minimum set). 16 oz hammer, 8–10″ adjustable wrench, slip-joint pliers, needle-nose pliers, set of screwdrivers (Phillips and flathead sizes #1–#3), 25 ft tape measure, utility knife, hex key set.
- Fastening and sealing supplies. 120-count assortment of screws and anchors, 3/4″ and 1/2″ Phillips drywall anchors, roll of plumber’s (Teflon) tape, 10 oz tube of silicone caulk and caulk gun.
- Electrical and safety gear. Non-contact voltage tester, GFCI tester, insulated screwdrivers, work gloves, safety glasses, N95 masks for dusty work.
- Plumbing quick fixes. Plumber’s wrench (adjustable), small basin wrench, a set of washers (1/2″, 3/8″), a simple drain snake (3–6 ft), WD-40 or penetrating oil.
- HVAC and appliance basics. Replacement HVAC filters (write sizes on the box), drip pan, soft brush for vents, lightweight shop vacuum (compact wet/dry).
- Consumables and stationery. Duct tape, electrical tape, permanent marker, labels, notepad for dates, spare batteries (AA/AAA/9V).
- Reference resources. Printed list of shutoff locations and appliance manuals, and a list of local pros for plumbing, electrical and HVAC.
Where to learn more product choices and reliable suppliers: home improvement online resources.
Transition: with the right tools at hand, you can move into focused indoor maintenance tasks that prevent the majority of common failures.
Indoor Home Maintenance Tips to Prioritize
These are the core indoor maintenance checks that protect comfort and minimize emergency costs. I structure these as repeatable steps you can complete in an hour each month.
- Replace HVAC filters monthly or quarterly. Check filter type stamped on the filter frame (common sizes: 16x20x1, 20x25x1). Replace every 30 days for pets/allergies, 90 days for low-use homes. When changing: turn thermostat off, slide old filter out, wipe fiberglass housing with damp cloth, slide in new filter with airflow arrow pointing into unit; reset any filter-change reminders.
- Test smoke and CO detectors. Press the test button monthly; replace 9V or sealed batteries yearly. Replace detectors every 10 years (smoke) and 7–10 years (CO) depending on manufacturer. According to a 2024 industry report by a national safety authority, functioning detectors reduce fatal fire incidents significantly — check manufacturer dates on the unit.
- Inspect plumbing for leaks and drips. Under each sink, open cabinet doors and visually check for moisture, soft wood, or mold. Turn off all water, note the water meter reading, avoid using water for 1 hour; if meter moves, you likely have a leak. For a visible leaky faucet, tighten handle packing nut (turn off water at supply valves first), replace worn washers: remove handle, replace rubber washer sized to old one (common sizes 1/2″ or 3/8″), reassemble and test.
- Check toilets for phantom flushes and running. Remove tank lid, press flapper — if water keeps running, replace flapper ($6–12). Adjust float so refill stops at 1″ below overflow tube. Run a food coloring test: add a few drops to tank; if color appears in bowl within 10 minutes, you have a leak.
- Maintain major appliances. For refrigerators, clean condenser coils every 6 months with a coil brush. For washing machines, run an empty hot wash with 1 cup white vinegar monthly to reduce mold; check door seals and clear lint traps on dryers and vents to prevent fires.
- Electrical quick checks. Test GFCI outlets with a GFCI tester quarterly. Never open panels unless trained — instead, label circuits clearly and document what each breaker controls. For flickering lights: tighten bulb and check fixture; if problem persists, note time and affected circuits and call a pro.
- Small repairs — caulk and touch-ups. Inspect caulk around tubs and sinks; if brittle or missing, remove with a utility knife and apply a 1/4″ bead of silicone caulk; smooth with a wet finger or tool and allow 24 hours to cure.
- Ventilation and moisture control. Run exhaust fans during showers and cooking; aim for 20–30 minutes after use. Keep indoor humidity between 30–50% using a hygrometer; if above 60% consider a dehumidifier to discourage mold.
Mini walkthrough — changing an HVAC filter: turn thermostat to OFF, note filter size, slide old filter out and measure, insert new filter with airflow arrow toward furnace, set thermostat to AUTO, and set a calendar reminder for the next change in 30–90 days. This takes 5–10 minutes.
Complement these checks with a deeper clean when needed: deep cleaning house checklist. For projects that reduce repetitive tasks, see home maintenance projects for efficient upkeep. For everyday routines, try these printable daily and weekly home cleaning checklists.
Transition: after mastering indoor routines, map those tasks into seasonal rhythms so nothing is missed across the year.
Seasonal Home Maintenance Tasks for Year-Round Care
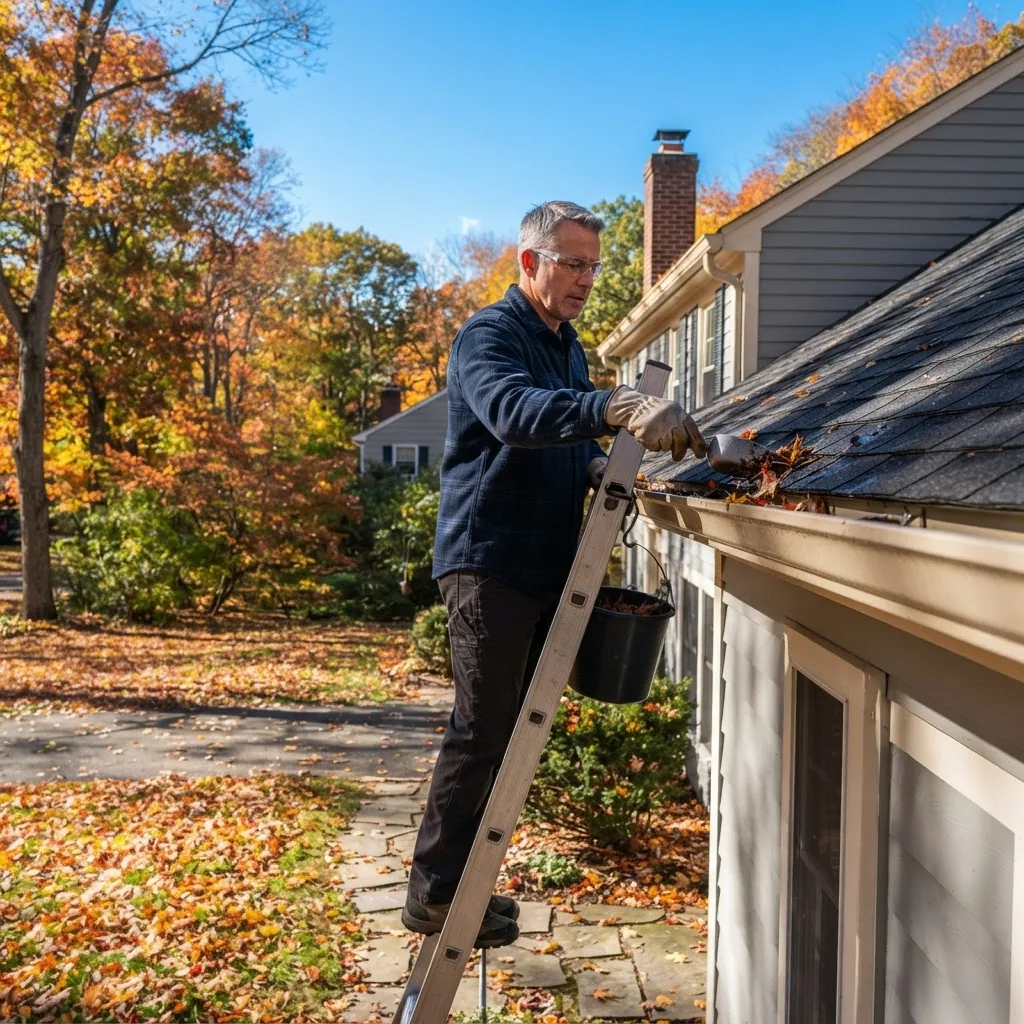
Seasonal upkeep reduces costly surprises. Below are focused, practical tasks for each season with timing and thresholds.
- Spring (Mar–May):
- Inspect roof after winter: look for missing shingles or cracked flashing. If you find 3+ damaged shingles or visible underlayment, schedule a professional roof repair.
- Clean gutters and downspouts — clear debris and run water to test flow; gutters should empty at least 3 ft away from foundation.
- Service HVAC: replace filters, clean outdoor condenser unit (turn power off at disconnect), and schedule a professional tune-up if last service was >12 months.
- Summer (Jun–Aug):
- Check exterior paint and caulking; touch up trim to prevent wood rot. Re-caulk gaps >1/8″ around windows/doors.
- Inspect and clean dryer vent externally and at lint trap; measure airflow — weak airflow (<50% of normal) suggests blockage.
- Run a whole-home plumbing check: test irrigation valves and look for damp spots near foundation after heavy rains.
- Fall (Sep–Nov):
- Winterize outdoor faucets and irrigation systems: drain lines if you live in freezing climates, and shut off exterior valves.
- Service furnace before heating season: replace filters, test thermostat, and schedule a professional safety inspection if furnace is >5 years or noisy.
- Trim trees so branches are at least 6 ft from the roof to reduce storm damage risk.
- Winter (Dec–Feb):
- Inspect attic insulation and ventilation: aim for R-38 to R-60 values in cold climates; add attic insulation if you see cold spots on ceilings or ice dams forming.
- Monitor for ice dams: if you see >1″ of ice buildup at eaves, call a roofer to add proper ventilation or gutter heating solutions.
- Keep a 3-day emergency kit (water, flashlight, battery radio) and confirm main shutoff locations; this saves time and stress during winter outages.
Seasonal checklist example: after fall leaf-fall, clear gutters within 48 hours of the first heavy loss, then again before the first freeze to prevent blockages and ice dams.
Transition: seasonal plans are effective only if you can address small repairs promptly — the next section breaks down common repair essentials and how to handle them confidently.
Basic Home Repair Essentials and How to Handle Common Issues
This section covers the most frequent home repair tips new homeowners need to do themselves and when to escalate to a pro.
- Fix a leaky faucet (simple washer replacement). Turn off local supply valves, open faucet to relieve pressure, remove handle (usually a small screw under a cap), remove old washer and replace with identical size, reassemble, test. Typical cost: $5–15 for parts; time: 20–40 minutes.
- Stop a running toilet. Adjust float and replace flapper if worn. Cost: $5–12. Time: 15–30 minutes.
- Clear a slow drain. Remove and clean the pop-up from bathroom sink; use a small drain snake for kitchen sink clogs (3–6 ft). Avoid chemical drain cleaners — they can damage pipes.
- Reset a tripped breaker and identify root cause. Flip the breaker fully to OFF, then to ON. If it trips again immediately or when a specific appliance runs, unplug the appliance and test outlets; persistent trips require licensed electrician intervention.
- Patch a small drywall hole (under 6 inches). Use a patch kit: clean hole, apply self-adhesive patch, skim with joint compound, sand after 24 hours, prime and touch-up paint. Time: 1–2 hours plus drying time.
- Address minor roof leaks (temporary patch only). Use roof patching tape and roofing cement as a stopgap; always record location and schedule a roofer for a permanent fix within 72 hours to avoid interior damage.
Troubleshooting quick tips:
- If water stains appear on ceilings, press the stain gently; if it feels soft and wet, turn off the nearest water supply and call for help.
- For persistent odors that smell like gas, evacuate immediately and call emergency services and your gas provider.
- When in doubt with electrical or structural issues, stop and consult a licensed professional — don’t escalate risk.
If you are planning to sell in the near term, review repairs to prioritize before selling and the common home maintenance problems and solutions.
To build skills, try some simple DIY home repair projects with clear step-by-step instructions.
Transition: knowing how to repair common items is essential, but you also need an organized schedule to make these tasks habitual; read on for building that schedule.
Creating and Using a Home Maintenance Schedule
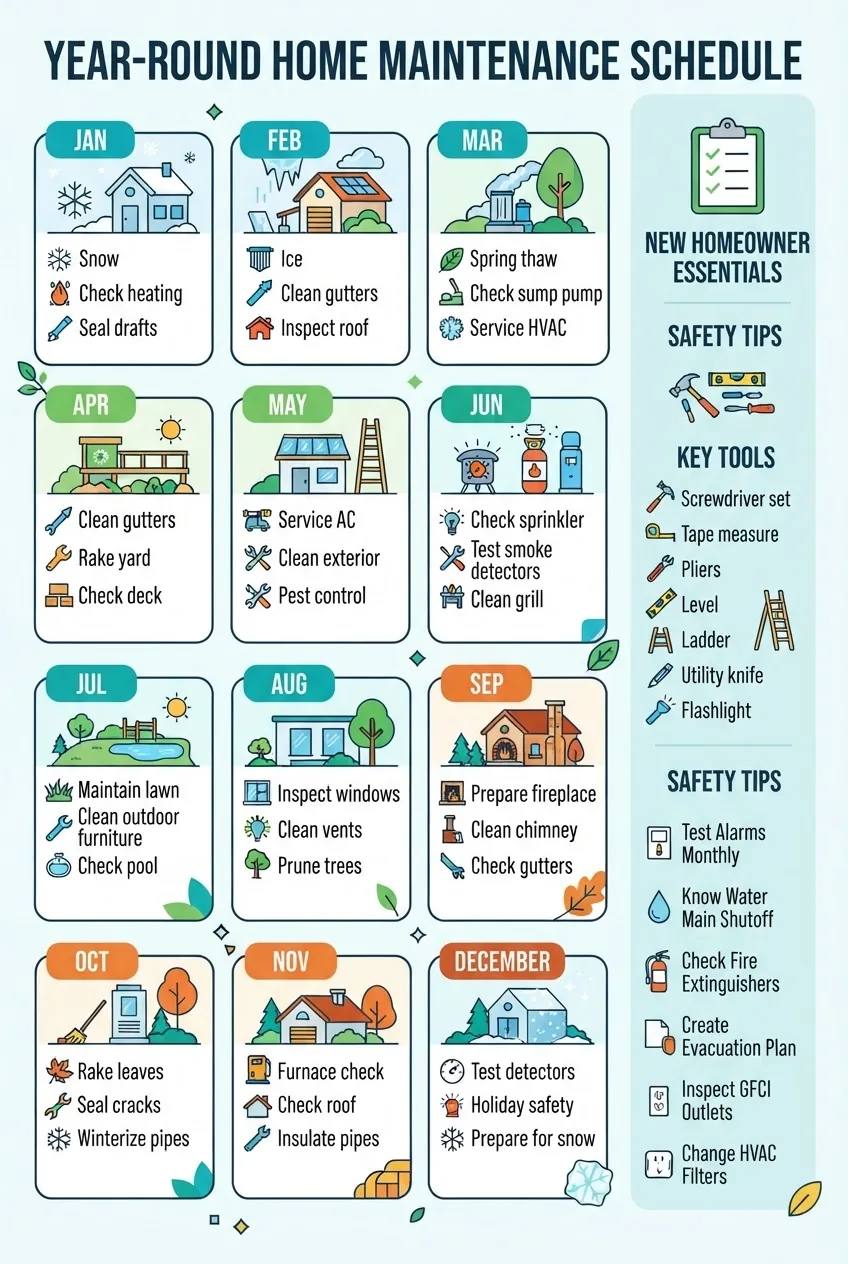
Turn tasks into habits with a maintenance schedule that maps daily, monthly, quarterly and annual tasks to realistic time slots.
- List and categorize every task. Use four categories: Safety, Systems (HVAC/plumbing/electrical), Exterior (roof/gutters/landscaping), and Interior (appliances, caulking, paint touch-ups).
- Assign cadence and owner. Example: replace HVAC filter — cadence: monthly; owner: you; estimated time: 10 minutes; materials: replacement filter. Enter this into calendar with reminders set 1 day before.
- Use digital tools and a paper backup. Choose one app for reminders and keep a printed card near the breaker panel showing main shutoffs. For digital aids see top home maintenance apps for scheduling. For printable templates see maintenance schedule template and program guide.
- Block time realistically. Example schedule: 15 minutes weekly for quick indoor checks, 1 hour monthly for deeper system checks, 3–4 hours quarterly for seasonal transitions, and 2–3 hours yearly for major inspections.
- Track costs and decisions. Log parts replaced and professional service costs; over time you’ll see cost vs. DIY time trade-offs and can adjust which jobs are subcontracted.
For a master planning resource, use this complete home maintenance checklist for yearly and monthly care.
Transition: keeping schedules and records improves safety decisions; the next section outlines safety considerations and when to call professionals.
Safety Considerations and When to Seek Professional Help
Home safety is non-negotiable. Follow these guidelines, and when a task crosses these thresholds, get qualified help.
When not to DIY: any work involving your home’s main electrical panel, gas lines, structural changes (load-bearing walls), or suspected mold remediation beyond a small patch. For safety standards and codes consult authoritative sources: U.S. Department of Housing and Urban Development (HUD), National Association of Home Builders (NAHB), and ASHRAE for HVAC maintenance standards.
According to a 2024 industry report by a national safety association, electrical- and gas-related incidents account for a significant portion of emergency home repairs; when you smell gas or see electrical sparking, evacuate and call emergency services immediately.
Affordable options: if you prefer monthly help or predictable costs, consider affordable handyman subscription services for routine tasks and small repairs. For home health checks, consult the healthy homes assessment checklist.
Safety checklist highlights:
- If a breaker trips and you smell burning, shut main breaker and call an electrician.
- For visible structural movement (new cracks >1/4″, doors that bind), get a structural engineer.
- Gas odors require immediate evacuation and utility emergency response.
I once attempted a gas appliance adjustment thinking it was a simple fix; a certified technician found a faulty connector and prevented a dangerous leak. Don’t risk gas lines.
Transition: final sections provide practitioner advice on common mistakes, a verification checklist, and guidance on when to call a pro.
Common mistakes and how to avoid them
From hands-on experience I’ve made — and seen — the following mistakes. I share them so you can avoid the same costs and delays.
- Ignoring small leaks: I once left a slow under-sink drip for months; mold and cabinet damage followed. Fix or isolate leaks within 48 hours.
- Using chemical drain cleaners: I used an over-the-counter drain chemical that caused pipe pitting; now I use a mechanical snake or call a plumber.
- Attempting major electrical work without permits: I tried to rewire a light circuit and ended up with repeated breaker trips; now I call a licensed electrician for anything beyond outlet replacement.
- Skipping pre-winter checks: I failed to insulate exposed pipes and had two burst lines during a cold snap. Insulate pipes when temperatures approach freezing.
Compact checklist — verify your work
| Item | Done (✓) | Notes |
|---|---|---|
| Main water shutoff located and labeled | ||
| Electrical panel labeled | ||
| HVAC filter replaced | Size noted: __________ | |
| Smoke/CO detectors tested | Battery date: __________ | |
| Gutters cleared (seasonal) | Last cleared: __________ |
When to call in a professional
Call a licensed pro immediately for: gas smells, electrical sparking or repeated breaker trips, structural movement, significant roof leaks, sewage backups, or mold covering >10 sq ft. For ongoing maintenance or uncertain small repairs, consider a subscription service or scheduled contractor visits.
Cost vs. benefit note: small tasks you can complete in under an hour (e.g., filter changes, basic caulking) generally favor DIY; labor-intensive or hazardous tasks (gas, structural, electrical) are more cost-effective and safer when done by licensed professionals. According to a 2024 industry report by a home-building association, preventive maintenance reduces emergency repair spend by an estimated 20–40% annually.
Final takeaways: set a simple schedule, equip a compact toolkit, prioritize safety items first, and build the habit of quick monthly checks. Start with a single weekend: locate shutoffs, replace the HVAC filter, test detectors, and clear visible gutter debris — that effort prevents most common problems.
Ready to systemize your care? Download the master checklist and set reminders using your preferred app, then schedule one routine task this weekend — your future self will thank you.