Air conditioner maintenance and service — by the end of this guide you will be able to perform reliable DIY upkeep, run a seasonal tune-up checklist, and decide exactly when to call a professional. Realistically plan 3–5 hours for hands-on DIY tasks and one annual 60–90 minute walkthrough for a full tune-up; the guide assumes basic DIY skills and comfort with household tools.
Introduction to Air Conditioner Maintenance and Service
This hands-on guide explains residential HVAC maintenance benefits and the practical steps homeowners need for effective air conditioning preventive maintenance. Regular HVAC maintenance reduces energy use, prevents breakdowns, and extends equipment life. According to a 2024 industry report, routine maintenance can improve system efficiency by 5–15% and reduce emergency repairs by roughly 30% when paired with seasonal tune-ups.
What you’ll achieve: clean filters, inspected coils, a checked refrigerant baseline, verified thermostat accuracy, and a simple log to track service dates. The approach here is DIY-friendly but professional-grade: we’ll show you where to stop and call in a pro for certified refrigerant handling or complex electrical work.
Before you move on, review the prerequisites below; they keep the work safe and effective.
Before you start
- Basic skills: turning off breakers, using a multimeter, changing filters, and following safety labels.
- Tools & materials: flat-head and Phillips screwdrivers, 10–12” adjustable wrench, coil brush, soft nylon brush, shop vacuum with brush attachment, fin comb, fin straightener, 20–30 ft. garden hose, 5–10 ft. ladder (if needed), replacement filters (size noted on filter frame), HVAC-grade coil cleaner, nitrile gloves, safety glasses, and a flashlight.
- Documentation: manufacturer’s model/serial number and the unit’s installation manual (download if needed).
- Safety: know how to switch the circuit breaker and gas valve (if present). Do not attempt refrigerant recovery or high-voltage work yourself; that requires certified technicians per EPA rules.
Transition: now that you’re prepared, we’ll map the system so each maintenance task makes sense.
Understanding Your Air Conditioning System Components
Knowing components gives you context for maintenance trade-offs. Below are the main parts of most residential systems and what each does.
- Air filter — Captures dust and particles; restricts airflow when clogged. Replace or clean monthly during heavy use. A clogged filter reduces efficiency and stresses the blower motor.
- Evaporator coil (indoor) — Absorbs heat from indoor air; delicate aluminum fins. Dirty coils lower heat transfer and can cause icing. Clean yearly with a soft brush or manufacturer-approved coil cleaner.
- Condenser coil (outdoor) — Releases heat outdoors; exposed to debris and vegetation. Keep 2–3 ft clear and rinse with a hose once per season.
- Compressor (outdoor) — The system’s pump for refrigerant. Audible signs (clanking, loud hum) or oil leaks indicate professional service is needed.
- Refrigerant lines (liquid/suction) — Carry refrigerant between indoor and outdoor units. Insulation on the suction line reduces efficiency loss; replace if brittle. Refrigerant level issues require EPA-certified handling.
- Thermostat — Controls setpoints and system cycles. Basic units can drift over time; calibration and fresh batteries keep accuracy within ±1°F.
- Blower motor and fan — Move air through the system; inspect belts (if present) and bearings for wear. Lubricate motors if manufacturer permits.
- Drain pan and condensate line — Collect and evacuate condensate. Clogs cause overflow and water damage; flush lines with a cup of household bleach diluted in a gallon of water or use specialized enzyme treatments monthly during high-humidity months.
- Ductwork (central systems) — Distributes conditioned air. Leaks reduce delivered cooling and increase energy use; seal visible gaps with mastic or foil tape.
- Air handler (indoor) — Houses the evaporator coil and blower; access it for filter changes, coil inspections, and blower cleaning.
Transition: with parts identified, we’ll move into concrete DIY tasks you can perform safely at home.
Routine DIY Maintenance Tasks for Homeowners
This section is the practical core: step-by-step homeowner actions for regular home ac unit maintenance, filter cleaning, coil cleaning, thermostat calibration, and seasonal checks. Work left-to-right: indoor then outdoor.
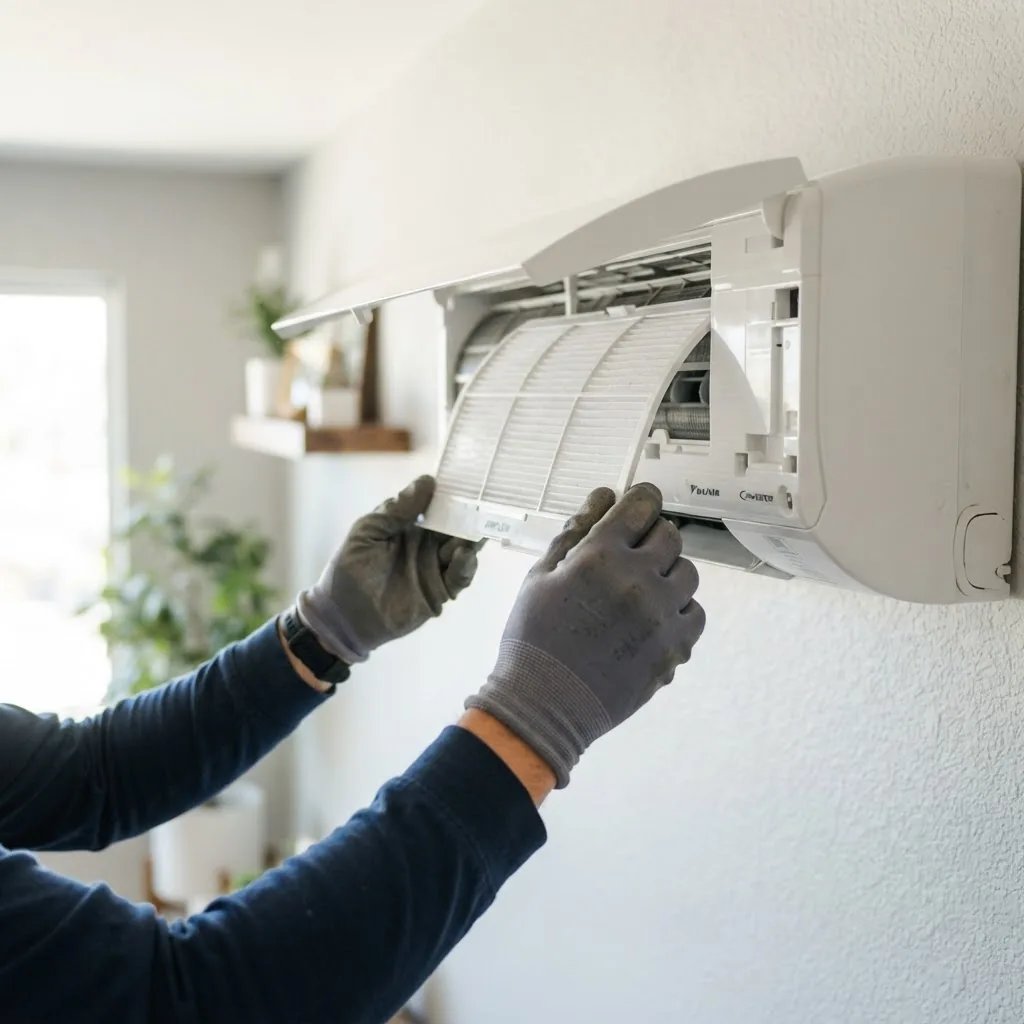
- Turn off power — At the breaker panel, switch off the AC breaker and flip the outdoor unit’s disconnect. Verify the system is off by setting the thermostat to fan mode and ensuring nothing runs. This prevents electrical shock. (Time: 2 minutes)
- Replace or clean the filter — Remove the filter; note its size (e.g., 16x25x1). Disposable pleated filters: replace every 1–3 months; high-efficiency filters (MERV 8–11) often monthly in dusty homes. Washable filters: vacuum, then rinse with water and air-dry fully before reinstalling. Dirty filters should not be reused. (Time: 5–15 minutes)
- Inspect and vacuum the air handler — Open the air handler access panel. Vacuum dust and lint from the blower and accessible surfaces using a soft brush attachment. Remove debris from around the motor and blades but do not force into electrical components. (Time: 15–30 minutes)
- Check the condensate drain — Locate the drain line and pan. Pour one cup of diluted bleach (1 part bleach to 10 parts water) or a commercial enzyme cleaner into the access; then flush with a gallon of water. Use a wet/dry vacuum on the outdoor drain stub if water is not flowing freely. Clean monthly during heavy use. (Time: 10–20 minutes)
- Clean the evaporator coil — If accessible: remove the evaporator access panel, inspect for dust and oil, and use a soft nylon brush and no-rinse foaming coil cleaner per label. Avoid bending fins. If fins are bent, use a fin comb to straighten. Do not attempt to remove the coil if not removable or if the unit requires disassembly beyond the panel. (Time: 30–60 minutes)
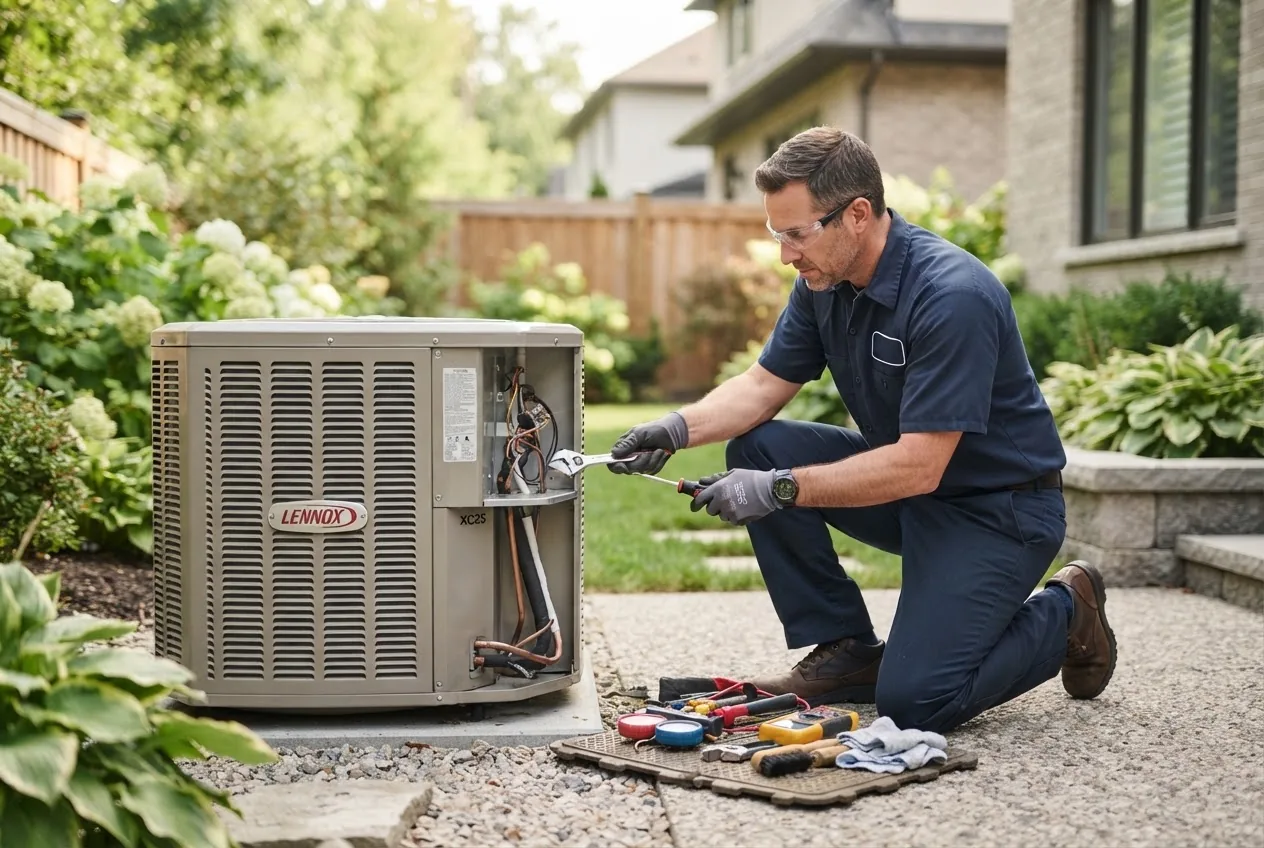
- Clear and clean the outdoor condenser — Remove large debris by hand, then use a hose on low pressure to spray from inside out. Leave at least 24–36 inches clearance around the unit. Trim vegetation and remove grass clippings. For heavy soil, use a coil cleaner designed for outdoor condensers. (Time: 20–40 minutes)
- Inspect fan blades and condenser fins — Check for bent fins and straighten with a fin comb. Inspect fan blades for cracks or chips; replace damaged blades. Tighten any loose guard screws. (Time: 10–20 minutes)
- Check refrigerant line insulation — Ensure suction line insulation (black foam sleeve) is intact; replace missing sections with pre-slit insulation secured with HVAC tape. Exposed lines reduce efficiency by up to several percentage points. (Time: 10 minutes)
- Test thermostat and controls — Replace thermostat batteries annually. For mechanical thermostats, verify calibration with a second thermometer: set to 75°F and confirm within ±1°F. For smart thermostats, check firmware updates and schedule settings. (Time: 10–15 minutes)
- Measure airflow and temperatures — With the system running: measure return and supply vents. Temperature split (return minus supply) should be 16–22°F on a typical dry day. Use an inexpensive digital thermometer at vents or a pocket thermometer. If split is <12°F or >24°F, further troubleshooting is needed. (Time: 15 minutes)
- Listen and smell for abnormalities — Run the system and note unusual noises (rattling, squealing) or burning smells. These are early signals of mechanical or electrical problems. If present, turn the system off and schedule professional inspection. (Time: 5 minutes)
- Record maintenance actions — Log filter changes, coil cleanings, refrigerant alerts, and any parts replaced. Keep manufacturer model/serial and technician notes. A simple maintenance log reduces missed tasks and verifies warranty coverage. (Time: 5 minutes)
- Seasonal checks to add — Before cooling season: inspect duct insulation, clear condensate lines, and verify outdoor unit clearance. Before heating season (if combined systems): test dual-fuel or heat pump settings and change filters. (Time: 30–60 minutes per season)
- Prioritize consumable replacements — Keep spare filters (3–6) on hand, a gallon of coil cleaner, a small fin comb, and a supply of 1”–2” screws for panels. Consumables save emergency trips and support on-time maintenance. (Time: ongoing)
Transition: after mastering routine checks, you’ll know when to escalate to professional HVAC maintenance.
Complementary reading: effective home cleaning tips and how to clean a house properly help improve indoor air quality.
For extended DIY guidance see how to maintain your AC system and detailed cleaning guidance like deep cleaning a house.
When and Why to Schedule Professional HVAC Maintenance
DIY tasks cover most preventative work, but certified professionals bring diagnostic tools, refrigerant certifications, and safety training. Schedule a professional tune-up at least once a year for split systems; twice yearly if you have a heat pump (pre-cooling and pre-heating). According to a 2024 industry report, annual professional maintenance reduces emergency repairs by about 30% and improves seasonal reliability.
Key reasons to hire professionals:
- EPA-certified refrigerant handling and leak repair (required for refrigerant addition or recovery).
- Electrical diagnostics and motor replacements beyond homeowner toolsets.
- Compressor or refrigerant circuit repairs and brazing.
- Accurate refrigerant charging using digital gauges and superheat/subcooling calculations.
- Warranty compliance — many manufacturers require documented annual professional checks to keep warranties valid.
Typical professional services included in an air conditioner maintenance plan:
air conditioner maintenance plan
- Full system inspection and safety checks
- Electrical testing of capacitors, contactors, and breakers
- Refrigerant charge verification and leak detection
- Compressor, fan motor, and blower performance testing
- Coil cleanings and condensate drain service
- Thermostat calibration and control testing
- System performance report and maintenance log
When to consider specialist services or repairs:
- professional aircon maintenance and repair for compressor failures, sealed-system leaks, or major electrical faults.
- aircon servicing and installation services when replacing units or modifying ducting.
- furnace cleaning and heater maintenance to align heating system upkeep.
- gas heater maintenance services when you have combined HVAC systems.
- heating tune-up and furnace maintenance for seasonal alignment.
- heat pump repair and maintenance if you use a heat pump.
- water heater cleaning and maintenance and related links for integrated home system care.
Find local professionals and compare plans: local air conditioning repair services. Preventive services providers are listed and compared in industry directories and customer reviews.
Also consider preventive maintenance companies offering bundled services: preventive maintenance services.
Transition: next we’ll walk through a professional-grade AC tune-up you can emulate at home where safe.
Detailed Guide to an AC Tune Up and Preventive Measures
This is a step-by-step how-to and checklist for a full ac unit tune up. Follow each step in order. If you reach any task that requires opening sealed components or refrigerant lines, stop and call a certified technician.
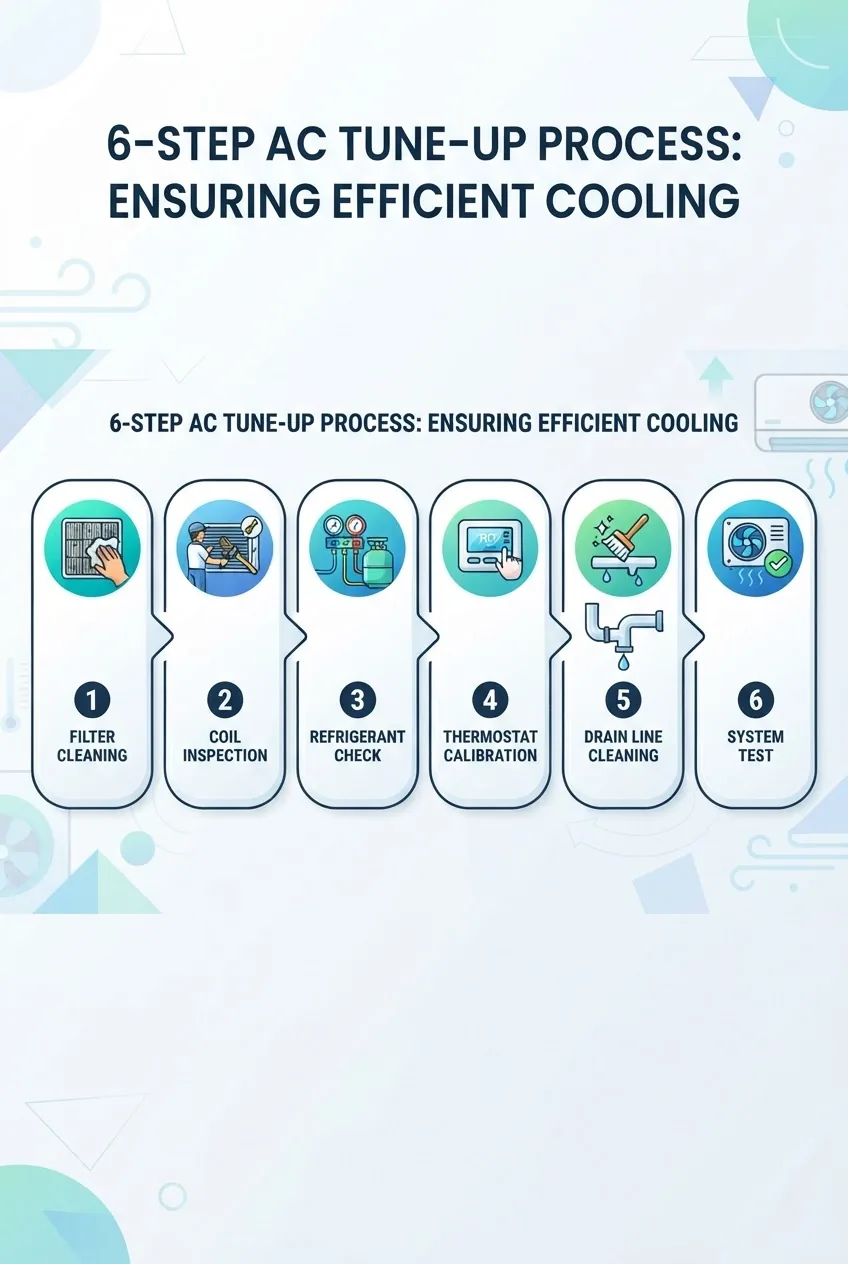
- Verify system documentation and safety — Gather the unit’s model/serial, manual, and previous service records. Turn off power at the breaker and outdoor disconnect. Use voltage tester to confirm zero voltage at the unit before touching wiring. (Time: 5 minutes)
- Change or clean filters and inspect airflow — Replace disposable filters with correctly sized pleated filters (MERV 8–11 recommended for most homes). Run the system on fan for 5 minutes and verify airflow across all primary vents. If airflow low, inspect ducts for detached connections and filter orientation. (Time: 10–20 minutes)
- Clean evaporator and condenser coils — Indoor first: vacuum accessible dust, apply manufacturer-approved no-rinse coil cleaner, and allow to drain into the drain pan. Outdoor: remove debris, then spray from inside out with low-pressure water and apply condenser coil cleaner if required. Use a fin comb to straighten up to 10–15 damaged fins; more extensive damage needs pro attention. (Time: 45–90 minutes)
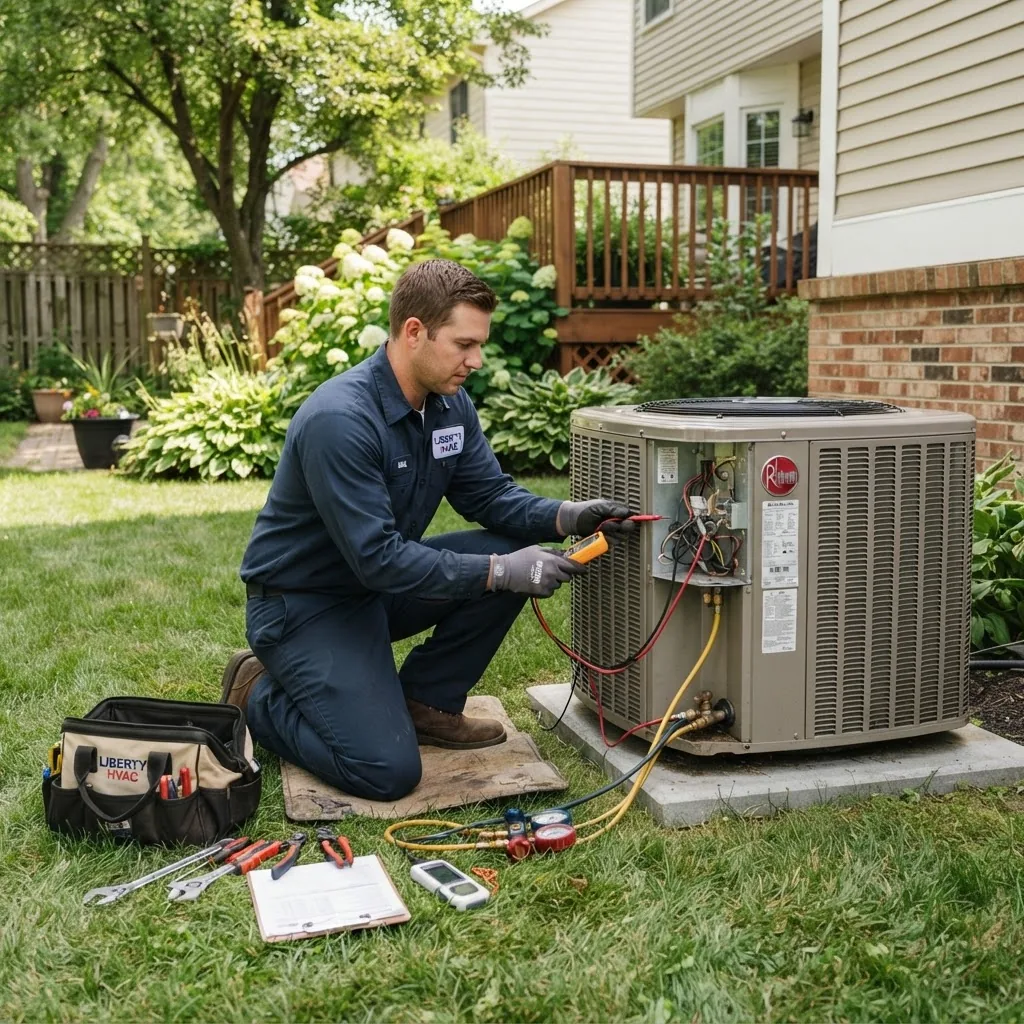
- Test electrical components — Inspect contactor and relays for pitting, measure capacitor microfarads with a meter and compare to stamped rating (replace if outside ±6%), check wiring connections for tightness, and test amp draw of motors against manufacturer specs. If any measurement falls outside spec, schedule an electrical repair. (Time: 20–45 minutes)
- Check refrigerant charge and pressures — Only a certified technician should add refrigerant. However, you can observe pressure readings on the service ports (do not attempt charging). Low suction pressure and low head pressure often indicate low refrigerant. Document readings for technician follow-up. (Time: 10 minutes)
- Inspect and clear condensate drain — Confirm water moves through pan and out the drain. Use pressurized air or a wet-dry vacuum to remove stubborn clogs. Treat with enzyme cleaner to minimize biofilm. (Time: 15–30 minutes)
- Verify thermostat and controls — Recalibrate or replace the thermostat if readings are off by more than ±1°F. For programmable/smart thermostats, verify schedule settings and Wi-Fi connectivity. (Time: 10–20 minutes)
- Lubricate motors if required — Apply small amounts of lubricant to bearings where ports exist; many modern motors are sealed and do not require oil. Check manufacturer guidance. (Time: 5–10 minutes)
- Test start-up and safety cycles — With panels secured, power on and observe start-up: compressor engagement, proper fan speeds, cyclical behavior, and no hearing of clunks or long click sequences which may indicate capacitor or contactor issues. Measure supply/return temperature differential (16–22°F expected). (Time: 10–15 minutes)
- Document findings and recommend follow-up — Produce a short report: filters changed, coil condition, refrigerant observations, electrical readings, and recommended actions. If refrigerant or electrical issues are found, note urgency and recommend a certified technician. Link to what an AC tune up includes for deeper reading. what an AC tune up includes
Common seasonal preventive measures:
- Replace filters at the start of spring and monthly during peak use.
- Clear 2–3 ft of vegetation and clean condenser fins before summer.
- Schedule professional refrigerant and electrical checks annually.
Transition: even with careful tune-ups, systems sometimes fail — here’s how to troubleshoot common problems yourself before calling a technician.
Troubleshooting Common Air Conditioner Problems
Use the numbered steps below to triage issues safely, saving time and money. Each troubleshooting step concludes with the decision threshold for calling a professional.
- AC won’t turn on — Check thermostat batteries and settings, verify breaker and outdoor disconnect, and inspect the emergency switch near the air handler. If breaker trips repeatedly when turning on, stop and call a pro. (If tripping persists after resetting once, call a technician.)
- Poor cooling or no cooling — Check the filter and airflow. Measure the return-supply temp split (should be 16–22°F). If airflow and filter are OK, inspect outdoor unit for frost or frozen coils. If frozen, turn off cooling and set fan on to thaw; persistent frosting suggests low refrigerant or airflow issues — call a certified technician. (If temperature split <12°F or unit cycles rapidly, seek professional help.)
- Strange noises — Buzzing may indicate relay or loose panels; grinding suggests motor/bearing wear; hissing can point to a refrigerant leak. Tighten loose screws and panels; replace capacitors if buzzing and visible bulging. For grinding, hissing, or loud clanking, schedule repair. (If noise appears suddenly and loudly, shut down and call a pro.)
- Water leaks or overflowing condensate pan — Inspect the drain line for clogs and flush with bleach solution. Check that the pan is intact and properly seated. If overflow continues, call a technician to inspect secondary drain setups or condensate pump issues. (Persistent leaks require professional diagnosis.)
- Short cycling (turning on/off frequently) — Check thermostat location (avoid direct sun), replace batteries, and ensure condenser fan runs freely. Short cycling often indicates incorrect refrigerant charge, an oversized unit, or failing capacitor; call a technician if simple fixes don’t resolve it. (If cycles fewer than 6–8 minutes each cycle, contact pro.)
- Electrical tripping — Check for overloaded circuits or recent electrical work. Tighten wiring at terminals (only if comfortable and after killing power). Persistent trips or burning smells require immediate professional electrical service. (If breaker trips more than once after reset, shut down and call technician.)
- Thermostat mismatch — Use a secondary thermometer to verify room temperature and compare. Replace thermostat if readings differ by >1°F or if controls behave erratically. If wiring on a replacement thermostat is unfamiliar, have it professionally installed. (If system fails to respond to correct settings, call HVAC pro.)
- Degraded energy efficiency — If energy bills jump without usage changes, check filters, duct leakage, and compressor runtime. A 10–20% loss in efficiency may indicate dirty coils, low refrigerant, or failing components; document runtime and consult a technician. (If you measure notable performance loss after cleaning, schedule a professional audit.)
Multiple issues together (noise + poor cooling + tripping) typically indicate a single failing subsystem such as the compressor or electrical board — call a certified technician.
Related maintenance of heating counterparts: furnace repair and maintenance often coincides with AC troubleshooting.
Transition: a planned seasonal calendar keeps troubleshooting events rarer and cheaper.
Seasonal and Annual HVAC Maintenance Planning
Compare central vs. window AC maintenance and set an annual schedule. This section includes a comparison table and a practical seasonal checklist. This article is part of our comprehensive routine home maintenance tasks series.
| System Type | Typical Annual Maintenance | Owner DIY Tasks |
|---|---|---|
| Central AC (split system) | Annual pro tune-up; coil cleanings; refrigerant check; duct inspection | Filter changes monthly, condenser clearance, thermostat checks |
| Packaged units / Rooftop | Bi-annual pro checks; belt and motor inspection; drainage checks | Filter replacement, debris clearing, visual inspection |
| Window / Wall AC | Annual deep clean and professional check every 2–3 years | Filter cleaning per season, exterior rinse, proper storage |
Seasonal checklist (use at start of season)
- Spring (pre-cooling): Replace filter, clean condenser, test thermostat, check refrigerant baseline, flush condensate drain, clear vegetation.
- Summer (mid-season): Replace filter monthly, inspect airflow, listen for new noises, log performance.
- Fall (post-cooling): Clean and cover window units if stored, inspect air handler, prepare heating crossover.
- Winter (off-season): Schedule professional check for heat pumps/furnaces and ensure outdoor unit is clear of snow when used year-round.
External home systems impact HVAC lifespan — clear gutters and roof flashings to prevent water infiltration that can affect indoor equipment. professional gutters cleaning and how to clean gutters help protect HVAC enclosures.
Further seasonal planning tools: HVAC maintenance checklist and annual schedule guidance: HVAC preventative maintenance schedule.
Transition: regular maintenance pays in energy savings and lower repair bills — here’s how.
Energy Efficiency and Cost Benefits of Regular Maintenance
Routine maintenance reduces energy consumption and extends equipment life. According to a 2024 Department of Energy report, clean coils and filters can shave 5–15% off HVAC energy use, and properly charged refrigerant improves capacity and reduces run-time.
Quick stats: A well-maintained unit can run up to 20% fewer hours per season versus a poorly maintained unit; preventative care often pays for itself in reduced utility bills and fewer expensive emergency repairs.
- Lower energy bills — improved airflow and heat transfer mean less compressor runtime.
- Fewer major repairs — catch small problems (capacitors, belts) before they cause failure.
- Longer equipment lifespan — regular maintenance can extend life by 3–5 years on average.
- Improved indoor air quality — cleaner filters and ducts reduce dust and allergens.
- Better comfort and humidity control — especially important in mixed climate homes.
Transition: always keep safety front of mind while working on HVAC equipment.
Safety Tips and Precautions During AC Maintenance
- Always kill power at the breaker and outdoor disconnect before working on electrical components; verify with a non-contact voltage tester.
- Wear gloves and safety glasses when cleaning coils or handling chemicals; use respirators if working in dusty or moldy spaces.
- Do not attempt refrigerant recovery, charging, or repairs to sealed systems — EPA certification is required. See EPA guidelines: EPA section 608 refrigerant rules.
- Follow manufacturer torque and replacement specifications for electrical components and capacitors; measure capacitor values before replacing. For electrical safety guidance consult: OSHA electrical safety resources.
- Use ladders safely and never lean tools on a condenser’s fan when it might start unexpectedly.
- Keep children and pets away when running diagnostic cycles with exposed panels removed.
External best practices and industry standards: reference ACCA guidance for professional-level maintenance procedures: ACCA standards and resources.
Conclusion and Final Recommendations for Homeowners
By following this hands-on guide you’ll be able to perform effective air conditioning unit maintenance, identify early warning signs, and maintain a seasonal schedule that reduces repairs and improves efficiency. Keep a maintenance log, replace filters regularly, and schedule an annual professional tune-up. When in doubt — especially with refrigerant, compressors, or persistent electrical problems — hire a certified technician.
Next steps: set a recurring calendar reminder for spring and fall tune-ups, stock replacement filters, and print the checklist below. If you want professional maintenance options, explore local services and plans for preventive coverage.
Common mistakes and how to avoid them (practitioner notes)
I once skipped checking the condensate drain after a winter and found water damage in May — lesson: flush the drain monthly during peak seasons. I also observed DIYers over-tighten fins and bend them badly; always use a fin comb and gentle pressure. Finally, homeowners sometimes add refrigerant without diagnosing a leak; that masks the problem and costs more long-term.
Maintenance verification checklist
- Filter replaced or cleaned and size recorded.
- Evaporator and condenser coils inspected & cleaned.
- Condenser clearance 24–36 inches maintained.
- Condensate drain flushed and flowing.
- Thermostat batteries and calibration checked.
- Electrical connections visually inspected; no burning smells.
- Temperature split measured (16–22°F).
- Maintenance logged with date, tasks, and observations.
When to call a professional
- Refrigerant adding, leak detection, or sealed-system repairs (EPA-certified technician required).
- Compressor failure, loud mechanical noises, or persistent electrical trips.
- Complex ductwork sealing, major airflow imbalance, or suspected failing motors.
- If any task shows test results outside safe thresholds (e.g., temperature split <12°F or >24°F, capacitor microfarad >±6% of rating).