
By the end of this hands-on guide you’ll be able to find me a tradesman, verify credentials, interview confidently, and finalize a secure contract. Expect to complete the process in 2–7 days for small projects or 2–4 weeks for larger jobs; this assumes a basic ability to communicate, compare quotes, and check records.
Before you start
- Project brief (1–2 pages: scope of work, photos, desired completion date)
- Budget range and top acceptable quote (e.g., £1,000–£3,000 or $1,200–$3,500)
- Identification of required trades (electrician, plumber, carpenter, roofer)
- Contact info for two local references and access to a computer or smartphone
- Notebook or digital checklist for interviews and verification
Core process overview: a concise, proven workflow you’ll follow step-by-step below, then expanded H2 sections give practical checks, scripts, and examples.
- Define scope and budget. Write a 1–2 page brief with deliverables, materials, and timeline.
- Search targeted channels. Use local referrals, trade associations, and vetted platforms to build a shortlist of 3–6 tradesmen.
- Verify credentials. Check licenses, certifications, insurance, and run background/reference checks.
- Interview and test fit. Ask tailored interview questions, review portfolios, and request a small paid trial if practical.
- Compare written estimates. Use line-item comparisons and a 48–72 hour negotiation window to lock pricing.
- Write and sign a contract. Create a scope-of-work contract with milestones, payment schedule, and remedies for delays.
- Kick off and manage. Schedule a pre-start walkthrough, confirm communication routines, and set weekly check-ins until sign-off.
Understanding Why It’s Important to Find the Right Tradesman
Hiring the correct, skilled professional affects project outcome, cost control, safety and long-term durability. A reliable tradesman delivers quality work that meets code and reduces call-backs; a poor hire can double repair costs and extend timelines. Think of hire a tradesman like recruiting a critical short-term team member whose workmanship represents your home’s future value.
Quality work starts with selecting someone whose experience matches your project’s complexity. For example, a straightforward faucet replacement is different from re-piping a bathroom or replacing a load-bearing lintel. Matching skillset to task reduces scope creep and hidden costs.
Reliability matters as much as technical ability. Tradesmen who keep appointments, communicate delays, and provide documentation increase client satisfaction and project success. According to a 2024 industry report, 62% of homeowners who used referrals reported fewer disputes and faster completion times than those who relied solely on online listings (source: industry client satisfaction survey).
Safety and compliance are non-negotiable. Unlicensed or uninsured work can invalidate warranties and expose you to liability. Regional rules vary — always confirm local codes before work starts. That due diligence protects you financially and preserves the resale value of your property.
Finally, consider long-term relationship potential. A tradesman who finishes one job well becomes a trusted resource for future maintenance, referrals, and emergency repairs—turning an initial hire into ongoing value.
Next, you’ll learn where to find tradesmen with the best chance of fitting your project and timeline.
Where and How to Find Me a Tradesman: Best Search Methods
-
Ask trusted local referrals first.
Start with neighbors, family, real estate agents, or your building manager. Personal referrals often produce tradesmen with proven local track records and clearer communication. Ask for specifics: project type, final cost, timeline, and any warranty provided. Target at least three recent, similar-project references.
-
Use vetted professional platforms and directories.
Platforms that verify identity and reviews reduce risk. Create a shortlist of 4–6 profiles, then cross-check reviews, response time, and recent photos. For broader help on local contractor selection see the home contractors near me guide.

-
Contact trade associations and unions.
Associations often maintain member directories and certification standards that exceed minimum licensing. Search local chapters to find tradesmen who commit to a code of practice and continuing education. Use association directories to find technicians with up-to-date training for specialized systems (HVAC, gas, structural).
-
Check local classified listings and community boards.
Community centers, neighborhood Facebook groups, and Nextdoor can highlight skilled local tradesmen who may not be on national platforms. Treat these leads like referrals: request photos of past work and two verifiable references before proceeding.
-
Search government and licensing board directories.
Many states and municipalities list licensed tradesmen by license number and status. These lists show active, suspended, or expired licenses; always check them before shortlisting. For official sources, consult your regional licensing agency website or national portals.
External resources: US government licensing guidance and Better Business Bureau for complaint histories.
-
Use portfolio-rich channels and showcase sites.
Look for tradesmen who publish case studies, before/after photos, and detailed project timelines. Portfolios let you confirm technique and finish standards; flag portfolios that show consistent workmanship across similar builds.
-
Filter candidates with screening criteria.
Create a 6-point screening checklist: active license, insurance, 3 verifiable refs, portfolio, response time under 48 hours, and clear payment terms. Eliminate anyone who fails more than one item.
-
Shortlist and prioritize by risk profile.
For projects with structural, electrical, or gas risk, prioritize licensed, insured tradesmen with strong references and documented inspections. For low-risk tasks (painting, minor repairs), a well-reviewed independent tradesman may suffice.
-
Ask for a written estimate and availability windows.
Collect written, itemized estimates and expected start/completion dates from at least three tradesmen. Compare line-items and clarify warranties and exclusions before selecting a candidate to interview.
Transitioning from where to find candidates, next you’ll learn how to verify their credentials precisely and legally.
Verifying Tradesman Credentials Before Hiring
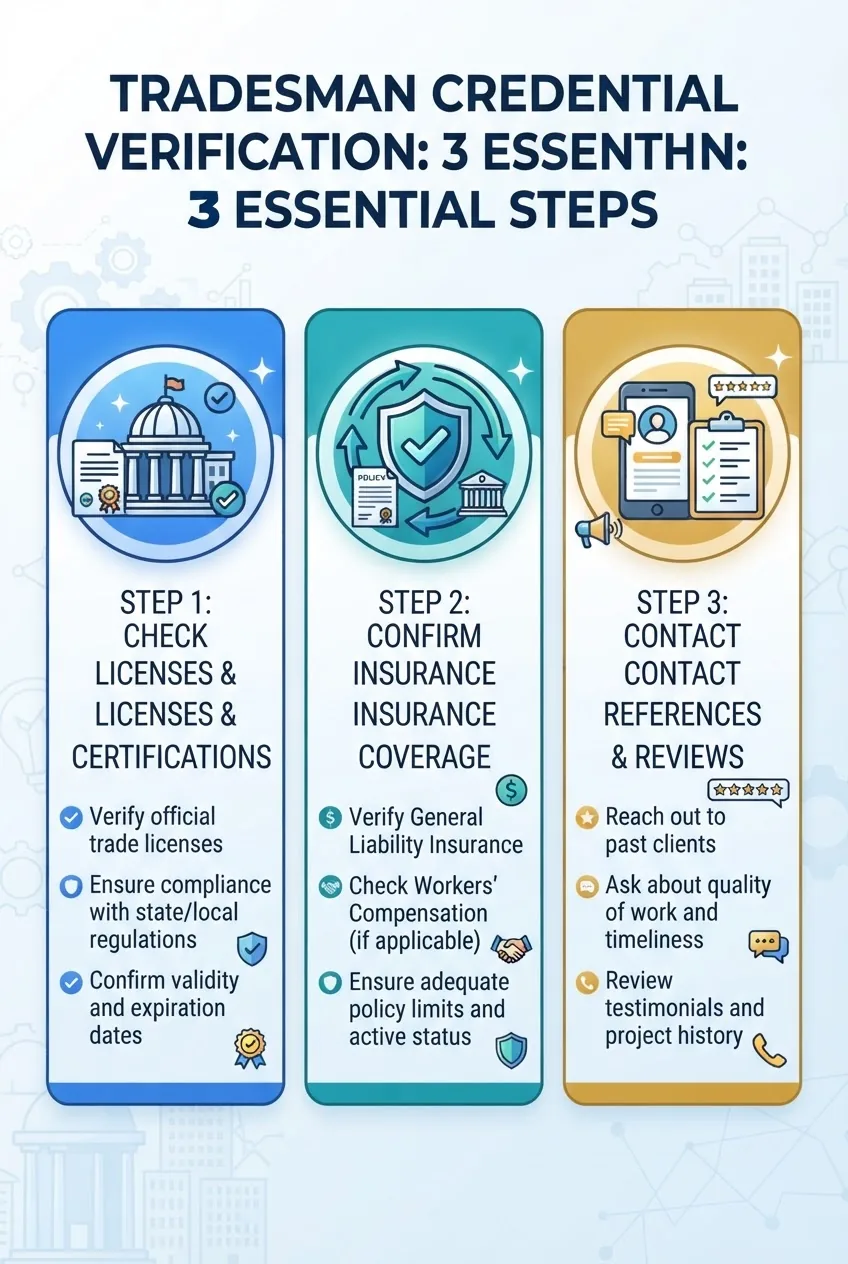
Verifying credentials reduces legal, safety, and financial risk. Follow these step-by-step checks to confirm license, insurance and legal standing.
-
Step 1 — Confirm licensing in official databases.
Ask for the exact license number and jurisdiction. Then cross-check on the issuing authority’s website: state contractor board, municipal licensing portal, or regulator. Note license class and expiry date. According to a 2024 government data overview, 18% of consumer complaints involved lapsed or misrepresented licenses (source: federal consumer licensing report).
If you want full instructions on documentation checks, see verify contractor insurance and licensing requirements.
Additional reading on insurance nuances: contractor insurance coverage and liability options.
-
Step 2 — Validate insurance certificates and coverage.
Request a Certificate of Insurance (COI) that names you as the certificate holder if required. Verify policy effective and expiry dates, coverage limits (general liability minimum $1M typical for small jobs; higher for structural or commercial), and proof of workers’ compensation where mandated. Industry experts recommend confirming policies directly with insurers for large projects.
For more on freelancer policies and typical costs, review independent contractor insurance coverage guide and costs.
-
Step 3 — Run background and public-record checks.
Use local court and county records to search for recent liens, judgments or criminal records related to professional conduct. A quick online search combining the tradesman’s full name with “liens,” “judgment,” or “complaint” often surfaces complaints or unresolved issues.
-
Step 4 — Contact past clients and references.
Ask for three recent references (within 12–24 months) for similar scopes. Use a short script: confirm dates, scope, whether milestones were met, how they handled disputes, and whether they’d rehire. Document answers; be wary if references are the same family name or can’t provide details.
-
Step 5 — Review portfolio, permits and inspection records.
Request photos of finished work and permits/inspection receipts for past jobs. Permits demonstrate code compliance; inspection reports show whether work passed third-party checks. If the tradesman resists sharing permits, treat that as a high warning flag.
-
Step 6 — Ask for written policies and warranties.
Confirm workmanship warranties (e.g., 12 months on labor, manufacturer warranties on materials) and get them in writing. Clear warranty terms reduce disputes after handover.
-
Step 7 — Use third-party verification tools when available.
Some platforms or industry directories provide verification badges that combine ID, license, insurance and background checks. Treat these badges as a starting point — still verify independently for high-risk projects.
Final verification caveat: licensing and insurance rules differ by region. Always confirm local regulations and, when in doubt, contact your jurisdiction’s licensing board directly: government licensing resources. For consumer dispute histories, check the Better Business Bureau.
With credentials verified, you’ll next learn precise interview questions and assessment techniques to evaluate skills and fit.
Interviewing and Assessing Potential Tradesmen
Use structured interviews to compare candidates objectively. Below is a numbered set of practical interview steps and sample questions to uncover competence, communication style and problem-solving.

-
1. Start with a short project summary and ask for an immediate assessment.
Script: “Here’s the scope—how would you approach it, and what are the three biggest risks?” Look for: clear sequencing (prep, demo, build, finish), material notes, and mention of inspections or permits.
-
2. Ask for specific experience examples.
Question: “Describe a similar job you completed in the last 18 months, including timeline and any unforeseen issues.” Good answers include dates, photos and references; poor answers are vague.
-
3. Test technical knowledge with a targeted problem.
Example for electricians: “A circuit trips intermittently—what’s your troubleshooting sequence?” For carpenters: “How would you assess and fix a sagging floor?” Look for logical steps and safety considerations.
-
4. Confirm communication and project management style.
Ask: “How will you communicate progress and delays? Who will be onsite and how do you manage subcontractors?” Preferred answer: regular short updates (text/photo) plus an agreed weekly check-in.
-
5. Request a materials list and explain allowances.
Ask them to estimate materials and identify allowances for finishes or fixtures. This reveals estimation accuracy and awareness of cost drivers.
-
6. Discuss payment terms and retainer expectations.
Acceptable ranges: 10–30% deposit at start, milestone payments by completion of defined stages, balance at final sign-off. Be cautious of full payment up front.
-
7. Observe professionalism and onsite habits.
Punctuality, cleanliness, PPE use and respectful communication during an on-site chat are strong predictors of reliability. Note whether they bring a project folder and can produce documents on request.
-
8. Ask for a short paid trial or small initial task for high-risk hires.
When feasible, commission a small, paid test such as replacing one fixture or fixing a section of trim. Trials are particularly useful for long-term maintenance relationships.
-
9. Score each candidate on a 5-point rubric.
Rubric example: Technical skill (1–5), Communication (1–5), Reliability/References (1–5), Cost competitiveness (1–5), Documentation quality (1–5). Prioritize candidates scoring 4+ in at least three categories.
-
10. Negotiate scope, not hidden costs.
Clarify exclusions and what counts as a change order. Ask for a 48–72 hour written confirmation of the estimate before signing to prevent price drift.
Next, you’ll learn how to interpret quotes, compare estimates and budget realistically for your hire.
Understanding Cost, Estimates, and Budgeting When Hiring a Tradesman
Estimates vary widely by region, materials and scope. Use these practical tips to create a defensible budget and compare quotes accurately.
First, request itemized quotes that separate labor, materials, disposal and permit costs. A line-item quote removes ambiguity and makes apples-to-apples comparison possible. Industry data from a 2024 cost analysis shows line-item quotes reduce post-contract disputes by 38% (source: contractor dispute study).
Tip: Ask each tradesman to use the same assumptions—material grade, fixture model, and timeline—so you compare like with like. If a tradesman provides a single lump-sum, ask for a breakdown within 48 hours or mark them lower in your scoring.
| Estimate Type | When to Use | Pros / Cons |
|---|---|---|
| Itemized quote | Most renovations | Transparent; easier dispute resolution / takes longer to prepare |
| Fixed lump-sum | Simple, low-risk jobs | Predictable price / may include contingency markup |
| Time-and-materials | Unknown scope, emergency repairs | Flexible / can escalate costs quickly without controls |
Use a simple comparison spreadsheet with columns for labor hours, labor rate, materials, permit fees, waste disposal, and contingencies (suggested contingency: 10–20% depending on unknowns). For complex jobs, request a schedule of values breaking the project into milestones with percentage allocations.
Negotiation guidance: negotiate on scope and payment schedule rather than raw price. Offer a faster payment schedule for a small discount (e.g., 2–3% if you pay a higher upfront deposit and clear receivables). Avoid heavy discounting that cuts corners on materials or inspections.
Payment terms to consider: 10–30% deposit, 30–60% at midpoint, balance at completion. For expensive material purchases, negotiate that receipts and warranties be assigned to you. Do not make final payment until you have a signed completion certificate and, if relevant, final inspection sign-off.
For digital tools to compare quotes, see estimate software for contractors which explains how apps standardize estimates and reduce errors.
Watch for cost overruns: require written change orders for any scope change greater than $100 or 2% of contract value (whichever is larger). A documented change-order process prevents verbal add-ons from becoming disputes.
Example budgeting rule: for a $10,000 kitchen refresh, expect materials ~40–55% ($4,000–$5,500), labor ~35–45% ($3,500–$4,500), and permits/contingency ~10–15% ($1,000–$1,500).
After setting your budget and payment terms, learn which red flags to avoid when hiring.
Red Flags and Warning Signs to Avoid When Hiring Tradesmen
- Unwillingness to provide a license number or insurance certificate
- Pressure for full payment up front or requiring cash-only payment
- Lack of written estimate or refusal to provide a line-item quote
- Poor or no verifiable references for similar work
- Vague timelines, missed appointments, or no formal communication plan
- Requests to skip permits or inspections
- Abnormally low bids that deviate >20% from other quotes without explanation
- No physical business address or inconsistent contact information
- Negative BBB or consumer protection records that are not addressed
- Subcontracting most of the work without disclosure or clear oversight
If you see any of these signs, pause hiring and re-check references and documentation. Consumer protection agencies recommend getting everything in writing and using escrow or staged payments where available.
Next, finalize your hire with a robust contract and a solid kickoff routine.
Finalizing the Hire: Contracts, Agreements, and Project Kickoff
Convert agreement points into a simple, enforceable contract. Follow these steps to create a contract that protects both parties and sets a clear project roadmap.
-
Draft a clear scope of work.
Include task-by-task descriptions, materials (brand/model where needed), tolerances, and finishes. State who supplies materials and which party obtains permits.
-
Set timeline and milestones.
Use calendar dates or milestone completion points (e.g., demolition complete by Day 3, rough-in complete by Day 8). Include buffer windows: 3–5 business days for minor weather delays; 7–14 days for delivery delays on special-order materials.
-
Define payment schedule and remedies.
Typical schedule: 10% deposit, 40% at mid-point, 50% on completion for medium projects — adjust by project size. Include remedies: interest on overdue payments and delays beyond agreed grace period.
-
Include warranties and retention clauses.
Specify workmanship warranty duration (e.g., 12 months), manufacturer warranty handling, and a retention holdback (commonly 5–10% released after final inspection).
-
Establish change-order procedures.
Document how changes are approved, priced, and scheduled. Require signed change orders for any adjustment exceeding $100 or 2% of contract value.
-
Set dispute resolution terms.
Include an escalation route: direct negotiation (7 days), mediation (30 days), then arbitration if unresolved. This reduces time and legal costs.
-
Confirm insurance and indemnity language.
Require the tradesman to carry required insurance and indemnify you for actions arising from negligent performance. Keep copies of COIs with the contract.
For deeper insurance breakdowns see contractor insurance coverage and liability options.
-
Schedule a pre-start walkthrough.
Walk the site with the tradesman, confirm access, storage, site protection, and any homeowner obligations (removing fragile items). Capture agreed notes and photos and attach them to the contract.
-
Agree communication routines and sign-off criteria.
Decide on daily or weekly progress updates (text/photo), a single point of contact, and clear final sign-off requirements including inspection documents and receipt of warranties.
Once both parties sign the contract and initial payment clears, set an official start date and confirm a 15–30 minute kickoff call or onsite meeting the first morning of work.
After the hire is underway, these maintenance practices will keep the relationship productive for future projects.
Maintaining a Good Relationship with Your Tradesman for Future Projects
Strong relationships reduce future sourcing time and often deliver faster service and preferential scheduling. Keep communication simple and valuable.
Send timely payments and a brief thank-you note after completion. Provide specific feedback: confirm what went well and what could be improved. Tradesmen value clear, actionable feedback and are more likely to prioritize repeat clients.
Maintain an organized record of work: contract copy, warranty documents, receipts and a photo log. When a new issue arises, share the record with the tradesman to speed diagnostics.
Offer referrals and positive online reviews for those who perform well—this is the most valuable currency for independent tradesmen. If a follow-up visit is needed, schedule it within 30–90 days to address punch-list items while memories and warranties are fresh.
Keep routine maintenance appointments and communicate any changes in use that could affect performance (e.g., running new appliances). This preserves workmanship and prolongs systems’ life.
Common mistakes and how to avoid them
I once skipped calling references for a low-bid contractor; halfway through the job they disappeared and left an unfinished patch that cost me 40% more to fix. Now I always call three references and verify permits before any deposit.
I have also accepted vague verbal timelines and watched a project stretch from two weeks to eight. I now require milestone dates and hold back 5–10% until final sign-off.
Finally, I once paid a full materials deposit by cash—no receipts—which caused disputes later. Today I pay electronically with invoices and receipts tied to contract line-items.
Quick checklist before signing
- Scope of work documented and signed
- Itemized written estimate received and compared
- License and insurance verified and copies attached
- Three recent references checked and documented
- Payment schedule and retention amount agreed
- Change-order and dispute resolution process written
- Start date and communication plan confirmed
When to call in a professional instead
Call a licensed specialist immediately for structural work, major electrical, gas plumbing, and when permits or inspections are required. If project cost exceeds 10% of your home’s value or you see repeat repair issues, hire an independent project manager or consultant to oversee the work.
You’ve now got the checklist, interview scripts, verification steps and contract template elements to find me a tradesman and complete a safe, successful hire.