
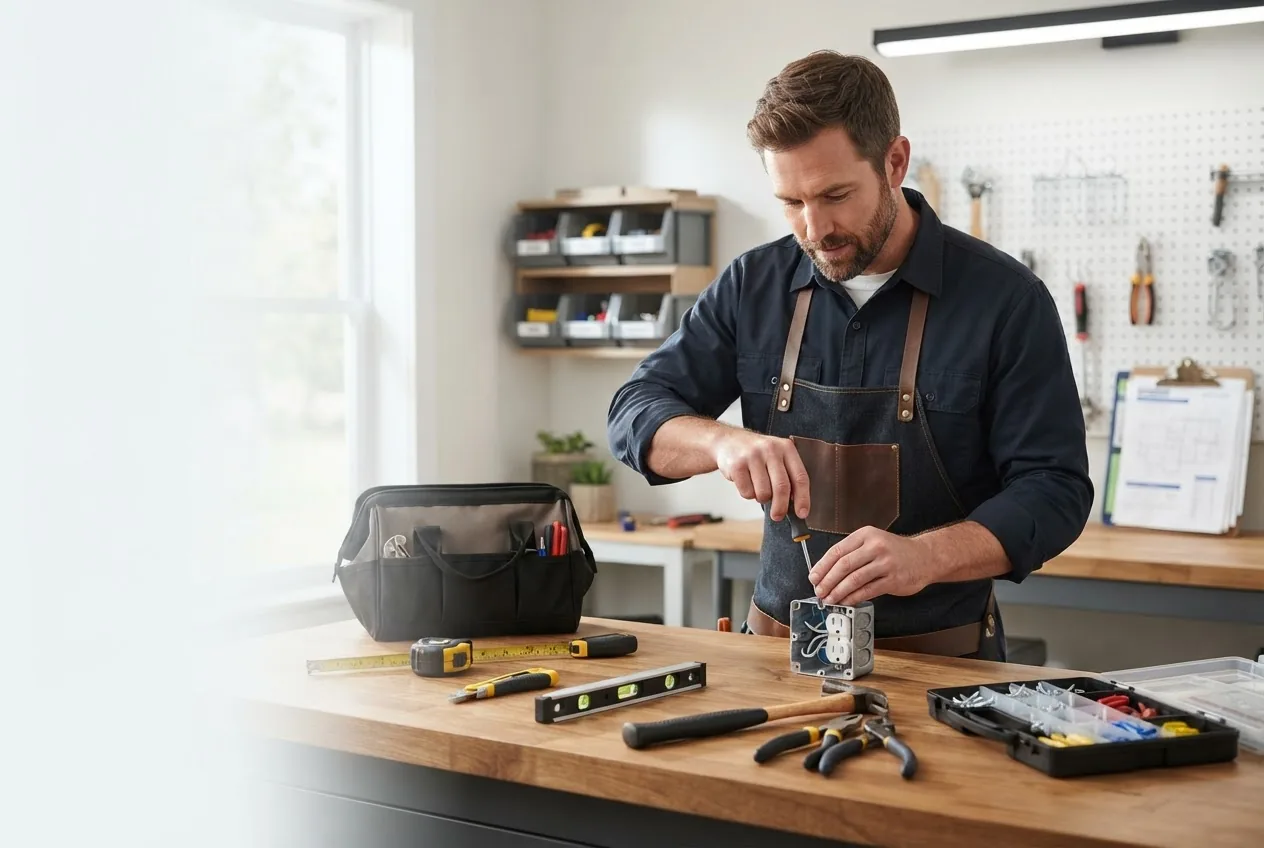
By the end of this hands-on guide you will have a practical foundation in home repair skills, a seasonal maintenance plan you can implement, and step-by-step routines for common plumbing, electrical and carpentry tasks. Time to complete: a realistic initial skill ramp of 8–12 weeks with 3–5 hours per week. Skill level assumed: true beginner to intermediate DIYer.
Before you start
- Basic safety gear: eye protection, work gloves, dust mask, ear protection
- Essential hand tools kit: adjustable wrench, flat & Phillips screwdrivers, tape measure, claw hammer, pliers set
- Power tool starter: 12V cordless drill/driver with 1/2″ chuck, circular saw or compact jigsaw (optional)
- Materials: thread tape, assorted screws, wood glue, spackle, plumber’s putty
- Access to tutorial resources and local codes if working on electrical/plumbing
Introduction to Essential Home Repair Skills
This section teaches why learning practical home repair skills matters, what foundational abilities you’ll use daily, and how they reduce costs and downtime. Learning basic home repairs and home improvement techniques empowers you to fix leaks, patch drywall, reset a tripped breaker safely, and perform preventive maintenance that avoids larger failures. I’ll map a learning path focused on durable, transferable skills: measuring and layout, fastening and joining, leak diagnosis, basic wiring safety, and surface preparation for finishes.
Why invest time? According to a 2024 industry report on household maintenance behavior, homeowners who perform routine maintenance reduce major repair spending by an average of 25% over five years. Practical return: fewer emergency calls, improved home comfort, and the confidence to handle day-to-day issues. If you’re a new homeowner, pair this guide with specific maintenance tips for new homeowners to prioritize first-year tasks.
Transition: The next section turns concepts into concrete, stepwise skills you can practice in the workshop or on small jobs around the house.
Core Home Repair Skills Every Homeowner Should Master
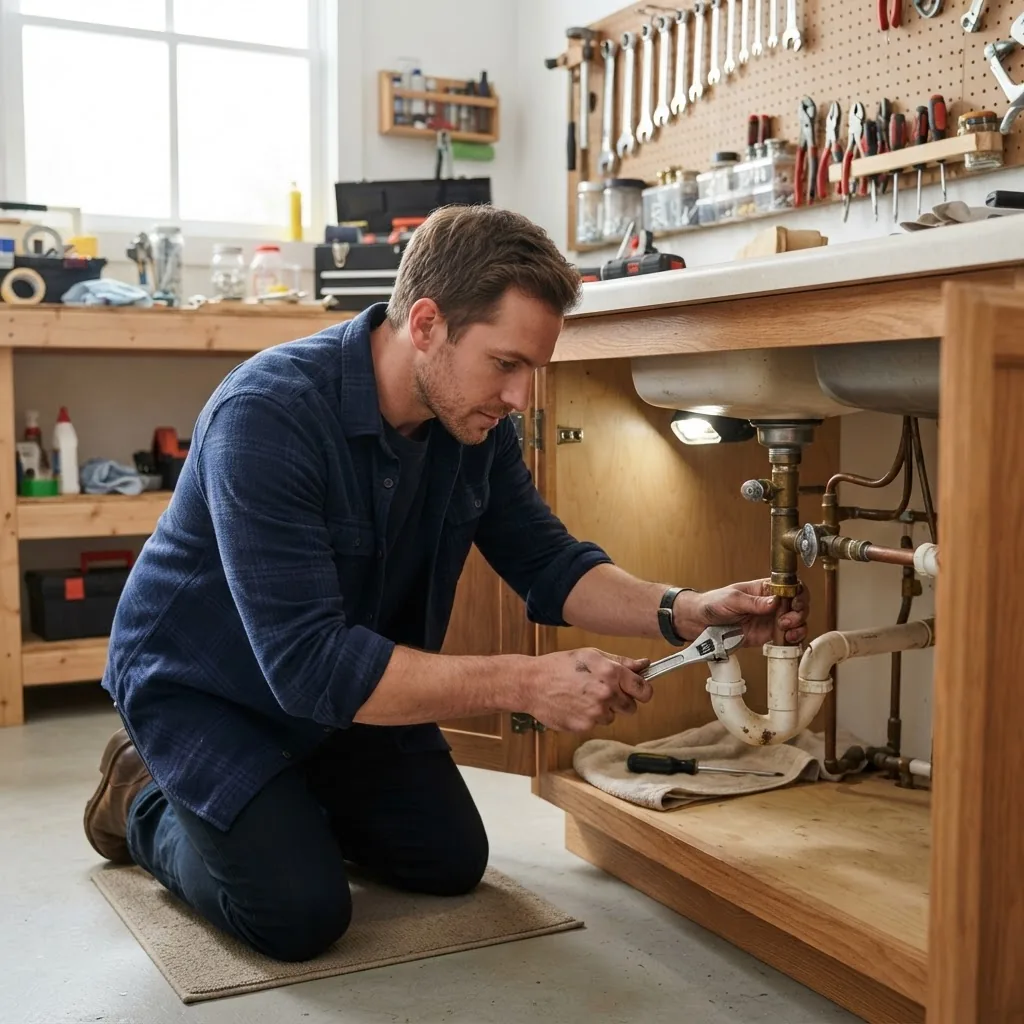
- Diagnose and fix small leaks — Learn to find the leak source (supply line, joint, fixture). Step: turn off the supply at the wall valve, dry the area, remove tape or corroded fittings, apply new thread tape (wrap clockwise 3–4 full turns) and hand-tighten, then finish with a quarter-turn using an adjustable wrench set to low torque. Tools: leak detection dye, adjustable wrench, pipe joint compound.
- Clear common clogs — Use a plunger for sinks/toilets, and a drain snake for deeper clogs. Step: for sink slow-drain, remove pop-up stopper, insert snake 3–6 ft, rotate clockwise to catch obstructions, withdraw slowly and flush with hot water. Chemicals only as last resort; avoid with PVC in hot water systems.
- Reset and test circuits safely — Locate the breaker panel, label circuits, and practice turning off power at the breaker. Step: always test with a non-contact voltage tester; when replacing a light fixture, cut power at the breaker and verify neutrality with a tester before touching wires. Familiarize with GFCI and AFCI protective devices.
- Install a new light fixture — Turn off breaker, remove old fixture, confirm voltage is dead with a tester, match wire colors (black to hot, white to neutral, green/bare to ground), use wire nuts and torque to manufacturer spec (about 7–9 in-lbs for typical wire nuts), mount securely to box rated for fixture weight.
- Repair drywall damage — For holes <6" use an adhesive-backed patch; for larger, cut square around damage, install a backer of 1x2 lumber, screw in drywall piece, tape joints with fiberglass mesh, apply 3 coats of joint compound sanding between coats (320 grit final). Dry time: 24 hours between coats under typical 20°C / 50% RH conditions.
- Basic painting techniques — Prep by cleaning surfaces, sanding loose paint (120–180 grit), prime bare patches with an alkyd or acrylic primer, and apply two coats of latex paint with 4–6 hour dry times between coats. Use 1/4″ nap roller for smooth surfaces, 3/8″ for light texture.
- Simple carpentry joinery — Learn measuring, 90° and 45° cuts, making butt and lap joints. For furniture repair: glue joints with PVA wood glue clamped for 30–60 minutes, full cure 24 hours. For structural repairs consult codes for fastener type and spacing (use 8d/16d nails or appropriate screws).
- Replace common fixtures — Replace faucets, doorknobs, and cabinet hardware. For faucet installs: shut off valves, remove retaining nuts (use basin wrench), replace rubber gaskets and apply plumber’s putty around drain flange, torque to manufacturer specs to avoid leaks.
- Assess and maintain HVAC basics — Replace filters monthly/quarterly depending on MERV rating; vacuum vents and check thermostat operation. Annual HVAC service by a technician is recommended, but you can monitor static pressure and filter condition monthly.
- Basic roof and gutter inspection — Visual roof checks from ground and safe ladder inspection of gutters twice a year. Remove debris, check for 1/4″ gaps in flashing, and replace 3–4 missing shingles immediately to prevent leaks.
Transition: Core skills split into three focused subsections below with practical tips and tools for each domain.
Plumbing Skills
Plumbing basics emphasize leak repair, pipe maintenance and fixture installation. Key tips: always shut off local valves first; spin fittings counter-clockwise to loosen; use thread tape on NPT threads and compression fittings where specified. Tools to own: basin wrench, pipe wrench (10–14″ medium), tape measure, tube cutter for copper lines, PVC cutter for plastic. For small copper solder joints: flux, propane torch (use only after training), and lead-free solder. For PVC: measure, chamfer, apply primer and PVC solvent cement per product instructions (hold joints 30 seconds).
Example step-by-step: Fix a dripping compression fitting — 1) Close downstream valve, 2) Place bucket, 3) Loosen nut with adjustable wrench while holding pipe steady, 4) Slide nut off, inspect ferrule, replace ferrule if deformed, 5) Reassemble and tighten to hand + 1/4 turn; test for 5 minutes under pressure. If leak persists, replace entire section or call a pro.
Electrical Repair Basics
Electrical safety is non-negotiable. Learn circuit breakers, wiring safety, and light fixture installation first. Always use a rated non-contact voltage tester, and when swapping switches or outlets, shut off the breaker and verify zero voltage. Understand basic wiring colors (US typical): black/red = hot, white = neutral, green/bare = ground. Tools: insulated screwdrivers, voltage tester, wire stripper set with calibrated stops for 14–12 AWG, and wire nuts sized appropriately.
Stepwise fixture install example: 1) Turn off breaker and lock it out if possible, 2) Remove old fixture and verify no voltage, 3) Mount bracket rated for the fixture’s weight (if over 10 lb use box rated for fixture support), 4) Make wire connections and cap each with wire nut, 5) Secure fixture and restore power, 6) Test operation. Consult local code when altering branch circuits; voltage and wiring methods are regulated.
Carpentry and Structural Repairs
Carpentry basics include woodwork repair, furniture fixing and drywall patching. Accurate measuring is foundational — use a tape measure and speed square. For framing repairs: use pressure-treated lumber for exterior or load-bearing work; splice members with 3″ overlap and install structural screws per manufacturer specs. For furniture, match glue type (PVA for most indoor wood). Drywall structural repair for studs: sister a 1×3 or 1×2 alongside damaged stud, fasten with 3 screws per stud every 8–12″ and use construction adhesive for strength.
Transition: With core skills in hand, the next major area is setting up routine preventive checks so small issues don’t become big ones.
Home Maintenance Skills: Preventive Care and Routine Checks
A proactive maintenance routine keeps systems running and extends their life. Preventive maintenance combines simple inspections with scheduled servicing. Use a checklist approach: do a visual round, test safety devices, and replace consumables. Complement homeowner checks with a comprehensive maintenance inspection checklist for deeper annual inspections.
Routine steps (weekly/monthly/seasonal):
- Weekly visual sweep: Check for drips under sinks, slow drains, and visible water stains. Time: 10–15 minutes.
- Monthly systems check: Test smoke and CO alarms, run water in seldom-used sinks, inspect gutter downspouts for flow. Time: 30–45 minutes.
- Quarterly tasks: Replace HVAC filters (MERV 6–8 typical for homes) and test GFCI outlets. Time: 45–60 minutes.
- Seasonal maintenance: Spring—inspect roof and gutters, Summer—check exterior paint and AC condensers, Fall—service heating system and insulate exposed pipes, Winter—monitor freeze risk and flush water heater if needed. Seasonal tasks vary but plan 2–4 hours per season.
Cross-functional resources: add a deep cleaning checklist and select home maintenance projects that reduce long-term upkeep. For health-focused inspections use the healthy homes assessment checklist. Integrate simple cleaning routines with printable home cleaning checklists to ensure visible areas are maintained while you perform system checks.
Practical scheduling method: break tasks into time buckets (10–15 minutes daily, 30–60 minutes monthly, 2–4 hours seasonally). Use a maintenance log (paper or app) to note dates, actions, and part numbers for replaced items. According to a 2024 industry report on homeowner behavior, logging maintenance increased on-schedule servicing by 40% among study participants.
Transition: The right tools and safety gear streamline repairs and reduce risk — next we inventory what you need and why.
Tools and Equipment for Effective Home Repairs
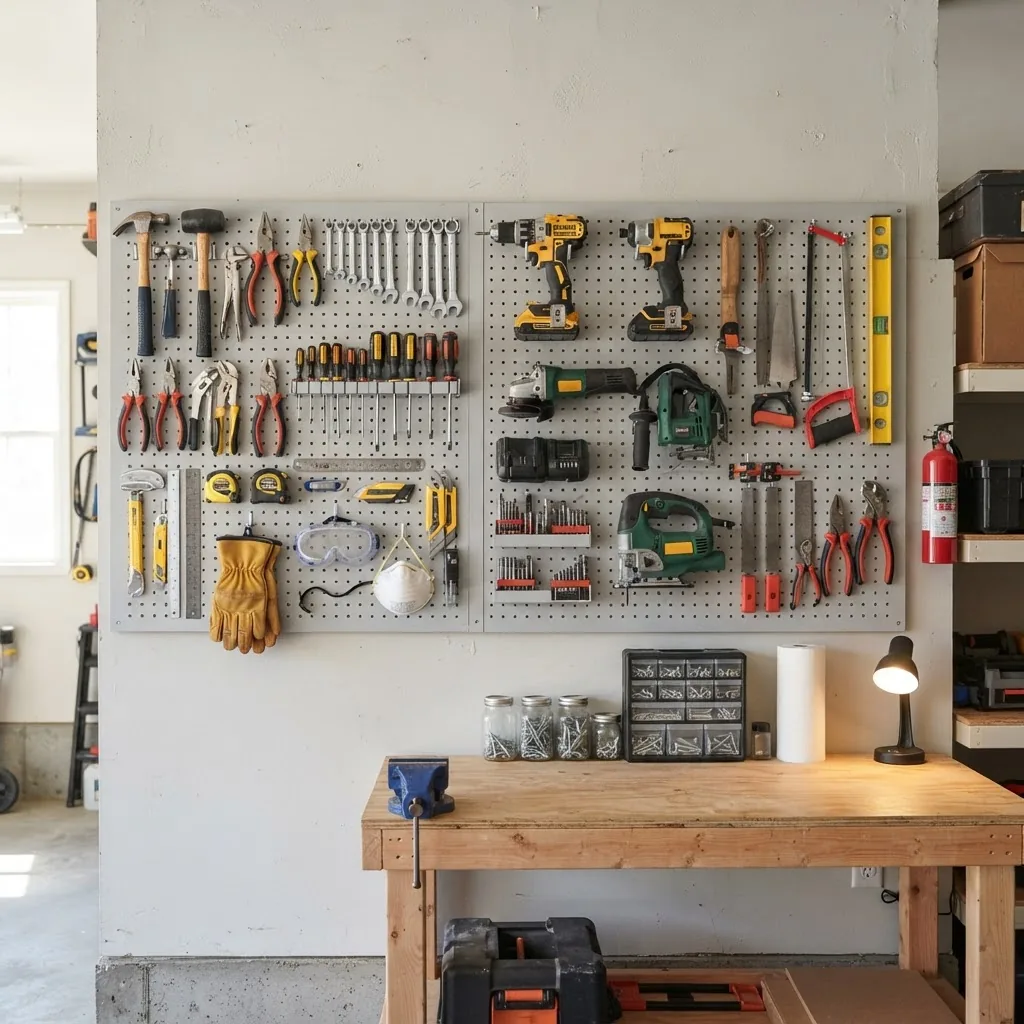
A practical toolset starts small and grows by skill: hand tools first, then power tools, and always safety equipment. Maintain tools (clean, oil, inspect) to lengthen life. Below is a compact tool comparison for first-year purchases.
| Category | Starter Tools | Why it matters |
|---|---|---|
| Hand Tools | Screwdrivers, adjustable wrench, tape measure, pliers | Precision and control for most repairs |
| Power Tools | Cordless drill, circular saw or jigsaw, oscillating multi-tool | Speeds up cutting and fastening tasks |
| Plumbing Tools | Basin wrench, pipe wrench, tube cutter | Access tight spaces and make secure joints |
| Electrical Tools | Non-contact tester, insulated screwdrivers, wire stripper | Safety and correct wire preparation |
| Safety Gear | Goggles, gloves, dust mask, ear protection | Protects from common repair hazards |
Safety brief: follow manufacturer instructions for power tools, maintain cord integrity, use clamps for small workpieces, and select blades appropriate to material (e.g., plywood blade for clean cuts). For electrical tasks consult national guidelines — see OSHA for tool and workplace safety standards.
Transition: Training and practice formalize the skills above — the following resources help you progress efficiently.
Training Resources and Skill Development Methods
Develop skills through a mix of video tutorials, hands-on workshops, and structured courses. Formats that work: short video modules (10–20 minutes), weekend workshops (6–12 hours), and community college or vocational certification programs offering measured progression and assessments.
- Free video tutorials — ideal for step-by-step visual learning; supplement with practice on scrap materials. For curated lists, see online home improvement resources.
- Hands-on workshops — maker spaces and hardware store workshops teach tool use and local code-aware practices; plan a 6–12 hour session to learn a focused skill (e.g., soldering, basic wiring).
- Vocational courses and credentials — consider accredited programs like NCCER for construction trade basics or local community college certificates to gain recognized competency and safety instruction. See NCCER for course formats and accreditation information.
- Apprentice-style learning — pair with a skilled friend or hire a local handyman for a day of shadowing to learn real-world approaches and troubleshooting techniques.
Practical training plan: 1) pick one domain (plumbing or electrical), 2) complete 3–5 short video modules, 3) attend one hands-on workshop, 4) perform 4 supervised home tasks in increasing complexity. Expect 8–12 weeks to reach comfort for common repairs.
Transition: Even with training, repairs present common challenges — next we examine typical problems and troubleshooting patterns.
Common Challenges in Home Repairs and How to Troubleshoot Them
Problem-solution framing helps you triage issues quickly. Below are frequent scenarios, diagnostic steps, and when to escalate. For sale-prep specific repairs see repair before selling your home and for an expanded fault list consult the common home maintenance problems and solutions.
- Leaky faucet persists after replacing cartridge — Problem: wrong cartridge or worn valve seat. Solution: verify model number, inspect and machine the valve seat or replace entire valve; if you encounter bronze corrosion, replace with compatible parts.
- Breaker trips repeatedly on a circuit — Problem: overload or short. Troubleshoot: unplug devices, reset breaker, measure current draw with clamp meter (acceptable household branch <15–20A depending on circuit). If trips persist, isolate loads and consult an electrician.
- Paint blistering on exterior — Problem: moisture or poor surface prep. Fix: remove blistered paint, dry substrate, prime with bonding primer, repaint in dry weather (>10°C, <70% humidity).
- Slow-draining sink after hair and soap buildup — Problem: organic clog. Solution: mechanical snake to 6–10 ft, remove trap and clean; avoid caustic chemicals if pipes are older PVC or ABS.
When troubleshooting, follow a method: observe, isolate, test, repair, and monitor. Short case study: I once fixed a kitchen sink that repeatedly flooded the cabinet. Observation found a worn rubber inlet on the dishwasher hose. Isolation: I removed the hose and ran the sink; no leak. Repair: replaced hose and installed a clamp, then tested under hot water for 10 minutes with no leakage. Time spent: 45 minutes, parts cost: US$12. This demonstrates stepwise thinking reduces unnecessary work and cost.
When to Call a Professional
If work risks life, property, or code compliance—call a licensed pro. Examples: panel upgrades, gas line work, structural beam replacement, and complex drainage re-piping. For cost-conscious options consider affordable handyman services for recurring small jobs and annual maintenance packages.
Transition: Safety is central—below are the core safety practices that protect you and your home.
Safety Best Practices for Home Repairs
Follow a prioritized safety checklist to reduce injury and code issues. For authoritative electrical and tool safety guidance consult national standards: OSHA and consumer product safety guidance from the CPSC when relevant.
- Use PPE: goggles for grinding/sanding, gloves for chemical or rough work, hearing protection for tools >85 dB, and a respirator rated for particulates/solvents when needed.
- De-energize electrical circuits: Always lock out breakers when working; verify with a non-contact tester and a multimeter for zero volts.
- Ventilate when using solvents or paints—open windows and use a fan to achieve 6–8 air changes per hour for small rooms during painting.
- Follow manufacturer torque and load ratings: use anchors rated for the specific substrate and load; do not exceed specified fixture weights for junction boxes.
- Comply with local codes: electrical rewiring, gas appliance changes, and structural modifications often require permits and inspection.
Checklist (numbered safety items above) — verify each before starting: PPE on, power off and verified, ventilation arranged, correct tool and anchor ratings, and permit checks if scope exceeds simple repairs. For regulatory specifics consult your local building authority and the National Association of Home Builders guidelines at NAHB.
Transition: A repeatable schedule ties skills and safety into regular care — the next section shows how to build one and links to templates and apps.
Creating a Home Maintenance and Repair Schedule
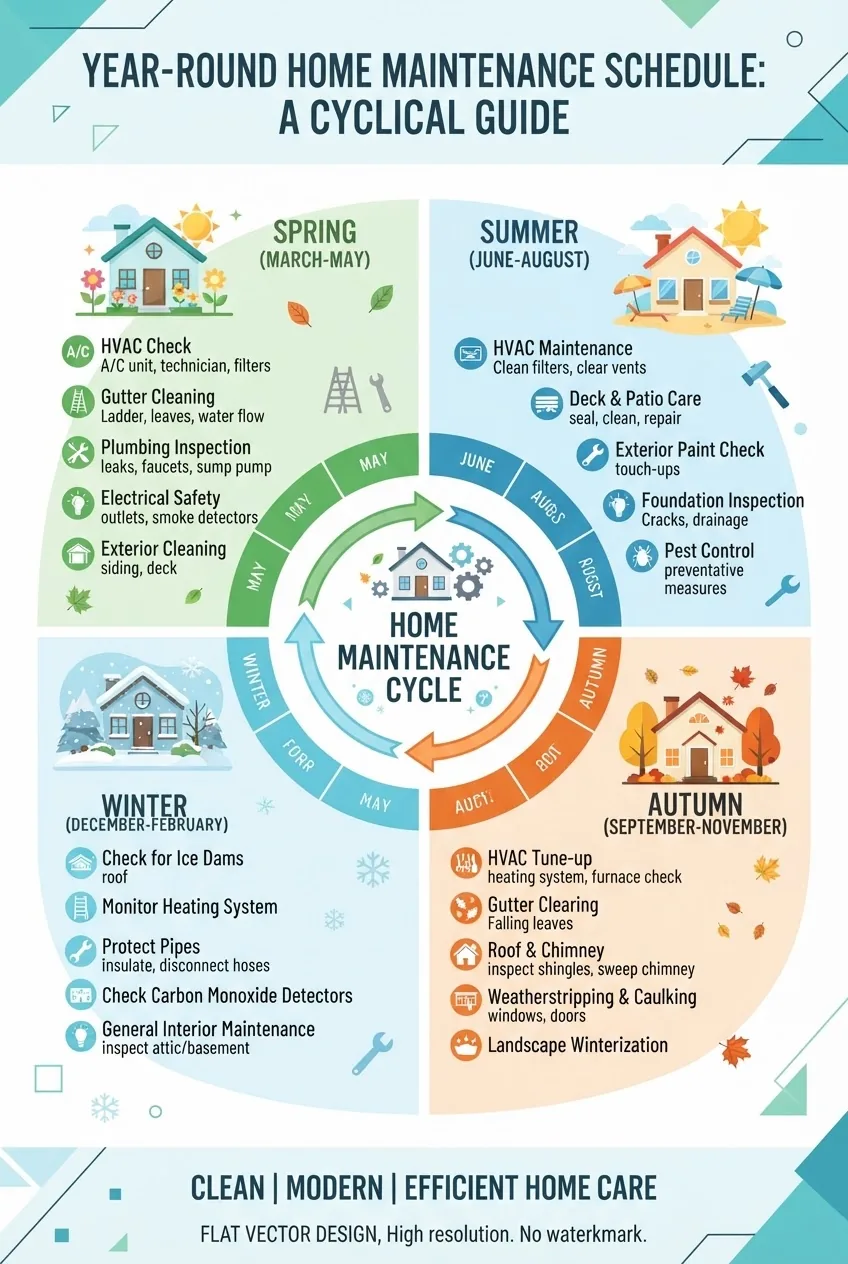
A maintenance schedule turns intentions into action. Start by mapping tasks into daily, monthly, quarterly, and seasonal buckets. For a fully detailed checklist that pairs with this schedule use the complete home maintenance checklist for yearly and monthly care which expands each bucket into specific actions and expected durations.
Step-by-step schedule creation:
- Inventory systems and parts — List HVAC, plumbing mains, water heater, roof type, and appliances. Note manufacture dates and warranty periods. Time: 1–2 hours.
- Assign frequency and owner — E.g., HVAC filter: monthly (owner), furnace tune-up: annually (pro). Enter tasks into your calendar on the first of each month or a chosen day.
- Create a log template — Fields: date, task, parts used, hours spent, cost, next due date. Use a spreadsheet or app for tracking.
- Automate reminders — Use home maintenance apps or calendar reminders. Set reminders 7 days before and the day-of for tasks requiring ordering parts.
- Use templates — Download a maintenance schedule template for equipment-intensive homes and consider the monthly home maintenance checklist if you prefer a printable cadence.
Sample seasonal overview (times are approximate): Spring (2–4 hours): roof/gutter check, exterior paint touchups. Summer (1–3 hours): AC condenser clean, deck check. Fall (2–4 hours): heating system prep, insulate pipes. Winter (1–2 hours ongoing): monitor freeze risk, clear snow from vents. For ongoing digital management integrate the schedule with the home maintenance apps your household prefers.
Transition: Before you begin actual steps on a repair, review common mistakes and how to avoid them from lived experience.
Hands-On Steps: A Practical 12-Step Training Sequence
The following numbered sequence is the core hands-on plan to build confidence: short, repeated exercises increasing in complexity. Each step starts with an action-first phrase.
- Inspect and log your home: Do a full walk-through noting visible issues. Time: 45–90 minutes. Outcome: a prioritized task list and age log for major systems.
- Practice safe shutdowns: Identify and operate main water shut-off, gas shut-off, and breaker panel. Test non-contact voltage tester on a known live circuit to confirm functioning.
- Change an appliance filter: Replace one HVAC filter (note MERV rating and direction arrow). Time: 15–30 minutes. Verify airflow improvement and record date.
- Replace a faucet washer or cartridge: Follow the exact cartridge/model number replacement steps described earlier; test under 60 PSI (typical domestic supply) for 5 minutes.
- Unclog a sink trap: Remove P-trap, clean, inspect for hair buildup, reinstall with new slip joint washers, and test for leaks.
- Install a new light fixture: Turn off breaker, test wires, mount bracket, connect wires, secure fixture and test lights. Use wire nut torque method and confirm grounding continuity with a multimeter (should read <0.5Ω).
- Patch drywall hole: Cut square opening, fit patch, tape, apply 3 coats of compound with 24-hour dry cycles, sand with 120 then 220 grit, prime and paint. Time: staged over 72 hours.
- Cut and join wood for a small shelf: Measure twice, cut with circular saw to a 90° edge using a speed square, pre-drill screw holes (1/8″ pilot for 1/2″ board), glue and screw; clamp for 30 minutes.
- Service a toilet: Replace flapper and fill valve; set water level 1″ below overflow tube. Test flush cycle for 10 consecutive flushes to verify no phantom flushing.
- Test and replace a GFCI outlet: Press TEST to trip, then RESET, then measure with a plug-in tester; if it fails, replace using the load and line labeling method. Label replacement with date and installer initials.
- Clean and inspect dryer vent: Remove lint trap, vacuum vent line, check exterior hood for free airflow, and measure static pressure drop if available (should be <0.5" w.c.).
- Run a seasonal checklist: Execute one seasonal sweep (items from schedule) and log results for continuous improvement.
Common mistakes and how to avoid them
I’ve learned from experience — here are errors I observed and how I corrected them:
- Failing to verify power off: I once replaced a light fixture without double-checking the breaker lock; the non-contact tester gave a false-negative because of a dead battery. Avoid by testing your tester on a known live source every time and carrying spare tester batteries.
- Over-tightening plumbing fittings: I stripped a compression nut by using too much torque. Remedy: tighten hand + 1/4 turn with wrench; when in doubt, replace ferrules and nuts instead of forcing old parts.
- Skipping surface prep before painting: I once saw a patch fail due to insufficient priming. Always use primer on new drywall and bare wood, and follow drying times (24 hours between coats in cool conditions).
- Using the wrong screws for exterior use: In one deck repair job I used plain steel screws and saw rust and staining within months. Use stainless or coated fasteners for outdoor work and match screw length to board thickness (1.25x thickness for secure seating).
Compact verification checklist
- Power and water shutoffs are labeled and tested.
- Basic tool kit and PPE on hand and inspected.
- Monthly filter and alarm test logged in maintenance log.
- No active leaks and gutters are cleared each season.
- Two practiced skills completed from the 12-step list in the last 30 days.
When to call a professional instead
Call a licensed professional for gas, high-voltage electrical, structural alterations, and major plumbing reroutes. If you encounter persistent leaks after two repair attempts, repeated breaker trips, or any visible foundation movement, stop work and contact a licensed specialist. For budget-friendly assistance consider vetted affordable handyman services or an annual service package to cover recurring small jobs.
Transition: Below are recommended continued-learning steps and authoritative references to deepen your skills.
Training follow-up and authoritative references
To progress beyond basics, register for a hands-on course at a community college or accredited vocational program (see NCCER earlier). For electrical code awareness, review local building code resources and national guideline summaries from the NAHB. Review federal safety publications and best practices on OSHA and consumer safety bulletins for tool handling from the Consumer Product Safety Commission.
Transition to closing: summarize the practical outcomes and encourage next steps.
Conclusion: Building Confidence and Self-sufficiency in Home Repairs
You now have a practical roadmap: what to learn first, the tools to acquire, a 12-step hands-on practice plan, a safety checklist, and scheduling templates to keep work current. Start with small, measurable wins (replace a filter, fix a faucet), log every action, and use the resources and apps linked above to automate reminders. If you follow this plan for 8–12 weeks of focused practice, you’ll be competent for most household repairs and better equipped to decide when a licensed pro is required. Ready to begin? Start with the first item on the 12-step list now and schedule your monthly maintenance check.