
Renovate my home: by the end of this hands-on guide you will have a phased plan, a sample budget and timeline, and a prioritized room-by-room action list ready to execute. Expect realistic planning and permitting to take 4–12 weeks; full remodel timelines vary by scope. Skill level assumed: motivated homeowner with basic DIY experience; structural, major electrical or gas work requires licensed pros.
Before you start
- Clear goals: scope, resale vs lifestyle priorities, and a target completion date.
- Essential tools: laser tape, stud finder, basic electrical tester, contractor-grade calculator, PPE (gloves, goggles).
- Materials list starters: paint samples, floor swatches, sample fixtures (bring home to test in room lighting).
- Documents: property deed, current warranties, previous inspection reports, local code summaries.
- Software: spreadsheet for budgeting, a project board (Trello or HomeZada) for tasks and milestones.
Understanding the Basics of “Renovate My Home”
When you say you want to renovate my home, you are choosing between a range of work types: light home refurb (cosmetic updates), targeted house remodeling (layout or system changes), and full-scale renovation (structural, envelope, mechanical). Each type has different timelines, cost ranges and permit requirements.
What “renovation” versus “refurbishment” means
“Refurb” commonly refers to surface-level improvements: paint, fixtures, cabinetry refreshes. “Remodel” or renovation implies changes to space, function or building systems. Use refurb if budget under 10% of home value; choose remodel if desired outcomes include improved circulation, adding a bathroom, or increasing square footage.
Renovation types and benefits
Common renovation types are: cosmetic, functional (kitchen/bath), structural (load-bearing walls, roof), and systems (HVAC, electrical). Benefits include improved comfort, energy efficiency, and resale value. Prioritize work that fixes water/integrity issues first; surface updates second.
Key considerations before any work
Assess the building envelope, permits, and existing systems. Factor in material lead times (currently 4–12 weeks for specialty cabinetry) and contractor availability. According to a 2023 report by the U.S. Department of Housing and Urban Development, renovation timelines frequently extend 10–25% beyond initial estimates because of hidden conditions—budget contingency is essential.
Transitioning from these basics to a practical, step-by-step plan will reduce surprises and keep you on schedule.
Planning Your Home Renovation: The Best Way to Remodel a House
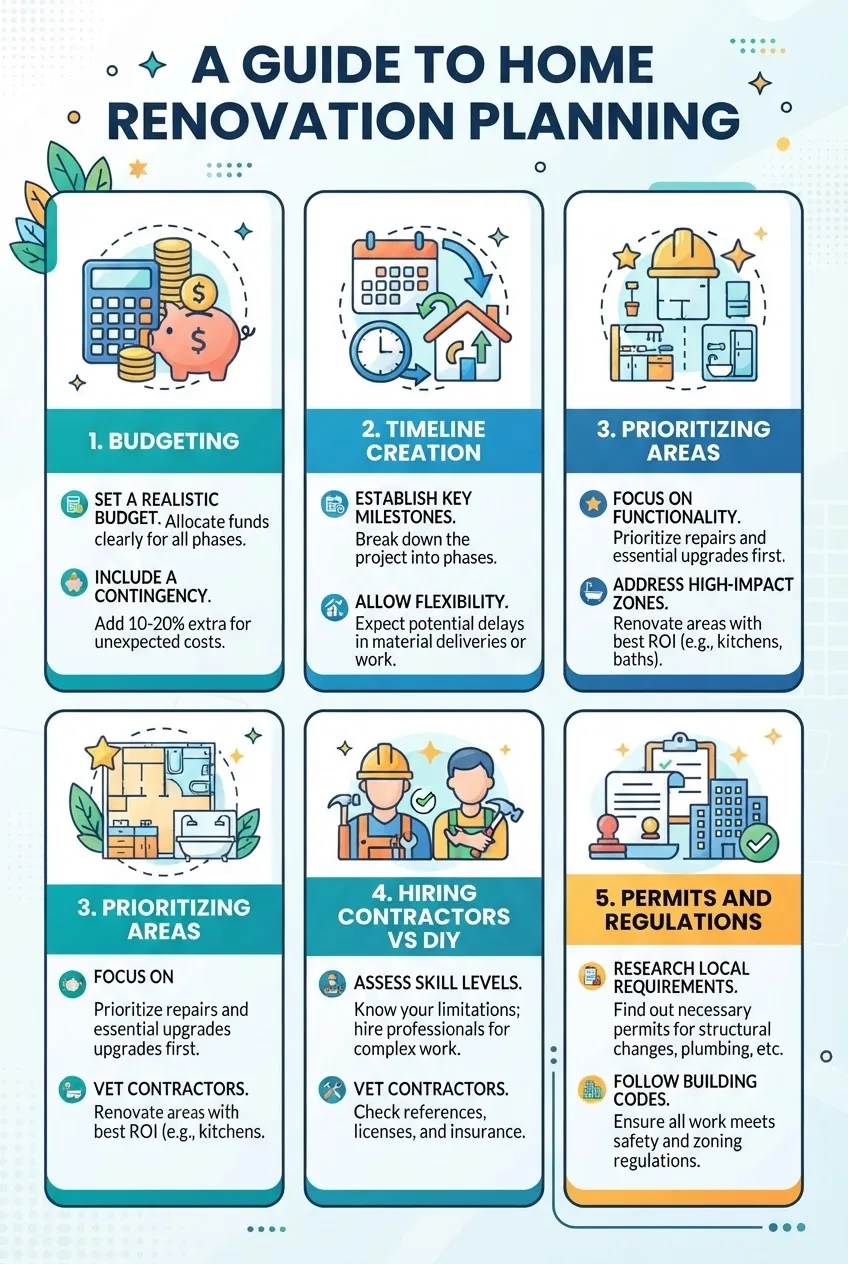
This section is the core step-by-step pathway. Follow the numbered steps below; each begins with a bold, action-first instruction and gives exact settings, amounts and timings where relevant.
- Define scope and objective. Write a one-page project brief: target rooms, functional goals (e.g., add 1 guest bedroom; improve kitchen workflow to “work triangle” standard), and three success metrics (cost, time, ROI). Limit scope for a single-phase project to no more than two adjacent rooms to keep timelines under 12 weeks.
-
Build a realistic budget. Use a three-tier budget: conservative (low), expected (mid), and stretch (high). Example for a mid-range single-kitchen remodel in 2024: low $12,000; expected $28,000; stretch $45,000. Allocate 15% contingency for unknowns. For methodology, create a spreadsheet with line items: materials, labor (hourly or fixed), permits, inspections, waste removal, and contingency. I recommend using HomeZada or a simple Google Sheets template for live tracking.
Walkthrough: list each task, estimate hours and unit costs (e.g., 8 hours demo @ $45/hr if DIY; contractor labor $65–$95/hr depending on trade), multiply and sum to produce category totals.
For financing, consider home equity lines (typical APR 6–8% as of 2024, check local offers) or 0% short-term credit offers for cabinetry/fixtures.
Transition to scheduling once your budget tiers are set.
-
Create a timeline and milestones. Work backward from your target completion date. For a mid-scale remodel: pre-construction planning 2–4 weeks; procurement 4–8 weeks; construction 3–12 weeks. Break into sprints with milestones: site prep, rough-in (electrical/plumbing), inspections, finishes, final inspection. Schedule inspections 3–5 business days after rough-in completion to avoid delays.
Use Trello or Buildertrend for task boards. I track daily tasks, contractor assignments, and material arrivals; set notifications for inspection windows. A sample cadence: Monday procurement check, Wednesday trade coordination, Friday progress photos.
- Prioritize rooms and work sequence. Tackle structural, envelope and systems first (roof, foundation, framing, HVAC), then wet rooms (bath, kitchen), then finishes. If you have to live in the house, sequence to preserve one functional kitchen and one bath at all times. For phased remodeling of an entire house, limit to two living spaces per phase.
- Decide DIY vs professional scope. DIY = demo, paint, trim, some tile; Professionals = structural, major electrical, gas, complex plumbing. For any load-bearing changes or electrical panel work, hire licensed pros. If you plan to DIY 40% or less, expect to save 20–30% on labor costs but add 10–15% in time. For small DIY ideas, see DIY home repair projects.
- Secure permits and understand codes. Identify required permits early—structural changes, electrical, HVAC and plumbing commonly require permits. Check your local permitting office or government guidance; standard building code frameworks are built around the International Residential Code. For authoritative permit guidance, consult U.S. Department of Housing and Urban Development guidance and follow local building officials’ instructions. Budget 1–3 weeks for permit approval in most municipalities.
- Select materials with trade-offs in mind. When choosing finishes, weigh cost vs lifecycle. Examples: engineered hardwood ($4–$8/sq ft) vs solid hardwood ($8–$14/sq ft); quartz countertops ($50–$150/sq ft) vs laminate ($10–$20/sq ft). For sustainability, see the dedicated section below. Order long-lead items (custom cabinets, windows) first—expect 6–12 week lead times for custom pieces.
- Vet and hire contractors. Use a three-step vetting: 1) license and insurance verification, 2) portfolio and references, 3) fixed proposal with payment schedule. Ask for a written contract with exact start/end dates, retainage terms (commonly 10%), and lien waiver requirements. For industry best-practice frameworks, review guidance from the National Association of Home Builders: NAHB contractor vetting resources.
- Plan logistics and protection. Schedule protection for existing finishes: 6-mil plastic for floors in traffic zones, moving blankets for doors, and a dedicated trash bin sized by cubic yards (1–3 yd³ for small jobs, 6–12 yd³ for full gut). Set a daily cleanup window: 30 minutes at day end for debris removal to keep trade access safe and inspections passing.
- Track progress and communicate. Hold weekly 30–45 minute on-site meetings to confirm milestones, inspect quality, and update the schedule. Use project software (e.g., Buildertrend, HomeZada) to store photos, invoices and inspection certificates. I use Buildertrend for schedule linking and HomeZada for asset warranty management.
- Closeout and documentation. Obtain final inspection sign-off, collect warranties and manuals for equipment, and document as-built changes. Store all certificates and receipts in a single folder or cloud drive with date stamps. This step protects resale value and ensures warranty claims are manageable.
Common mistakes and how to avoid them
I once underestimated lead times for custom cabinets by six weeks and had my finish stage delayed; now I always order cabinetry and major fixtures as soon as design is locked. I also used casual contractor quotes without a signed scope—this cost me 12% more. My rule now: written contracts, 15% contingency, and booking long-lead items first.
Quick verification checklist
- Permits applied and dates logged.
- Three-tier budget with at least 15% contingency.
- Milestone schedule with inspection windows.
- Signed contracts for every trade and proof of insurance.
- As-built documentation plan for warranties.
When to call in a professional
Call a licensed professional for any structural changes, electrical panel work, gas line modifications, and major HVAC revisions. If a task requires a building permit in your jurisdiction, hire a pro to ensure code compliance and pass inspections efficiently.
Now that you have a detailed planning pathway and tools, move into room-specific inspiration and practical refurb techniques below.
Key House Renovation Areas and Best Refurbing Ideas
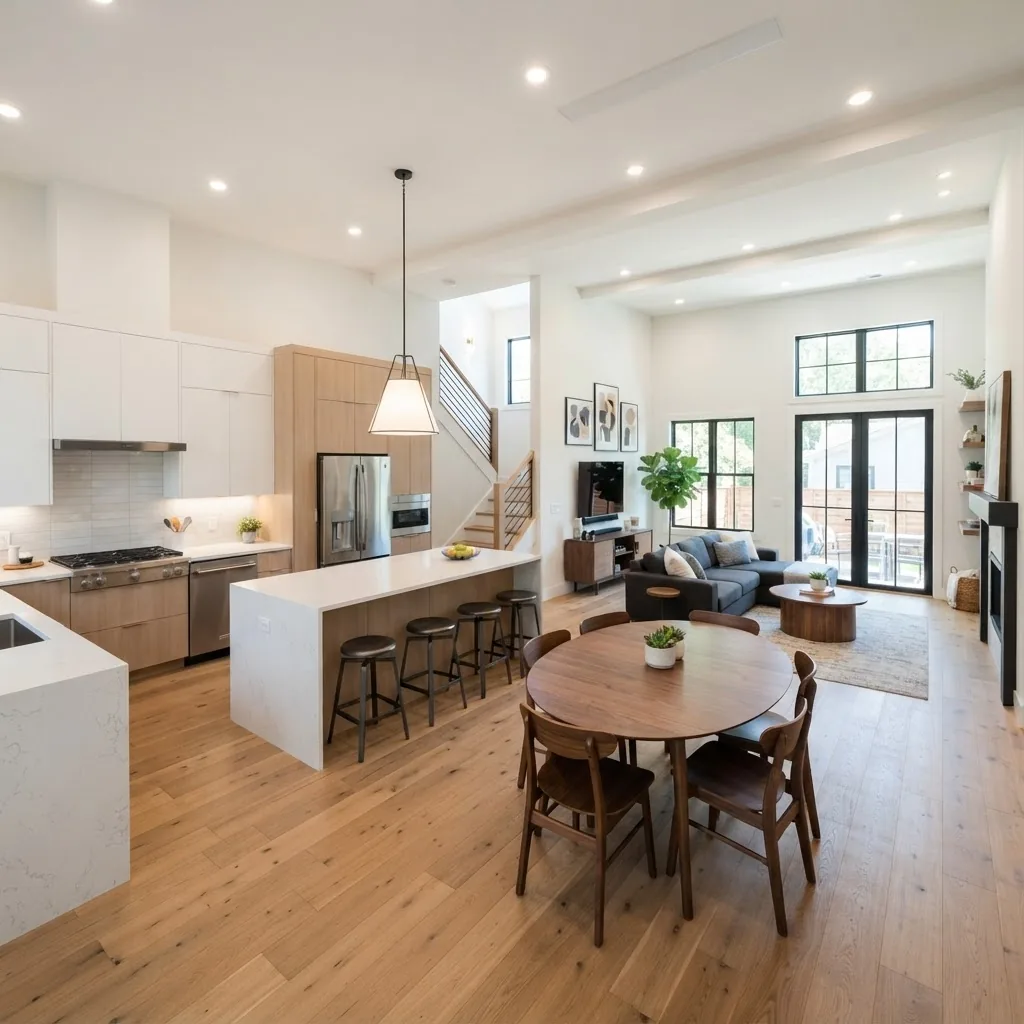
This section gives targeted ideas by area. Each suggestion balances creativity, cost, and value uplift so you can choose based on your house type and budget.
Kitchen
Kitchens return high value when planned for functionality. Ideas: replace fronts and hardware for a mid-budget refresh ($3,000–$8,000), reconfigure island to improve circulation (consult electrician/plumber; expect $4,500–$12,000), or full remodel with new layout and appliances ($25,000+). Prioritize durable surfaces in high-use areas—quartz at entry-level price points offers a 0.5–1% maintenance advantage over sealed natural stone per industry lifetime estimates.
Bathroom
Small bathrooms can be transformed with targeted swaps: replace vanity and fixtures ($1,200–$4,000), install low-flow fixtures to save water and qualify for some rebates. For wet-area waterproofing, use a Kerdi or similar membrane; expect installation to add $800–$1,500 but prevent costly water damage later.
Living and Dining Spaces
Open-plan conversions often require beams and structural design—budget $4,000–$20,000 depending on span and finishes. Simpler upgrades like recessed lighting, new millwork, and focused paint palettes deliver large visual impact for $2,000–$8,000.
Basement and Attic
Basement conversions that add legal living space typically cost $40–$120 per sq ft depending on finishes and egress requirements. Add insulation (R-13–R-19 for walls) and dehumidification to control moisture; install an egress window if adding a bedroom to meet code.
Exterior and Curb Appeal
Simple exterior updates—new siding sections, entry door, and landscaping—can produce a 5–10% increase in perceived value. Durable siding like fiber cement costs $6–$12/sq ft installed but cuts repaint cycles and maintenance costs over 20 years.
Small-budget refurb ideas
- Repaint cabinets instead of replacing: $600–$2,000.
- Swap lighting and cabinet hardware: $200–$1,200.
- Upgrade faucets and showerheads to water-saving models: $80–$300.
Transitioning from specific room ideas, consider how sustainability and energy upgrades amplify both comfort and long-term savings.
Sustainable and Energy-Efficient Remodeling Solutions

Sustainability should be a planning lens, not an afterthought. Energy-efficient upgrades often have measurable paybacks and help retain value. Key standards to consider include ENERGY STAR and LEED certifications; they guide appliance selection and envelope upgrades.
High-impact energy upgrades
- Insulation: raise attic insulation to R-49 (recommended in cold climates) or R-38 in temperate zones; typical cost $1,200–$3,500 for average home attic, with heating/cooling savings visible within 3–7 years.
- High-efficiency HVAC: replacing a 10-year-old furnace or AC with a modern unit (SEER 16+ or AFUE 95%+) yields 10–30% energy savings; incentives may apply.
- Windows: choose double-glazed, low-E units; replacement cost $400–$1,000 per window but reduces heat loss and condensation.
- Solar PV: rooftop solar payback depends on local rates and incentives; average installation for a 6 kW system ranges from $12,000–$24,000 before incentives.
According to a 2024 industry report by the National Association of Home Builders, energy-efficient retrofits and renewables are among the top three investments homeowners choose for long-term value. For health-focused renovation choices, consult the healthy homes assessment checklist.
For authoritative energy-efficiency tips and rebates, see ENERGY STAR guidelines: ENERGY STAR. Choose sustainable materials like FSC-certified wood, recycled-content insulation, and low-VOC paints—compare embodied carbon and lifecycle costs when possible.
Transitioning next to budgets and cost control will help you choose which sustainable upgrades fit your payback targets.
Budgeting and Cost Management Tips for Renovations
Budgeting is a continuous activity from planning through closeout. Below are concrete techniques and tips to manage costs without sacrificing outcome.
- Line-item cost estimation: Break every trade into hours and unit cost. Example: tiler estimated 60 sq ft at 6 hours @ $60/hr = labor $360 + materials $240 = $600 total.
- Contingency rules: Younger homes (<30 years) use 10–12% contingency; older homes or those with known deferred maintenance use 15–20%.
- Phased payment schedule: 10% deposit, 40% at midpoint, 40% on completion of rough-in, 10% on final sign-off is a common safe schedule.
- Track change orders strictly: Every scope change must have a signed change order with cost and days added.
Cost-saving strategies:
- Buy non-perishable materials during sales and store safely.
- Reuse or refinish durable components (doors, stair rails) where possible.
- Bundle trades for discounts (e.g., window installer + siding contractor).
- Consider affordable handyman services for small follow-ups and punch-list tasks rather than calling a general contractor for every minor item.
Financing options include home equity lines, renovation loans, and personal loans. Always compare APR and term length—the lower monthly payment of a 30-year amortized loan may cost more in interest than a shorter-term HELOC.
| Task | Typical DIY cost | Pro cost range |
|---|---|---|
| Paint a 200 sq ft room | $80–$250 | $300–$800 |
| Replace kitchen cabinets (refinish) | $500–$2,000 | $3,000–$8,000 |
| Full bathroom remodel | — | $8,000–$25,000 |
Transition: after budgeting, you need to anticipate and manage common challenges during work—read on.
Managing Renovation Challenges and Avoiding Common Pitfalls
Renovations produce predictable risks. Here are problems with direct remedies and references to further reading.
Unexpected structural surprises
Problem: Rotten joists or hidden water damage discovered during demo adding time and cost. Solution: Reserve 15–25% contingency for older homes and have a structural engineer on call for immediate assessment.
Contractor disputes
Problem: Scope creep and non-delivery. Solution: Use signed contracts with clear milestones and retainage. Keep a photo log and daily notes. For pre-sale preparations and prioritized repairs see what to repair before selling a home.
Permit delays and noncompliance
Problem: Work halted for missing permits. Solution: Confirm permit lists before hiring and include permit pull timelines in contractor proposals. Reference local building officials for exact code interpretation and follow industry best practices for documentation.
Quality control
Problem: Subpar finishes and missed punch-list items. Solution: Schedule staged inspections, hold back final payment until punch-list is completed, and document all approvals in writing. For common troubleshooting refer to common home maintenance problems.
Transition: integrating renovation outcomes into ongoing maintenance extends value—next we explain how.
Integrating Renovation with Home Maintenance Planning
Think of renovation as a major milestone in your home’s lifecycle plan. Proper handoff to maintenance protects the investment and keeps warranties valid.
Document all warranty start dates, maintenance intervals for new equipment, and inspection schedules. Use maintenance projects to align seasonal checks with new installations; for planning resources see home maintenance projects.
Create an annual calendar tied to your renovation closeout: filter HVAC filter changes, gutter cleaning, and service calls into a shared schedule. For a ready structure see the pillar checklist Complete Home Maintenance Checklist for Yearly and Monthly Care and combine it with a detailed inspection.
Use digital tools to manage your calendar and warranties; explore our Top Home Maintenance Apps for Scheduling and Management for recommended options and integrate warranty reminders immediately after project closeout.
Transitioning into post-renovation care ensures your work looks and performs well for years—see the final section for care steps.
Post-Renovation: How to Care for Your Newly Remodeled Home
Follow these stepwise tasks in the first 90 days and beyond to protect finishes and warranties.
- Confirm final sign-offs. Secure final inspection certificates, lien waivers from trades, and stamped plans if structural work occurred.
- Collect and file warranties. Gather manufacturer warranties, contractor guarantees (written, dated), and service contacts. Save digital copies in your project folder.
- Deep clean and cure times. Wait recommended cure times: painted surfaces 7–30 days before heavy cleaning; grout 72 hours before sealing. Use a professional or follow the deep cleaning checklist for room-specific steps.
- Schedule first maintenance calls. Book HVAC service within 30 days of startup and water heater flush within 90 days for new installations. Use a maintenance schedule template to set reminders.
- Establish routine cleaning. Use printable weekly and monthly cleaning checklists to protect finishes and maintain air quality: printable home cleaning checklist.
Transition to final summary and call to action below.