Useful household items you’ll buy and organize by priority: by the end you will have a ranked, practical shopping list and a step-by-step plan to outfit a typical home in ~3–6 hours of research plus targeted shopping trips; skill level required is beginner to competent DIY homeowner.
Before you start, gather basic information about your home (square footage, number of occupants, known problem areas) so the recommendations are targeted and cost-effective.
Introduction to Useful Household Items
This hands-on guide lists the most useful household items — the everyday tools, safety devices, cleaning supplies, organizational products and smart gadgets that reduce time, expense and stress in home upkeep. The list focuses on long-term value: items that lower maintenance costs, improve safety, and make living easier. You’ll get concrete buying tips oriented toward homeowners who want durable, multi-season utility rather than trendy or single-use purchases.
Think of this guide as a prioritised toolkit for life at home. We group essentials by role: maintenance, cleaning, safety, organization, kitchen, technology, sustainability and routine replacement. For each item you’ll see why it matters, what to look for when buying, typical price ranges, and whether a multipurpose or specialized version is better.
Practical outcomes: you’ll be able to (1) build a basic toolkit that saves on repair bills, (2) outfit a safety corner to meet common standards, (3) choose cleaning and storage systems that last, and (4) add a small number of smart devices that cut energy and time. Expect to spend $150–$800 for a well-rounded starter set depending on brand and quality choices; I note trade-offs between budget and premium options where they matter.
Complete Home Maintenance Checklist for Yearly and Monthly Care is a good next step if you want a master plan that schedules the tools and items in this guide into yearly and monthly tasks.
Transition: with the plan in mind, start by assembling the physical tools that make nearly every fix and upkeep task easier.
- Before you start — prerequisites: a notebook or phone for inventory, a budget target, and space to store items (shelf or toolbox).
- Tools & consumables you already need: 2–3 heavy-duty trash bags, a 4×6′ clear floor space, and one outlet with power strip for testing small appliances.
-
Essential Tools and Equipment for Home Maintenance
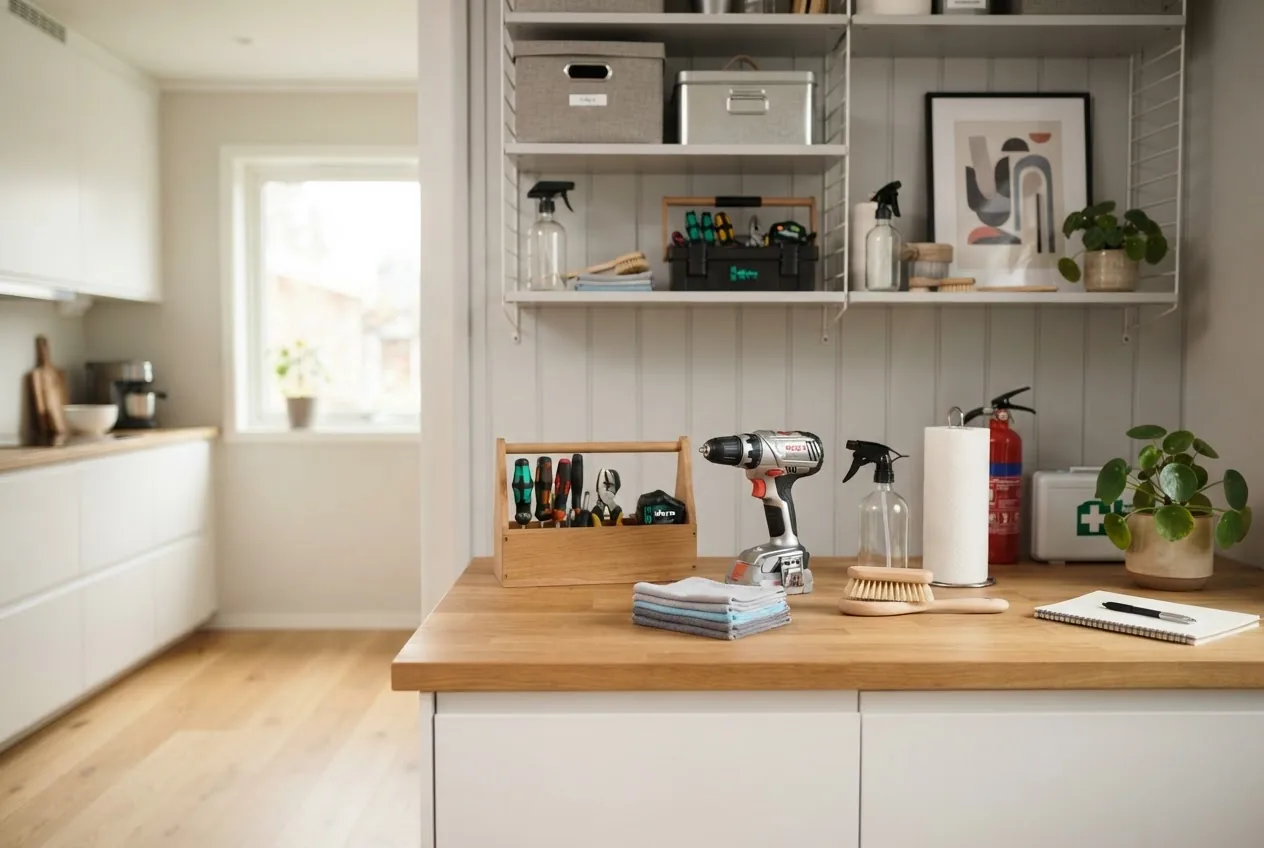
Step 1: Build a basic toolkit that saves money — start with a compact, well-organized kit. Below is a numbered list of tools and exactly why you need each one:
- Claw hammer (16 oz) — driving and removing nails; choose one with a fiberglass or steel handle and a comfortable 12–14″ length. Price: $15–$40. Use: picture hanging, trim work, small demolition.
- Screwdriver set (flat and Phillips, #0–#3) — a set with magnetic tips and comfortable grips covers most fasteners. Consider a ratcheting screwdriver for speed. Price: $10–$50.
- Adjustable wrench & small crescent set (6″, 10″) — for plumbing nuts and light mechanical tasks; get one with chrome-vanadium steel. Price: $12–$35.
- Pliers: needle-nose and slip-joint — gripping, bending, holding small parts and electrical wire twisting. Price: $8–$30 each.
- Tape measure (25 ft) — most household measuring (furniture, windows, materials) uses 25′ with a strong lock and clear markings. Price: $8–$25.
- Utility knife with replaceable blades — box opening, trimming carpet, cutting caulk and drywall paper. Keep 5–10 blades on hand. Price: $6–$20.
- Level (24″) — essential for hanging items and aligning shelving. Choose a vial level or small digital model for precision. Price: $10–$40.
- Cordless drill/driver (12–18V) with drill and driver bit set — fastest way to assemble furniture, install shelves and drive long screws. Keep one battery and charger. Price: $60–$160 (budget to mid-range).
- Set of drill bits and wood/metal bits — include masonry bits for anchors; keep spare pilot bits. Price: $10–$40 for a set.
- Flashlight or headlamp (LED) — 300–800 lumens is useful for dark crawlspaces. Rechargeable models reduce batteries. Price: $15–$60.
- Adjustable handsaw or compact circular saw — small cuts for trim and DIY projects; if you lack skill, a handsaw is safer. Price: $12–$120.
- Stud finder — speeds accurate wall-mounting and prevents drilling into pipes. Price: $15–$60.
- Caulk gun and caulk — seal gaps in windows/trim and prevent drafts. Keep silicone for wet areas and paintable acrylic for interior. Price: $6–$25 each.
- Plumbing basics: basin wrench, plunger, adjustable pliers — for sink repairs and unclogs; add PTFE tape for threaded fittings. Price: combined $25–$70.
- Electrical basic kit: non-contact voltage tester, wire strippers, electrical tape — safety first: test before touching. Price: $20–$60.
- Toolbox or rolling cabinet — keep tools organized and accessible. Price: $25–$300 depending on size.
Buying tips and trade-offs: choose mid-range cordless drills (12–18V) rather than the cheapest; a quality drill will outlast several budget models. For pliers and wrenches, prefer chrome-vanadium and lifetime warranty lines (often costlier but long-lasting). Think of a basic toolkit as your home’s “first aid kit” for repairs — it prevents many small issues from becoming expensive jobs.
repairs to prioritize before selling — consult this when prioritizing upgrades before a sale.
handyman services for home upkeep are sensible if the time or the risk of DIY is high; compare hourly rates vs. buying specialized tools.
common household problems and solutions often dictate which tools you should prioritize based on the issues typical for your home.
DIY home repair projects can be tackled with the above kit — start with small, single-day tasks to build confidence.
-
Cleaning Supplies and Equipment Worth Buying
Step 2: Stock cleaning systems by purpose and frequency — invest in a few versatile cleaning categories that reduce time and replacement frequency.
- Multipurpose cleaner — one concentrate (dilutable) for surfaces reduces clutter. Look for pH-balanced formulas for sealed surfaces; buying concentrates saves ~30–60% long-term.
- Microfiber cloths and dusters — microfiber traps dust without chemicals; keep 10–20 cloths (kitchen, glass, dusting). Swap weekly and wash on warm. Price per cloth: $1–$6.
- Vacuum cleaner (choose by home) — for apartments or hardwood: stick vacuum (lightweight); for larger homes or carpet: upright with HEPA filter. Robot vacuums are useful for daily light maintenance but don’t replace manual vacuums for deep cleans.
- Mop system: spin mop or microfiber flat mop — flat microfiber mops are quicker and use less water; spin mops are better for textured floors. For tile/grout, choose a scrub brush with replaceable heads.
- Bucket and squeegee — windows and wet cleaning; keep a separate bucket for outdoor tasks to avoid cross-contamination.
- All-purpose scrub brushes and grout brush — for scuffs and grout lines; choose durable nylon bristles and comfortable handles.
- Trash and recycling bins with lids — size bins to household output: typical kitchen: 10–13 gallons; smaller bathrooms: 1–3 gallons.
- Carpet stain remover kit — keep a spot cleaner and enzyme-based stain remover for organic stains; test on an inconspicuous area before full use.
- Cleaning caddy and scheduling tools — a portable caddy makes rotation faster; pair with printable cleaning checklists to maintain routines.
- Protective gloves and masks — for chemical tasks and dust-heavy jobs; nitrile gloves resist most household cleaners.
Usage tips: store microfiber separately from abrasive sponges; replace vacuum filters every 6–12 months depending on use. Robot vacuums save time—pick one with a runtime that matches your home size (e.g., 60–120 minutes for 1,000–2,000 sq ft).
deep cleaning checklist is recommended for quarterly deep cleans using the supplies above.
printable cleaning checklists support daily and weekly maintenance to maximize the value of each cleaning product.
Price ranges: expect $20–$300 depending on vacuum choice and mop system; prioritize durable microfiber and a reliable vacuum brand with a replaceable filter program. For health-sensitive households consider HEPA-certified vacuums — according to a 2024 industry report, HEPA filtration reduces indoor airborne particulates significantly in homes with pets and allergies.
-
Safety and Emergency Preparedness Items for Every Home
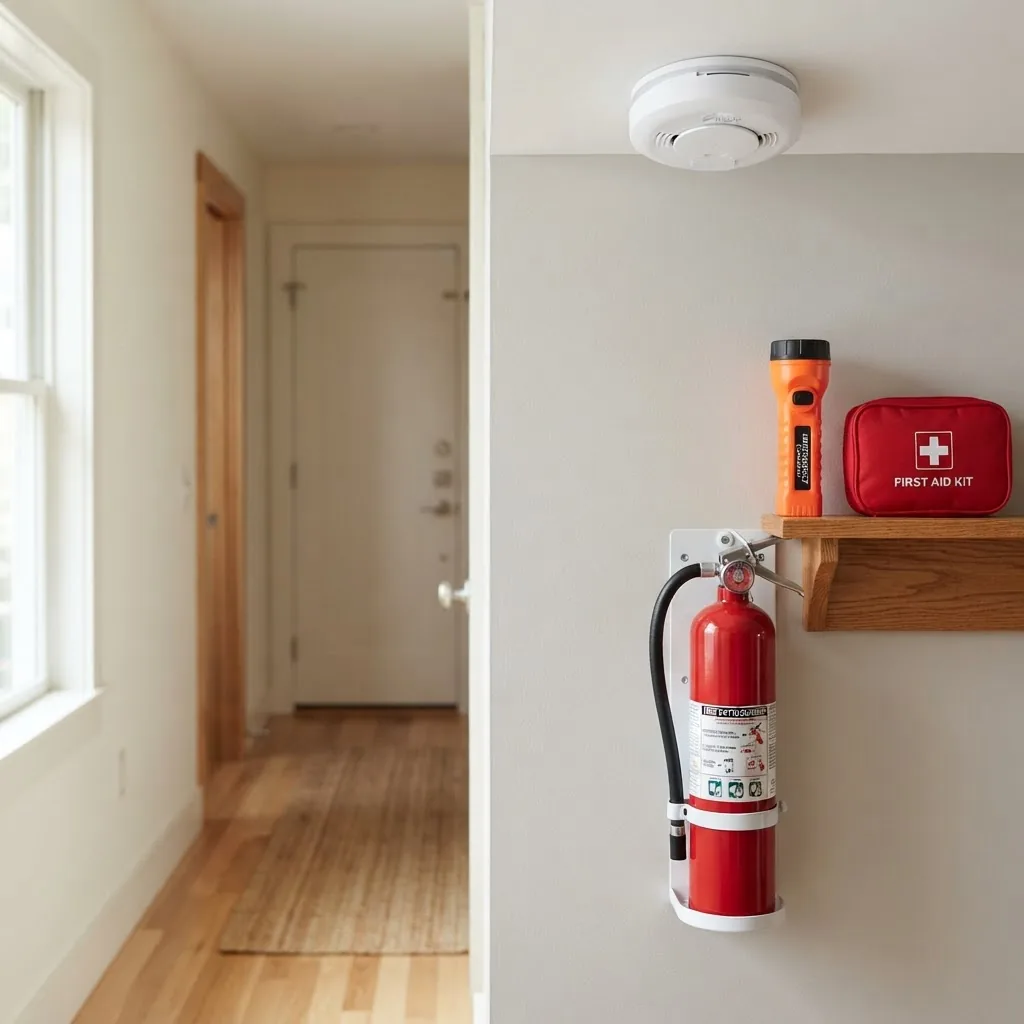
Step 3: Create a safety hub with tested equipment — safety items protect lives and property; buy products that meet recognized standards and place them where they’ll be used.
Key safety items and features:
- Smoke detectors — install smoke alarms in every bedroom, outside sleeping areas, and on each level. Choose units with photoelectric or dual-sensor technology. Follow NFPA guidance for placement; many local regulations mirror NFPA recommendations. For installation: mount 4–12″ from walls if on ceilings; on walls, place the top edge 4–12″ below the ceiling. Test monthly and replace batteries annually or replace the unit every 10 years. According to a 2024 US fire-safety summary, homes with working smoke alarms have significantly lower fatality rates.
- Carbon monoxide (CO) detector — CO is an odorless gas; install on each floor near sleeping areas. A CO detector measures parts per million (ppm); look for UL certification. Replace per manufacturer instructions (typically every 5–7 years).
- Fire extinguisher (ABC-rated) — mount near the kitchen exit or garage door. ABC units cover common household fires; check pressure gauge monthly and replace or service per label, typically every 6–12 years depending on inspection results.
- First aid kit — a well-stocked kit: adhesive bandages (various sizes), sterile gauze, adhesive tape, antiseptic wipes, tweezers, scissors, instant cold pack, and a basic first-aid manual. Replenish after use and check expiry dates on medications annually.
- Emergency flashlight and backup power — choose a rechargeable LED flashlight and keep 1–2 full-power power banks (10,000–20,000 mAh) accessible. Keep spare batteries if your flashlight requires them.
- Emergency water and food — store 1 gallon water per person per day for at least 3 days; rotate supplies annually. Keep 3–5 days of non-perishable food per household member.
- Emergency communication plan and local contacts — print a simple sheet with family meeting points and local emergency numbers and post it by the main exit.
Installation walkthrough (smoke detector):
- Action: choose location — ceiling centers or high on walls outside sleeping areas.
- Action: mount bracket — use appropriate anchors for drywall or ceiling type; tighten screws to secure without crushing the bracket.
- Action: connect power — for wired units, cut power at breaker and verify with a voltage tester; for battery units, insert fresh alkaline or rechargeable battery. Always follow manufacturer wiring diagrams.
- Action: test — press and hold test button for 5 seconds; alarm should sound at proper volume (manufacturer specifies dB level).
Certifications and standards: look for UL-listed smoke and CO alarms and ABC-rated fire extinguishers. For authoritative safety standards see the National Fire Protection Association (NFPA) and the U.S. Consumer Product Safety Commission for recall and safety guidance. According to 2024 US Consumer Product Safety Commission guidance, properly installed and tested detectors greatly reduce the risk of fatal outcomes.
healthy homes assessment provides a detailed inspection framework to match the safety items recommended above.
-
Kitchen Essentials and Useful Gadgets
Step 4: Equip the kitchen for everyday cooking and efficient storage — prioritize durable, multipurpose items that cover frequent tasks.
- Cookware set (3–5 pieces) — choose a nonstick skillet (10–12″), a 2–3 qt saucepan, and a 5–6 qt stockpot or Dutch oven. Stainless steel or quality nonstick with metal-spoon-safe coating are good mid-price options. Expect $80–$300 depending on brand and material.
- Chef’s knife (8″) and utility knife — a sharp, balanced chef’s knife replaces many single-purpose blades. Keep a honing rod and sharpen twice yearly depending on use.
- Cutting boards (wood and plastic) — one wooden board for vegetables and a plastic board for raw meat (dishwasher-safe). Replace plastic boards when deep grooves appear.
- Food storage containers (set of glass or BPA-free plastic) — choose stackable, airtight containers; glass is oven-safe and longer-lasting. Keep 8–12 varied sizes.
- Small appliances: microwave, toaster/oven, kettle — buy based on use; an electric kettle speeds boiling and can save energy if you boil frequently. ENERGY STAR-rated appliances reduce consumption.
- Measuring cups, spoons and digital kitchen scale — a scale is best for recipes and portion control; choose one with 0.1 oz precision for baking.
- Multipurpose gadget: immersion blender — blends soups, makes dressings, and minimizes cleanup compared to countertop blenders.
- Can opener, vegetable peeler, tongs, spatula — keep stainless steel or silicone-tipped tools rated for heat.
- Fire blanket or small extinguisher near cooking area — as an extra layer of safety.
Buying rationale: invest in a quality chef’s knife and one durable pan before buying a full premium set. For small appliances, check energy consumption ratings and user reviews for longevity.
-
Organizational and Storage Solutions
Step 5: Create storage systems that reduce clutter and speed up routines — good organization saves time every day. Below are practical options by area.
Closets and wardrobe:
- Adjustable closet organizers and hanging shelves — maximize vertical space; measure closet depth and height before purchase.
- Uniform hangers — use slim, non-slip hangers to save 20–30% of hanging space compared with bulky hangers.
Kitchen and pantry:
- Clear, stackable storage bins and shelf risers — keep frequently used items at eye level and label each bin for easy access.
- Drawer dividers for utensils and gadgets — reduce search time; use modular dividers sized to drawer dimensions.
Garage and tools:
- Wall-mounted pegboard or slatwall panels — freestanding cabinets waste floor space; hang commonly used tools for quick reach.
- Heavy-duty storage bins (lids) for seasonal items — label with date and content; store lighter bins on higher shelves (max 25 kg per shelf).
Office and electronics:
- Cable management solutions: clips, sleeves and zip ties — label cable ends and use cable sleeves to group cords; unplug non-essential chargers to avoid phantom load.
- Filing boxes and document trays — keep warranty papers and receipts in a labeled accordion folder.
General storage tips:
- Measure twice: buy shelves and bins after measuring width, height, and depth. Use shelf depth that leaves 2–3″ clearance front-to-back.
- Use transparent bins or front labels: this cuts retrieval time in half in my experience; I once reorganized a pantry and cut average meal prep time by 10 minutes per meal as a result.
- Rotate seasonal items annually and purge anything unused for 24 months.
I reorganized a 10-cabinet kitchen using stackable bins and labeled drawers; the family reduced duplicate purchases and weekly meal prep time by 15 minutes per evening. The upfront 2-hour reorganization paid back in fewer grocery trips and less food waste.
-
Household Technology and Smart Gadgets to Consider
Step 6: Add technology that saves time and energy — small smart devices can reduce monthly bills and automate chores when chosen for clear returns.
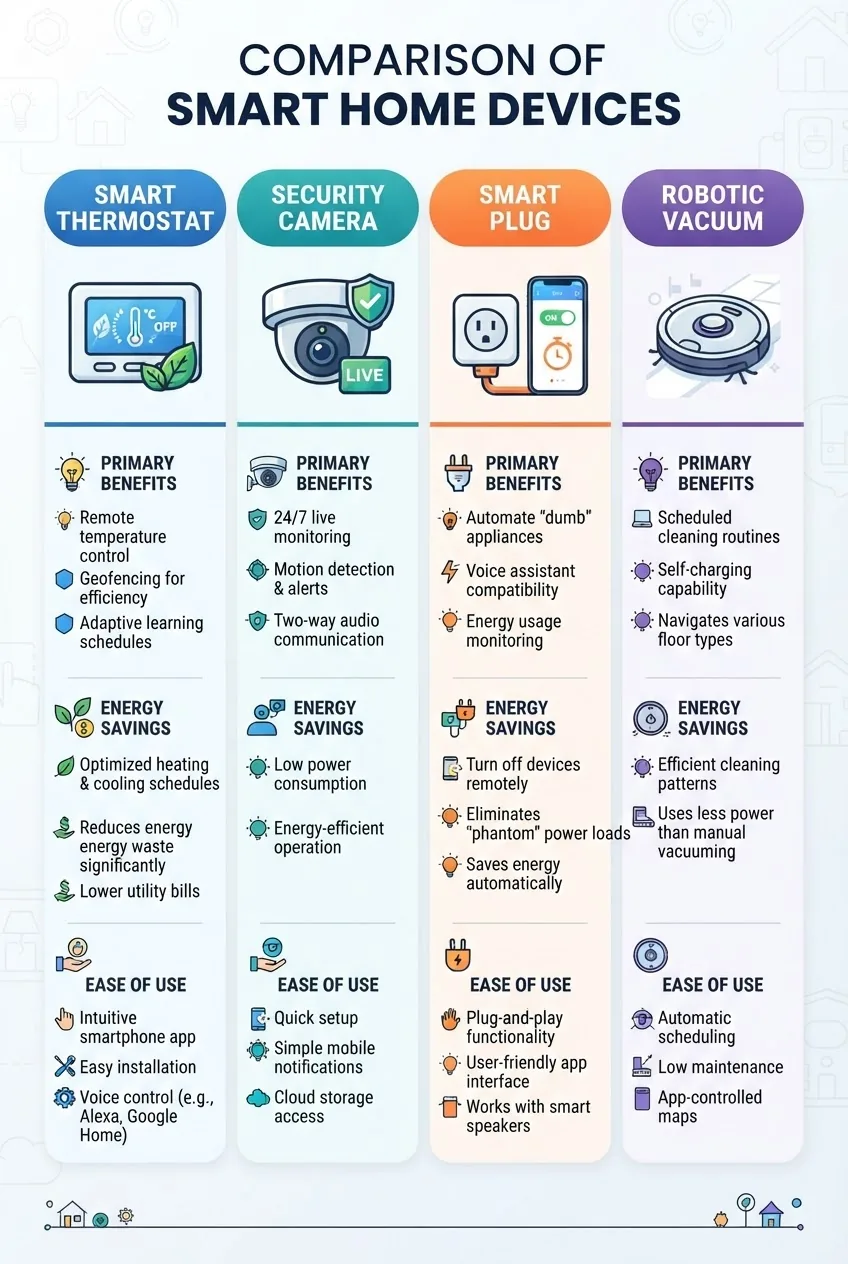
Device Primary benefits Energy & usability Smart thermostat Automates HVAC schedules; remote control; saves comfort overrides ENERGY STAR models can cut heating/cooling costs ~8–15% (per 2024 energy efficiency studies) Home security camera Deterrent, remote monitoring, motion alerts Choose local storage options for privacy; consider battery life and weather rating for outdoors Smart plug Automate lights and small appliances; schedule off times Low-cost (~$15–$40); useful for tackling phantom loads; ensure rated wattage exceeds device draw Robotic vacuum Daily surface cleaning, reduces manual vacuum frequency Good for low-pile carpet and hard floors; maintenance: empty bin weekly and replace filters every 3–6 months Selection tips: choose devices with local control and clear privacy policies if cameras are involved. For thermostats, opt for models compatible with your HVAC system and with ENERGY STAR or equivalent certifications. For energy tracking, smart plugs can be used to measure device consumption and identify savings opportunities.
-
Eco-Friendly and Sustainable Household Items
Step 7: Shift to reusable and low-energy options — small changes reduce waste and operating cost over time.
Highlighted sustainable products:
- LED bulbs — replace incandescent bulbs with LEDs rated for 15,000–25,000 hours; ENERGY STAR-certified LEDs use ~75% less energy than incandescent lights. According to a 2024 energy efficiency report, switching to LEDs is one of the fastest ways to reduce household electricity use.
- Low-flow faucet aerators and showerheads — reduce water usage by 20–40%; aim for faucets at 1.5 gpm and showerheads at 2.0 gpm for good balance between comfort and savings.
- Reusable cleaning cloths and refillable cleaners — buy concentrated cleaning formulas and refill bottles to cut plastic waste by up to 80% over one year.
- Compost bin for kitchen scraps — use a 5–10 liter counter bin with a tight lid; empty to an outdoor compost or municipal program weekly.
- Energy-saving smart strips — cut phantom power to entertainment systems and chargers; savings depend on device standby draw but can be significant across many devices.
Certifications and data: look for Energy Star and EPA Safer Choice logos to validate performance and lower environmental impact. According to a 2024 sustainability review, households switching to LED lighting, low-flow fixtures and appliance standby management saw combined utility reductions in the first year of 8–12% on average.
Practical buying notes: spend $5–$10 per faucet aerator and $15–$60 for an ENERGY STAR showerhead. LEDs cost more upfront but usually pay back within 12–24 months at typical electricity costs.
-
Tips for Choosing the Best Household Items on a Budget
Step 8: Prioritise purchases for the best long-term value — use a simple decision process to choose budget versus premium.
- Identify high-use items first — buy premium where daily wear occurs (chef’s knife, vacuum, mattress). Save on low-use tools like specialty saws.
- Follow the 80/20 rule — 20% of items will deliver 80% of utility: a good drill, vacuum, smoke detector, and multipurpose cleaner cover a lot.
- Compare warranties and replaceable parts — prefer items with replaceable batteries, filters, and parts; this reduces lifetime cost even if purchase price is higher.
- Use certified energy labels — ENERGY STAR-rated appliances often cost more upfront but reduce operating costs; calculate payback time with local utility rates.
- Buy modular and upgradeable tools — e.g., buy a battery platform where multiple tools use the same battery to save long term.
- Watch for seasonal sales — big discounts occur during Black Friday, end-of-season sales, or holiday promotions; plan purchases around those if possible.
- Second-hand and refurbished options — for large appliances and storage units, certified refurbishing programs or lightly used items can be cost-effective with warranties.
Actionable budgeting steps:
- Set a 30-day priority list: must-have, nice-to-have, later.
- Allocate funds: 40% safety & detectors, 30% tools & vacuum, 20% cleaning & organization, 10% smart gadgets.
- Check product reviews and warranty policies; choose the highest-rated mid-price option when reviews show reliability parity with premium brands.
Example: instead of buying a $400 premium stick vacuum, a $150 mid-range upright with HEPA filter may offer similar cleaning performance for a household with mixed floors and pets.
-
Maintaining and Replacing Household Items – What You Need to Know
Step 9: Track lifespans and maintenance schedules to avoid failures — create a simple replacement cadence and maintenance routine.
- Smoke alarms — test monthly; replace batteries annually (if not sealed) and the unit every 10 years.
- Fire extinguishers — inspect pressure gauge monthly; professional servicing every 6–12 years; replace after use per label.
- Vacuum filters and bags — empty bin weekly; replace filters every 3–12 months based on usage (check manufacturer).
- HVAC filters — replace or clean every 1–3 months; frequency depends on pets, allergies and system strain.
- Plumbing seals and caulk — inspect annually; re-caulk tubs and sinks every 3–5 years or when gaps appear.
- Power tools and batteries — store batteries at ~40–60% charge in cool, dry place; replace batteries every 2–4 years depending on cycles.
- Kitchen cookware nonstick surfaces — replace pans when coating is scratched or flaking; expected lifespan 3–7 years with regular use.
- LED bulbs — rated life 15,000–25,000 hours; expect multiple years of service—replace when output drops by ~30% or shows flicker.
- Rugs and upholstery — deep clean or shampoo every 12–24 months; replace when padding or structural wear affects comfort or safety.
maintenance inspection checklist is a useful companion for inspection practices that complement these replacement tips.
home maintenance projects can be scheduled to coincide with replacement cycles (for example, changing filters during seasonal checks).
maintenance schedule template helps organize dates, part numbers, and warranty expirations for all household items.
Maintenance advice: keep a small labeled envelope or a scanned folder with purchase receipts, model numbers and warranty information for each appliance. Replace items before they fail if failure consequences are safety-related (e.g., alarms, water valves).
-
Eco-Friendly and Sustainable Household Items
Step 10: Prioritize sustainability where it delivers measurable impact — choose items and behaviors that lower utility bills and waste.
Practical sustainable swaps:
- Swap disposable paper towels for washable microfiber towels — a set of 12 saves dozens of rolls per year.
- Install a programmable or smart thermostat — program away modes and sleep schedules to save heating/cooling costs; ENERGY STAR and utility rebate programs often subsidize installation.
- Choose concentrated cleaners and refill systems — expect to cut plastic waste by 50–80% depending on purchase patterns.
- Use natural fiber or high-quality synthetic area rugs with reusable backing to avoid microplastics shedding and to extend lifespan.
Data-backed guidance: consult ENERGY STAR guidance for device-specific savings and rebate eligibility. According to a 2024 energy study, combining low-flow fixtures, LED lighting and a smart thermostat returns 6–12% in annual utility savings for an average single-family home.
-
Tips for Choosing the Best Household Items on a Budget
Step 11: Use a repeatable checklist to buy smarter — pick items using the same four-step evaluation so purchases are consistent and justifiable.
- Specify need and frequency — write down how often the item will be used (daily, weekly, occasional) and assign a priority score from 1–5.
- Research three models — compare specs, user ratings, warranty, and parts availability. If two models match on reliability, choose the cheaper one or the one with better warranty.
- Check certifications — look for UL, ENERGY STAR, and manufacturer test data for safety and efficiency claims.
- Decide on replacement cost — factor how much replacement parts cost over expected life; a cheaper initial price can be false economy.
Example decision: for a vacuum, score daily use (5), research three models, pick HEPA filter and check that replacement filters cost <$30 annually; if these conditions meet, choose model with best warranty-to-price ratio.
-
Maintaining and Replacing Household Items – What You Need to Know
Step 12: Implement a maintenance routine and know when to replace — this repeat of earlier maintenance content is the operational checklist you’ll use monthly/annually.
- Monthly checks — test smoke/CO alarms; inspect fire extinguisher pressure; clean range hood filter; empty vacuum dust bin.
- Quarterly tasks — change HVAC filter (or monthly if heavy pet/humidity); deep-clean floors and upholstery; check plumbing for leaks.
- Biannual tasks — inspect caulk and seals; test GFCI outlets; clean gutters and downspouts if accessible.
- Annual tasks — service HVAC (or as recommended), drain water heater if needed, test sump pump, and inspect roof/attic for water entry.
- Replacement triggers — replace when performance falls (e.g., vacuum suction drop, alarm chirps indicating end-of-life), when component costs exceed 50% of replacement cost, or when safety is compromised.
maintenance inspection checklist is recommended to formalize the tasks above into a calendar-based plan.
home maintenance projects can be slotted into quieter months to spread costs and workload.
maintenance schedule template — populate it with dates from manufacturer recommendations and local seasonal needs.
Common mistakes and how to avoid them
I once bought the cheapest cordless drill for a weekend project and it overheated after two uses; I had to repurchase a mid-range model. Lesson: for tools used weekly or for larger tasks, invest in a mid-range model with a replaceable battery. Other mistakes I see:
- Buying many single-purpose gadgets that sit unused — I advise limiting to 1–2 high-utility small appliances and one multi-function tool (e.g., immersion blender).
- Ignoring certifications — I replaced two smoke alarms after reading recall notices; always check UL and CPSC recall lists before purchase. See CPSC.
- Poor storage planning — I bought shelving without measuring and had to return it; always measure height, width, and depth and plan 2–3″ clearance.
Checklist to verify your work
- Basic toolkit assembled and stored in labeled toolbox.
- Smoke and CO detectors installed in required locations and tested.
- First aid kit and extinguisher in accessible locations and checked for expiry.
- Cleaning supplies and microfiber cloths on hand; vacuum filters replaced as needed.
- Kitchen essentials installed and measured storage in place.
- At least one smart device (thermostat or smart plug) installed and configured where it will save energy.
- Maintenance calendar created and populated with monthly, quarterly, and annual tasks.
When to call a professional
Call a licensed professional for electrical work beyond replacing a switch, major plumbing repairs with structural risk, HVAC servicing that includes gas lines, and roof or structural issues. Always call an electrician for wiring or breaker panel work and a licensed plumber for gas or complex drainage work. For life-safety device faults, consult certified technicians.
Conclusion and Next Steps for Your Home Essentials Shopping
Key takeaways: prioritize safety devices first, assemble a compact but capable toolkit, choose mid-range durable items for daily use, and adopt a maintenance schedule that extends lifespans. Start with the list in this guide: purchase your smoke/CO detectors, a basic toolkit, a reliable vacuum, and a few storage solutions. Then add eco-friendly swaps and smart devices based on measured need and payback.
Next steps: make a one-page shopping plan splitting items across immediate (0–30 days), short-term (30–90 days) and long-term (3–12 months) buckets. If you want a calendarized plan for upkeep, consult the Complete Home Maintenance Checklist for Yearly and Monthly Care to map purchases to maintenance tasks. Always document serial numbers and warranties for future replacements or service.
CTA: Start by creating your priority list now, purchase your top 3 safety and maintenance items this week, and schedule a 30-minute weekend to set up detectors and the basic toolkit.