By the end of this hands-on guide you will have a clear roadmap to become a qualified emergency-property damage carpentry repair professional: the training pathway to choose, specific certifications and licensing steps, a safety checklist to pass on-site audits, and a 12–36 month action plan depending on entry route. This guide assumes a beginner to early-intermediate skill level (basic tools, basic math, and reliable transportation).
Before you start
- Prerequisites: valid photo ID, high-school diploma or GED recommended for many programs, physical fitness to lift 50+ lbs repeatedly, baseline hand-tool familiarity.
- Essential tools and PPE: tape measure (25 ft), 16 oz framing hammer, cordless drill (18V), circular saw, carpenter’s pencil, nail set, speed square, pry bar, N95 respirator, hard hat, ANSI-rated safety glasses, ear protection, steel-toe boots.
- Recommended certifications to pursue early: OSHA 10-hour Construction, basic First Aid/CPR, and a general safety orientation from a local workforce development center.
- Time commitment estimate: 12–36 months from no experience to journeyman/initial certification—apprenticeships average 2–4 years, trade school diplomas 9–24 months.
Introduction to Carpentry Repair in Emergency Property Damage Response
This section introduces what emergency-focused carpentry does on damaged properties and how it differs from general remodeling. Emergency-property damage carpentry repair centers on fast, durable interventions that restore structural safety and weatherproofing after events such as storms, floods, fires, and pipe bursts. Typical property damage types encountered include partial roof collapse, sheared wall studs, delaminated subfloor after flooding, compromised load-bearing members from fire, and wind-driven fascia and soffit failures. The repair scope ranges from temporary shoring and board-up to full replacement of structural members and finish carpentry that prepares a property for insurance inspection and full restoration.
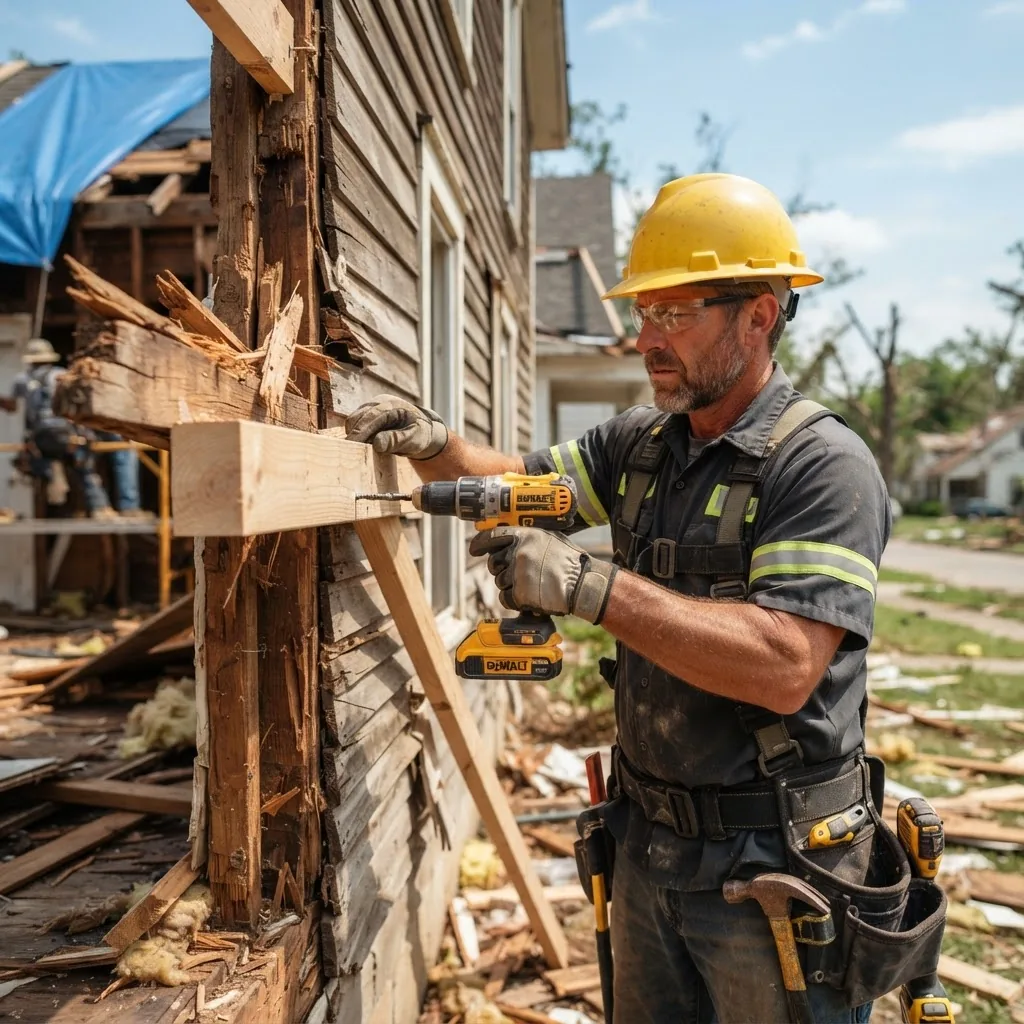
Carpentry in restoration prioritizes three sequential objectives: 1) immediate safety — remove hazards and shore structures; 2) moisture and contamination control — dry and contain to prevent mold and further rot; 3) permanent structural repair — restore load paths and envelope integrity. Unlike routine renovations where aesthetics may drive methods, emergency carpentry emphasizes rapid, code-compliant methods and repair documentation for insurers and municipal inspectors.
For a broader context of the storm and weather-related side of restoration work, see our storm damage restoration service guide and cost overview.
Transition: With the emergency scope clear, next we map the concrete training and entry pathways that lead to effective on-site carpentry repair performance.
Overview of Carpentry Repair Training Pathways
Emergency carpentry requires an educational blend of structural knowledge, hands-on skill, safety training, and documentation practices. Below are the main training options you’ll evaluate when planning your pathway. Each entry lists typical duration, outcomes, and recommended next steps for emergency restoration focus.
-
Trade school / vocational college (certificate or diploma) — 6–24 months. Structured classroom + shop time teaching framing, finish carpentry, blueprint reading, material science, and job-site safety. Ideal if you want condensed theory plus shop hours. Many programs include OSHA 10 and job placement. Pair this with targeted modules on water damage and stormboard installation.
- Typical outcome: diploma/certificate and a portfolio of shop projects.
- Next step: a short-term apprenticeship or entry-level restoration job to build field hours.
- outdoor home repair courses
-
Apprenticeship program (trade union or employer-sponsored) — 2–4 years. Earn-as-you-learn combined with portable credentials. Apprentices typically complete 8,000–10,000 hours of on-the-job training plus classroom modules (e.g., NCCER or union curricula).
- Typical outcome: journeyperson eligibility, state journeyman tests where applicable.
- Apprenticeship note: documented employer experience accelerates eligibility for contractor licensing in many states.
- Case example: a 2022 workforce development case study documented a 78% employment placement within 6 months for graduates of a 3-year restoration-focused apprenticeship (source: local workforce development program report).
Transition link: apprentices often work alongside restoration crews including basement flood cleanup services teams to manage structural drying prior to permanent carpentry repairs.
-
On-the-job training / entry-level laborer — 6–36 months. Start as a restoration laborer assisting carpenters and gaining hands-on experience: demolition, moisture assessment, shoring, and basic framing. This path requires proactive learning and may be combined with short courses.
- Outcome: practical field skills quickly acquired; slower credentialing unless combined with certification courses.
- Recommended pairing: OSHA 10/30 and manufacturer training for structural products (LVLs, OSB, engineered joists).
-
Short courses and micro-credentials — days to weeks. Targeted courses in water damage assessment, mold awareness, roof tarping, and emergency board-up. Good for contractors and responders needing rapid upskilling.
- Use these for continuing education and earning credentials like water damage response or mold awareness badges.
- Related: water damage inspection training.
-
Certification-focused training (e.g., NCCER modules) — variable. NCCER offers core modules recognized by industry; many community colleges teach to NCCER standards which helps portability across employers.
- Outcome: recognized credentials that can shorten path to contractor licensing and are increasingly requested by commercial restoration clients.
-
Online blended learning — weeks to months. Use for theory: construction math, blueprint reading, code basics. Always pair with hands-on hours; do not rely on online-only for emergency carpentry competence.
- Tip: verify whether the online provider issues a proctored exam or recognized certificate accepted by local licensing boards.
-
Specialized restoration training — storm response, flood remediation, and fire-damage carpentry modules. These are specialized and often required or strongly preferred by restoration companies.
- Recommended sources: insurance carrier vocational programs, industry associations, and accredited restoration schools.
- Complementary course: flood cleanup guide and professional service cost overview.
Transition: Once you select a pathway, you’ll need to understand certification and licensing—next we compare the major credentials and state nuances essential for emergency carpentry repair.
Certification and Licensing Requirements for Carpentry Repair Professionals
This section explains the difference between trade certifications and legal licenses, the common exam content, continuing education, and a regionally generalized comparison table of major certifications and licensing requirements. First, definitions: a certification is a competency credential issued by an industry body (e.g., NCCER) or vendor after passing exams and practical evaluations. A license is a government-issued permission to operate and contract, often requiring specific hours, exams, and business credentials. Certifications help with employability; licensing allows you to sign contracts and operate legally.

Major certifications and regulatory touchpoints commonly encountered in emergency carpentry repair:
- NCCER Core and Carpentry Credentials — widely recognized modules; exam includes written and performance evaluations on framing, blueprint reading, fasteners, and safety. NCCER credentials are often used as the classroom benchmark for apprenticeships and employer validation.
- State contractor licenses — vary. Examples: some states require a tradesman’s license for carpentry work above a financial threshold (commonly $2,500–$5,000 in contract value), others require specific classification licenses (residential vs. commercial). Always verify with your state licensing board.
- Restoration-specific certifications — IICRC water restoration (WRT), fire and smoke remediation, and mold remediation certificates are frequently required by insurers and commercial clients. While IICRC is not a carpentry cert, its modules on drying and contamination control are essential complementary credentials.
- OSHA 10/30 — required by many employers for site safety baseline. OSHA standards are legally binding for workplace safety and often required before site access.
- Continuing education (CE) — many jurisdictions require CE for license renewal, ranging from 4–16 hours per renewal cycle depending on state and license type.
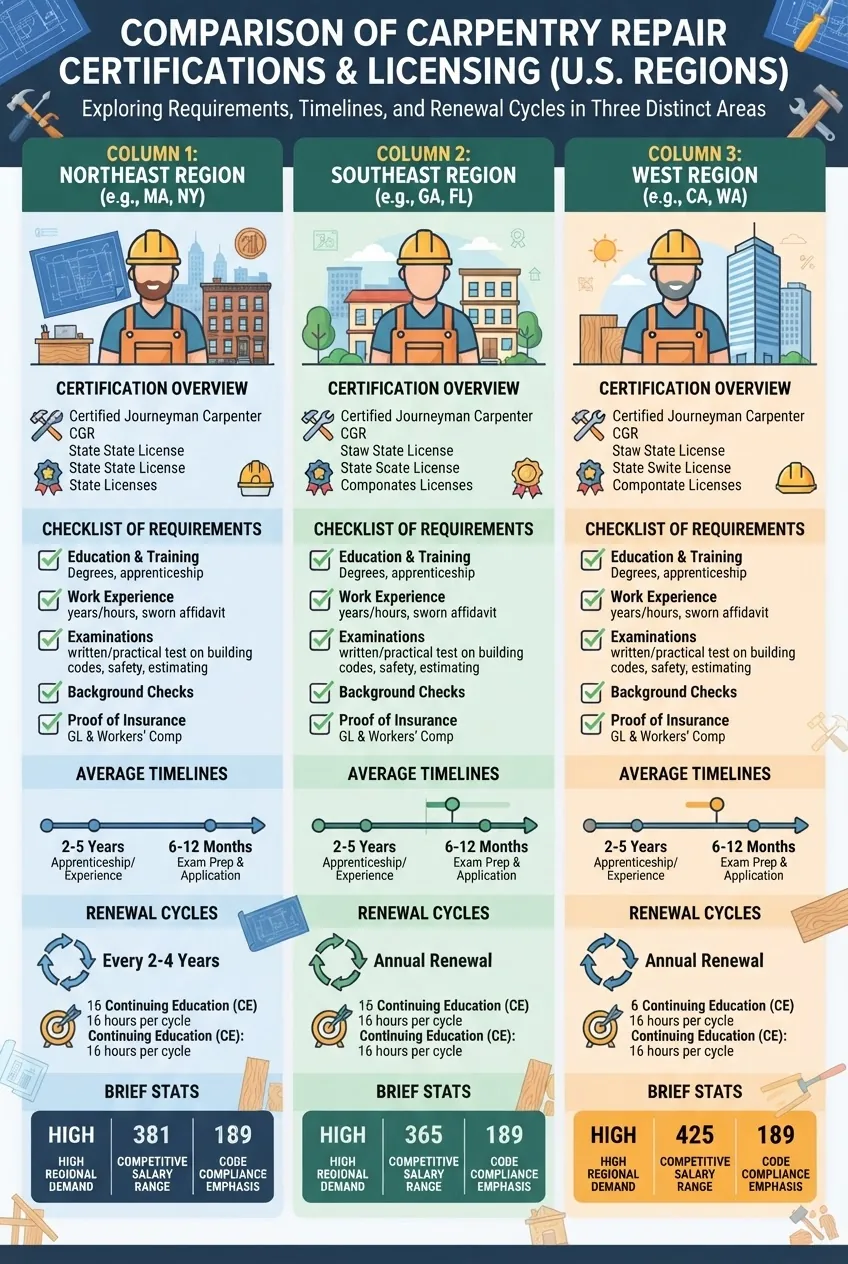
Regional licensing is highly variable. The table below generalizes three U.S. regions to show typical requirements for a person seeking to perform emergency carpentry repairs for hire. Use this as a planning tool — always check your state licensing board website for current rules.
| Region (generalized) | Common Certification & Exam | Typical Licensing Requirement | Renewal / CE |
|---|---|---|---|
| Northeast | NCCER modules; IICRC WRT; local community college carpentry diploma | State trade license often required for contracts > $3,000; exam may include business & law | 8–16 hours / 1–3 years |
| South / Southeast | Apprenticeship credentials; NCCER; IICRC modules common | Local license thresholds vary widely; many counties require business registration and liability insurance | 4–12 hours / 1–2 years |
| West / Mountain | NCCER plus vendor certifications for engineered products; restoration micro-credentials | State contractor license common for residential & commercial; proof of experience (4,000–8,000 hours) | 6–12 hours / 2–3 years |
Certification exam walkthrough (typical): expect a written section (construction math, codes, blueprint reading, safety—20–40 questions) and a performance test (cut and assemble a stud wall or roof section to specified tolerances: 1/8″ tolerances commonly required). For NCCER, the performance module is scored on dimension accuracy, fastening quality, and cleanup. For state licensing exams, expect added business and law questions covering contract law, liens, and local code enforcement.
Specialized certifications that support carpentry work in restoration: see our damage restoration service requirements, and training such as fire and water damage restoration certifications for complementary qualification.
External resources to consult for current rules and safety references:
- OSHA — federal workplace safety standards and compliance guidance for construction sites.
- NCCER — industry-recognized curriculum and credentialing for carpentry and construction trades.
- Bureau of Labor Statistics — occupational outlook and median pay data (useful for ROI calculations and career planning).
Transition: With credentials and licensing understood, the next core area is on-site skills and safety—how to perform repairs, manage hazards, and document work for insurers and municipal inspectors.
Key Carpentry Repair Skills and Safety Standards
This section combines practical how-to steps for emergency carpentry repairs with a safety checklist. First, core skills: a qualified emergency carpentry repairer must be able to perform structural assessments, execute temporary shoring, replace compromised studs and joists, install sheathing and roofing patches, and prepare assemblies for drying and mold remediation.
-
Perform a rapid structural assessment — Steps:
- Visually inspect load-bearing walls, roof spans, and floor deflections. Note deflection limits: >1/2″ over a 6 ft span indicates urgent shoring. Use a 6 ft level or laser level for measurement.
- Document damage with photos and measurements: record member sizes (e.g., 2×8, 2×10), span lengths, and connection failures (nail pull-through, sheathing blowout).
-
Secure the site and reduce hazards — Steps:
- Establish a 15 ft exclusion zone for partial collapses and use barricade tape or physical barriers.
- Shut off utilities where necessary and verify de-energization with a multimeter before working near wiring.
- Wear PPE: hard hat, N95 respirator, gloves, eye protection, and fall protection when working above 6 ft per OSHA fall protection standards.
See OSHA construction standards for fall protection and PPE requirements at OSHA.
-
Install temporary shoring and tarping — Steps:
- For sagging floors: place adjustable screw jacks at 4–6 ft on center under beams; use 4×4 posts as load transfer members. Tighten jacks incrementally—1/8 turn per pass—monitoring deflection changes.
- For open roofs: install 3/4″ CDX plywood patches over rafters with 8d ring-shank nails at 6″ edges, then tarp with 6-mil poly and contractor-grade tarps secured with roofing nails and furring strips.
-
Replace or sister structural members — Steps:
- If a single joist is compromised, sister a new joist (same species and grade) along at least 3 ft past damage and fasten with structural adhesive and 3 rows of 12d nails or 3/8″ bolts at 16″ o.c.
- For studs with rot from water intrusion, remove damaged portion back to sound wood (no staining or softness). Replace with a full-length stud where possible; otherwise, plate splice with overlapping studs and toe-nails per local code.
-
Manage moisture, remediation and contamination risks — Steps:
- Coordinate with drying crews to ensure wood moisture content drops below 16% before closing walls. Use a penetrating moisture meter and log readings daily.
- If mold or soot is present, follow IICRC protocols for containment and remediation before finish work. See water damage and mold remediation guidance.
-
Tool and material handling — Steps:
- Maintain battery tool packs at 20–80% to prolong life on site; rotate batteries to avoid mid-day downtime.
- Use mechanical lifts for materials over 50 lbs and team-lift for bundles of sheathing; avoid lifting loads above shoulder height to reduce injury risk.
-
Documentation and repair sign-off — Steps:
- Provide a daily log that records work performed, materials replaced (list sizes and grades), moisture readings, and photos with timestamps.
- Prepare an itemized repair scope ready for insurance review: include quantity, material (e.g., “5 – 2×8 SPF #2, 12 ft”), labor hours, and any permit numbers.
Safety checklist (use on every emergency repair):
- OSHA clearance for site access and fall protection plan in place.
- Utility shut-offs verified and tagged.
- PPE available and used: hard hats, eye protection, N95, gloves, steel-toe boots.
- Shoring installed where deflections >1/2″ for concerned spans.
- Moisture logs kept daily until <16% readings achieved before close-in.
- Mold/contamination protocol coordinated with certified remediator when visible contamination exists.
Practical onsite audit walkthrough: an auditor will sample three repaired assemblies and check for proper fastener schedules, nailing patterns (8d at 6″ edges for sheathing), correct adhesive use, and that moisture readings were recorded and acceptable. A clear daily log and labeled photos reduce contention during claims and inspections.
Transition: Having the skills and safety foundation lets you plan for specialization and career growth—next we explore advancement opportunities and niches within carpentry repair for emergency response.
Career Advancement and Specialization Opportunities in Carpentry Repair
A career in emergency carpentry repair can progress from field technician to foreperson, estimator, project manager, or business owner. Specializations increase earning potential and marketability; focus early on one or two niches, then broaden. Below are practical growth steps and common specialty fields where carpenters add restoration value.
- Advance via credentials — Obtain NCCER certifications, IICRC modules, and state journeyman licenses to qualify for supervisory roles. Consider contractor licensing which typically requires documented hours (4,000–8,000) and passing a business & law exam.
- Develop estimating and documentation skills — Learn Xactimate or Symbility for insurance estimates; accurate estimates convert directly to higher project responsibility and pay.
- Specialize in storm-related carpentry — Focus on hurricane roof repairs, stormboard sealing, and rapid board-up. Resources: commercial storm damage restoration.
- Commercial restoration — Larger projects require knowledge of commercial codes, engineered assemblies, and coordination with subcontractors. Commercial roles often require additional certifications and insurance limits.
- Personal property restoration and contents repair — Branch into personal property restoration for higher-margin work on interiors and finishes.
- Roofing and exterior systems — Adding roof repair services increases contract sizes. See training on roof repair services.
- Business ownership and contractor licensing — To operate your own firm, secure business licensing, liability and workers’ comp insurance, and a contractor’s license where applicable. Many states require passing a trade exam and a separate business & law test.
- Complementary services — Upskill with handyman paint service training and contents restoration to offer end-to-end restoration scopes.
- Subcontracting to storm restoration companies — Partner with larger outfits or join networks of storm restoration companies to access larger, recurring work.
Specialization fields (bullet list):
- Storm damage carpentry repairs
- Commercial storm damage restoration
- Water intrusion and structural drying coordination
- Fire-damage structural carpentry
- Mold-aware carpentry and contaminated material removal
- Roof repair and emergency tarping
- Contents and finish repair for personal property restoration
Transition: Specialization choices impact your training cost and timeline. The next section breaks down the expected costs and time investment for each route and credential.
Costs and Time Investment for Carpentry Repair Training and Certification
Understanding cost and timeline helps you plan a realistic training-to-earnings path. Below is an average stat block showing typical costs and ranges; all figures are generalized and regional; confirm with your local providers.
Average investment overview (2023–2024 figures, generalized):
- Trade school diploma: $3,000–$15,000; 9–24 months (According to a 2024 industry report from community college program aggregates).
- Apprenticeship: often paid (wage scales start ~40–50% of journeyman wage and scale up); 2–4 years with 8,000–10,000 hours required (According to a 2023 apprenticeship program report).
- NCCER module costs: $150–$600 per module; performance testing fees vary (According to NCCER published fees, 2024).
- IICRC WRT certification course: $400–$900 including exams and materials (According to IICRC training providers, 2024).
- State contractor exam and license fees: $100–$1,000 initial exam and application; insurance and bond requirements vary (According to state boards, 2024).
Factors that affect costs and timelines:
- Program length and intensity: accelerated trade programs cost more per month but reduce living expenses and time to work.
- Apprenticeship wages: apprentices earn while learning, reducing net cost but extending the total calendar time to a full credential.
- Additional required courses: OSHA 30, IICRC modules, and vendor-specific product training add $200–$1,500 cumulatively.
- Licensing exams and business setup: contractor bonds and insurance can add $1,500–$5,000 in start-up capital for a solo business.
- Return on investment: according to a 2024 labor market report, journeyperson carpenters in restoration report median wages 10–25% above general carpentry averages in disaster-prone regions due to premium emergency response rates.
For commercial-scale skills related to restoration, compare these training costs with typical service revenue—see our sibling article on commercial water damage repair costs for project-based earning expectations.
Transition: With costs and timelines in hand, you’re ready to make a choice. The next section gives a step-by-step decision guide to pick the right training program for your goals.
How to Choose the Right Carpentry Repair Training Program
Choosing the right program requires clear decision criteria: accreditation, hands-on hours, instructor qualifications, placement metrics, and compatibility with targeted certifications. Follow the step-by-step guide below, then use the checklist to verify.
- Define your immediate goal — Are you aiming to be an entry-level restoration tech within 6 months, or to pursue a journeyman license within 2–4 years? Your timeline dictates whether you choose a short course, trade school, or apprenticeship.
- Verify accreditation and industry recognition — Ask if the program maps to NCCER or IICRC standards and whether local employers recognize the certificate. Check if the program offers proctored exams for industry credentials.
-
Assess hands-on experience — Require a minimum of 400–800 shop hours for a 6–12 month program; apprenticeships should document 1,000+ supervised hours per year. Programs that place students on live restoration projects provide higher-quality experience.
Related training to consider before fieldwork: water removal services training and flood cleanup training options.
- Check instructor qualifications and employer tie-ins — Instructors should have journeyperson or contractor licenses and restoration experience. Programs with employer partnerships boost job placement rates.
- Compare job placement and licensure outcomes — Ask for placement rates (aim for >60% placement within 6 months) and sample graduate license pass rates for state exams.
- Evaluate cost, financing and ROI — Compare total cost (tuition + tools + exam fees) vs. expected starting wage. Consider apprenticeships if you prefer paid training.
- Confirm continuing education and recertification support — Choose programs that offer CE modules or refresher courses for license renewal.
- Make a final decision checklist — Before enrolling, ensure program provides: documented hours, recognized credential path (NCCER or state-approved), practical shop time, job-placement help, and an instructor with restoration experience.
As you compare programs, consider additional courses like flood cleanup training options and water removal services training that often precede or coincide with carpentry repairs on water-damaged jobs.
Transition: After choosing a pathway and completing training, use the final section to confirm readiness and take immediate next steps.
Conclusion and Next Steps for Aspiring Carpentry Repair Professionals
By now you should have a clear pathway: choose between trade school, apprenticeship, or fast-track certification; prioritize NCCER and restoration-specific credentials; and meet OSHA and local license requirements. Practical next steps: enroll in an OSHA 10 course (1–2 days), schedule an NCCER core module, and secure a local mentor or employer for on-the-job hours. Begin documenting all hours, photos, and moisture logs from day one.
Call to action: Start by contacting your local community college or apprenticeship office this week, enroll in OSHA 10, and plan a 12–36 month progression map toward certification and licensing. If you want targeted help evaluating programs in your state, visit the workforce development board or contact a regional training counselor.
Hands-On Steps (Core Actions)
- Assess your goal and timeline. Write a 12–36 month plan with milestones: OSHA 10 (week 1), NCCER core (month 1–3), apprenticeship or trade school start (month 1–6), 1,000+ field hours (year 1), state license eligibility (year 2–4).
- Secure baseline safety credentials. Complete OSHA 10 or 30 (10–30 hours). Schedule First Aid/CPR (4 hours). Budget $150–$400 total.
- Enroll in practical carpentry training. Choose trade school or NCCER-aligned program. Require minimum 400 shop hours for competency. Budget $3,000–$12,000 depending on program.
- Find an apprenticeship or employer mentor. Apply to union or employer programs; log hours daily and request supervisor sign-offs. Target 2,000 logged hours within first year if full-time.
- Complete restoration-specific modules. Take IICRC WRT or equivalent (2–5 days, $400–$900). Add mold awareness and fire-damage modules if working in those niches.
- Pass certification and licensing exams. Schedule practical exam with NCCER or state board. Prepare with mock performance tests (measurements within 1/8″ tolerances). Allow 2–6 weeks prep depending on experience.
- Build a documentation system. Use standardized job logs: photos (timestamped), moisture meter logs (daily), materials list (cut lengths and grades), and labor hours.
- Market your skills and network with restoration companies. Create a one-page services summary, highlight IICRC/NCCER/OSHA credentials, and approach restoration firms and insurance adjusters for subcontracting opportunities.
Common mistakes and how to avoid them
I once accepted a tarping-only job without confirming moisture protocols; the crew closed walls too soon and we had to reopen and re-dry framing—costly rework. Avoid this by insisting on moisture-content documentation (<16% threshold) before close-in. I also saw trainees skip performance test drills and fail practical exams; I now recommend weekly mock builds with dimension tolerances checked with a carpenter's square and tape to simulate exam pressure.
I observed new contractors underbid after ignoring permit and bond costs—always add permit, insurance, and overhead to bid calculations. Finally, insufficient PPE and fall protection led to an OSHA citation on a restoration site; prioritize fall-protection planning on any roof or >6 ft work.
Verification Checklist
- OSHA 10 or 30 completed and documented.
- NCCER or equivalent core module completed (certificate on file).
- At least 400 documented shop hours (for expedited competency) or 2,000+ field hours (for apprenticeship year 1).
- Moisture meter and daily logs used; readings below 16% before close-in.
- At least one IICRC or water-damage module completed if working on flood or mold-prone jobs.
- State or local license eligibility confirmed with licensing board; exam scheduled if applicable.
- Liability insurance and bonds obtained if contracting directly.
When to call in a professional
Call a licensed structural engineer or experienced restoration contractor when load-bearing members show >1/2″ permanent deflection over 6 ft span, when damage involves roof truss assemblies, when fire has compromised steel connectors, or when insurance requires an engineer certification for extent-of-damage. If contamination (black mold, sewage) is present, coordinate with certified remediation firms before structural close-in.