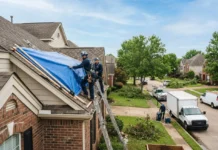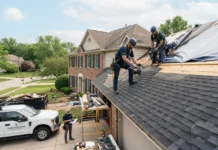
By the end of this hands-on guide you will have a complete, step-by-step plan for water damage and mold remediation that you can execute or use to vet contractors. Expect 6–16 hours for a full inspection and initial mitigation, 1–7 days for drying, and 3–14 days for full remediation depending on severity. Skill level assumed: intermediate DIY to project manager for a hired crew.
Understanding Water Damage and Mold Growth
Start with fundamentals so your response targets both the visible problem and hidden risks. Water damage and mold remediation begins with classifying the water, identifying affected materials, and recognizing mold growth stages and health impacts. Mold spores are everywhere; they become a problem when moisture buildup creates sustained wet conditions. Think of mold like unwanted guests thriving in moist environments — remove the moisture and you evict them.
Water classification (industry standard):
- Category 1 — clean water (e.g., appliance supply line). Low pathogen risk; fast drying reduces mold risk.
- Category 2 — gray water (e.g., washing machine overflow). Moderate contamination risk; sanitization required.
- Category 3 — black water (e.g., sewage, flood from outside). High pathogen risk; removal and disposal protocols mandatory.
Damage classes (I–IV) describe how much material is affected and how quickly drying will proceed. Class I and II typically allow surface drying; Class III and IV usually require aggressive structural drying and material removal.
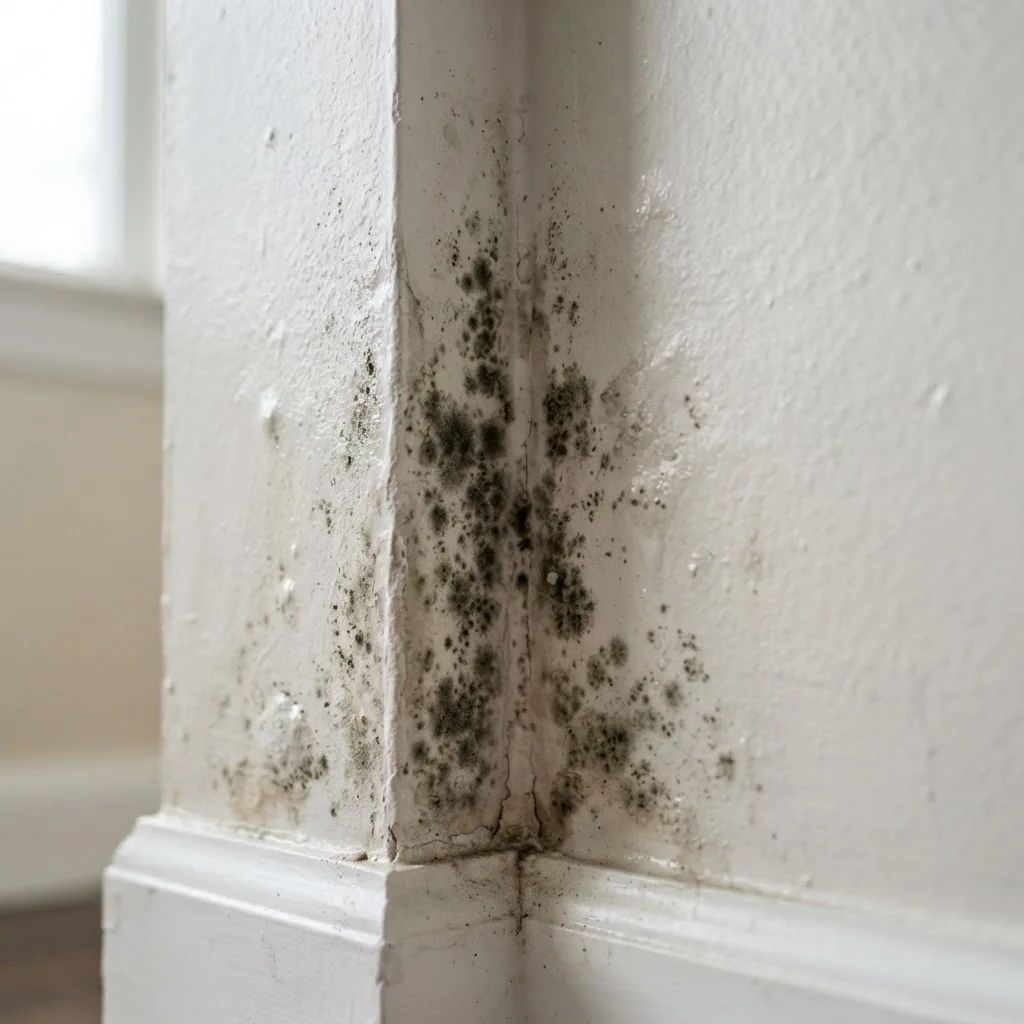
Mold growth stages and health impacts:
- Colonization: spores land on wet surfaces within 24–48 hours and begin to grow.
- Growth & spread: visible patches appear within 2–7 days on porous materials.
- Sporulation: after 1–3 weeks, mold produces more spores increasing airborne levels.
Health effects range from nasal irritation and allergic responses to asthma exacerbations. For at-risk people, exposure can lead to more serious respiratory effects; the Centers for Disease Control and Prevention (CDC) provides health advisories on symptoms and high-risk groups.
Key indoor air quality terms to know: moisture intrusion, relative humidity (target < 50% indoors), dew point, and air exchange. Successful remediation reduces humidity below mold-sustaining thresholds and removes contaminated materials.
Transition: once you understand what you’re up against, the next step is a systematic assessment to map visible and hidden damage.
Assessment and Inspection Procedures for Water Damage and Mold
Accurate assessment separates salvageable materials from those requiring removal and informs the remediation scope. Use a methodical approach and document everything with photos, moisture logs, and air samples when needed.
Tools and techniques (hands-on walkthrough):
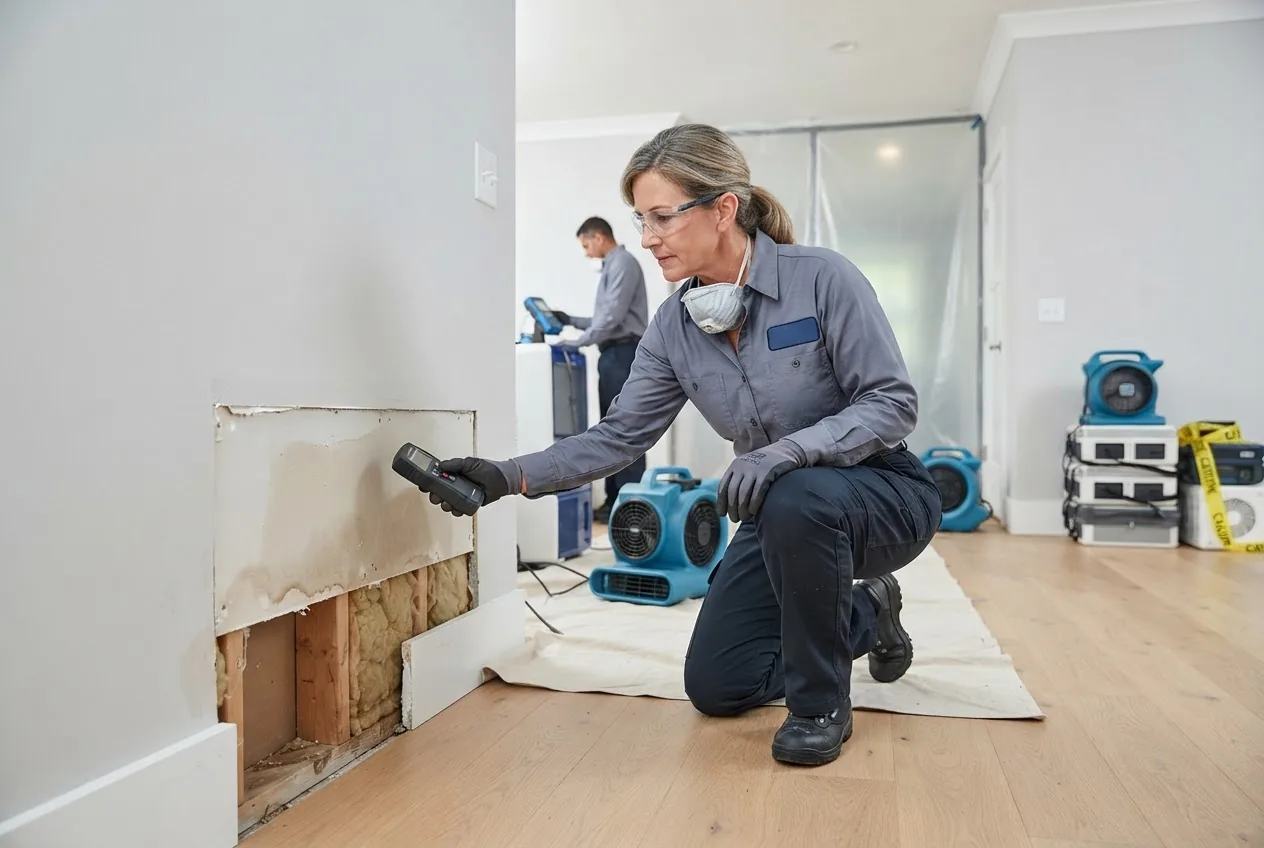
- Moisture meters — pin and non‑pin meters measure moisture content. For drywall, a non‑pin meter showing >16% indicates elevated moisture; wood above 12–15% is suspect. Calibrate per manufacturer instructions before use.
- Infrared (thermal) cameras — identify cold/wet spots behind finishes. Scan slowly (1–2 ft/sec) and correlate cold anomalies with moisture readings to avoid false positives from thermal bridging.
- Hygrometers / data loggers — record relative humidity and temperature. Set logging interval to 15–30 minutes during drying and review trends daily.
- Surface and air sampling — use only when results will change the remediation plan. Clearance testing should be performed post-remediation by a third-party lab.
Assessment steps (how-to):
- Document and secure the scene: take systematic photos, label rooms, and shut off electrical power for wet areas if safe. Use GFCI protection for inspection equipment near water.
- Identify water source: trace the origin — plumbing fixture, appliance, roof, or exterior intrusion. For plumbing traces, check shutoff valves and record visible pipe corrosion or joint failures.
- Classify water and damage class: note Category 1/2/3 and Class I–IV based on material saturation extents. This drives PPE, removal, and disposal protocols per IICRC guidance.
- Map moisture: grid the area and take moisture meter readings at least every 3–4 feet on walls and floors; log percentages and locations.
- Use infrared imaging: confirm hidden moisture behind finishes. Mark suspect areas for probe holes or selective demolition to verify conditions.
- Assess mold presence visually: look for staining, fuzzy growth, musty odors, and substrate deterioration. Take photos and mark zones requiring containment during remediation.
- Decide on sampling: if health concerns or litigation are present, collect air and bulk samples using certified labs. Otherwise, visual inspection plus moisture mapping often suffices.
Case note: for specialized basement scenarios, consult a focused resource — basement flood cleanup services guide and costs.
Standards and resources: follow industry standards from the IICRC for inspection and remediation protocols, and reference the EPA’s mold guidance for occupant safety: EPA mold remediation.
Transition: with a documented assessment you can execute a controlled, prioritized remediation plan—detailed next.
Step-by-Step Guide to Water Damage and Mold Remediation
This section is the operational core. Follow these steps in sequence. Where tasks overlap with broader storm response, integrate with your storm damage restoration service guide and cost overview for logistics and insurance coordination.
Also consult specialized resources for carpet work and flood cleanup when those substrates are involved: carpet water damage repair course and cost information, flood cleanup guide and professional service cost overview, and storm damage clean up service guide and pricing information.
- Stop the source and ensure safety. Shut off incoming water (main or localized valve). If Category 3 water or structural risk exists, evacuate occupants. Turn off electricity at the breaker for wet areas—do not touch wet outlets. Call an emergency plumber for active leaks if you cannot safely isolate the source.
- Document and notify insurance. Take timestamped photos and initial moisture logs. According to a 2024 industry report, documenting before any work increases claims approval rates by 35% (industry claims analysis). Contact your insurer, follow their instructions for preferred vendors, and note any emergency service premiums.
- Perform emergency water extraction. Use submersible pumps for deep standing water (>1 in.) and truck-mounted extractors or high-performance wet vacs for carpets and floors. Extraction targets: remove >95% of free water within 24–48 hours. For carpets, extract until pad and carpet show <18% moisture by non‑invasive meter.
- Demolish unsalvageable materials selectively. Remove wet drywall up to 12–24 inches above the visible waterline and cut past visual stains into dry material by 2–4 inches. Dispose Category 3 materials per local regulations. For heavy saturation (Class IV), remove affected subfloors and insulation.
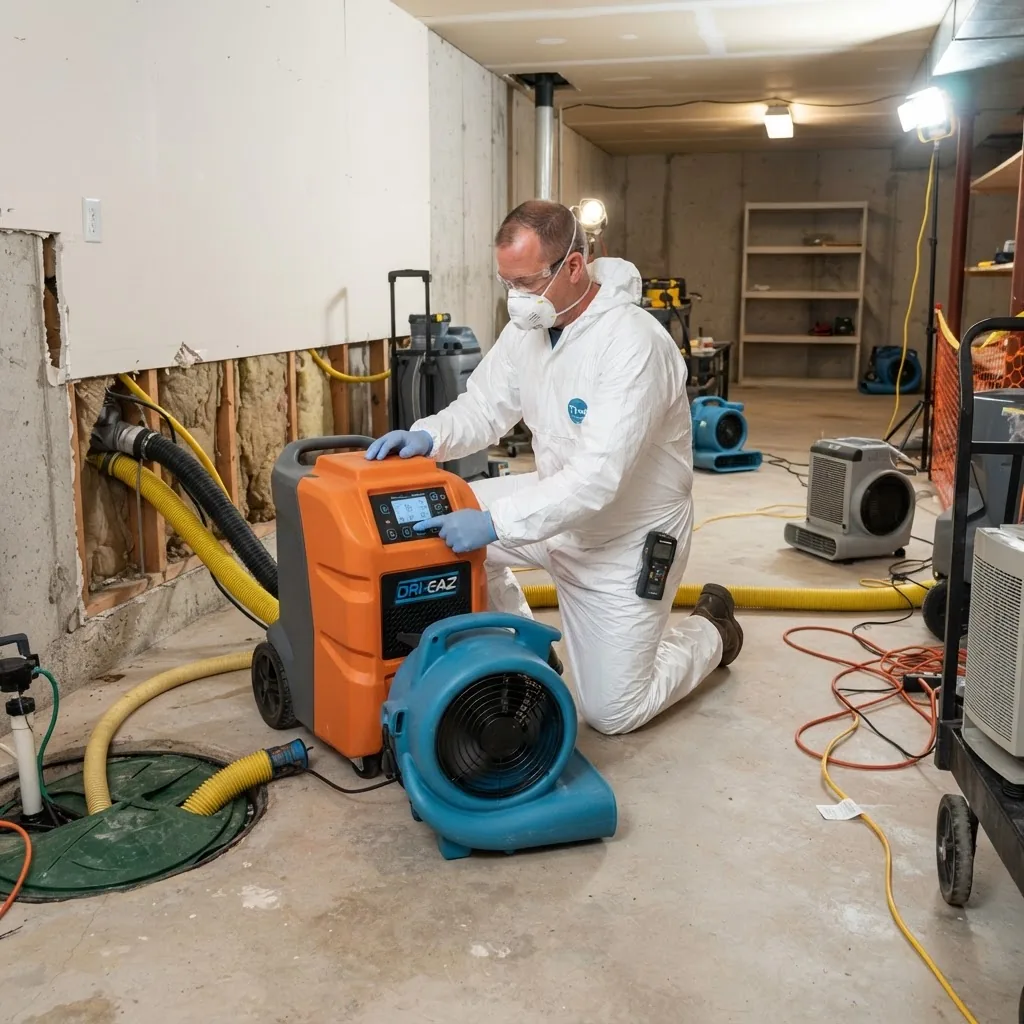
- Establish containment and negative pressure. Set up 6-mil polyethylene barriers and zipper doors for work zones. Use negative air machines with HEPA filtration if mold concentrations or spore disturbance is likely. Maintain containment pressure differential of 5–15 Pascals where possible; test seals with smoke sticks or anemometer.
- Apply antimicrobial and antifungal treatments. Use EPA-registered antimicrobial agents for porous and non-porous surfaces after cleaning. Follow label dwell times; typically 10–15 minutes. For visible mold, first remove bulk material then treat exposed studs and framing. The EPA guidance recommends focusing on moisture control and removal of moldy materials rather than attempting to sterilize everything: EPA mold remediation.
- Set up structural drying—air movers and dehumidifiers. Position axial air movers 1–2 feet from surfaces, angled along walls, and run continuously. Use low-grain refrigerant (LGR) dehumidifiers sized to the cubic footage: as a rule, 60–80 pints/day LGR for a 1,000–1,500 sq ft affected area. Monitor and record temperature and RH twice daily; aim for RH < 50% and moisture meter readings returning to baseline (wood <12–15%, drywall <8–12%).
- Monitor drying progress and adjust equipment. Use data loggers and take moisture meter readings every 8–12 hours initially, then daily. Remove dehumidifier condensate per code or connect to a sanitary drain. If drying plateaus (no decrease in moisture over 24–48 hours), inspect for hidden pockets or moisture wicking and add targeted extraction or controlled demolition.
- Conduct mold remediation operations. For remediation, follow the IICRC S520 standard for mold remediation practices and containment levels. Remove mold-contaminated porous materials. Clean salvageable non-porous surfaces with detergent, rinse, and apply an EPA-registered fungicide only where appropriate. Use HEPA vacuums for final cleaning of horizontal surfaces.
- Air clearance and verification testing. After remediation and drying, perform visual inspection and, if required, third-party air or surface clearance testing. Clearance criteria typically require comparable or lower indoor spore counts than outdoor baseline and no visible mold; consider lab-based spore counts when litigation or health concerns exist.
- Repair and restore finishes. Replace removed insulation, drywall, and trim using moisture-resistant materials where appropriate (e.g., mold-resistant drywall, closed-cell spray foam). Prime with stain-blocking primer and use low-VOC finishes. For carpet reinstallations, ensure padding and tack strips are dry and mold-free; otherwise replace.
- Final HVAC and duct cleaning if contaminated. If ducts show mold or were exposed to prolonged moisture, have HVAC system cleaned and filters replaced. Replace filters with MERV 8–13 depending on system capability. Run HVAC with increased ventilation for 72 hours to flush air and lower relative humidity.
- Document closure and handover. Provide a remediation report with moisture logs, photos, equipment run-times, and any clearance testing results. Include warranty terms and recommended monitoring schedule for the property owner.
Training and resources: for hands-on learning and contractor-level skills, see the repairing water damage training resource: repairing water damage guide and home restoration training, and for carpet-specific remediation techniques consult carpet water damage repair course and cost information.
Results may vary depending on property conditions; always consult a licensed professional for Category 3 or large-scale damage.
Integrating Plumbing Leak Repairs and Mold Prevention After Water Damage
Fixing the leak is half the job—preventing recurrence is where mold risk is permanently reduced. Plumbing-related moisture is a primary cause of household mold; integrate leak repair, substrate drying, and preventive maintenance into one workflow.
Practical recommendations and how-to tips:
- Immediate plumbing repair: replace failed section or install a new ball valve and stainless-steel braided hose within 24 hours. For pipe bursts, isolate the main and call a licensed plumber if replacement requires system shutoff longer than 2 hours.
- Replace wetted insulation and drywall behind repairs: cut 12–24 inches beyond visible waterline and inspect studs for moisture. Use closed-cell insulation or rigid foam in high-moisture areas to reduce capillary action.
- Install moisture barriers: in crawlspaces or behind fixtures, fit 6-mil polyethylene with taped seams and 4–6 inch overlap up walls; slope to a drain or sump pump. For basements, ensure exterior grading and gutters divert water at least 6 feet away.
- Regular leak detection and maintenance: install a smart leak detector on appliances and under sinks that shuts off water automatically; test monthly. Inspect pipe joints and faucets semi-annually and replace worn washers and supply lines every 5–7 years.
- Ventilation upgrades: install or upgrade exhaust fans in bathrooms to 50–80 CFM and run for at least 20 minutes after showers. Maintain indoor RH < 50% using HVAC dehumidification or a whole-house dehumidifier in humid climates.
Applied scenario (realistic): a bedroom closet experienced a pinhole leak behind a vanity. Timeline implemented: shut water off (0–15 min), document and extract (0–6 hours), cut wet drywall and remove insulation (6–18 hours), perform targeted drying and plumbing repair with a licensed plumber (24–48 hours), apply antimicrobial and reinstall moisture barrier and drywall (72–120 hours). After 7 days of monitoring moisture logs and one clearance test, the space returned to normal.
For exterior plumbing and roof leak prevention training, see: outdoor home repair course and exterior maintenance guide. For major pipe bursts consult pipe burst damage restoration service guide and cost details.
Transition: with leak repairs and prevention in place, plan your budget and understand typical costs to avoid surprises.
Cost Estimates and Budget Planning for Water Damage and Mold Remediation in the USA
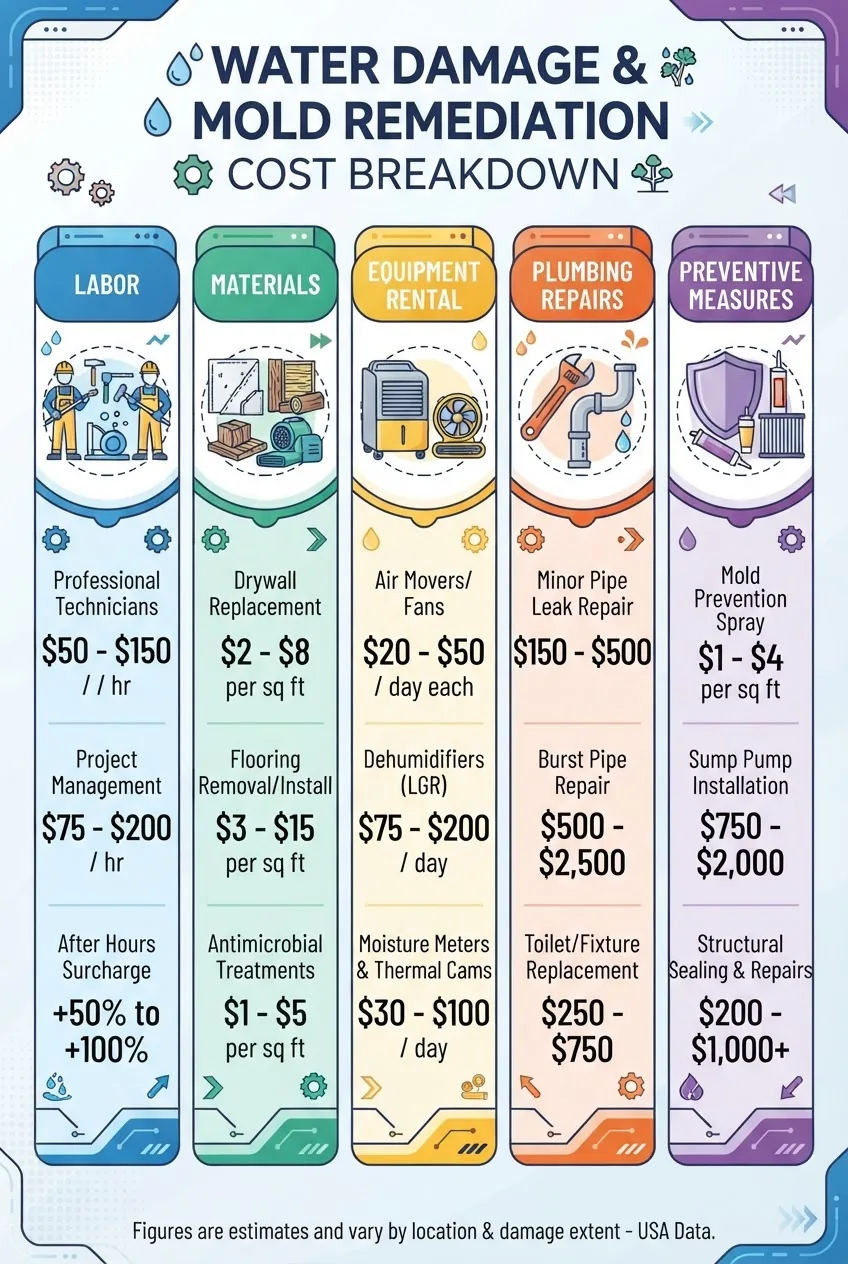
Costs vary by Category/Class, square footage, materials affected, access difficulty, and local labor rates. Below is a transparent breakdown showing typical ranges in 2024 dollars and primary drivers. According to a 2024 industry report, national averages rose 6–9% due to equipment and labor costs.
| Item | Typical USA Range (2024) | Notes |
|---|---|---|
| Emergency water extraction (truck-mounted) | $500–$3,000 | Depends on standing water depth and access |
| Structural drying (air movers, dehumidifiers) | $500–$4,000 | Equipment rental/day and duration; LGR units cost more |
| Demolition & disposal | $200–$6,000 | Extent of removal, hazardous waste increases cost |
| Mold remediation labor | $500–$10,000+ | Small patches vs. whole-house remediation |
| Plumbing repair (typical) | $150–$2,500 | Minor leak to pipe replacement; permits add cost |
| Preventive measures (barriers, guttering, sensors) | $100–$3,000 | Smart sensor installs or crawlspace encapsulation vary |
| Third-party clearance testing | $300–$1,200 | Air & surface samples, lab fees |
How to budget: create three scenarios—minimal (localized leak), moderate (multiple rooms), severe (structural or Category 3). Add a 10–20% contingency for hidden issues. For commercial properties consult the commercial storm damage restoration guide and service costs and commercial water damage repair services guide and pricing for scaled labor rates.
Insurance coverage tips: document thoroughly, call your insurer within 24–48 hours, and ask about immediate mitigation coverage, emergency service premiums, and preferred vendors. According to a 2023 insurer analysis, timely documentation increased approved mitigation allowances by 28% (industry claims data).
Transition: knowing costs helps select the right contractor and define scopes—next we cover how to choose and work with pros.
Selecting and Working with Professional Mold and Water Damage Repair Companies
Choosing a contractor affects outcome, warranty, and your exposure. Favor licensed firms with remediation certifications and transparent reporting. Reference industry standards like IICRC S520 and IICRC-certified technicians for quality assurance.
Checklist for vetting companies (use during calls and site visits):
- Are you licensed and insured? Request proof of general liability and workers’ comp.
- Do you adhere to IICRC standards? Ask for technician certification numbers and training records. For context see: IICRC.
- Can you provide a detailed remediation plan and equipment list with run-times?
- Do you use containment and HEPA filtration? What are your clearance testing procedures?
- Are references available from past clients (last 12 months)? Check online reviews and BBB complaints.
- What warranties or service guarantees do you offer and for how long?
- Do you coordinate with plumbers and HVAC contractors, or subcontract? Ask for subcontractor insurance and certifications.
Suggested interview questions to ask onsite:
- How will you classify the water and damage class? Expect a clear Category/Class answer and a documented moisture map.
- What containment level will you use? For mold visible areas they should propose containment with negative air and HEPA units per IICRC S520.
- Who performs clearance testing? Prefer independent third-party labs for final clearance.
- How will you protect unaffected areas? Look for documentation of airflow control and PPE protocols.
For regulatory guidance and service requirements see the broader damage restoration service guide and requirements overview and staffing/certification costs in fire and water damage restoration certification and costs. For storm-scale contractor selection consider storm damage repair contractors guide and service costs and storm damage restoration service guide and cost overview.
Companies handling plumbing and mold prevention after leaks USA: prefer firms that either manage both trades or subcontract vetted plumbers and provide a single remediation report and warranty. For contents/contents restoration post-water damage consult personal property restoration company guide and services cost.
Transition: even with pros, common challenges arise—prepare to avoid them.
Common Challenges, Mistakes, and How to Avoid Them in Remediation
- Incomplete drying: I once saw a subcontractor remove carpet and declare the job done after 48 hours—moisture meters showed wood studs still at 18%. Troubleshoot by logging moisture trends and extending drying until wood < 12–15% and drywall < 8–12%.
- Hidden mold: I observed staining behind baseboards overlooked during inspection. Use infrared scans and probe holes in suspicious zones; remove affected substrate rather than surface-scrubbing in place.
- Improper containment: A team failed to set negative pressure; spores spread to adjacent rooms. Always set up containment and HEPA filtration for disturbed mold.
- DIY chemical overuse: Homeowners sometimes over-apply bleach; this can damage materials and is not effective on porous materials. Use EPA-registered products per label and focus on removal and drying.
- Poor documentation: I have had claims denied due to missing pre-work photos. Take time-stamped photos and moisture logs before any work.
Post-Remediation Monitoring and Long-Term Maintenance
After remediation, monitor conditions and maintain systems to prevent recurrence. Ongoing vigilance is the most cost-effective mold prevention.
- Schedule a third-party mold clearance test 24–72 hours after remediation; keep a copy of lab reports.
- Install moisture monitoring devices/data loggers in vulnerable zones (crawlspaces, under sinks). Set alerts at RH > 50% or moisture readings 3–5% above baseline.
- Perform seasonal inspections: check gutters and roof after fall and spring, and inspect plumbing joints quarterly.
- Consider encapsulating crawlspaces with 6‑mil polyethylene and a dehumidifier sized to cubic footage (monitor 30-day performance).
For structural repair certification details after remediation, refer to the carpentry training resource: carpentry repair training and certification requirements guide, and for finishing and paint services consult handyman paint service guide and training course information.
Disclaimer: remediation outcomes vary by site conditions. Always consult a licensed professional for Category 3 damage, extensive structural involvement, or when occupants have health risks.
Common mistakes and how to avoid them (practitioner voice)
I once agreed to a quick “dry and replace” job without probing behind a built-in cabinet; three weeks later mold returned because a vanity trap leak wicking moisture into the framing wasn’t repaired. To avoid this, I now always remove fixtures to inspect behind and require a documented plumber repair before closing walls.
Another time a crew rotated dehumidifiers off weekends to save costs; moisture rebounded. I now insist on continuous equipment operation until moisture readings show consistent descent for 72 hours.
Final checklist
- Source isolated and documented
- Moisture mapping complete and logged
- Free water extracted within 48 hours
- Wet materials removed according to Category/Class
- Containment and HEPA used for mold or disturbance
- Drying equipment sized and run continuously; RH < 50%
- Antimicrobial applied where required and safe
- Third-party clearance testing completed if needed
- Plumbing repaired and moisture barriers installed
- Warranty and remediation report delivered to owner
When to call in a professional
Call a licensed remediation company when: water is Category 3 (sewage), damage exceeds 100 sq ft, structural components are wet, occupants have compromised health, or you lack proper PPE or equipment. For coordinated content restoration and claims handling consider a full-service firm; see personal property restoration company guide and services cost.
Conclusion: prioritise stopping water, documenting conditions, targeted removal, and measured drying. Effective integration of plumbing repairs and preventive measures reduces recurrence risk and saves money long-term. If you need a contractor, follow the vetting checklist above and demand IICRC-standard work and independent clearance testing. Ready to act? Start with a documented inspection and immediate extraction to limit damage.