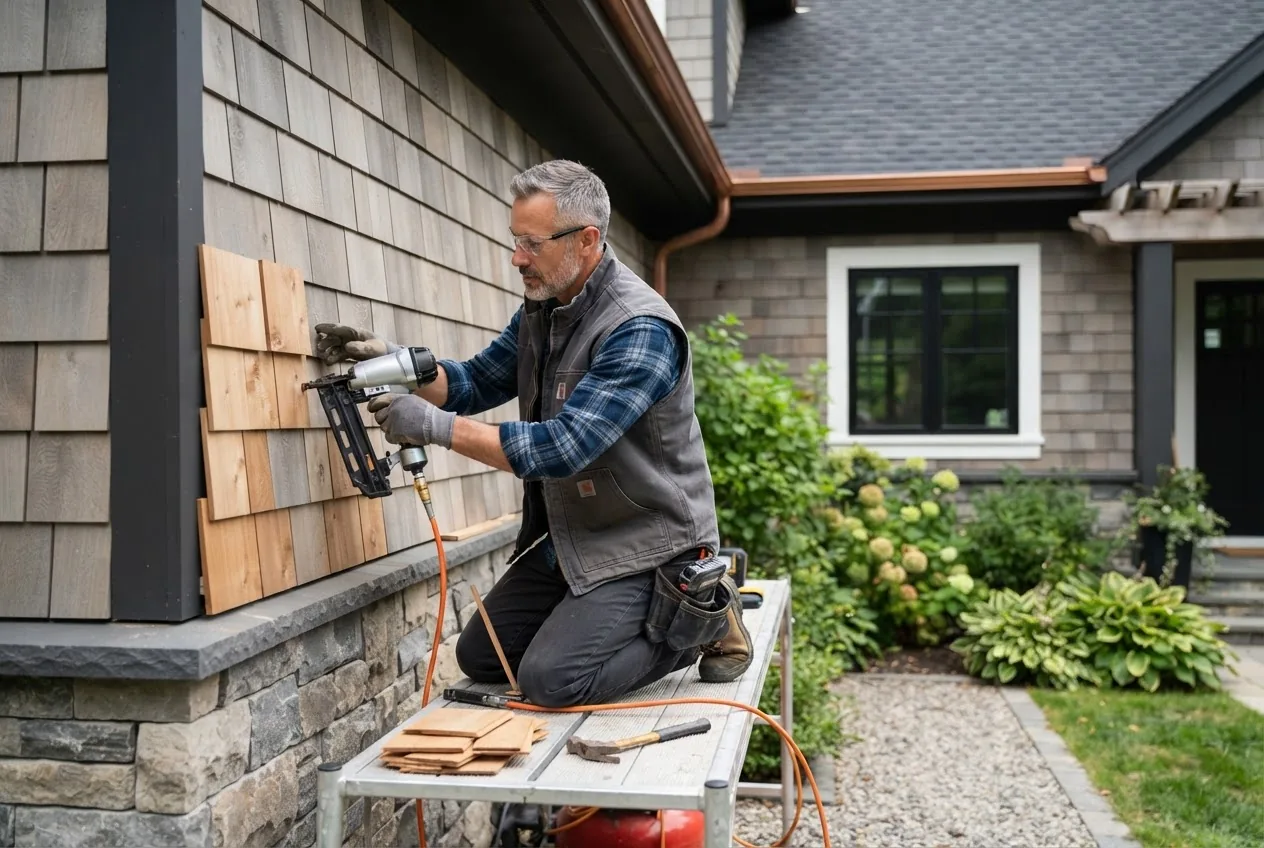
Outdoor home repair skills taught here will leave you able to inspect, maintain and complete common exterior house repairs that reduce storm risk. Expect to spend 6–20 hours learning and practicing core tasks; this guide assumes a homeowner-level skill set with basic carpentry, ladder safety and power-tool familiarity.
You will finish able to: spot weak points in siding, gutters, decks and driveways; perform routine sealing and basic repairs; maintain a seasonal schedule; and decide when to hire pros. Read the Before you start checklist, follow the step-by-step procedures, and use the post-steps checklist to verify your work.
- Basic prerequisites: comfortable working from a 6–12 ft ladder, able to use a circular saw, cordless drill, caulking gun and hand tools safely.
- Time estimate: small repairs (1–3 hours), medium jobs (4–8 hours), combined maintenance session (half-day to full day).
- Skill level: homeowner to advanced DIY; if you lack confidence with electrical or structural tasks, plan to hire a professional.
Introduction to Outdoor Home Repair
This hands-on course-style guide focuses on practical, repeatable methods for exterior house repairs and routine exterior maintenance that prevent or mitigate storm-related damage. We approach the topic like a seasonal service plan: inspect, prioritize, repair, and document. The steps you’ll learn apply to common surface-specific repair methods—siding, gutters, decks, fences and driveways—as well as preventive weatherproofing and emergency readiness.
Why maintenance matters: routine exterior care is like oil changes for a car — minor investment and effort today avoids major repairs after a storm. As of 2024, according to a 2024 industry report, homes that followed seasonal exterior maintenance had 30–45% lower out-of-pocket costs following moderate storm damage (report type: industry survey, 2024).
Definitions up front (short, plain-language):
- Moisture barrier — a membrane or housewrap placed under siding to prevent water from reaching framing.
- Flashing — metal or molded material installed at joints (roof-to-wall, window sills) to direct water away from the structure.
- Weatherproofing — a combination of sealants, flashing and overlaps designed to keep wind-driven rain out of the building envelope.
This guide balances stepwise DIY instruction with clear signals about when to call pros. It integrates inspection processes, cost-aware repair choices, and safety checks, and it links to professional and emergency resources so you can build a complete property-protection plan.
Transition: Now that you understand the goals and definitions, let’s inventory the essential tools and materials you’ll use repeatedly.
Essential Tools and Materials for Outdoor Home Repair
Below is a compact, prioritized kit for general exterior repairs. Each item includes how you’ll use it and minimum recommended specifications.
- Claw hammer (16 oz) — framing and trim nails up to 8d; choose a solid steel head, wooden or anti-vibration fiberglass handle.
- Cordless drill/driver (18V) — use with clutch settings 1–15 for screws; keep a spare battery and 1–5/8″ exterior-grade screws (coated) on hand.
- Circular saw — 7-1/4″ blade for rough cutting siding, plywood; use a fine-tooth blade (60–80T) for clean composite cuts.
- Caulking gun and exterior-grade sealants — 100% silicone or hybrid polymer sealants rated for exterior use; have clear and color-matched options. Use a 10 oz/300 ml cartridge; expect 1–2 cartridges per small house perimeter re-seal.
- Utility knife and blades — for trimming housewrap, shingles and cutting backing strips. Keep at least 5 extra blades.
- Tape measure (25 ft) — metal, locking; mark materials with a mechanical pencil for precision.
- Adjustable wrench and socket set — useful for downspout bracket bolts, fasteners and gutter spikes.
- Work gloves and safety goggles — cut-resistant gloves (ANSI A6 recommended) and ANSI-rated safety glasses for debris protection.
- Respirator mask (N95 or P100) — use when sanding paint or working near moldy materials.
- Ladder (Type IA or 1A+) — rated for 300–375 lb; extension ladder for roof/gutter work and a 6–8 ft stepladder for lower eaves. Inspect before each use.
- Caulk smoothing tool & putty knives — for finishing sealant beads and applying fillers.
- Hand sander or orbital sander — 3–5″ orbital for deck smoothing and paint prep. Use 80–120 grit sanding discs according to material.
- Gutter scoop and magnetic gutter guard tools — plastic scoops, grit brushes, and a garden hose with adjustable nozzle to flush gutters.
- Roofing nail gun (optional) — for roof flashing and shingle repair; otherwise use 1″ roofing nails and a hammer.
- Weather-resistant materials inventory — a minimal stock: 10–20 matching siding pieces or planks (or sample size), a 25 ft roll of flashing tape, 10–20 ft of drip edge, 10 ft of housewrap, extra deck boards, and a small bag of polymer-modified cement for driveway patching.
Transition: With your kit ready, you’ll now learn the methodical repair techniques for the surfaces most at risk in storms.
Step-by-Step Outdoor Home Repair Techniques
This section presents practical repair procedures for the most common exterior areas. Each subsection contains step-by-step actions, recommended materials, and clear pass/fail checks.
Repairing Siding and Exterior Walls
Common siding materials include vinyl, fiber cement, wood clapboard, and engineered wood. Choose repair materials that match existing siding and use a moisture barrier beneath replacements. For the majority of homeowners, patching and resealing are realistic tasks.
handyman paint service training
- Assess the damage. Walk the perimeter; mark damaged panels/boards and measure each piece. If rot penetrates >25% of board depth or framing is soft, plan to call a contractor.
- Remove the damaged siding. For vinyl: use a zip tool to unlock panels above the damaged piece; slide out retaining nails and remove the panel. For wood or fiber cement: remove nails or screws, cut the damaged board with a circular saw set to thickness minus 1/16″ and pry out carefully.
- Prepare the substrate and moisture barrier. Clean the sheathing; if the moisture barrier is damaged, overlap new housewrap by 6″ and tape seams with flashing tape. Fasten housewrap with staples every 12″ and tape around openings.
- Cut and fit replacement material. Cut replacement siding to the exact length. For wood, leave a 1/8″ expansion gap at vertical ends; for fiber cement, use carbide blade and seal cut edges with primer.
- Install flashing around openings. Use step flashing at roof walls, and head flashing above windows. Secure with corrosion-resistant nails and seal top edges with a 3/16″ bead of exterior-grade sealant.
- Fasten and finish. Nail or screw per manufacturer specs (e.g., siding nails 1-1/4″ into studs). For vinyl, lock panels into place per manufacturer. Apply color-matched caulk to horizontal overlaps and trim joints; too much caulk can trap water — use ≤3/16″ bead.
- Inspect your work. Verify all seams are sealed, flashing sheds water, and the siding sits flat without buckling. Water test with a garden hose for 5 minutes at seams; no visible seepage into the wall cavity should occur.
Materials & trade-offs: wood is repairable and refinishable but requires annual sealing; fiber cement is low-maintenance but heavier to install (use two-person lifts) and needs carbide tools; vinyl is easier for DIY panel swaps but can warp in heat.
Cleaning and Repairing Gutters
Clogged or leaking gutters cause many preventable water problems. Regular cleaning and correct slope reduce overflow and foundation risk. Here’s a clear, tested process.
- Secure access. Position an extension ladder on firm ground; use a ladder stabilizer for gutters. Wear gloves and safety glasses.
- Clear debris. Remove leaves and debris by hand or with a gutter scoop into a bucket. Work in 4–6 ft sections. For heavy moss, use a plastic scraper to avoid denting gutters.
- Flush and inspect. Run a garden hose with moderate pressure from the downspout end and watch for leaks or slow drainage. A properly sloped gutter has 1/4″ drop per 10 ft toward downspout.
- Address leaks and holes. Small holes: apply an exterior silicone patch or roofing cement with a patch of metal flashing behind it; for long cracks, remove fasteners, flatten edges, apply a strip of EPDM underlayment, and reseal with roofing sealant.
- Resecure loose hangers. Replace broken hangers or install new hangers every 24–36″ for aluminum gutters; every 16–24″ for heavy vinyl to maintain slope under load.
- Install gutter guards (optional). Choose low-profile mesh guards to limit debris entry; test with heavy rain simulation for 10 minutes to ensure water still enters the gutter lip.
- Downspout care. Make sure downspouts discharge at least 6 ft from foundation; add extenders or splash blocks. If water pools, extend to 10 ft or route to a dry well.
Quick pass/fail test: after cleaning and repairs, run water for 5–10 minutes across the roof edge; gutters should carry water to downspouts without overflow or leaks.
Deck and Fence Maintenance
Wood decks and fences take heavy weathering. Sealants, board replacement and rust prevention extend life. For larger structural rot or load-bearing joist failures, call a pro.
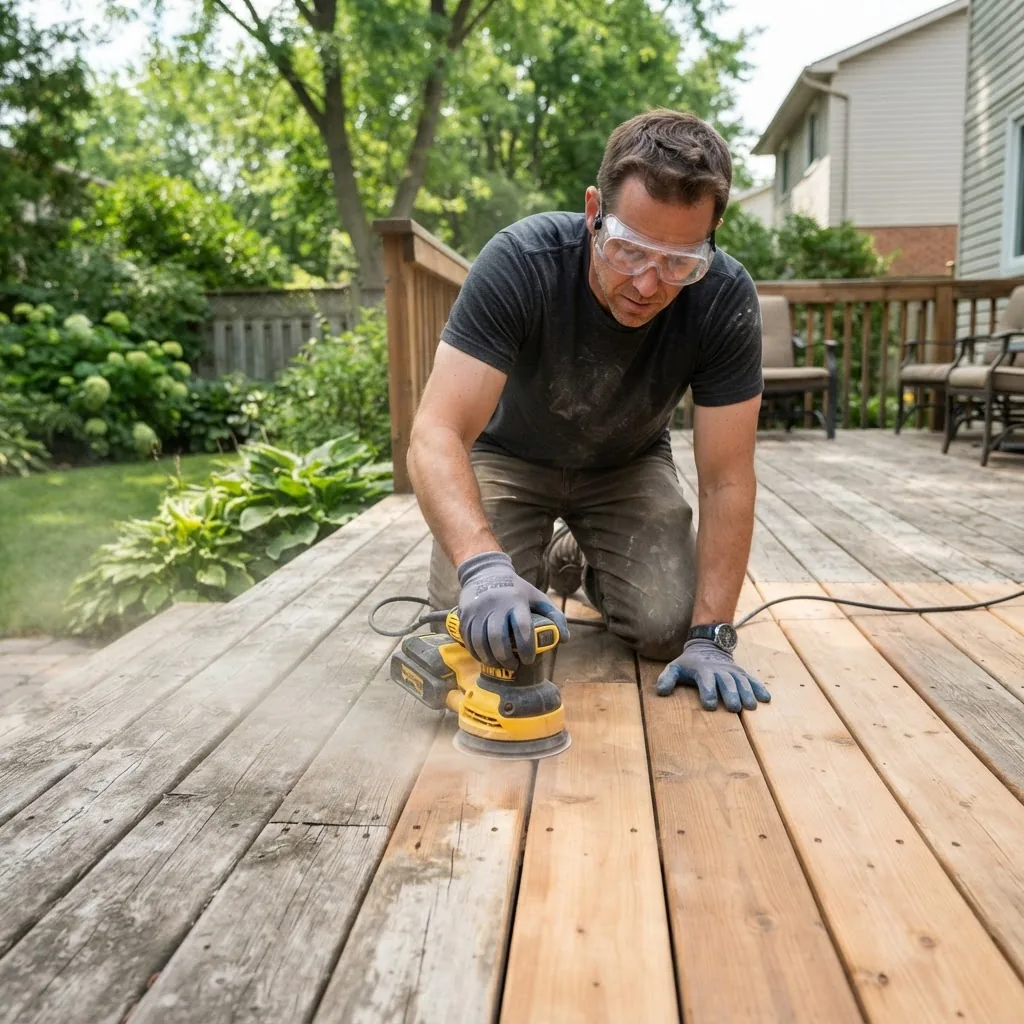
carpentry repair training and certification
- Inspect structure for rot. Probe ledger boards, joists and fence posts with an awl. Replace any member with soft spots >2″ across or 25% depth loss.
- Replace boards or posts. For deck boards: remove fasteners, cut new boards to length (leave 1/8″ gap for drainage), pre-drill and fasten with two 2″ corrosion-resistant screws each end. For posts: bury new post in 6–8″ of compacted gravel and concrete to frost depth recommended by local code.
- Sand and prepare surface. Use an orbital sander with 80–100 grit to remove splinters and old finish. For pressure-treated wood, wait 6–8 weeks after installation before sealing.
- Apply sealer or finish. Use a breathable deck stain or sealer with UV inhibitors. Apply two coats with a pump sprayer or roller; target 350–500 sq ft per gallon coverage. Allow 24–48 hours drying between coats at 70°F and <60% humidity.
- Prevent and treat rust. Replace rusted screws with stainless steel or coated fasteners. Sand rust off metal railings to bright metal and treat with a rust-inhibiting primer before painting.
- Final check. Walk the deck for bounce and creaks; tighten loose joist hangers per manufacturer torque (hand-tight + 1/4 turn with ratchet). Fence panels should align within 1/2″ of level for aesthetics and wind loading performance.
Material trade-offs: pressure-treated wood is economical; cedar has natural rot resistance; composite decking reduces maintenance but requires different fasteners and can fade over time.
Driveway and Walkway Repairs
Cracks in concrete or asphalt left unrepaired grow and collect water. Patch small cracks and resurface where needed to prevent freeze-thaw or root-driven expansion.
- Clean the crack. Remove vegetation and debris with a stiff brush and wire tool. Blow out dust using compressed air or a leaf blower.
- Underfill deep cracks. For cracks >1″ deep, fill the bottom with compacted sand or backer rod until the crack depth is 1″ below the surface.
- Apply crack filler. For concrete: use a polymer-modified cement or concrete patch; for hairline cracks, a concrete resurfacer mixed per directions. For asphalt: use hot pour asphalt crack filler or a cold patch compound for narrow cracks.
- Level and cure. Use a trowel to finish; for concrete resurfacer allow 24–48 hours dry (20°C/68°F); for asphalt cold patch, tamp to manufacturer density and do not allow traffic for 24–72 hours depending on temperature.
- Resurface if necessary. For extensive wear (>25% of surface area cracked or cupped), plan a mill-and-overlay (asphalt) or 1–2″ concrete overlay; these are mid-level contractor jobs.
Cost-effective strategy: prioritize cracks that channel water toward foundations; small annual crack filling (materials $30–$120) prevents larger repaves (contractor cost thousands).
Common mistakes and how to avoid them
I once patched gutters with tape only to find the tape failed after a heavy rain; now I always use roofing cement plus a metal patch and retest with a hose for 10 minutes. I also used interior caulk outdoors once — it cracked in six months. Lesson: match materials to exterior grade. When sanding, I underestimated dust control and created a bigger cleanup job; now I use a respirator and vacuum attachment.
Checklist: Verify your repair work
- Seams and flashing show continuous seal and no visible gaps when probed with a screwdriver.
- Gutters slope at ~1/4″ per 10 ft toward downspouts and clear water during a 5–10 minute flush test.
- Deck boards fastened with two screws per end; no soft spots underfoot and finish uniform after two coats.
- Driveway cracks filled and level with surrounding surface; no immediate pooling after a 10-minute water test.
- All replaced materials rated for exterior use and fasteners are corrosion-resistant (stainless or coated).
When to call a professional
If structural members (joists, rafters, ledger boards) have rot beyond 25% cross-section loss, if roof penetrations or flashing at chimneys are compromised, or if repairs require working on steep roofs or high-voltage lines, stop and hire a licensed contractor. Use the hiring guidance in the next section to find qualified firms.
Transition: With hands-on repairs and verification complete, adopt a routine maintenance rhythm to keep your exterior defenses strong year-round.
Routine Exterior Maintenance Tasks to Prevent Storm Damage
Use the seasonal checklist below to schedule tasks that prevent small problems from causing major storm-related damage. Think of this as a recurring maintenance plan: inspect, document, repair, and store records for insurance.
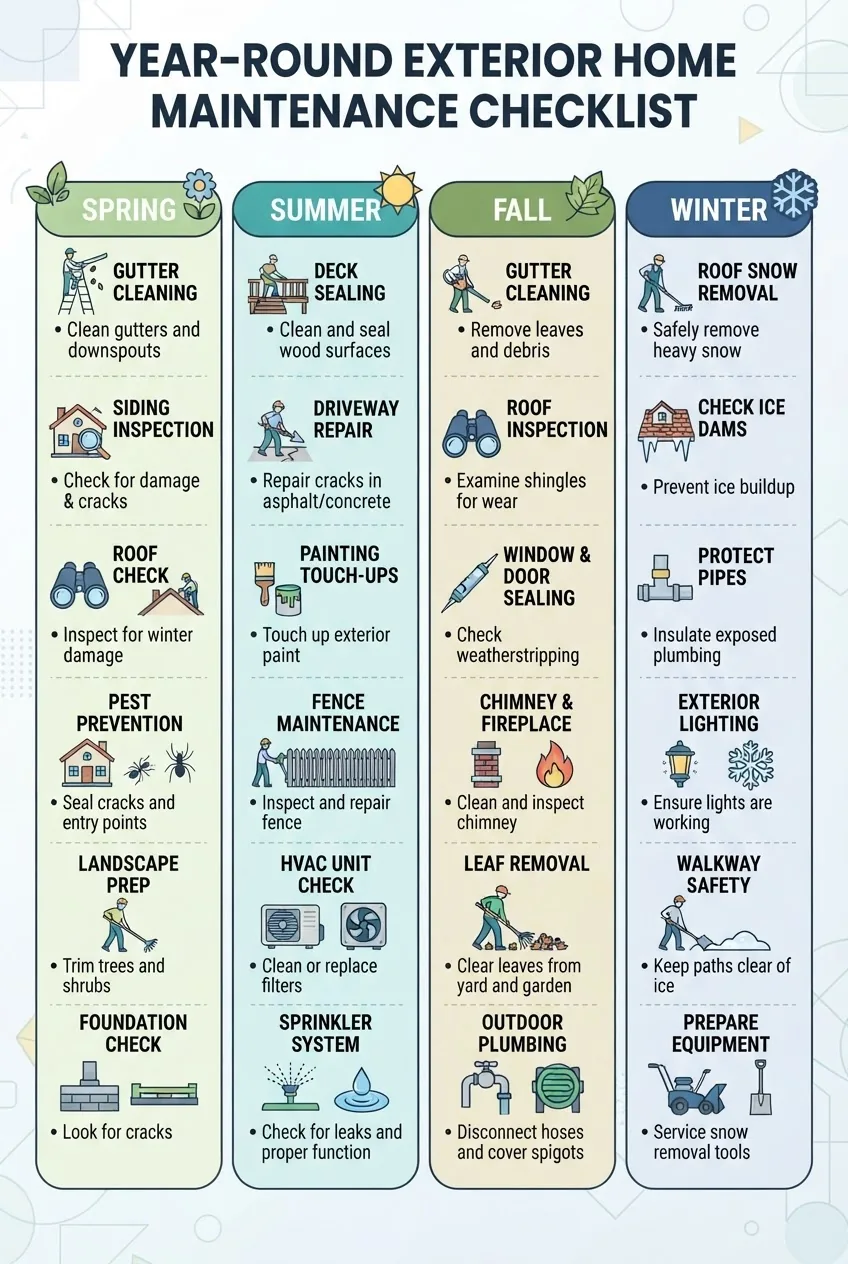
- Spring (March–May)
- Clean gutters and downspouts; flush with hose for 5–10 minutes.
- Inspect roof for missing shingles and flashing failures after winter storms.
- Check siding for winter cracking, caulk windows and doors (use exterior-grade polyurethane or hybrid caulks).
- Deck: pressure wash and apply sealer if last applied >2 years ago (cover 350–500 sq ft per gallon).
- Inspect grading; soil should slope away from foundation 6 inches over 10 ft where possible.
- Summer (June–August)
- Trim trees and limbs 6–8 ft from roofline to reduce wind-borne debris.
- Check and secure loose shingles and flashings; repair minor areas with roofing cement.
- Inspect and treat pest entry points (wasps, carpenter ants) on siding and under eaves.
- Inspect paint and touch up exposed trim; UV degrades finishes fastest in summer.
- Fall (September–November)
- Clean gutters before leaf fall; check for downspout clogs and extend discharge away from foundation.
- Check heating- and chimney-related flashings and seals (hire a chimney sweep if needed).
- Inspect insulation and attic vents for signs of moisture — early detection prevents mold growth.
- Check driveways and walkways for cracks and schedule patching before freeze-thaw cycles.
- Winter (December–February)
- After major storms, inspect roofs and gutters for ice dam formation; remove heavy snow with a roof rake from ground level.
- Check exterior pipes and hose bibs for insulation and freeze protection.
- Monitor trees for stress or cracks after heavy snow or ice accumulation; hire arborist for hazardous limbs.
- Review emergency supplies and evacuation plans; document damage quickly after any storm for insurance.
Frequency and climate notes: in high-wind or hurricane-prone regions inspect monthly during storm season. In freeze-thaw climates, inspect pre- and post-winter. As of 2024, NOAA data indicate increasing heavy-precipitation events in many regions (source type: meteorological agency, 2024), so increase inspection frequency accordingly. For code and compliance details consult your local building authority or the U.S. Department of Housing guidance at https://www.hud.gov.
Transition: Routine schedules reduce risk, but when repairs exceed your time, skill, or local permit requirements, follow a clear hiring process.
When and How to Hire Exterior Home Maintenance Services
Hiring the right exterior maintenance service can save time, ensure code compliance and reduce cost overruns. Here’s a compact decision and selection guide with cost factors and scope expectations.
- Decide scope first. Separate small repairs (single-surface fixes under $1,000) from medium jobs ($1,000–$10,000) and large structural or roof projects (>$10,000). For small repairs, a skilled handyman often suffices; for structural, roofing or major waterproofing, hire licensed contractors.
- Check credentials. Ask for business license, insurance certificates (general liability and workers’ comp), and local references. Confirm permit responsibilities — many municipalities require licensed contractors for roofing and structural work.
- Get multiple bids. Obtain at least three written estimates and a clear scope of work: materials, labor hours, start/end dates, and payment schedule. Beware of very low bids that request large upfront deposits (>30%).
- Understand cost drivers. Roofing and flashing replacement, permit fees, and engineered materials increase costs. For comparison of commercial standards, see commercial storm damage restoration services to understand how pricing scales for large projects.
- Ask about certifications. For advanced restoration hire firms that list certifications such as IICRC for water/mold or manufacturer certifications for roofing systems. For an overview of relevant certifications, review fire and water damage restoration certification.
- Negotiate warranty and maintenance plan. Get a written warranty on workmanship (typically 1–5 years) and ask about a recurring maintenance plan—they often reduce long-term repair costs by 20–40% versus reactive repairs (source type: contractor survey, 2024).
- For personal property impacts. If repairs will affect interior belongings, ask whether the contractor offers or coordinates with personal property restoration services and whether documentation for insurance is included.
- When comparing to larger service markets. Review local firm reputations against regional or national services like storm restoration companies for large-scale storm readiness and response.
- Costs—typical ranges (2024 contractor averages). Handyman exterior repair: $150–$600 per visit; gutter replacement: $600–$2,000; deck resurfacing: $800–$4,000; roof repairs: $200–$2,000 for small leaks, full roof replacement $5,000–$20,000 depending on materials (source type: contractor pricing survey, 2024).
- Get it in writing. Signed contract, scope, material specs, permit responsibilities, date windows, payment terms and a clear change-order process.
- Related professional training. If you or staff are considering upskilling, see options for home restoration training to understand professional-level competencies.
- Compare to commercial standards. If your property is a mixed-use or commercial building, you may prefer contractors experienced with commercial water damage repair services standards for code and insurance expectations.
Transition: hiring the right service reduces risk, but always follow strong safety protocols when doing any outdoor repair yourself.
Safety and Best Practices in Outdoor Home Repair
Safety is non-negotiable. Use personal protective equipment (PPE), secure ladders, and respect electrical hazards. Below are practical safety rules and legal considerations.
- PPE baseline. Eye protection (ANSI Z87.1), hearing protection for power tools, cut-resistant gloves (ANSI A6), and N95/P100 masks when sanding or dealing with mold. Replace PPE as recommended by manufacturer or after visible damage.
- Working at heights. For gutters and roof edges, use a Type IA extension ladder rated 300 lb, tie-off ladder base or use ladder stabilizer, and avoid working alone—buddy system reduces risk. If you must work alone, use a phone check-in every 15 minutes. Do not climb on wet shingles or icy surfaces.
- Tool handling and maintenance. Keep blades sharp (dull blades cause kickback), set circular saw depth to material thickness + 1/16″, and inspect cords for frays. For battery tools, follow manufacturer charging instructions to preserve battery life and prevent thermal events.
- Weather considerations. Do not perform exterior repairs in sustained winds over 25 mph or during thunderstorms. For hurricane-prone areas follow local evacuation orders rather than attempting major repairs during a storm. For official storm preparedness guidance consult the National Weather Service at https://www.weather.gov.
- Legal & code compliance. Many jurisdictions require licensed trades for structural, electrical, or significant roofing work. Verify local requirements with your building department (see https://www.hud.gov for housing guidance).
- Hazardous materials. If you encounter suspect asbestos (older vermiculite or certain sidings) or lead paint during repairs, stop work and hire certified abatement professionals.
- Insurance and documentation. Photograph damage and repairs before work begins. Keep receipts and contractor contracts; these items are helpful for insurance claims and warranty enforcement.
Use these practical boundaries: if a task requires lifting >75 lb overhead, working above 12 ft without fall protection, or involves exposed wiring, hire a licensed professional.
Transition: outdoor repairs are also the front line in emergency property damage response; the next section explains how routine repairs integrate with formal storm recovery.
Integrating Outdoor Repairs with Emergency Property Damage Response
Outdoor repairs reduce the scale of restoration after a storm. Treat them as preventive restoration steps and coordinate with emergency response services for a seamless recovery process. For a detailed look at full-scale emergency recovery, consult the storm damage restoration service guide and cost overview.
- Immediate post-storm actions. Secure temporary tarps for roof breaches, clear downed trees away from structures if safe to do so, and document all damage with timestamped photos. Contact your insurer early and collect contractor receipts for mitigation work.
- Coordinate specialized services. For interior water you may need basement flood cleanup services or carpet water damage repair course resources if fabrics and padding are affected.
- Commercial parallels. If your property is commercial or mixed-use, review commercial water damage repair services and commercial water damage repair services standards to align expectations.
- Related restoration services. Many restoration workflows intersect: damage restoration service guide and requirements, water damage and mold remediation, and water removal services and cleanup costs may be required depending on breach severity.
- Specific storm scenarios. For hurricane damage, consult hurricane damage repair services and for pipe-related water events consult pipe burst damage restoration services.
- When interior restoration is required. If exterior breach caused interior water intrusion, restoration may include repairing water damage training, flood cleanup professional service costs, or the storm damage clean up services depending on severity.
- Commercial restoration and mitigation. If you require larger mitigation, consult resources such as storm damage restoration services and water mitigation company services for specialized response.
- Additional emergency services to consider. For structural or widespread losses check pipe burst damage restoration services, flood cleanup professional service costs, and water damage inspection services to ensure comprehensive assessment.
Insurance considerations: document pre-storm maintenance (photos, receipts, maintenance contracts) — insurers often reduce disputes when proof of reasonable maintenance and mitigation is presented. For a broader restoration and cost overview see the damage restoration service guide and requirements.
Transition: to wrap up, we’ll summarize next steps for building your maintenance routine and advancing skills.
Conclusion and Next Steps for Outdoor Home Repair Mastery
By following this guide you’ll be equipped to perform the most common outside home repair tasks, maintain a seasonal schedule, and make informed hiring decisions. Next steps: implement the seasonal checklist, stock the essential toolkit, and complete one full maintenance cycle (spring+fall) to internalize inspection routines.
If you want structured learning, consider formal courses listed in the linked resources and practice tasks like a siding patch or gutter rehang on a small section first. Keep records of maintenance and repairs to reduce storm restoration costs and accelerate insurance claims.
Ready to protect your home? Start with a perimeter inspection today and schedule gutter cleaning within the next two weeks.