Repairing water damage is a hands-on task that, by the end of this guide, you will be able to assess, extract water, dry, prevent mold, and complete basic structural repairs. Expect to spend 1–7 days on light-to-moderate jobs (48–72 hours for drying) or multiple weeks for structural repairs; this guide assumes an intermediate DIY skill level.
Understanding Water Damage and Its Impact on Homes
Water intrusion can range from a slow plumbing leak to sudden flooding; each type affects building materials and systems differently. Understanding these differences helps you prioritize actions and choose the right restoration path.
Types of water damage (examples):
- Clean water — from supply lines or rain (low contamination). Short-term drying usually suffices.
- Greywater — from appliances (dishwashers, washing machines), higher contamination and requires disinfection.
- Blackwater — sewage or floodwater, high pathogen risk; often requires professional remediation.
Practical example: a slow pipe burst behind a kitchen wall will saturate drywall and insulation; you may see discoloration and a musty odor before structural failure. By contrast, a roof leak that splashes light rain onto attic insulation often causes localized staining and rot over months.
Common causes of home water damage include pipe bursts, roof leaks, appliance failures, and storm flooding. For detailed options if the cause is a burst supply line, see pipe burst damage restoration services. If roof-related, consult roof repair services and costs.
Structural impacts to watch for:
- Wood swelling and framing rot — can lead to structural weakening within weeks.
- Drywall delamination and joint failure — requires replacement if saturated beyond 48 hours.
- Flooring delamination (laminate) and cupping (hardwood) — drying windows and sanding may follow depending on severity.
According to a 2023 EPA report, mold can begin growing within 24–48 hours on damp building materials, so quick action is essential; this fact changes how you sequence extraction and drying steps.
Transition: now that you can recognize causes and impacts, the next section walks through immediate safe responses to limit damage and health risks.
Immediate Steps: How to Deal with Water Damage Safely
When water is active in the home, safety and quick containment reduce repair scope and long-term costs. Follow these numbered emergency steps exactly and stop if you encounter blackwater or structural instability — call a pro.
- Stop the water source — locate and shut off the main water valve or the appliance supply. Turn off the home’s water immediately. If the leak is electrical-near, cut power at the breaker to affected zones.
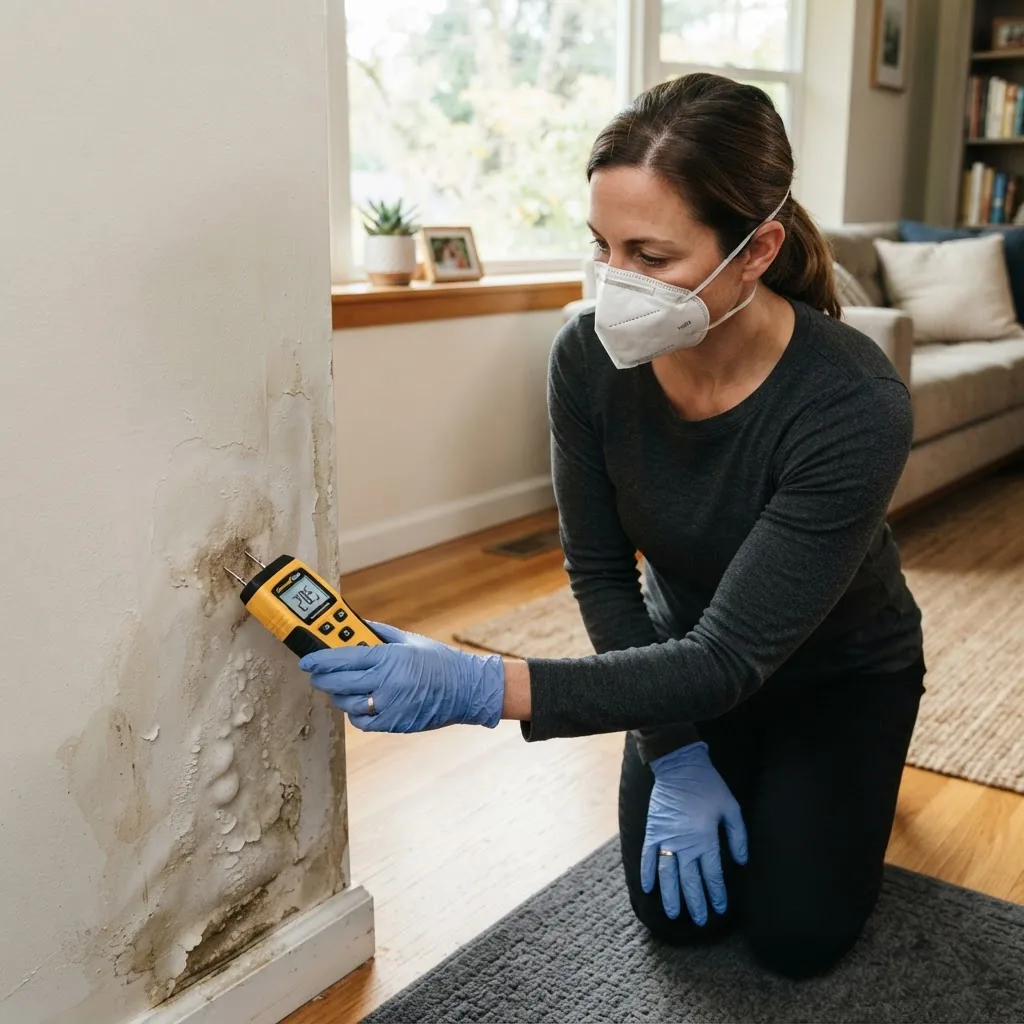
- Ensure personal safety — equip PPE: N95 or P100 respirator, nitrile gloves, waterproof boots, and eye protection. Avoid contact with floodwater or sewage.
- Assess contamination level — classify water: clean, grey, or black. If sewage or outdoor floodwater is present, do not attempt extensive cleanup; hire professionals trained for biohazard risks (see basement flood cleanup services and professional flood cleanup services).
- Protect utilities and electricity — if water is near outlets, switch power off to affected circuits at the panel. For major flooding, cut main power and call an electrician.
- Document damage for insurance — photograph all affected areas before moving items; note times and appliance serials. Keep receipts for repairs and rentals.
- Remove valuables safely — take out undamaged furniture and move salvageable items to a dry area. Keep porous items (mattresses, upholstered furniture) separate for specialist cleaning.
- Begin water extraction — for standing water under 1 inch, use mops and towels; for deeper water, use a portable sump pump or wet-dry vacuum. For large volumes or structural flooding, contact a professional water mitigation firm: water mitigation company services.
- Ventilate and dehumidify — open windows to increase airflow if outdoor humidity is low; place fans and set dehumidifiers to lower RH to 30–50% for drying. For storm-related events, consult storm damage cleanup services.
- Limit mold-friendly conditions — discard wet drywall and insulation that cannot be dried within 48 hours. Isolate contaminated areas with plastic sheeting when removing materials.
- Call your insurer — notify your carrier early, follow their claim intake process, and document all conversations. For advice on submitting claims and preparing estimates, review the insurer’s guidance (see external resources in Planning).
Transition: once the immediate site is stabilized and documented, you’ll select tools and plan the controlled repair and drying process below.
Tools and Equipment for Repairing Water Damage
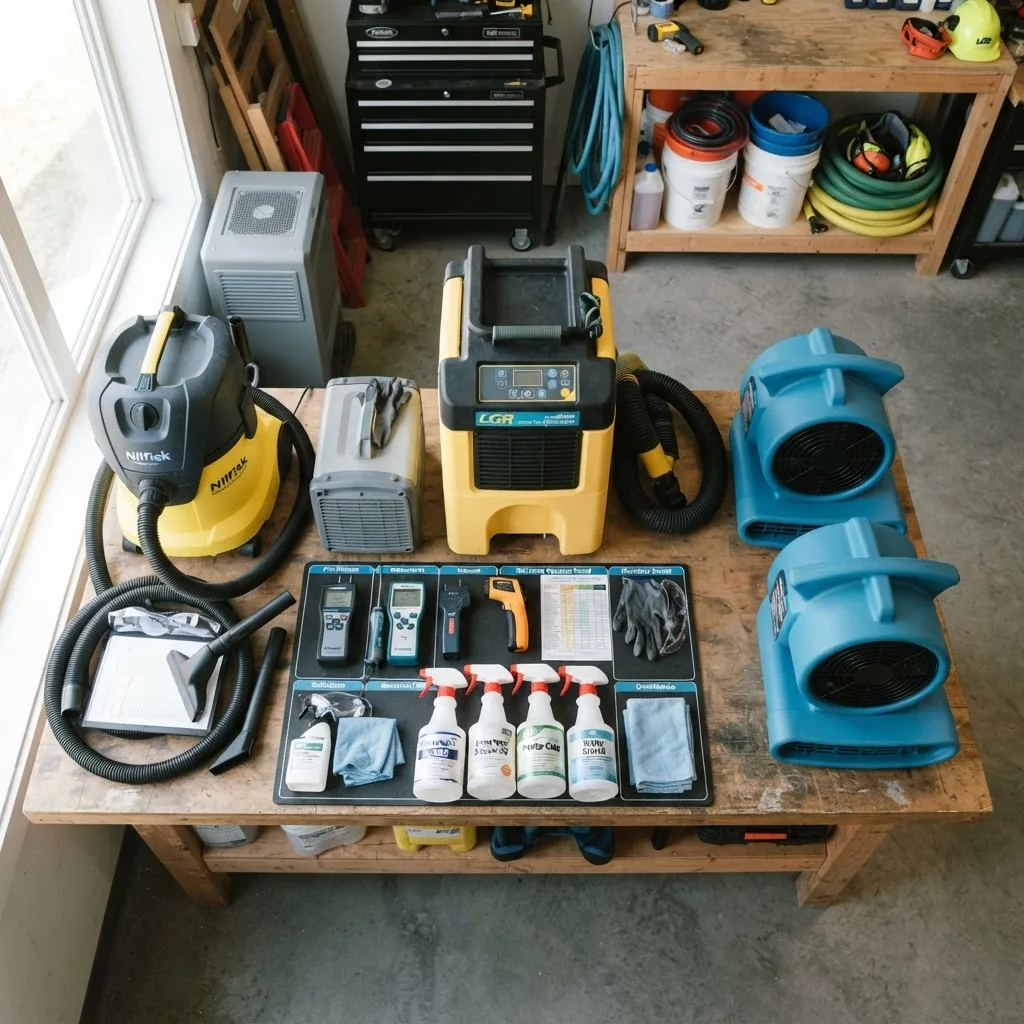
Selecting the right tools shortens drying time and reduces secondary damage. Below are essential categories and common models/benchmarks used by restoration pros.
- Water extraction tools — submersible pumps for deep standing water (2-inch solids-handling pumps for heavy debris), wet-dry vacuums with at least 6–8 peak HP for indoor extraction.
- Air movement — axial air movers (2,500–3,500 CFM per unit) placed every 10–15 feet to create airflow over surfaces.
- Dehumidification — refrigerant dehumidifiers rated for 60–100 pints/day in moderate conditions or desiccant units for cooler environments; set dehumidifiers to target 30–50% relative humidity (RH).
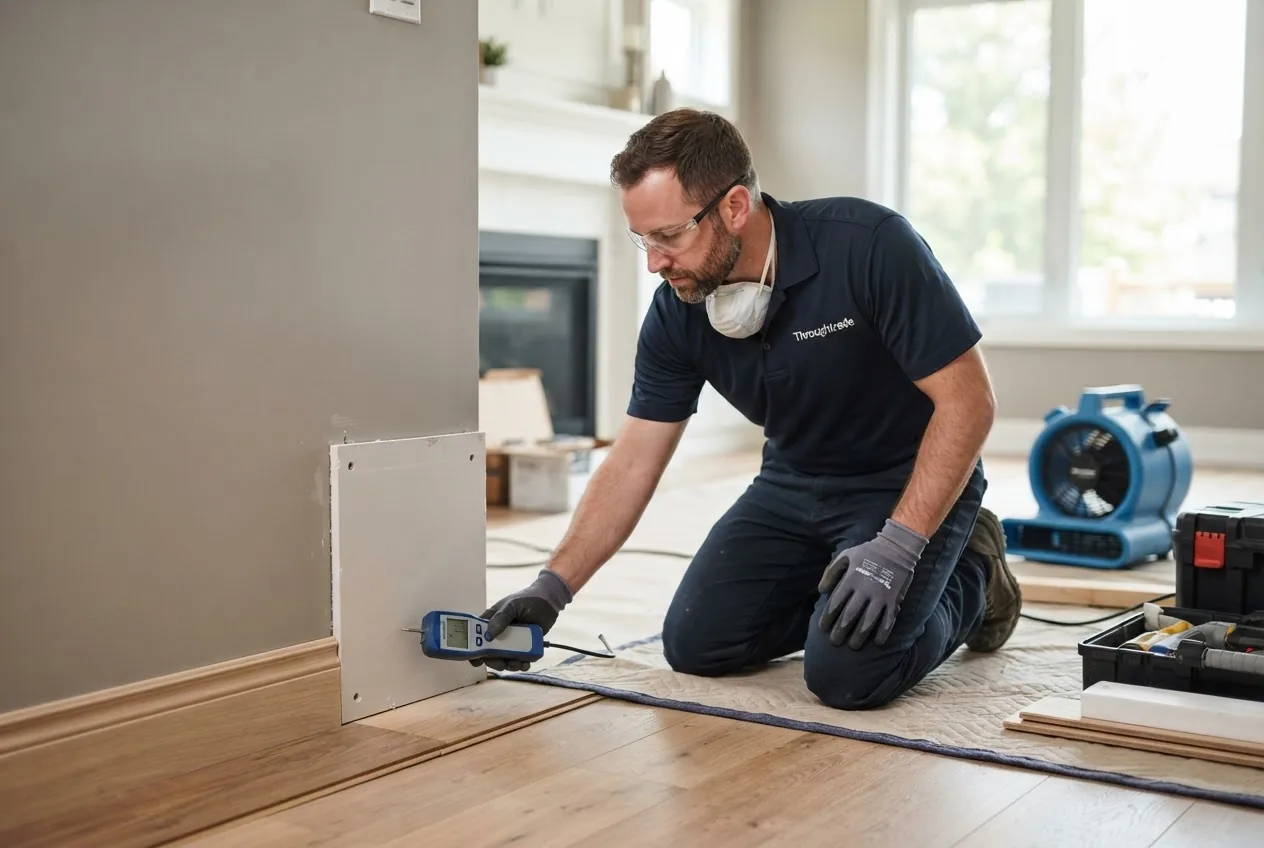
- Moisture detection tools — pin-type and pinless moisture meters for wood and drywall; infrared (IR) cameras to locate hidden moisture; hygrometers to track RH and temperature.
- Cleaning and antimicrobial supplies — EPA-registered disinfectants for greywater; specialized enzymatic cleaners for organic soils; HEPA vacuum and HEPA-filtered negative air machines when mold is suspected.
- Personal protective equipment (PPE) — N95/P100 respirators, nitrile gloves, eye protection, and disposable coveralls for heavy contamination.
| Tool | Use | Practical tip |
|---|---|---|
| Wet-dry vacuum | Surface water extraction | Empty every 20–30 minutes as capacity fills |
| Dehumidifier | Remove moisture from air | Place centrally; measure RH every 4 hours |
| Air mover | Increase evaporation across surfaces | Angle 45° to direct airflow under drywall or between joists |
For specialist water removal options and typical pricing, review water removal services and cleanup costs.
Transition: with tools chosen, the next H2 contains the hands-on step-by-step repair workflow you’ll follow from assessment through finish.
Step-by-Step Guide to Repairing Water Damage at Home
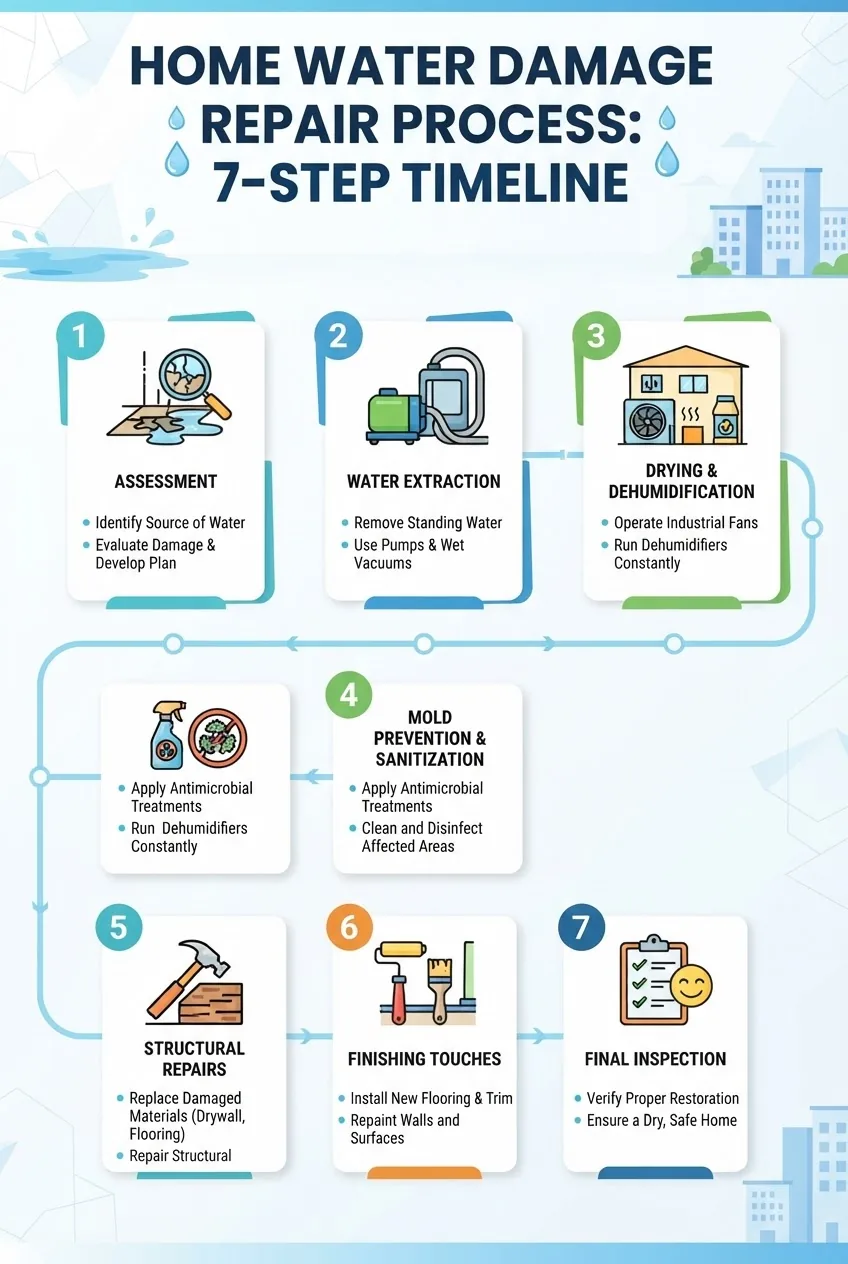
This section is the core hands-on workflow. Follow each numbered step and sub-step precisely. When quantities are required, use the exact settings and timing listed.
-
Assess the scene and classify damage
Duration: 30–90 minutes. Tools: flashlight, moisture meter, IR camera, camera for documentation.
- Visual walk-through: identify wet materials, standing water, and contamination sources.
- Measure moisture: use a pinless meter across surfaces — record wood readings as %MC (moisture content) and drywall as relative moisture. Note baseline readings for unaffected areas.
- Map the affected area: sketch or photograph with annotations showing high-moisture zones and likely water paths (follow ceilings, baseboards, and trim).
-
Document for insurance and safety
Duration: 15–30 minutes. Action: photo and written log.
- Photograph all damage before removal; include timestamps.
- Retain receipts for emergency purchases (fans, dehumidifiers) for claims.
-
Extract standing water
Duration: depends on volume — estimate 1–4 hours for moderate basement seepage with a submersible pump.
- Small amounts <1″ — use wet-dry vacuum, changing collection canisters every 20–30 minutes. Empty outside away from foundation.
- Larger volumes — deploy a 2″ submersible pump into the lowest point; pump into a sanitary sewer or downhill drainage per local codes.
- Continuous extraction — monitor pump and hoses every 30 minutes for clogs and ensure GFCI protection for electric tools.
-
Remove unsalvageable porous materials
Duration: 1–6 hours depending on area. Rule: cut and remove wet drywall and insulation where saturation is beyond surface or where moisture readings exceed 20% MC for wood.
- Drywall: cut at least 12 inches above the visible wet line and remove to allow airflow behind the cavity; double-check with moisture meter.
- Insulation: remove fiberglass batt insulation if wet — it retains moisture and supports microbial growth.
- Flooring: lift carpet if wet for >24 hours; pad is often unsalvageable — remove and document for contents loss.
- Bag and label contaminated materials for disposal.
-
Set up drying and dehumidification plan
Duration: drying phase 48–120+ hours. Targets: reduce ambient RH to 30–50% and surface moisture to baseline.
- Position air movers: place fans 8–10 feet apart, angled 45° at walls and under affected floor joists to encourage evaporation.
- Place dehumidifiers: use refrigerant units when room temp >60°F; desiccant units if <60°F. For a 200–300 sq ft affected room, one 70–90 pint/day dehumidifier is typical.
- Monitor progress: take moisture readings every 8–12 hours for the first 48 hours, then twice daily. Stop when readings return to within 5% of baseline for three consecutive measurements.
-
Clean and sanitize
Duration: 1–4 hours for typical room. Use EPA-registered disinfectants for greywater; for blackwater, call professionals.
- HEPA vacuum all dry debris and dust once surfaces are dry.
- Apply antimicrobial treatments to affected framing and substrate per product label; ventilate during application.
- Allow disinfectant dwell time — usually 10–15 minutes — then wipe or rinse if required by the label.
-
Repair structural materials
Duration: 1–14 days depending on scope. Focus on framing, drywall, subfloor and finish flooring.
- Framing: replace any joist or stud with >20% rot or soft spots; sister joists using 2x material and structural fasteners.
- Drywall: install 5/8″ moisture-resistant drywall in high-moisture areas; tape and mud with quick-setting compound (90–120 minute set) to shorten reoccupancy time.
- Flooring: for engineered hardwood, allow planks to dry 48–72 hours, then assess for sanding; for laminate or carpet pads, replacement is usually necessary.
- Finish carpentry and trim: replace caulk and baseboards after humidity stabilizes <50% RH for 72 hours.
-
Final inspection and verification
Duration: 1–2 hours. Confirm moisture readings and visual quality before closing cavities.
- Measure moisture: wood should read within 5% of unaffected areas; drywall should be consistently low and non-tacky.
- Confirm air quality: if mold was present, consider a post-remediation verification by a certified inspector.
- Document the completed repairs and update your insurance claim records with before/after photos.
-
Finishing touches and reinstallation
Duration: 1–7 days. Final painting and finish work should wait until RH is stable below 50% for 72 hours.
- Prime: use a stain-blocking primer on repaired drywall to prevent water stains bleeding through finishes.
- Paint: apply at least two coats; allow full cure before reinstalling carpet or area rugs.
- Reinstall: replace HVAC filters, return furniture to dry areas, and note any items sent for professional cleaning (see personal property restoration options: personal property restoration companies).
Training resources: for specialized carpet restoration skills and cost-oriented courses, consider carpet water damage repair courses. For learned painting techniques after repairs, see handyman paint service training. If the scope exceeds DIY ability, review water damage restoration professional costs.
Transition: drying and cleaning are only part of restoration — preventing and remediating mold is the next crucial step.
Mold Prevention and Remediation Basics During Home Restoration
Mold grows where moisture persists; the trade-off in remediation is balancing removal of contaminated material against invasive demolition. Follow EPA and CDC guidelines when remediation is required.
First-line prevention steps:
- Dry wet materials within 24–48 hours to prevent colonization.
- Maintain indoor RH between 30–50% using dehumidifiers; check with a hygrometer.
- Remove and replace materials showing visible mold growth or odour after cleaning attempts.
Remediation overview procedure:
- Assess extent: small isolated growth (<10 sq ft) may be handled by trained homeowners with PPE. Larger infestations should be remediated by certified contractors.
- Containment: set up negative pressure with HEPA-filtered air scrubbers and seal off affected areas.
- Removal: mechanically remove moldy materials and HEPA-vacuum surfaces; avoid dry brushing which disperses spores.
- Clean and treat: apply EPA-registered antimicrobial if appropriate; follow label dwell times and safety guidelines (see EPA mold guidance below).
- Verification: for large jobs, use third-party post-remediation verification to confirm spore levels have returned to acceptable baselines.
According to a 2023 EPA report, mold growth can begin within 24–48 hours on damp materials; their guidance recommends controlling moisture and documenting remediation steps. For their guidance, see EPA mold guidance.
Health risks: exposure to mold can irritate the respiratory system, trigger asthma, and cause allergic reactions. Use respirators (N95 or better) and avoid entering highly contaminated spaces without PPE.
Transition: these remediation fundamentals link to the training pathways in the next section — essential if you want certified, repeatable results.
Home Restoration Training: Courses, Certification and Skill Development
Upskilling makes repairs safer and reduces recurrence. Training ranges from short workshops to full IICRC certification tracks. IICRC sets widely recognized standards for restoration technicians — consider their courses for formal acceptance in professional settings.
Course types and what they teach:
- Short workshops (1–3 days) — introduce moisture detection, basic drying, and safety protocol. Good for homeowners and handypersons.
- Technical certificates (3–7 days) — e.g., IICRC-approved courses on water damage restoration (WRT) teach drying science, equipment selection, and documentation.
- Advanced certifications — content restoration, fire and water restoration (a combined track), and applied structural drying require practical exams and supervised hours. For combined paths, see fire and water damage restoration certification.
- Trade school / carpentry crossover — carpentry certifications expand structural repair skills; pair restoration training with carpentry repair training and certification.
- Specialized tracks — contents and textiles, carpet repair, and paint finishing. See dedicated courses for carpets: carpet water damage repair courses, and for exterior work: outdoor home repair courses.
Practical training elements to look for in curricula:
- Hands-on drying lab with dehumidifiers, air movers, and moisture meters.
- Case study reviews of typical household scenarios, including pipe burst and storm events.
- Instruction on documentation and insurance report writing.
For professional service prerequisites and standards, consult damage restoration service requirements and consider formal inspection training: water damage inspection service training.
Industry standards: review IICRC standards and recommended practices for course alignment: IICRC.
Transition: after training and certification planning, you’ll need a realistic budget and timeline for a successful restoration project.
Planning and Budgeting Your Home Water Damage Repair Project
Estimate costs, set timelines, and decide whether to DIY or hire professionals. Insurance often covers sudden, accidental water damage; however, coverage varies. For nuanced storm-related cost structures, consult the pillar resource: storm damage restoration service guide and cost overview.
Sample cost ranges (typical residential repairs):
- Minor water extraction and drying (single room): $500–$2,000.
- Moderate repair (multiple rooms, removal of drywall/insulation): $2,000–$10,000.
- Major structural repair (framing, flooring, full restoration): $10,000–$50,000+.
Compare commercial vs residential cost references: for commercial benchmarking see commercial storm damage restoration costs and commercial water damage repair services. For business-oriented pricing models, also see commercial storm damage restoration costs.
Budgeting checklist:
- Immediate mitigation (extraction, fans, dehumidifiers) — estimate $300–$1,500 for rental/equipment and labor.
- Demolition and disposal — $200–$2,000 depending on scope.
- Repairs (materials + labor) — get 3 bids for jobs over $3,000.
- Contents cleaning/restoration — itemize and compare to replacement costs; consult personal property restoration companies.
Insurance tips:
- Report promptly and provide full documentation (photos, receipts).
- Ask whether mitigation and temporary repairs are covered immediately — many policies allow emergency measures to prevent further loss.
- If disputed, escalate to your insurer’s claims adjuster and reference industry estimates.
- For comparative service costs in storm scenarios, also reference storm damage restoration service guide, storm damage repair contractors, and storm restoration companies.
For commercial comparisons including restoration and business interruption costing, see commercial storm damage restoration costs and commercial water damage repair services. If personal property restoration is needed, consult personal property restoration companies.
For insurer consumer guidance on claims and documentation, consult industry resources: National Association of Insurance Commissioners (NAIC).
Transition: budgeting provides a baseline, but common practical challenges can derail even well-planned repairs — read on for troubleshooting advice.
Common Challenges and Troubleshooting in Water Damage Repair
Hidden moisture, secondary damages, and equipment limitations are frequent issues. Below are typical problems and practical fixes.
- Hidden moisture behind walls — use an IR camera and pin meters; open test holes if readings remain high. If moisture persists after 72 hours of drying, remove adjacent materials to allow airflow.
- Tool failure or inadequate capacity — rent commercial-grade dehumidifiers for large volume drying; domestic units often lack the capacity to lower RH effectively in basements and crawlspaces.
- Mold reappearance — usually from residual moisture or missed pockets; conduct a second containment cleaning and consider professional remediation if mold returns within a month.
- Insurance delays — keep mitigation receipts and continue documenting urgency; temporary repairs are generally covered when they prevent further loss.
- Health hazards — if any occupant experiences respiratory distress or the contamination is sewage, stop work and bring in certified remediation teams.
Common troubleshooting checklist: verify humidity logged at 8–12 hour intervals, inspect beneath baseboards and behind appliances, and ensure dehumidifiers run continuously (do not cycle off daily).
Before you start
- Prerequisites: basic carpentry skills, familiarity with household electrical panel, and ability to lift 50 lbs safely.
- Essential tools & materials: wet-dry vacuum, submersible pump (if needed), 2–4 air movers, one 50–90 pint dehumidifier, pin and pinless moisture meter, respirator (N95+), nitrile gloves, disposal bags, quick-set joint compound.
- Safety: PPE, GFCI power for all temporary equipment, and an evacuation plan if blackwater or structural issues are found.
Common mistakes and how to avoid them
I once underestimated the drying load in a 300 sq ft basement and ran a single small dehumidifier; moisture stalled and mold developed behind baseboards. I now always calculate capacity by room volume and use commercial units when the affected area exceeds 200–300 sq ft.
I also once reinstalled drywall after two days of running fans without measuring moisture; the gypsum retained enough water to fail the joint compound later. Now I require three consecutive moisture readings at baseline before closing cavities.
Verification checklist before you consider the job done
- All moisture readings within 5% of baseline for wood and consistent low readings for drywall.
- Ambient RH maintained at 30–50% for 72 hours without dehumidifiers cycling off between checks.
- No visible mold, no musty odors, and no new discoloration.
- All removed materials documented and disposed of or sent for cleaning; receipts filed.
- Final photos taken and stored with repair invoices for insurance.
When to call a professional
- Blackwater contamination (sewage or floodwater).
- Structural compromise (sagging ceilings, compromised load-bearing elements).
- Mold contamination exceeding 10 sq ft or recurring growth after remediation.
- Large-scale floods affecting multiple rooms or HVAC systems.
- If you need certified documentation for insurance or litigation.
For specialty professional services and cost comparisons, consider contacting storm and restoration firms listed in our service guides such as storm restoration companies, storm damage repair contractors, and for hurricane-specific issues hurricane damage repair services.
Final takeaway: fast containment, correct equipment, measured drying, and good documentation are the keys to successful water damage repair. Training amplifies your results — pursue IICRC or equivalent courses for repeatable, professional-grade outcomes.