By the end of this hands-on guide you will be able to assess storm damage, perform initial emergency clean up actions, document loss for insurance, estimate cleanup costs, and decide whether to hire professionals or handle the job yourself. Expect about 2–5 hours to read and plan, plus variable work time; the guide assumes basic homeowner maintenance skills (comfort using ladders, basic hand tools, and a shop vacuum).
Before you start
- Permissions: homeowner or property manager authority to access and alter the site.
- Safety gear: helmet, N95/ P100 respirator, gloves (cut-resistant), eye protection, waterproof boots.
- Documentation tools: smartphone or camera, flashlight, notepad, tape measure.
- Basic tools: pry bar, hammer, utility knife, heavy-duty trash bags, ratchet straps, tarps (6×10 ft), ladders.
- Power tools & equipment (for professionals or rentals): submersible pumps, wet/dry vac, air movers (3–6 per room), desiccant dehumidifier or LGR dehumidifier, chainsaw for large debris.
- Insurance paperwork: policy number, agent contact, preliminary inventory of damaged items.
Start with Step 1 below; continue through the numbered steps for a practical workflow. After the procedural steps you’ll find focused H2 sections that explain definitions, scope, pricing, company selection, safety, and post-cleanup requirements.
Step-by-step Storm Damage Clean Up Workflow
-
Step 1 — Assess and document the scene:
Walk the property only if safe. Photograph every damaged area from multiple angles (include wide shots and close-ups), timestamp images if possible, and make a simple inventory: location, item, visible damage, estimated value. Note hazards—downed lines, fuel leaks, large structural cracks. This documentation is essential for insurance claims and contractor bids. For structural issues, limit access and mark areas with caution tape.
-
Step 2 — Secure the property (temporary protections):
Prioritize life-safety and minimizing further damage: shut off electricity at main if water intrusion or submersion is present (only if you can access breaker safely), turn off gas if you smell it, and install tarps on compromised roofs or cover broken windows with plywood or tarps. Use 6×10 tarps and ratchet straps; staple or screw plywood (1/2″ minimum) to window frames for secure temporary protection. Take photos of all temporary repairs for insurance.
-
Step 3 — Emergency water extraction:
Start water removal within 24–48 hours to reduce mold risk. Use submersible pumps for >1″ standing water; move to a 2″ trash pump for heavy debris-laden water. For <1" standing water, use a commercial wet/dry vacuum. Extract water in passes (pump down to 1", then suction carpets, then capture residual in low spots). Set up at least three air movers and one LGR dehumidifier per 250–500 sq ft of affected carpeted or porous area; monitor temperature and relative humidity every 8–12 hours until target conditions (RH < 60% and surface dryness). For complex or contaminated water (sewage, flood), stop and call a professional with proper PPE.
-
Step 4 — Remove debris and hazardous materials:
Segregate debris: green waste (trees, branches), construction debris (wood, shingles), hazardous materials (fuel, asbestos suspect material—do not disturb). Use 30–90 cubic yard roll-off containers depending on volume. For storm-damaged roofs and siding, bag loose materials to avoid cross-contamination. For suspect asbestos shingles or insulation, contact specialists; do not attempt removal without testing.
-
Step 5 — Structural drying and mold prevention:
Open wall cavities where insulation remains wet; remove wet insulation and allow cavities to dry to <16% moisture content or RH < 60%. Drill 1" weep holes at base of affected studs when necessary to promote airflow. Install desiccant dehumidifiers in cool climates or where evaporation is slow. Apply antimicrobial cleaners on non-porous surfaces per manufacturer instructions; do not use bleach on wood framing—use an EPA-registered product when indicated.
-
Step 6 — Clean, sanitize, and deodorize:
Use detergent detergents for soil removal, then disinfect with appropriate agents for contaminated water. For sewage/flood work use an EPA-registered disinfectant and follow dwell times on the label. HEPA-filtered vacuums should be used for dust/soot; change filters per manufacturer schedule. For persistent odors, thermal fogging or ozone services may be required by professionals.
-
Step 7 — Dispose and comply with environmental rules:
Segregate debris per local regulations: green waste often goes to municipal yards; construction waste and household hazardous waste must follow local disposal rules—check your municipality. For oil/fuel spills, immediate containment and a licensed hazmat contractor may be required. Keep manifests or disposal receipts for insurance and regulatory review.
-
Step 8 — Inspect, document, and coordinate repairs:
Conduct a final walkthrough with photos, moisture readings, and a written checklist. Document completed drying targets (RH < 50% ideally), air mover/dehumidifier runtime, and disposal receipts. Collect contractor bids for repairs and keep a consolidated file for insurers. If you will hire contractors, use the selection guidance in the "How to Choose Reliable Storm Cleanup Companies" section below.
Common mistakes and how to avoid them
I once saw a homeowner wait five days to start water extraction because they underestimated the volume; by then carpeting and drywall had significant mold colonization that doubled cleanup time and cost. I now insist on a 24–48 hour target for extraction. I also observed improper tarp installation that caused wind uplift; secure fasteners and overlap tarps by at least 12 inches and use straps, not just staples.
Final checklist before closing the project
- All standing water removed and moisture levels documented.
- Temporary repairs in place with photos and receipts.
- Debris segregated and disposal receipts obtained.
- Inspection report with moisture readings, photos, and contractor bids saved.
- Insurance claim filed or agent contacted with documentation.
When to call in a professional
- Standing water above 1″ or water contaminated by sewage or chemicals.
- Structural compromise (sagging roof, large cracks, exposed load-bearing elements).
- Widespread mold growth or persistent moisture after 72 hours of drying work.
- Suspected asbestos or other hazardous materials.
- Large-scale debris removal (trees, heavy construction waste) requiring equipment.
What Is Storm Damage Clean Up?
The term storm damage clean up refers to the organized set of activities performed after wind, hail, flooding, or debris-producing weather to make a property safe, limit further damage, remove contaminants, and prepare the site for repairs. It ranges from emergency board-ups and temporary tarping to comprehensive water extraction, debris hauling, structural drying, and sanitation. Typical tasks include debris removal from yards and streets, water extraction from interiors, drying and dehumidification, mold prevention measures, and disposal of unsalvageable items.
Example: after a late-summer thunderstorm that dropped 6 inches of water in a low-lying basement, a two-person crew used a submersible pump to remove standing water (3,000 gallons pumped over 4 hours), followed by a staged drying plan using four air movers and a desiccant dehumidifier, reducing ambient RH from 85% to 45% in 72 hours.
Another case: a coastal property hit by a windstorm lost portions of its roof decking; immediate steps were tarping, removal of saturated insulation, and temporary roof patching to stop interior water entry. The cleanup crew coordinated with roofing contractors for a permanent repair estimate while documenting losses for the homeowner’s insurer.
Standards and requirements for damage restoration vary; for background on industry practice and minimum service scopes consult the damage restoration service requirements.
Transition: Understanding what the work includes helps you prioritize the emergency steps covered next.
Emergency Storm Damage Clean Up: When and Why It’s Crucial
Emergency response in storm situations is about triage: stopping active threats to life and property, then stabilizing the structure to prevent compounding damage. Immediate cleanup is often the difference between a repairable loss and a total loss of materials.
Key emergency actions (think of these as prioritized triage):
- Life-safety checks — evacuate if necessary and secure utilities (shut off gas, power) to prevent electrocution or explosions.
- Hazard containment — isolate fuel spills, downed power lines, exposed nails, and sharp debris.
- Temporary weatherproofing — tarping roofs, boarding windows and doors to prevent further water entry.
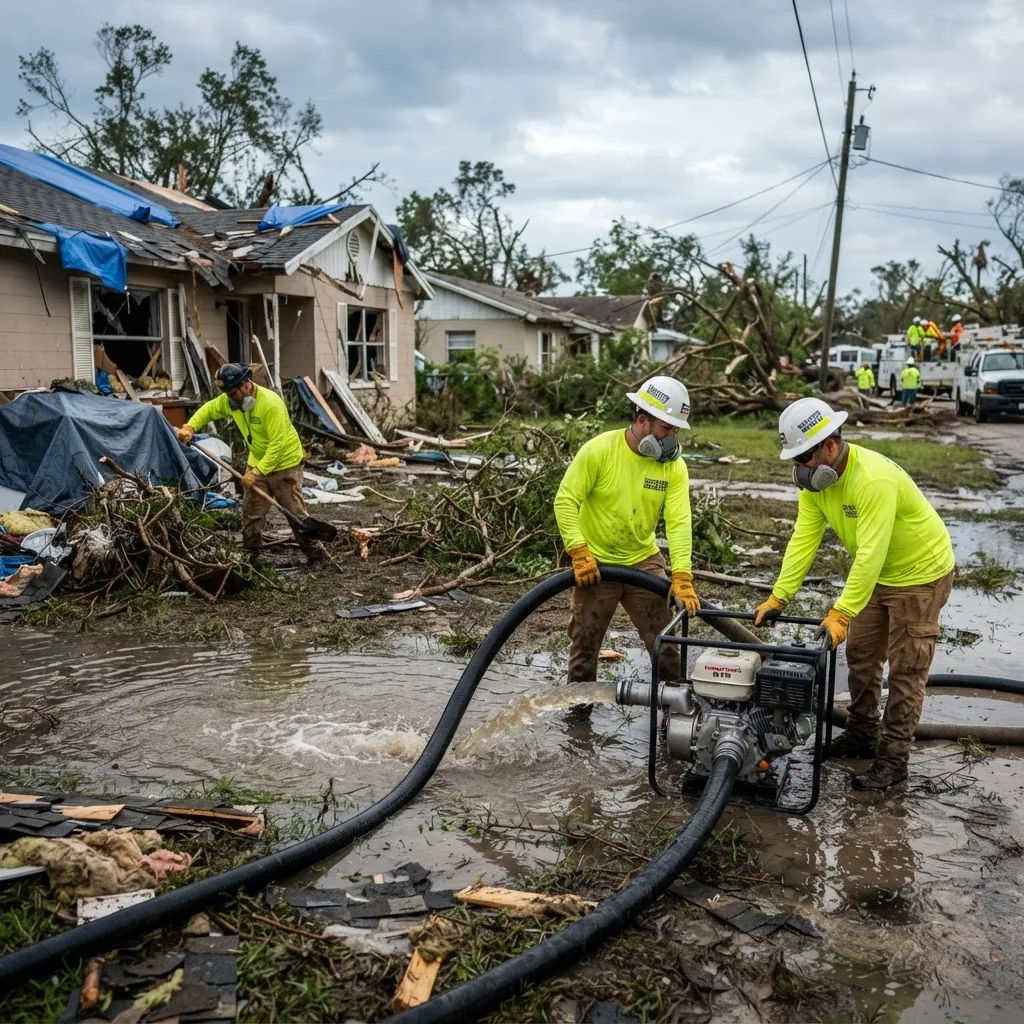
- Rapid water mitigation — extract standing water using pumps and vacuums within 24–48 hours to reduce mold and structural risks.
- Debris removal — prioritize removal of hazardous debris (store-bought asbestos testing if suspect), large trees obstructing access, and items blocking egress.
When to request professional emergency services immediately:
- Flooding that includes sewage or chemical contamination.
- Standing water over 1 inch on interior floors with compromised electrical systems.
- Roof failures exposing living space to the elements.
- Large fallen trees threatening structures or utilities.
Case study: In a 2023 coastal storm response I observed, a homeowner called a professional crew within two hours of roof loss. The crew installed a tarp and performed temporary water extraction; by preventing further interior water intrusion they saved interior finishes valued at $18,000. The rapid response also made insurance approval for temporary repairs straightforward (According to a 2023 insurer guidance memo provided to the homeowner).
Specialized emergency services to consider:
- flood cleanup guide and costs — for heavy floodwater events requiring environmental precautions.
- hurricane damage repair services — when wind-driven damage and salt water exposure are factors.
- water mitigation company services — for immediate water control and technical drying plans.
Transition: After emergency stabilization, cleanup shifts to the full service scope described next.
Typical Scope of Storm Damage Clean Up Services
Storm clean up services are modular; companies will combine components based on damage. Below are numbered service components with detailed explanations so you can understand bids and scope sheets.
-
Debris removal and site clearing
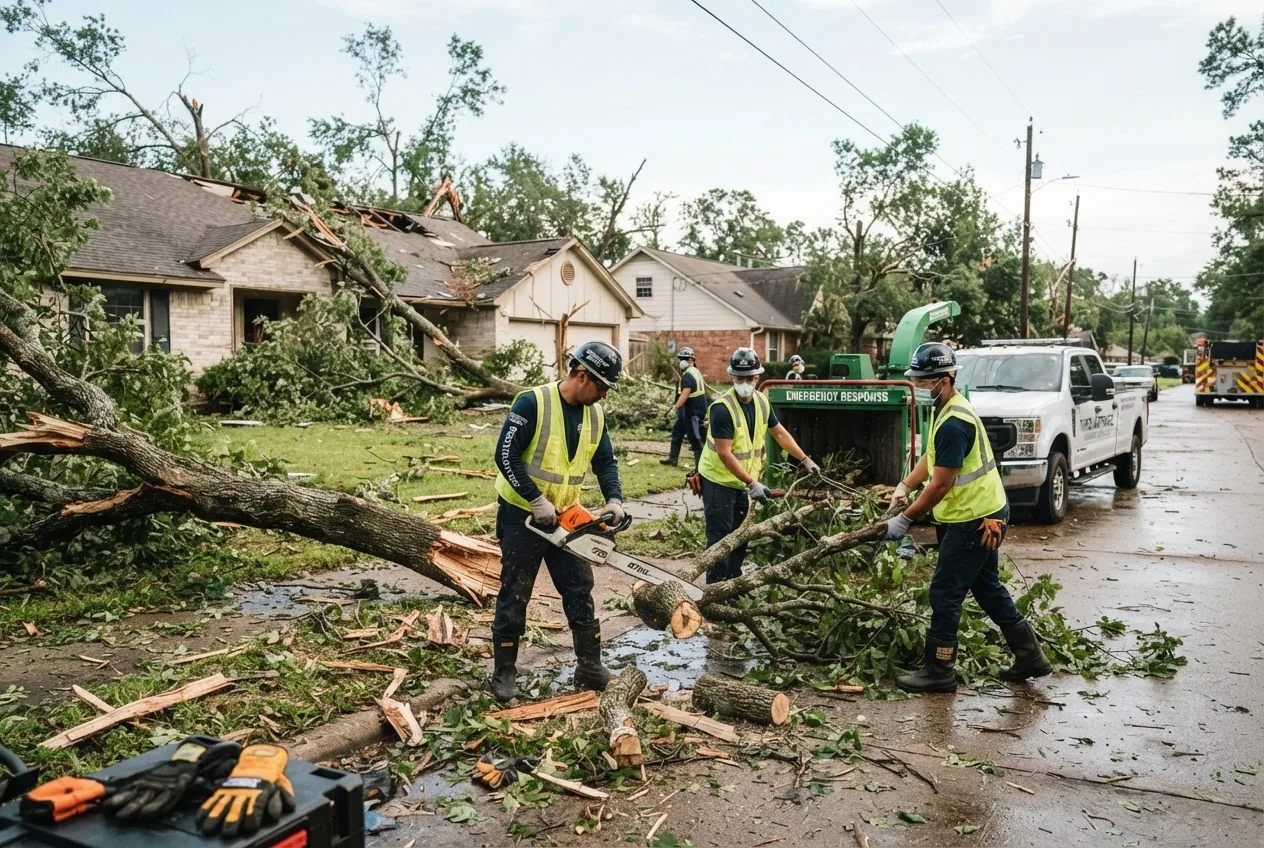
Scope: clearing trees, branches, roof shingles, fence sections, broken glass, and saturated personal property. Methods: chainsaws for large trees, stump grinders if necessary, and roll-off containers (30–90 yd³). Contractors price by volume and type: green waste vs construction waste. Expect separate charges for hazardous material handling.
basement flood cleanup services are a specialized subset typically bundled with debris removal when storms cause basement inundation.
-
Water extraction and pumping
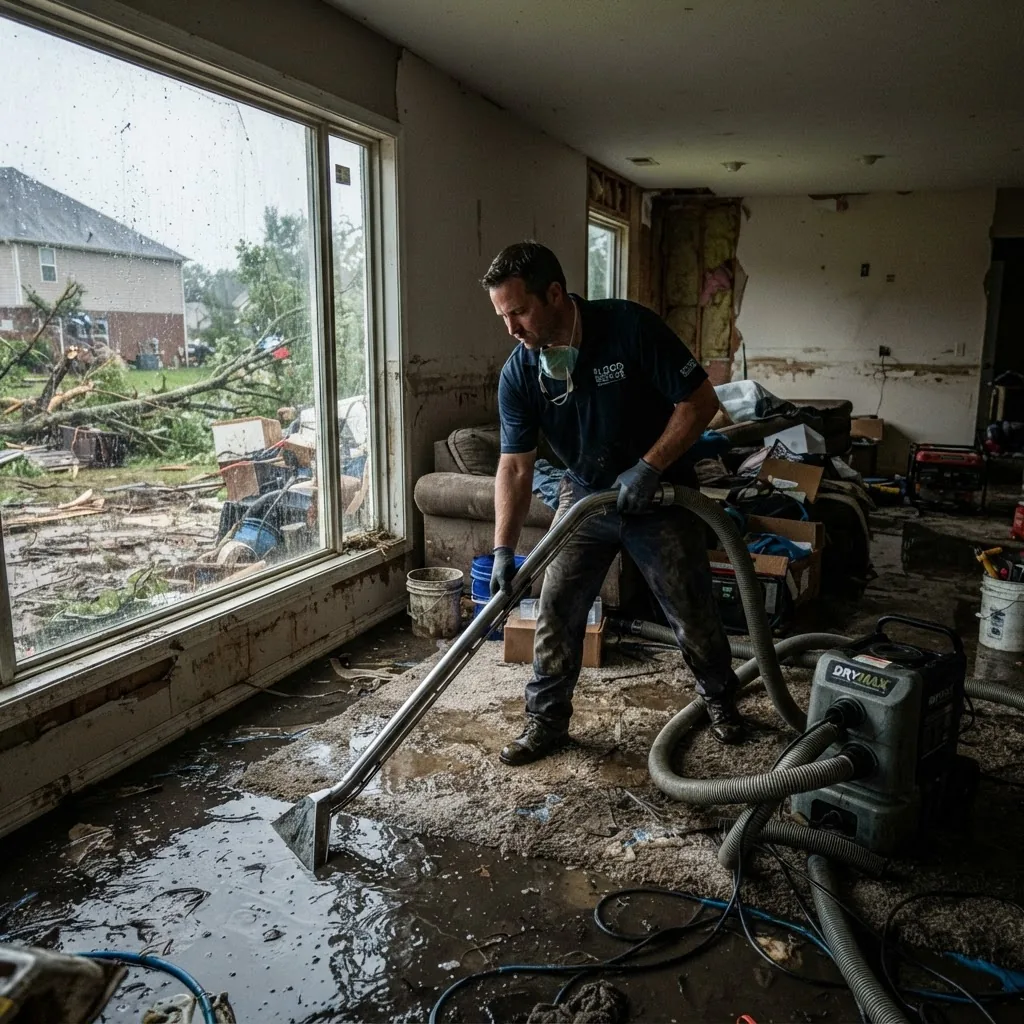
Scope: removing standing water with pumps, wet/dry vacs, and trash pumps. For standing water over 1″ and areas larger than 250 sq ft, subcontracted pumps and 2–4 technicians may be required. Extraction rates: submersible pumps can move 1,000–3,000 gallons per hour depending on head and debris; wet/dry vacs typically handle smaller volumes.
water removal service costs detail unit pricing for pumps and extraction labor.
-
Structural drying and dehumidification
Scope: controlled drying using air movers, axial fans, LGR or desiccant dehumidifiers, cavity drying (drilling), and moisture monitoring. Typical equipment setup: 1 air mover per 50–100 sq ft of affected floor area; 1 dehumidifier (LGR) per 250–500 sq ft of moderate wetness. Drying time varies: small wet areas 24–72 hours; whole-house incidents 5–14 days.
Moisture targets: interior RH ideally <50%; wood moisture content under 16% to stop mold growth. Technicians log moisture meter readings every 24 hours and adjust the setup until targets are met.
-
Demolition and controlled removal of unsalvageable materials
Scope: removal of wet drywall (cut 12–18″ above visible waterline), saturated insulation, collapsed ceilings, and unsalvageable flooring. Contractors usually charge per square foot of controlled demolition plus disposal fees. This work prepares the structure for rebuild and reduces hidden moisture pockets.
-
Cleaning, sanitizing, and mold prevention
Scope: applying detergents and EPA-registered disinfectants where contamination is present, HEPA vacuuming for soot or particulates, and surface treatments to reduce mold risk. For porous materials with visible mold growth, remediation (removal) is required rather than surface cleaning.
carpet water damage repair provides specialized techniques for salvaging or replacing carpeting affected by storm water.
-
Hazardous material assessment and removal
Scope: testing and handling asbestos, lead paint, fuel or chemical spills. Only licensed abatement contractors should handle asbestos; costs vary widely by testing and containment requirements and are priced per square foot or per cubic yard for removal and disposal.
-
Personal property recovery and restoration
Scope: content manipulation (pack-out), drying, cleaning, and inventorying personal items for salvage. Salvage methods: freeze-drying for documents, ultrasonic cleaning for select electronics, and pack-out to climate-controlled storage. For guidance on providers, see personal property restoration services.
-
Temporary repairs and roof tarping
Scope: temporary fixes like tarping roofs, temporary fencing, and boarding windows. Tarps are usually EPDM or heavy polyethylene anchored to roof decking; professionals install at minimum a 6×10 tarp with 12″ overlap and secure tie-downs to rafters. Temporary repairs are billed as emergency services or as an add-on with a standard fee.
-
Final cleaning and clearance
Scope: post-drying cleaning, odor control, and preparing documentation for the insurance claim and repair contractors. This includes a final moisture report, photographs, and a signed client sign-off noting completed tasks.
-
Repair coordination (handoff to repair contractors)
Scope: preparing a punch list for carpenters, roofers, electricians, and HVAC technicians. For specialized trades training references check pipe burst damage restoration and other trade-specific guides to understand scope and handoff.
Transition: Scope details clarify why choosing the right company matters — the next section explains how to vet and select reputable providers.
How to Choose Reliable Storm Cleanup Companies
Choosing the right contractor directly affects cost, speed, and final outcomes. Follow these steps and use the checklist to compare bids objectively.
-
Step 1 — Verify licensing and insurance:
Confirm general contractor or restoration firm licensing per your state. Require proof of general liability and workers’ compensation insurance. Ask for certificate of insurance and verify policy numbers with the insurer if possible.
-
Step 2 — Check certifications and industry standards:
Preferred certifications include IICRC S500 for water damage restoration and applied structural drying credentials. Ask for technician cards and course certificates.
fire and water damage restoration certification and recognized courses are a strong signal of competence. For industry standards, consult the IICRC (IICRC standards).
-
Step 3 — Evaluate emergency availability and response time:
Ask: Do they offer 24/7 emergency response? What is their typical response time in your neighborhood (hours)? Obtain a written commitment for initial stabilization within a specified timeframe (e.g., 4 hours for tarping, 24 hours for water extraction).
-
Step 4 — Request written scope and a clear estimate:
Get an itemized bid: labor hours, equipment rental days, disposal fees, material costs, and markups. Beware of vague “as needed” line items. Contracts should specify dryness targets, monitoring cadence, and teardown of equipment.
-
Step 5 — Ask for references and recent project examples:
Request recent case studies with before/after photos and client contactable references. Verify that the company has performed the specific services you need (e.g., roof tarping, sewage cleanup).
-
Step 6 — Compare guarantees and warranties:
Look for service guarantees: documented drying targets, follow-up inspections, and warranty period for moisture-related failures (commonly 30–90 days). Be cautious of companies that refuse to commit to measurable drying outcomes.
-
Step 7 — Confirm subcontractor management:
If the company uses subs (roofers, tree crews), ensure they manage permits and provide proof of subcontractor insurance. Obtain a list of potential subs and ask about coordination procedures.
-
Step 8 — Check dispute and billing policies:
Clarify change order procedures, payment schedules (typical: 30% deposit, progress billing), and overtime/emergency fee calculations. Get everything in writing to avoid surprises.
-
Step 9 — Confirm environmental and disposal compliance:
Ask for disposal manifests for hazardous materials and receipts for landfill or recycling centers. Reputable firms follow local environmental regulations and can supply manifests on demand.
-
Step 10 — Consider broader service capacity:
If you manage commercial or multi-property portfolios, ask about their experience with commercial storm damage restoration services and whether they can scale rapidly after large storms.
Quick selection checklist
- Valid contractor license and insurance certificate.
- IICRC (or equivalent) certifications on staff.
- 24/7 emergency response with documented response time.
- Itemized estimate with drying targets and monitoring plan.
- References and local project examples.
- Clear change-order and dispute resolution terms.
- Environmental disposal receipts provided.
Additional references for contractors and service types: roofing fix services and repair costs, storm damage repair contractors, and storm restoration companies and services.
Transition: Hiring decisions are closely tied to pricing structures; next we break down pricing models and typical cost ranges so you can budget accurately.
Storm Damage Clean Up Pricing Explained
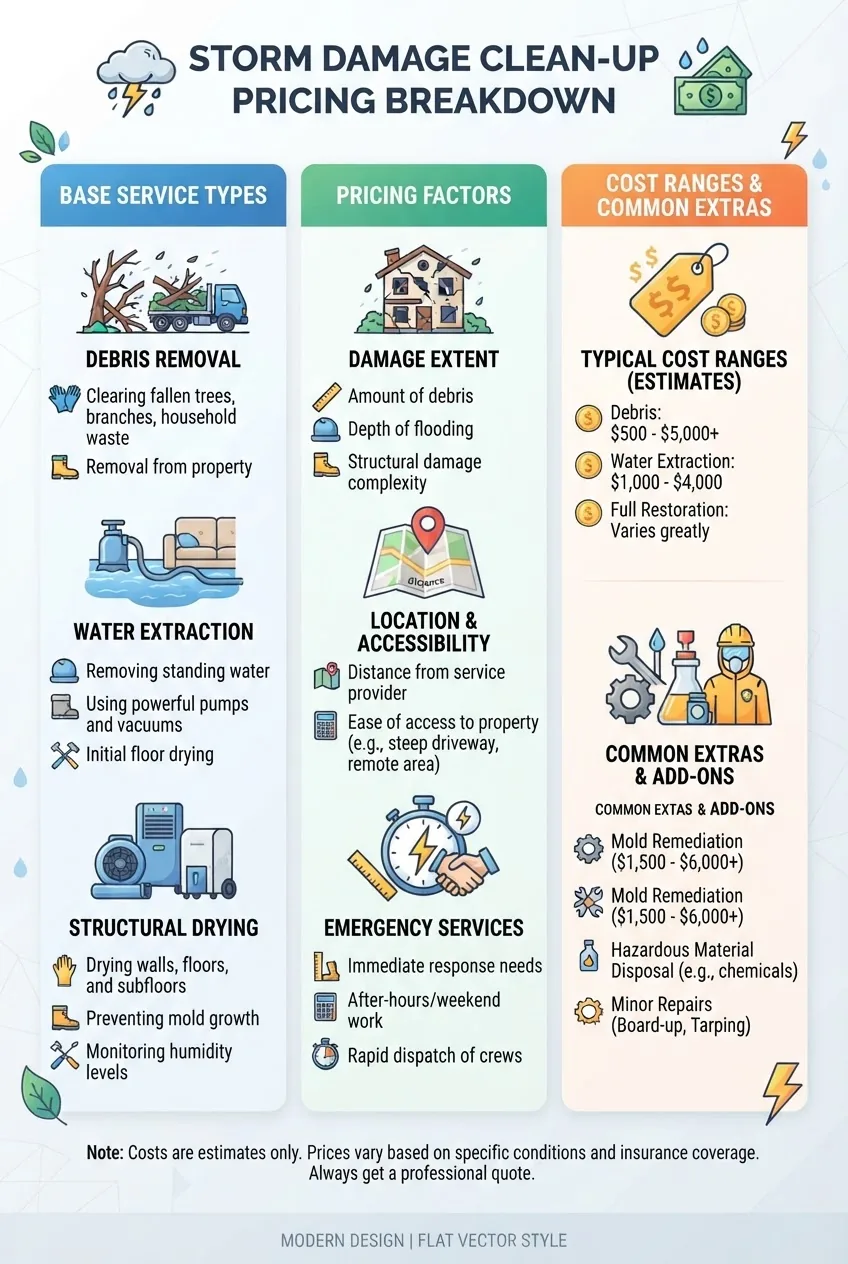
Pricing for storm damage clean up depends on type and severity of damage, access, local labor rates, disposal rules, and whether work is emergency (after-hours) or scheduled. Below is a comparison table followed by detailed analysis, pricing models, and examples to help you interpret bids.
| Service | Typical Pricing Model | Typical Cost Range (USD) |
|---|---|---|
| Emergency tarping / board-up | Flat fee or hourly + materials | $200–$1,500 |
| Debris removal (yard/roof) | Per cubic yard or flat roll-off | $300–$5,000+ |
| Water extraction | Hourly + equipment; or per sq ft | $100–$3,000 |
| Drying & dehumidification | Day rate for equipment + monitoring fee | $250–$2,500 per week |
| Controlled demolition | Per sq ft | $1.50–$6.00 per sq ft |
| Hazardous abatement | Per job; testing + containment | $500–$20,000+ |
Pricing models explained:
- Flat fee — common for small emergency tasks like tarping or single-room extraction. Advantage: predictable; disadvantage: may miss hidden costs.
- Hourly — used when extent is uncertain. Expect crew rates $75–$250 per hour depending on crew size and region.
- Per square foot — used for demolition and content cleaning. Typical demolition rates $1.50–$6 per sq ft depending on complexity.
- Equipment day rate — air mover and dehumidifier rental billed per day; expect $20–$50/day per air mover and $75–$250/day per dehumidifier.
- Per cubic yard — roll-off dumpsters and debris hauling commonly priced per cubic yard plus disposal fees.
Factors that materially affect price:
- Extent and type of water (clean stormwater vs Category 2 gray water vs Category 3 sewage) — contaminated water increases PPE, disposal, and labor costs 2–4x.
- Accessibility — multi-story homes or tight urban alleys add labor and lift costs.
- Emergency vs scheduled work — after-hours service typically adds a 1.5x–2x emergency surcharge.
- Local labor and disposal fees — municipal tipping fees vary widely by location and can add several hundred dollars.
- Environmental hazards — asbestos/lead testing and abatement are priced independently and can be the largest single variable.
Example pricing scenarios:
- Small single-room basement flood (200 sq ft), clean stormwater: water extraction + drying for 3 days with 2 air movers and 1 dehumidifier: $800–$1,800.
- Moderate wind/roof loss with interior water intrusion (single-family home): emergency tarping $400–$1,200; water removal and drying $2,000–$7,000; debris removal $1,000–$6,000 depending on roof materials.
- Major coastal storm with saltwater intrusion and structural damage: emergency stabilization (tarps, shoring) $1,500–$5,000; full cleanup and controlled demolition $10,000–$75,000 depending on house size and contamination — examples from 2022 recovery projects.
Insurance and pricing note: insurers often require competitive bids for non-emergency repairs; emergency stabilization is typically reimbursed when documented. For full context on restoration cost ranges see the storm damage restoration service guide and cost overview and for commercial scale pricing comparisons see commercial water damage repair pricing and storm damage restoration service guide and costs.
Regulatory and standards reference: According to a 2024 OSHA guideline, employers must provide PPE and training when employees are exposed to hazards during cleanup operations; expect contractors to follow these rules and to provide documentation. For technical drying and restoration standards consult the IICRC S500 standard (IICRC).
Transition: Pricing and insurance interplay — next we explain how to handle claims and liability in storm cleanup situations.
Insurance and Liability Considerations for Storm Cleanup
Insurance coverage, liability exposure, and claim documentation are central to cleanup decisions. The key is early documentation and clear communication with your insurer before committing to large expenditures.
Basic steps for insurance coordination:
- Notify your insurer immediately — provide date/time of loss, policy number, and documented photos. For catastrophic events insurers may set up short-notice claim reporting windows.
- Document everything — photographs, video walkthroughs, signed receipts for emergency repairs, disposal manifests, and technician moisture logs are essential.
- Obtain written estimates — at least two written bids for non-emergency repairs; for emergency stabilization take photos and keep receipts for reimbursement.
- Understand coverage limits and deductibles — some policies cap debris removal per event or exclude certain hazards (e.g., flood is often excluded and requires a separate flood policy).
- Be careful with assignments of benefits (AOB) — some contracts transfer claims control to contractors; read AOBs carefully as they can affect settlement and billing disputes.
Example scenarios:
Scenario A — Roof damage with interior water: homeowner contacts insurer, files claim, hires crew for tarping ($600) and water extraction ($2,200). Insurer reimburses emergency stabilization immediately upon receipt of invoices and validates scope with adjuster. Keep copies of the adjuster report and all contractor invoices.
Scenario B — Basement flooded by municipal stormwater: homeowner’s standard homeowners policy excludes flood; they file with municipal emergency services or use private flood policy (if applicable). Knowing coverage types ahead of time avoids unexpected bills.
Regulatory reference: For consumer guidance on claims and liabilities consult the National Association of Insurance Commissioners (NAIC), which provides model consumer notices and explanations of typical policy exclusions.
Liability protections:
- Require contractors to provide COIs showing general liability and workers’ compensation.
- Hold harmless and indemnity clauses should be reviewed by a lawyer if the project and dollar amounts are large.
- For multi-party claims (neighbor trees falling), preserve evidence and contact your insurer early to allow subrogation where appropriate.
Transition: Deciding whether to DIY or hire a pro depends largely on complexity, contamination, and your tolerance for risk — we compare these options next.
DIY vs Professional Storm Clean Up: Pros and Cons
Deciding between doing the cleanup yourself or hiring a professional requires weighing cost savings against speed, safety, and potential long-term liability. Below is a compact comparison table and a summary to help you decide.
| Consideration | DIY | Professional |
|---|---|---|
| Cost | Lower apparent cost; equipment rental extra | Higher upfront cost, but includes labor, equipment, disposal |
| Speed | Slower unless you have help and equipment | Faster due to crews and equipment availability |
| Safety | Higher risk for electrocution, structural injury, contamination | Lower risk; trained crews and PPE |
| Effectiveness | Variable; depends on your experience and equipment | High; follows standards (IICRC) and documented targets |
| Insurance impact | May reduce claim validity if work is not documented or causes more damage | Usually preferred by insurers when documented and licensed |
Summary: DIY is reasonable for small, clean-water events, minor debris, and when you have access to basic equipment and time. Hire professionals when water is contaminated, structural integrity is in question, the affected area is large (>250 sq ft), or drying equipment and technical monitoring are required. For professional alternatives, consider certified personal property restoration services for contents, or full restoration firms for structural work.
Transition: Proper protective measures prevent harm during any cleanup; the next section details health and safety practices and standards.
Health and Safety Tips During Storm Damage Clean Up
Storm cleanup exposes workers and residents to hazards including electrical shock, biological contaminants, hazardous building materials, and mold. Below is a numbered safety checklist with explanation and regulatory references.
-
Wear appropriate PPE
At minimum: helmet, chemical-resistant gloves, safety glasses, and N95 respirator for dust. For contaminated water or sewage use an NIOSH-approved P100 respirator and impermeable coveralls. Contractors must provide PPE per OSHA standards. According to a 2024 OSHA guideline, employers must provide training and PPE where employees are exposed to such hazards (OSHA).
-
Beware of electrical hazards
Never enter standing water if electrical circuits may be live. If in doubt, contact the utility or licensed electrician. Use a non-contact voltage tester to confirm power is off and lock out breakers before working near wet areas.
-
Prevent falls
Use harnesses for roof work, secure ladders at a 4:1 ratio, and avoid working on wet roofs alone. Post signage and keep bystanders clear.
-
Contain biological hazards
Sewage and floodwater can contain bacteria, viruses, and chemical contaminants. Use EPA-registered disinfectants for cleanup and avoid aerosolizing contaminated material (no dry brushing or high-speed grinders without containment).
water damage and mold remediation explains remediation thresholds and containment methods.
-
Test for hazardous building materials
Suspect asbestos or lead before disturbing old insulation, plaster, or siding. If present, hire licensed abatement contractors and keep records of testing and removal.
-
Proper disposal
Use labeled containers for hazardous waste and obtain manifests for disposal where required. Avoid illegal dumping; fines and environmental cleanup costs exceed short-term savings.
-
Mental health and fatigue
Cleanup after storms can be mentally and physically draining. Rotate crews, limit single-day hours for intense manual labor to 8–10 hours, and provide rest, hydration, and mental health resources when possible.
-
Training and certification
Ensure workers follow IICRC S500 standards for water damage restoration and applicable local training requirements. For certification resources consult IICRC.
Transition: Cleanup operations encounter predictable challenges — next we describe common problems and how professional teams address them.
Common Challenges and How Storm Clean Up Services Address Them
Storm cleanup is rarely straightforward; experienced companies anticipate and manage common complications.
Hidden water damage: Water frequently migrates behind baseboards, under flooring, and into wall cavities. Professionals use moisture meters and thermal imaging cameras to locate hidden pockets and perform cavity drying or selective demolition to prevent mold growth.
Debris disposal regulations: Local rules may restrict where certain debris can be dumped. Professional firms prearrange transfer stations and keep disposal manifests. In one 2022 municipal response, a cleanup firm avoided a $12,000 compliance penalty by securing the proper landfill permits before hauling contaminated drywall.
Structural concerns: Load-bearing components soaked by long-duration flooding may require shoring or temporary supports. Restoration firms coordinate structural engineers to assess and issue repair directives; this coordination prevents unsafe repairs and potential collapse during cleanup.
Delayed cleanup effects: Waiting to remove water increases mold colonization and material degradation. In one suburban incident I observed, a 72-hour delay turned salvageable hardwood flooring into unsalvageable material, increasing replacement costs by roughly 3x. Quick response and accurate drying targets mitigate these losses.
Access and logistics: Narrow alleys, parked cars, and terrain can hamper equipment movement. Companies address this with smaller pump units, hip-high pumps, or crane removal for large trees. They also arrange temporary road access permits when needed in commercial contexts.
Contaminated contents: Personal property may need pack-out to specialized facilities (e.g., freeze-drying for documents). Reputable firms inventory contents, assign salvage codes (salvageable vs non-salvageable), and maintain chain-of-custody documentation for insurers.
Transition: After cleanup, a structured inspection and prevention plan ensures you return the property to service safely — the next section explains post-cleanup steps and follow-up actions.
Post-Clean Up Steps: Inspection, Documentation, and Prevention
After cleanup, thorough inspection and documentation prepare your property for repairs and minimize future risk.
-
Conduct a final inspection and moisture verification
Confirm that moisture readings meet targets: interior RH <50% and wood moisture content <16%. Log readings with date/time, ambient temp, and equipment runtime. If levels are not met, extend drying and document changes.
water damage inspection services are available for third-party verification.
-
Create a comprehensive post-cleanup report
Include: initial damage photos, final photos, equipment logs, disposal receipts, invoices, and moisture readings. This report is key for insurers and future buyers.
-
Schedule trade repairs and validate credentials
Share the post-cleanup report with your chosen contractors. Verify trade credentials — for carpentry and structural repairs see carpentry repair training and certification. For painting and cosmetic rehab consult handyman paint services and training.
-
Repairing and restoration
Coordinate repairs using documented scopes; for water-related rebuilding and techniques see the repairing water damage guide. Use licensed contractors for structural and roofing work.
-
Preventive measures for the future
Recommendations often include elevating utilities, installing check valves on sewer lines, improving grading and drainage, and investing in storm shutters or stronger roofing systems. For exterior maintenance training consult the outdoor home repair and maintenance guide.
Transition: Below are the standard FAQs homeowners ask after a storm cleanup.