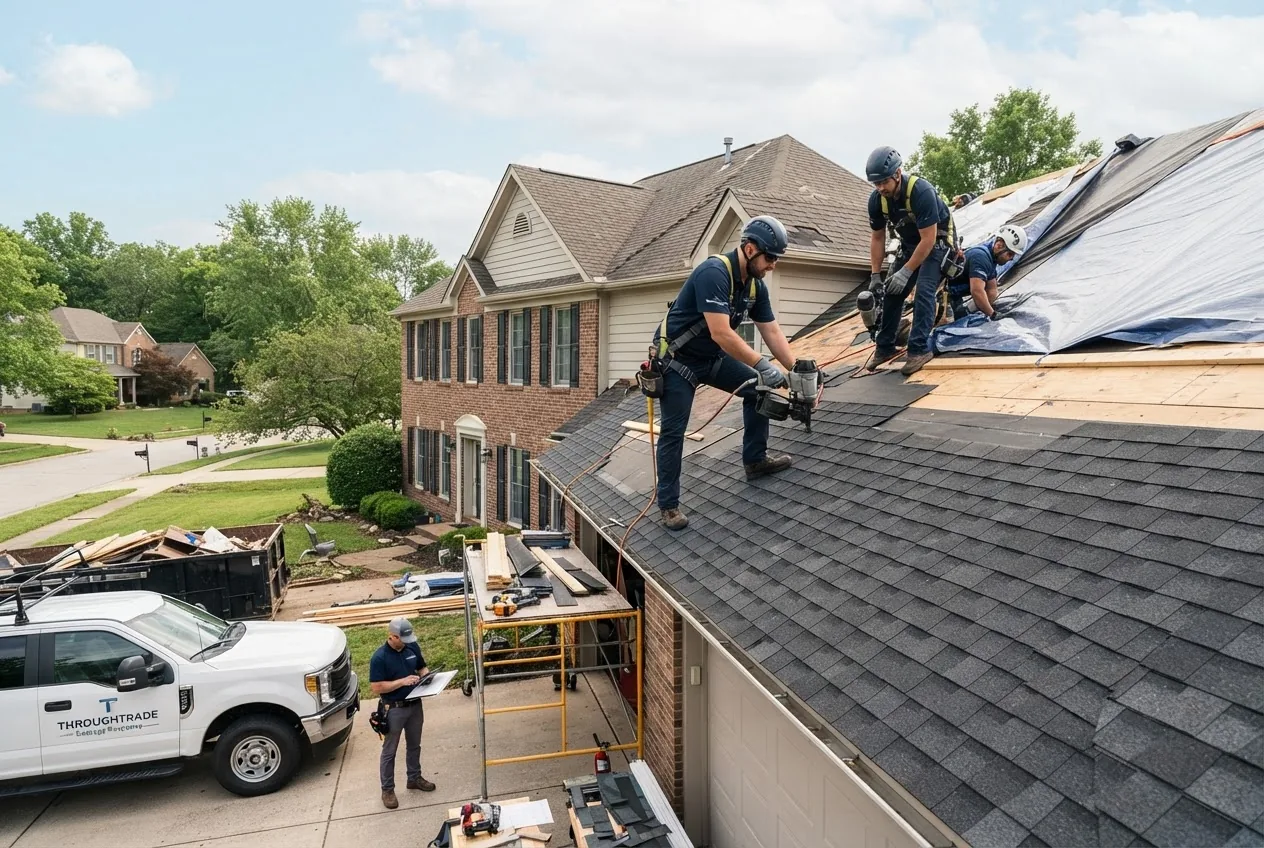
By the end of this hands-on guide you’ll know how to evaluate, hire, and manage storm damage repair contractors for a residential property, estimate realistic costs, and complete basic oversight checks; plan 4–12 hours of hands-on work over 1–2 weeks, skill level: homeowner with basic DIY and project-management capability.
Before you start
- Documentation tools: smartphone with high-resolution camera, notepad, and a digital or printed clipboard.
- Safety gear: hard hat, gloves, N95 respirator, and closed-toe boots for any on-site walkthrough.
- Paperwork: recent homeowner’s insurance policy, mortgage/property documents, and prior maintenance receipts.
- Communication: phone numbers for 2–3 contractors and your insurance agent; email account for sending estimates.
- Time: set aside 2–3 hours for initial inspection and 1–2 hours per contractor bid review.
- Secure immediate hazards. If there are dangling trees, exposed wiring, or large holes, call emergency services and use contractor emergency-response services for tarping and boarding within 2–6 hours. Note emergency surcharges can be 20–50% above normal hourly rates.
- Document everything with photos and notes. Photograph damage from multiple angles, label photos with location and time, and create a simple inventory of damaged items for insurance and contractor estimates.
- Contact your insurer and report the claim. File your claim within 24–72 hours; request the insurer’s guidance on preferred documentation and whether they will send an adjuster.
- Request three written contractor estimates. Ask for itemized pricing (labor, materials, disposal) and a start/completion timeline. Use fixed-price sections where possible to limit scope creep.
- Verify contractor credentials. Confirm license, general liability, and workers’ compensation insurance; ask for two recent local references and recent photos of similar work.
- Align scope with the adjuster. Arrange a joint walk-through with your insurer’s adjuster and the chosen contractor to minimize disputes; contractors should provide detailed scope to the adjuster.
- Sign a clear contract before work starts. Include payment schedule, lien waiver terms, materials and brand allowances, permit responsibility, and a warranty period (typically 1–10 years depending on work).
- Schedule periodic inspections during the project. Agree on weekly or milestone inspections (foundation/roof/substructure checkpoints) and require photo logs for each milestone.
- Retain final payment until punch-list is complete. Hold 5–10% until final inspection and signed completion acceptance; get all warranties and manuals delivered in writing.
- Conduct a post-repair inspection 30–90 days after completion. Look for settling, water intrusion, and finish defects; document and require contractor follow-up per the warranty clause.
Common mistakes and how to avoid them
I once trusted the lowest bid that arrived first after a storm; when the crew left, I discovered mismatched shingles and an incomplete permit. Now I always require itemized bids and confirmation of permit pulls before allowing work to begin. I learned to keep final retention until satisfactory completion.
I’ve also seen homeowners sign “verbal agreements” for additional work; insist on written change orders with price and timeline adjustments. I avoid contractors who pressure for large upfront deposits—20% is a reasonable maximum for most residential jobs.
Checklist before you call it done
- All permits pulled and finaled with local building department.
- Itemized final invoice matches paid amounts and lien waivers are signed.
- Workmanship warranty in writing (length and coverage clearly stated).
- Debris removed, site cleaned, and landscaping restored or a plan provided.
- Follow-up inspection set for 30–90 days post-completion.
When to call a professional instead
Call a licensed storm damage repair contractor immediately if structural framing is compromised, there is active water intrusion, visible mold growth over 10 sq ft, or electrical systems are exposed. If in doubt, get a professional structural or electrical consult within 24 hours.
Now that you have the hands-on steps, the sections below expand each topic with professional detail, assessment checklists, cost breakdowns, and hiring best practices you can apply immediately.
Understanding Storm Damage Repair Contractors
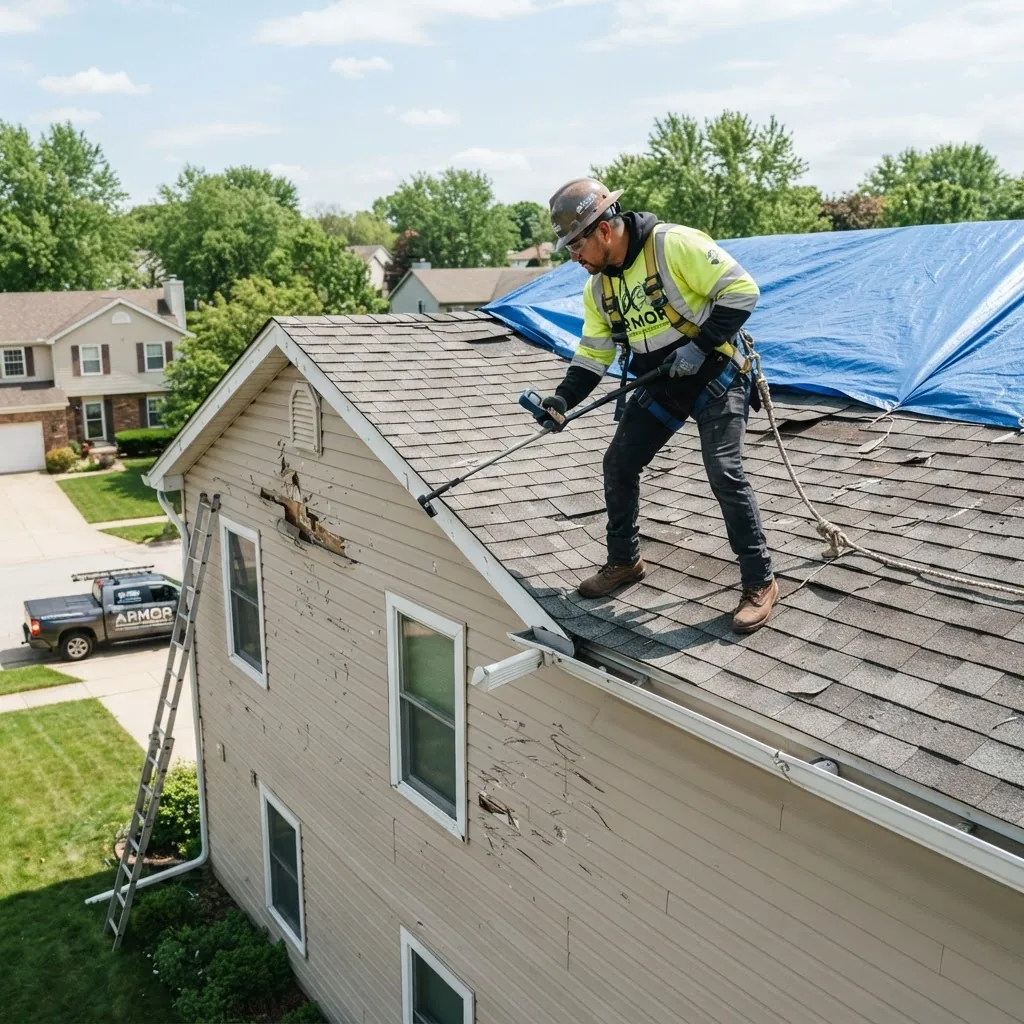
A storm damage repair contractor is a trades-focused professional or company specializing in returning a damaged residential property to safe, habitable condition. Their scope of work commonly includes temporary emergency services (tarping/boarding), coordinated repairs across trades, and permanent fixes for roof, siding, structural and interior components. These contractors differ from large-scale restoration firms that may handle commercial projects; for a comparison, see commercial storm damage restoration services.
Typical roles on a residential job include: a licensed general contractor or restoration manager who oversees permits and scheduling; trade subcontractors (roofers, carpenters, electricians, plumbers); and a project manager who coordinates inspections. Contractors should be prepared to handle debris removal, temporary weatherproofing, structural repairs, and finish trades such as siding and exterior paint.
Emergency repair services are often the first requirement after a severe storm; these include rapid tarping, tree removal at-risk to structures, and temporary power or lighting for safety. Many contractors operate 24/7 during peak storm seasons and can provide emergency response times of 1–24 hours depending on the queue and your location.
Residential storm repairs emphasize safety, preventing secondary damage (like water intrusion leading to mold), and aligning with insurance claim processes. Contractors may also liaise with your insurer and independent adjusters to clarify scope and documentation. Always confirm who will handle permit pulls and inspections — some contractors do it directly, others require the homeowner to sign permit applications.
Common exclusions: full-scale restoration management for commercial properties, historic preservation specialties, and licensed HVAC or complex structural engineering beyond standard repairs—these require separate specialists. For severe storm-damage scenarios such as hurricane-grade destruction, refer to specialized resources like hurricane damage repair contractors.
Case example: a two-story home lost 20% of roof area in straight-line winds; contractor response included 3-hour emergency tarping, a full roof assessment, and an itemized repair estimate. The homeowner accepted a phased plan: emergency repairs within 24 hours, complete roof replacement in 10 business days, and siding patching scheduled for week two. The phased approach limited water intrusion and allowed the insurer to process the claim efficiently.
Understanding these contractor roles and emergency-response expectations helps homeowners set priorities after a storm and avoid common pitfalls like accepting rapid but under-documented fixes.
Common Storm Damage Repair Services Provided
- Roof repair and replacement — repair missing shingles, replace underlayment, or full roof replacement. Typical costs: patch repairs $300–$2,000; partial roof replacement $2,500–$8,000; full asphalt roof replacement $6,000–$18,000 depending on pitch and materials.
- Siding repair and replacement — replace damaged vinyl, fiber-cement, or wood siding; address sheathing and insulation if wet. Expect $500–$6,000 for localized repairs; full exterior re-siding often $12,000–$40,000.
- Debris removal and tree work — remove fallen trees, stumps, and storm debris; stump removal and heavy lifting require certified crews. Emergency debris removal can carry a 15–40% emergency surcharge.
- Structural repairs — repair or sister joists, replace damaged trusses, and correct foundation issues from impact or water. Structural fixes usually begin at $1,500 for minor bracing to $10,000+ for major framing.
- Water removal and drying — extract standing water, set drying equipment, and monitor moisture levels with meters. For specialized services see water removal and cleanup services.
- Mold remediation and decontamination — removal of contaminated materials, HEPA vacuuming, and anti-microbial treatments; common when water intrusion goes untreated. See cost overview at mold remediation services and costs.
- Interior repairs and finish trades — drywall replacement, insulation, flooring repair, and paint. For specialized interior tasks like carpet restoration, consult carpet water damage repair.
- Basement and crawlspace cleanup — pumping, drying, and sanitizing; often paired with perimeter waterproofing. For dedicated flood services see basement flood cleanup services.
- Plumbing and pipe burst repairs — address burst pipes and associated water damage, including pipe replacement and insulation. Related guidance: pipe burst damage restoration.
- Personal property contents restoration — cleaning, packing, and contents restoration companies can salvage furniture, documents, and appliances. For options see personal property restoration services.
- Outdoor repairs and landscape restoration — fence, deck, awning, and exterior lighting repairs; additional exterior maintenance skills covered in outdoor home repair and maintenance.
- Storm damage clean up services — general debris clearance, small-scale demolition, and site sanitation. See pricing and service packages at storm damage clean up services.
- Roofing-specific emergency fixes — tarping, temporary flashing, and leak patches. For full roofing cost studies refer to roof repair services and costs.
- Masonry and chimney repair — resets, repointing, and cap replacement when chimneys or brick veneers are compromised by wind or impact.
- Permit acquisition and inspection coordination — many contractors include pulling permits and coordinating final inspections with local building authorities; confirm responsibilities in the contract.
- Finishing trades (paint, trim, cabinetry) — post-repair cosmetic work, sometimes offered by handyman or finishing subcontractors; for training and services consult handyman paint service training.
- Specialty services — structural engineering reports, HVAC diagnostics, and electrical system certification when damage affects safety systems.
- Insurance liaison and documentation support — preparing itemized estimates, scope of loss documents, and photographic logs to support claims.
Many homeowners will require a combination of the services above. For related commercial-focused pricing and scope, see commercial storm damage restoration services, which contrasts with the residential emphasis of this guide.
How Storm Damage Repair Contractors Assess Damage
- Initial safety and hazard check (0–30 minutes). Contractor verifies electrical hazards, gas leaks, and structural instability. They will mark unsafe areas and recommend immediate mitigation steps like tarping or shoring.
- Visual exterior survey (15–45 minutes). Inspect roof, gutters, siding, windows, and foundation from grade and via ladder where safe. Photos and drone imagery may be used for high roofs; expect a 20–30 photo set for a typical single-family home.
- Interior walkthrough and moisture mapping (30–90 minutes). Check ceilings, walls, attic, and crawlspace. Use moisture meters and infrared thermal imaging to find hidden wet pockets; document moisture levels in percentage or relative units (e.g., wood moisture 12% dry baseline vs. >18% concern).
- Assess structural elements (45–120 minutes). Inspect framing, load-bearing walls, and foundations for displacement, cracked masonry, or rotated joists. For suspected structural compromise, contractors will recommend a licensed structural engineer—this can add 1–3 days to the timeline.
- Inventory and contents assessment (30–90 minutes). Note personal property damage, electrical system condition, HVAC, and appliances. For contents restoration coordination, contractors may recommend a professional contents company.
- Estimate preparation and line-item scope (1–3 days). Contractor produces an itemized estimate with labor hours, material allowances, disposal fees, permit costs, and a project timeline. Many contractors use standard estimating software and supply a written scope within 48–72 hours.
- Permit and code review (1–7 days). Contractor checks local building codes and pulls required permits; some jurisdictions require structural plans or engineer sign-offs which extend the intake process. Reference local building codes at International Code Council.
- Final review and adjuster coordination (1–7 days). Contractor and homeowner align scope with the insurer’s adjuster to resolve coverage questions and any supplemental estimates for hidden damage discovered during repairs.
Sample assessment checklist (homeowner copy):
- Photos from all exterior sides and interior rooms; label with date/time.
- Moisture meter readings for attic, wall cavities, and floor junctions.
- List of visible structural issues: sagging rafters, cracked headers, foundation cracks >1/4″.
- Temporary mitigation actions taken and receipts for emergency repairs (tarping, tree removal).
- Contractor-provided itemized estimate with clear material specs and warranty terms.
Contractors follow industry standards such as those published by certification bodies; for training and assessment standards see IICRC and local code authorities. For detailed assessment training resources, see damage restoration service requirements.
Factors Influencing Costs of Storm Damage Repairs

Several variables determine what you pay a storm damage repair contractor. Common drivers include labor rates, material choices, extent and severity of damage, permit and inspection fees, disposal and hazardous material handling, and regional market conditions. According to a 2024 industry report, labor and materials can account for 60–80% of total project costs.
Key cost factors broken down:
- Labor costs: Vary by region and craft. Skilled tradespeople (roofers, carpenters, electricians) typically bill $60–$150 per hour depending on locality; union areas skew higher.
- Material prices: Asphalt shingles vs. metal roofing or cedar differ widely. Example: architectural shingles $90–$150 per square (100 sq ft), metal panels $250–$700 per square.
- Extent of damage: Surface-only repairs are lower than hidden water damage requiring replacement of sheathing, insulation, or structural members.
- Repair complexity: Steep roofs, multiple roof penetrations, and historic details increase labor hours and require specialist trades.
- Geographic location and seasonality: Storm season spikes contractor demand and may increase prices 15–50% in high-demand windows.
- Permit and inspection fees: Municipal fees range from $50 to $1,500 depending on the project’s valuation and scope.
- Insurance coordination: Supplemental estimates, re-inspections, and negotiated scope items can add administrative time that is sometimes billable.
- Emergency response and mobilization: Rapid-response tarping and boarding are billed higher and may be invoiced as a standalone emergency fee.
Concrete cost examples (illustrative, national averages):
| Repair Type | Typical Range | Notes |
|---|---|---|
| Small roof patch | $300–$2,000 | Covers limited shingle and flashing repair. |
| Partial roof replacement | $2,500–$8,000 | Depends on complexity and materials. |
| Full asphalt roof | $6,000–$18,000 | Higher for steep pitches and complex valleys. |
| Siding repair (localized) | $500–$6,000 | Includes replacement of sheathing if wet. |
| Structural bracing/repair | $1,500–$10,000+ | Engineer fees may be extra. |
Why you may see wide ranges: material market volatility and local labor shortages cause rapid swings. According to a 2024 homeowner cost survey, average emergency repair bills rose 12% year-over-year in high-storm regions. For broader restoration and cost context beyond contractor-specific pricing, see storm damage restoration service guide and cost overview.
Trade-offs to consider: choosing the lowest bidder can save money up-front but risk workmanship or use of inferior materials. Prioritise contractors who provide a warranty, proof of insurance, and a detailed, signed contract. For commercial cost comparisons, see commercial water damage repair pricing for reference on larger-scale labor rates.
Typical Pricing Models and Service Cost Breakdown
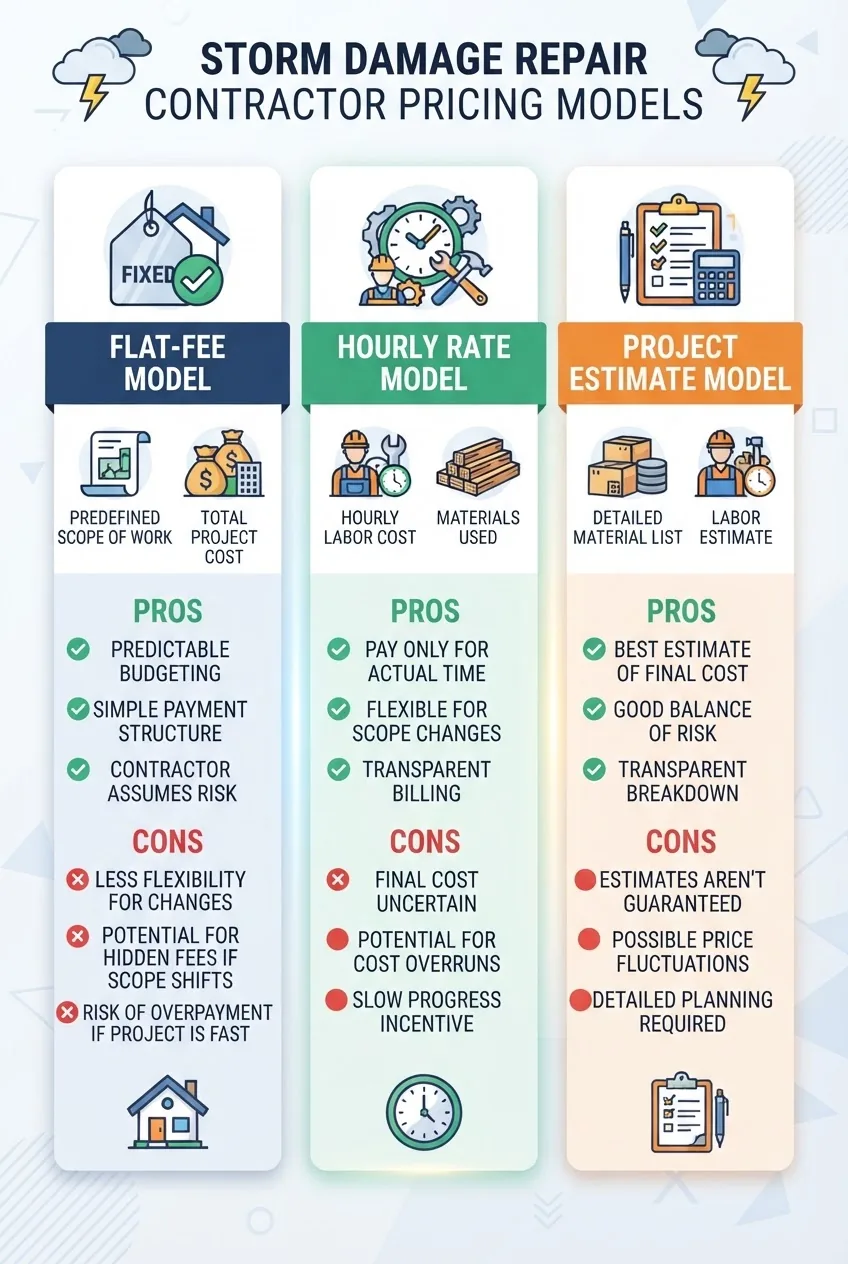
Contractors commonly price projects using three main models: flat fees (fixed price), hourly rates, and detailed project estimates. Each model affects risk allocation between homeowner and contractor.
| Pricing Model | Typical Use | Pros / Cons |
|---|---|---|
| Flat fee (fixed price) | Common for clearly scoped repairs (roof replacement, siding section) | Pros: predictable cost. Cons: change orders can be expensive; contractor may pad for unknowns. |
| Hourly rate | Used for uncertain scope, emergency work, or cleanup | Pros: flexible. Cons: cost can rise if scope expands; requires detailed time logs. |
| Project estimate (itemized) | Large or multi-trade projects that require line-item detail for insurance | Pros: transparency for insurance. Cons: requires homeowner review to understand allowances and exclusions. |
Examples of service cost breakdown for a hypothetical $10,000 roof repair project:
- Labor: 40–55% ($4,000–$5,500)
- Materials: 30–45% ($3,000–$4,500)
- Disposal and permits: 3–7% ($300–$700)
- Overhead and profit: 8–15% ($800–$1,500)
Insurance billing considerations: Contractors may submit direct invoices to insurers or provide estimates for homeowner submission. Emergency repair invoices are often billed separately; keep receipts. For a broader comparison of restoration pricing models, see storm damage restoration services and costs and for water-specific pricing see water damage restoration pricing.
Choosing a pricing model: for well-defined full replacements a fixed-price contract reduces surprises. For uncertain hidden-damage scenarios, an itemized project estimate with clear change-order rules is safer. Always require written change-order forms that state additional labor rates and material markups (typical markup cap: 10–20%).
Tips for Hiring Reliable Storm Damage Repair Contractors
- Verify licensing and insurance. Ask for license number and verify with your state or local licensing board; confirm general liability and worker’s comp policies. Ask for current certificates and record policy numbers.
- Check references and recent work. Request two recent local references (within 12 months) and photos of completed repairs. Visit completed jobs when possible and ask neighbors about workmanship.
- Confirm permit responsibilities. Ensure the contract states who pulls permits and who is responsible for failed or missing inspections.
- Require an itemized, signed contract. The contract should detail scope, materials, timeline, payment schedule, change orders, and warranty terms.
- Watch for common red flags. Beware of door-to-door storm chasers offering to start immediately for a large cash prepayment, no local office, or high-pressure sales tactics.
- Request warranties and workmanship guarantees. Accept written warranties that specify coverage length and what triggers warranty service.
- Get multiple bids and compare apples-to-apples. Ask all contractors to price the same scope and materials; do not accept vague scopes like “repair as needed.”
- Confirm subcontractor credentials. If a contractor uses subs, require their names, license numbers, and proof of insurance on file.
- Understand payment schedules and retainage. Standard residential practice: initial deposit up to 20%, progress payments at defined milestones, final 5–10% holdback until final sign-off and lien waivers.
- Check for specialty certifications. For complex water-related tasks or restoration, ask about carpentry repair certification requirements and fire and water damage restoration certifications.
- Ask about dispute resolution and change orders. Ensure the contract includes a written process for change orders, dispute mediation, and an agreed method for escalating unresolved issues.
- Prefer companies with local presence. Local firms are easier to verify, faster to respond, and more likely to be accountable for warranty service than out-of-area storm chasers. See comparative options at storm restoration company services.
Working With Insurance and Storm Damage Contractors
Contractors and insurers must coordinate closely to move a claim from initial loss to completed repairs. Contractors that actively support documentation and provide line-item estimates significantly improve claim acceptance rates. According to a 2024 insurer guidance bulletin, detailed photographic logs and signed scopes increased successful supplemental claims by approximately 18%.
Key insurance interaction steps:
- Notify your insurer and ask about preferred documentation and timelines.
- Share contractor itemized estimates with the adjuster; request a joint inspection when possible.
- Keep copies of all emergency repair receipts and contractor invoices for claim submission.
- Get change orders in writing and submit them to the insurer promptly to avoid coverage disputes.
- Retain a copy of denied line items and ask the contractor for supporting evidence to contest or appeal denials.
Resources and parallel services that often coordinate with contractors include professional flood cleanup service costs, personal property restoration services, and water mitigation companies (water mitigation company services).
If you encounter an insurer denial or considerable scope dispute, document the contractor’s justification and escalate with written appeals. For homeowner-focused insurance best practices see national guidance such as the National Association of Insurance Commissioners at NAIC and your state insurance consumer protection office.
Timeline Expectations for Storm Damage Repairs
Storm repair timelines vary by damage severity, permit needs, and contractor availability. Typical timeline phases:
- Emergency response: 0–48 hours for tarping, debris removal, and life-safety measures.
- Assessment and bids: 48 hours–7 days for inspections and receiving 2–3 estimates.
- Permits and scheduling: 3–14 days depending on municipal backlog and required engineering.
- Active repair phase: Small repairs 1–3 days; moderate projects 1–3 weeks; full roof or major structural work 2–8 weeks.
- Final inspection and follow-up: 1–4 weeks after completion for correction of punch-list items.
Example case timeline (moderate damage): initial emergency tarping within 6 hours, adjuster visit day 2, contractor estimate delivered day 4, permit pulled day 6, work start day 10, completion day 21, final inspection day 24. Weather delays can add 3–10 days, especially during winter or active storm periods.
Suggestion for homeowners: build 10–20% time contingency into your expectation and get written start and finish dates in the contract with allowances for weather and permit delays.
Warranties, Guarantees, and Post-Repair Follow-Up
Workmanship warranties are common; their length depends on trade: roofing workmanship warranties may range from 1–10 years, while manufacturer material warranties for shingles or siding often range 20–50 years. Contractors may offer limited warranties covering labor only and excluding materials or consequential damage—review exclusions carefully.
Best practices for warranty management:
- Get the warranty in writing on company letterhead and tied to the completed invoice.
- Understand the process for warranty claims: who to call, expected response times, and whether repairs are free or billed.
- Schedule a 30–90 day post-repair follow-up inspection; ask the contractor for a photo log of final conditions and any finish warranties (paint, trim).
- If you need minor finishing trades after structural work, contractors frequently subcontract painting and carpentry; see handyman paint service training for expected service scopes.
Practical tip: store all warranty documents, material receipts, and contractor correspondence in one folder (digital and physical). If future issues arise, having a single source speeds the warranty process and supports any insurance claims for recurring damage.